
★★★★★
December 3, 2025
Great fit
Worked great and fit perfect

Replaces








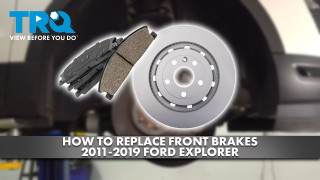
About TRQ:
TRQ is a trusted brand dedicated to making every repair a success story by combining premium parts with easy installation. Each TRQ part is engineered by a team of automotive experts to meet or exceed OEM standards, delivering enhanced performance and maximum longevity. With rigorous in-house testing, the brand ensures superior fit and function across every product line. TRQ also provides customers with best-in-class, step-by-step installation videos—so you can complete repairs with confidence, whether you're a first-time DIYer or an industry professional.
Product Features
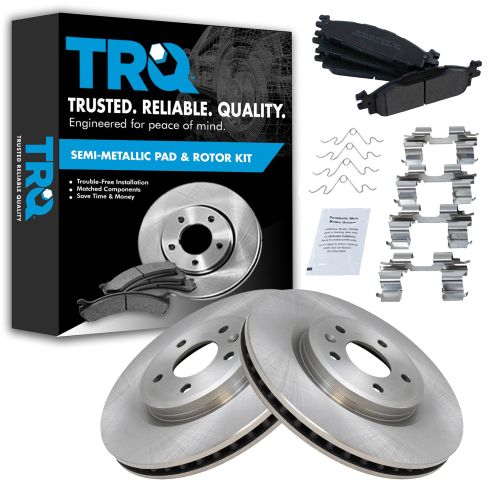
TRQ brake kits are designed to restore your brake system to like-new performance. TRQ brake pads are positive molded, thermal scorched, chamfered, and utilize a multi-layer shim for enhanced performance and service life. TRQ rotors have a non-directional finish that reduces the break-in period for new rotors as well as reducing vibrations throughout the rotor’s lifecycle. All products are fit and road-tested in our Massachusetts R&D facility to ensure we deliver on our promise of Trusted Reliable Quality.
Attention California Customers:
 WARNING: This product can expose you to chemicals including Lead and Lead Compounds, which are known to the State of California to cause cancer, and birth defects or other reproductive harm. For more information, go to www.P65Warnings.ca.gov.
This part fits 16 vehicles spanning 2009-2019.
| Year | Make | Model | Description |
|---|---|---|---|
| 2011-2012 | Ford | Explorer | Ford Explorer Front Semi-Metallic Brake Pad & Rotor Kit TRQ BKA10931 |
| 2013-2014 | Ford | Explorer | Ford Explorer Front with Standard Duty Brakes Semi-Metallic Brake Pad & Rotor Kit TRQ BKA10931 |
| 2015-2019 | Ford | Explorer | Ford Explorer Base Model Front with Standard Duty Brakes Semi-Metallic Brake Pad & Rotor Kit TRQ BKA10931 |
| 2009-2011 | Ford | Flex | Ford Flex Front Semi-Metallic Brake Pad & Rotor Kit TRQ BKA10931 |
| 2012-2019 | Ford | Flex | Ford Flex Front with Standard Duty Brakes Semi-Metallic Brake Pad & Rotor Kit TRQ BKA10931 |
| 2010-2019 | Ford | Taurus | Ford Taurus SE Front Semi-Metallic Brake Pad & Rotor Kit TRQ BKA10931 |
| 2010-2019 | Ford | Taurus | Ford Taurus Limited Front Semi-Metallic Brake Pad & Rotor Kit TRQ BKA10931 |
| 2010-2019 | Ford | Taurus | Ford Taurus SEL Front Semi-Metallic Brake Pad & Rotor Kit TRQ BKA10931 |
| 2009-2011 | Lincoln | MKS | Lincoln MKS Front Semi-Metallic Brake Pad & Rotor Kit TRQ BKA10931 |
| 2012 | Lincoln | MKS | Lincoln MKS To 2/05/12 Production Date Front Semi-Metallic Brake Pad & Rotor Kit TRQ BKA10931 |
| 2010-2011 | Lincoln | MKT | Lincoln MKT Front Semi-Metallic Brake Pad & Rotor Kit TRQ BKA10931 |
| 2012 | Lincoln | MKT | Lincoln MKT Front with Standard Duty Brakes Semi-Metallic Brake Pad & Rotor Kit TRQ BKA10931 |
| 2013-2014 | Lincoln | MKT | Lincoln MKT Base Model Front with Standard Duty Brakes Semi-Metallic Brake Pad & Rotor Kit TRQ BKA10931 |
| 2013-2014 | Lincoln | MKT | Lincoln MKT Livery Front with Standard Duty Brakes Semi-Metallic Brake Pad & Rotor Kit TRQ BKA10931 |
| 2013-2014 | Lincoln | MKT | Lincoln MKT EcoBoost Front with Standard Duty Brakes Semi-Metallic Brake Pad & Rotor Kit TRQ BKA10931 |
| 2015-2019 | Lincoln | MKT | Lincoln MKT Front with Standard Duty Brakes without Painted Calipers Semi-Metallic Brake Pad & Rotor Kit TRQ BKA10931 |
| Brand Label | Part Number |
|---|---|
| Raybestos Brakes | EHT1508H |
| Raybestos Brakes | 680688 |
| Aimco | 54166 |
| Bendix | PRT5842 |
| Wagner | BD180285 |
| DuraGo | BR900632 |
| Ford | BB5Z2001A |
| Ford | BB5Z2001B |
| Ford | EB5Z2001A |
| Lincoln | BB5Z2001B |
| Lincoln | EB5Z2001A |
| Lincoln | BB5Z2001A |
| Raybestos Brakes | 680688R |
| Raybestos Brakes | 680688FZN |
| Raybestos Brakes | 680688P |
| BrakeBest | 680758R |
| Autopartsource | 592123 |
| BrakeBest | 621261RGS |
| PowerStop | AR85137EVC |
| BrakeBest | 680688FZN |
| Centric Parts | 121.61094 |
| Centric Parts | 320.61102 |
| BrakeBest | 680688RGS |
| Centric Parts | 126.61094SR |
| Wagner Brake | BD180285 |
| Centric Parts | 126.61094SL |
| UAP | 2901020 |
| BrakeBest | 680758RGS |
| Dura Corp | BR901020 |
| Bosch | 20011505 |
| Promax | 14-54171 |
| Centric Parts | 126.61102SL |
| Centric Parts | 127.61102L |
| PowerStop | AR8194EVC |
| Centric Parts | 128.61102L |
| Advance Auto Parts | YH322455 |
| Centric Parts | 227.61102R |
| Raybestos Brakes | 680758 |
| BrakeBest | 680688 |
| Advance Auto Parts | N1000393056WBR |
| BrakeBest | 680758 |
| BrakeBest | 680758PER |
| Ford | CB5Z1125A |
| Centric Parts | 128.61102CR |
| Ford | 8A8Z1125A |
| Dura Corp | BR54166 |
| Centric Parts | 120.61094CRY |
| Winhere | 6621008 |
| Centric Parts | 128.61102CL |
| Centric Parts | 121.61102 |
| Autoxtra | AX900632 |
| BrakeBest | 680758FZN |
| Ford | AG1Z1125A |
| Wagner Brake | BD180462E |
| Newtek Automotive USA | 54166 |
| Centric Parts | 127.61094R |
| DuraGo | BR90102002 |
| Motorcraft | NBRR12 |
| Centric Parts | 320.61094 |
| Centric Parts | 126.61102CSL |
| Bendix | PRT6124 |
| DuraGo | BR901020 |
| Centric Parts | 120.61102CRY |
| DuraGo | 900632 |
| Bosch | 20011511 |
| Advance Auto Parts | 270345 |
| Centric Parts | 120.61094 |
| Centric Parts | 127.61094L |
| BrakeBest | 20011511 |
| Centric Parts | 128.61102R |
| Advance Auto Parts | YH322455C |
| Advance Auto Parts | YH322455P |
| Centric Parts | 227.61102L |
| Dura Corp | BR90063202 |
| DuraGo | BR90063202 |
| BrakeBest | 680688R |
| Centric Parts | 321.61102 |
| BrakeBest | 20011505 |
| Centric Parts | 126.61102CSR |
| Autopartsource | 492925 |
| Promax | 14-54166 |
| Newtek Automotive USA | 54171 |
| Dura Corp | BR900632 |
| UAP | 54166 |
| Advance Auto Parts | G09526SD |
| Ultra Brake | 54515 |
| Centric Parts | 127.61102R |
| Dura Corp | BR54171 |
| Centric Parts | 126.61102SR |
| UAP | R61102 |
| Wagner Brake | BD180462 |
| Advance Auto Parts | YH270345 |
| Centric Parts | 120.61102 |
| Parts Master | 901020 |
| Hollander | 530-00189 |
| Hollander | 530-00154 |
| WABCO - Archived | PS54166 |
| DIY Solutions | BFS01073 |
| Raybestos Brakes | SGD1508C |
| FMSI | CD1508 |
| Raybestos Brakes | MGD1508CH |
| Sangsin Brake | SP1171 |
| Sangsin Brake | SP4384 |
This item may be interchangeable with parts from other brands with the above part numbers. This information is provided only for reference and does not guarantee that the item you are purchasing is identical to parts with part numbers from the brands listed above. To confirm that this item fits your vehicle, use the above "Check Vehicle Fit" option.
Lifetime Warranty
This item is backed by our limited lifetime warranty. In the event that this item should fail due to manufacturing defects during intended use, we will replace the part free of charge. This warranty covers the cost of the part only.
FREE Shipping is standard on orders shipped to the lower 48 States (Contiguous United States). Standard shipping charges apply to Hawaii and Alaska.
Shipping is not available to a P.O. Box, APO/FPO/DPO addresses, US Territories, or Canada for this item.
Expedited is available on checkout to the United States, excluding Alaska, Hawaii.
Final shipping costs are available at checkout.
Created on:
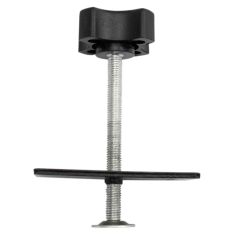
Tools used
Hi, I'm Mike from 1A Auto. We've been selling auto parts for over thirty years. We're dedicated to delivering quality auto parts, expert customer service, fast and free shipping, all backed by our 100% satisfaction guarantee. We've created thousands of videos to help you install our parts with confidence. That saves you time and money, so visit us at 1AAuto.com, your trusted source for quality auto parts.
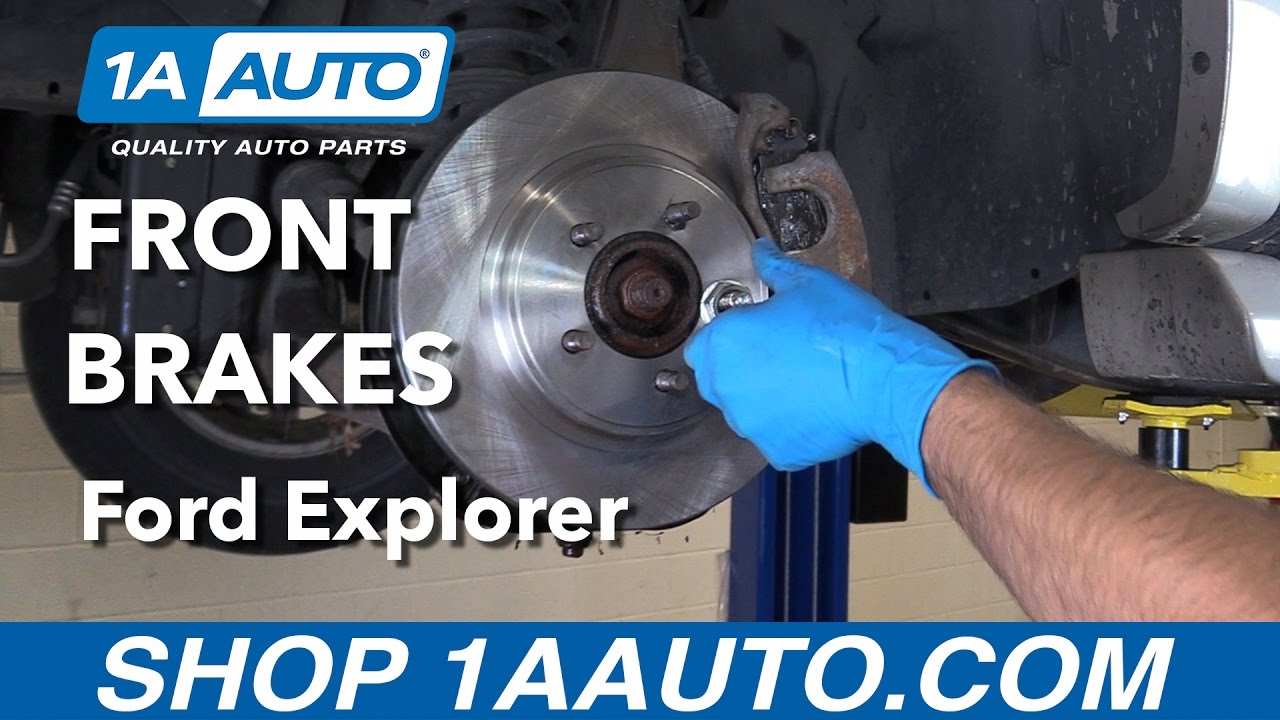
In this video, we're going to be working with our 2006 Ford Explorer. We're going to show you how to remove and replace your front brake pads and rotors. If you like this video, please click subscribe. We have a ton more information on this truck as well as many other makes and models. If you need these parts for your vehicle, you can follow the link down in the description over to 1AAuto.com.Here are the items you'll need for this repair.
Using a 19mm socket and a breaker bar, loosen the lug nuts. Your vehicle should have five, but ours has a stud broken off. We're using a lift to make it easier to show you what's going on, but this job can easily be done in the driveway on a jack and jack stand. With the vehicle raised and supported, go ahead and finish removing your lug nuts. Remove your wheel and tire.
On the back side of the caliper, remove the two 17mm bolts securing the caliper onto the slides of the bracket. We'll do this using the 17mm socket and a ratchet. Be sure to loosen both of them before removing either one, fully, to prevent the caliper from twisting on the slide when you go to remove a stuck bolt. With the bolts removed, work the caliper off of the pads and out of the bracket. You may need a small pry bar to help get the caliper off of the bracket. This particular vehicle has been sitting for a few years, so everything's pretty well stuck on there. Using a bungee cord, mechanics wire, or a zip tie, whatever you have handy, we'll remove the caliper and hang it up out of the way. This way we know it won't fall and tear the flex hoses.
On the backside of the caliper bracket, we'll remove the two bolts with a 21mm socket. We're going to start it with a breaker bar and then move to a ratchet. The same rule applies here, where you'll want to break both of them lose before removing either one fully, so we don't twist that bracket while we're removing the bolts. Remove the bracket from the vehicle. Remove the rotor from the hub.
Whenever you're working on brake components, we recommend you wear a dust mask just to keep all of this brake dust from getting into your lungs. Once you've got your caliper bracket off, go ahead and tap the pads out. Carefully pop the clips off. If these are really rusted and corroded, you're going to have to replace them, but ours don't look too bad. We'll just clean them up. The same process will apply whether you're reinstalling a good set of old slides or replacing them with a new one. Using a wire brush or a wire wheel, if you have one, go ahead and get all of that build-up and debris out of the area underneath the slides. If your clips look good but just have a little bit of dirt build up on them, you can go ahead and clean them off the same way with that wire brush. Now, these don't have to be absolutely perfect, but you want to make sure that you get any heavy deposits and build ups off of there to make sure that your brakes slide smoothly.
Reinstall your clips once your bracket and clips are clean. Then, we'll apply a thin coat of brake grease to where the pads are going to ride on the slides. There's no need to really build up a thick coat of grease here as long as we get a nice coat on there. Get that metal covered. It will keep it from corroding, quiet our brakes down, and give a nice quiet, smooth operation.
Peel back the boots on your caliper slides. Remove the slides one at a time. Use a paper towel or a rag to wipe off all that old grease. Then, we'll apply a new coat with the same brake grease we used on the slides. The one we're using here happens to be gray, but they also make clear ones. There's kind of a yellowish one. Doesn't really matter as long as you're using a brake specific grease, because non-brake greases can cause wear on these components. If it gets onto a rotor or pad, it's going to do a lot more damage than this stuff would. Slide that back in until the boot reattaches. You can see how much smoother that slide moves now compared to our old one. Go ahead and repeat that step with the other slide. Now, we're ready to reinstall our caliper bracket onto the vehicle.
Here we have our old brake parts that we removed from our vehicle and our new parts from 1AAuto.com. As you can see, these parts are exactly the same. We have the same dimensions on our pads here. You can sort of tell where the breather channel was in the middle of these pads before they got worn down. These pads aren't completely worn out. We probably still have five thousand miles or so on there. You can see the difference between the old pad and the new pad as far as the thickness of the material. The rotors are the exact same size and shape. There's are a little bit thicker, because our old parts have been used and worn down. You can see we have quite a bit of corrosion on here from them sitting, as well as being a properly vented rotor to allow the heat generated when braking to escape normally. If your vehicle has corroded brake parts that are making noise, not stopping properly, or they've just worn out from normal usage, these new parts from 1A Auto are going to go in direct fit, just like your original equipment, get your vehicle stopping smoothly and safely, and fix you up right.
Using a wire brush, we'll remove all of this rust build up and corrosion on the surface of the hub to make sure our rotor sits flat. Make sure you get the center bore here as well. Now that we've got all the rust and corrosion removed from our hub, we got ahead and put a nice coat of grease on there to keep any more corrosion from coming back and to make sure that our rotor is nice and easy to remove the next time we have to do a brake job. Again, there's no need to get really thick with the grease here. Just make sure that you cover all the metal surfaces that are going to contact our rotor. Install the rotor onto the splines backwards and spray down the contact surface with some brake cleaner.
Flip the rotor around, and install it back onto the splines in the correct direction, and spray down this surface the same way. We're doing this to remove cosmoline, which is a coating they put on to these rotors at the factory to prevent it from corroding while it sits on the shelf at a warehouse. The next step isn't completely necessary to finish the brake job, but if you have one handy it's really helpful and makes reinstalling the pads, caliper, and caliper bracket a lot easier.
We're going to use an old axle nut over one of the studs as a spacer. Just install one lug nut on there finger tight to keep our rotor flat against the hub, so when we reinstall the bracket, pads, and caliper, the rotor is nice and straight, and flush, and lines up with everything going on.
Reinstall your caliper bracket, and the two 21mm bolts that secure it to the spindle. We'll get those bolts started by hand, and then tighten them down with our socket and ratchet. Once they're in there by hand, go ahead and tighten them down with a 21mm socket and ratchet. Install the brake pads into the slides on the front and the rear. We'll apply another thin coat of grease to the back side of the pad here. This will prevent our caliper from getting stuck on. It'll also act as a little bit of an insulator to keep them from making move while they're moving.
Remove the bungee cord, mechanic's wires, zip tie, or whatever it is you used to secure the caliper up and out of the way. Be sure that when placing it back in that you don't have this flex hose, here, twisted up. Set the caliper back onto the slides, and reinstall the two bolts. You may have to work these around a little before the go in. Tighten the two caliper slide bolts up with a 17mm socket and ratchet. Remove the lug nut and the axle nut you used to keep that rotor in place.
Then we can reinstall our wheel and tire. Reinstall the wheel and tire onto your hub. It's easiest to put a lug nut inside of the 19mm socket to start it onto the studs. Get all five of these down as tight as you can by hand, and then we'll torque the wheel once there's some weight on it. Lower the vehicle back down, and put partial weight onto the wheel and tire. This means that you may have your jack or lift under the vehicle, get the tire to touch, and let the vehicle come downs some without allowing it completely off of the lift or jack. Torque your lug nuts to 100 foot-pounds in a cross pattern.
Thanks for watching. Visit us at 1AAuto.com for quality auto parts, fast and free shipping, and the best customer service in the industry.
Tools used
Hi, I'm Mike from 1A Auto, we've been selling auto parts for over 30 years. What's up guys, I'm Andy from 1A Auto. Today I'm gonna show you how to install these brakes on this 2011 Ford Explorer. If you need these parts or other parts for your vehicle, click the link in the description and head over to 1AAuto.com.
We're gonna loosen the lug nuts up. I'm just gonna use a 19mm socket and a breaker bar. I'm just gonna crack them free. Now we're gonna raise and support the vehicle. We're using a two post lift. You're doing this at your house, you can use a jack and jack stands. Remove the lug nuts. Once those lug nuts are off, take the tire off.
Okay, next we're gonna take these two bolts out. We're gonna use a 17mm wrench. Loosen these bolts up, they're on there a little bit tight. You could use a socket and a ratchet.
Next I'm gonna take a straight blade screwdriver. I'm just gonna pry this out a little bit, compress the caliper just a little bit, and then pull the caliper out. And then we're going to use a bungee cord and tie it up up top, wrap around the spring and do this so that the that we don't just let the caliper hang, and that could damage the hose.
And at this point we can take these brake pads out. There is these little springs, oops, these springs will come up with the brake pads. It's a good idea to change these, but if they're in good shape, you can reuse them. Take the inside brake pad out, just use a screwdriver to help guide it out.
I'm gonna take an 18mm socket and a breaker bar, and I'm gonna take these two bolts out that hold the caliper bracket on. These are on there pretty tight.
Once I break those free, then I can use an 18mm socket and a ratchet and loosen these up all the way. Bolts up there is some thread Locker on these bolts, you can either add some thread Locker or get some new bolts. Take this bracket out, now it can remove the rotor. Just pull it straight out, if it was stuck on there you can take a hammer and just hammer on on the rotor and get it off if it's rusted on there.
Here's our old brakes, here's our new brakes from 1A Auto. As you can see the pads are the same shape, the same size, pad materials the same. If you look at the rotor, rotors are the same height, they have the same cooling fins in the middle. Get yours at 1AAuto.com and you'll be ready to rock and roll.
Now we're gonna clean this hub up before we put the rotor back on. I'm just gonna use a wire brush, clean all around the hub.
All right, we're gonna clean up the caliper bracket. I'm gonna start by taking these caliper slide pins out, spray it down with a little brake cleaner, brake parts cleaner, and wipe it down with a rag, and spray a little brake parts cleaner in here, clean that out with the rag. I'm gonna take a little brake caliper grease down the slide pin and reinstall it into the bracket, and we'll do the same for the other side.
Now we're gonna clean up the pad clips. We'll take a wire brush, clean this up, take a screwdriver, just take these pad clips off. Try underneath here, pop it up and we'll clean underneath there, get some of this rust out, it's a little dirty underneath here. We can clean the backsides of these, reinstall the clips, will do the same for the other side.
We're install this brake rotor backwards first, I'm gonna spray this down with brake clean, brake parts cleaner, and we'll wipe it down with a rag. There is a protective coating on these rotors so that they don't rust. Flip it back over, you're gonna want to line up this hole with that screw hole there. Our vehicle didn't have a screw in but yours may, and will spray this down with brake parts cleaner and wipe it down on the rag.
Next we're going to take a lug nut, because I don't have that screw there, I'm just gonna screw this lug nut down so that I'll hold my rotor on there better.
Now install this brake caliper bracket, these bolts, it's recommended that you replace these bolts, we're gonna reuse ours. Now with those two bolts tightened up, we're gonna torque these to 111 foot-pounds, use my 18mm socket and a torque wrench.
Those are good and tight. Next we'll install the brake pads. We're just gonna take a little bit of caliper grease, put it on where the pads will sit in the bracket, and carefully, you don't want to get any grease on the pad material itself, slide it into the bracket. Do the same with the inside one.
And we're gonna take the brake caliper off, the bungee, or the bungee off the brake caliper, flip it over. I'm gonna take one of the old brake pads, slide it in here, and I'm gonna use this brake caliper compressing cool, it's made for one piston caliper, this is obviously a two piston caliper, but with the brake pad there I can go back and forth slowly and just compress both the pistons. We actually sell these tools at 1AAuto.com.
So we're just gonna compress this slowly. As we're compressing this, fluid's coming out of the caliper, going through the hose, through the pipes, up to the master cylinder and into the reservoir. And it's a good idea to check the fluid level after you're done to make sure that it's at the proper level and adjust when needed.
We'll just go back and forth, just compress it a little bit. That's fully compressed. Pull that brake pad away. Make sure these dust boots didn't get folded or anything. If you go slowing up, generally they go down properly and they look good.
Now I'll take the caliper, another thing you want to make sure, you never want to let the caliper hang from the hose cuz it could damage the hose. Slide the caliper over the bracket and the brake pads, get that into position. All this caliper bolt and the top caliper bolt. I'll take a 17mm socket and a ratchet, snug these down, then I can torque these with the torque wrench, 253 foot-pounds.
Next we're gonna install these pads springs. It's recommended that you replace these when you do this job. You can put these on before you put the caliper on, but sometimes they spread the pads out and get a hold the pads, so I decided to do it after, which it might be a little bit tricky to do it after, so whatever you guys want to do, if you wanna do it before or after, there. Push that, there, there's some little holes in the caliper pad themselves, this basically just pushes the pads out when the caliper is released, and do the same for the top one.
Reinstall the tire, put the lug nuts on and lower the vehicle. Now we're gonna torque these lug nuts to a hundred foot-pounds. We're gonna use a torque wrench, and we're gonna torque them in the star pattern. The reason you do it in a star pattern is so that the wheel gets tightened down properly against the rotor and evenly.
And go around again just to double-check, make sure you got them all good to go.
Thanks for watching. Visit us at 1AAuto.com for quality auto parts, fast and free shipping, and the best customer service in the industry.
Worked great and fit perfect
Vec stops great was the correct parts
Great Price and great quality
I've ordered lots of parts from 1A auto. I've always gotten good parts. And I've only returned one time which was partially my fault. They were courteous to my returns. Great store to buy from.
Quality parts at a terrific price. Beats going to the parts store if it's not an emergency. If you're able to install correctly yourself. This is a site you would definitely benefit from. Sliced my overall cost in half by not visiting the parts store. Bright the price down to a 1/4 of the price had I visited auto center. Thanks A1-auto, I refer you to all I know.
Excellent fit
Replaced working well. Gotta replace the rear soon. I will recommend this product.

BKA10931
