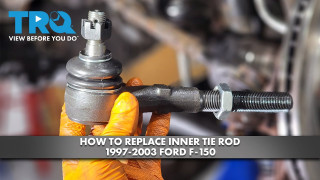
Was sent bad inner and outer tie rods for the passenger side threads came bad so I couldn't install the castle nut had to go to the parts store so I could make my alignment appointment on time, also both sway bar end links were bad
Replaces
PSA27315
This part doesn’t fit a . Select from parts that fit.
Specify your vehicle's year, make and model to guarantee fit.
This part does not fit a .
About TRQ:
TRQ is a trusted brand dedicated to making every repair a success story by combining premium parts with easy installation. Each TRQ part is engineered by a team of automotive experts to meet or exceed OEM standards, delivering enhanced performance and maximum longevity. With rigorous in-house testing, the brand ensures superior fit and function across every product line. TRQ also provides customers with best-in-class, step-by-step installation videos—so you can complete repairs with confidence, whether you're a first-time DIYer or an industry professional.
Product Features
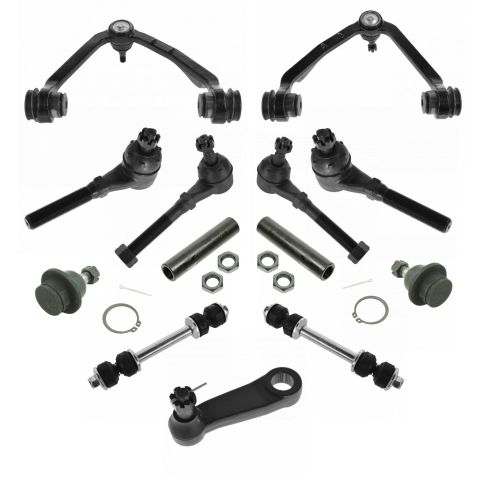
TRQ suspension kits are manufactured using premium raw materials and coatings for extended service life. Each TRQ suspension component is designed to be a direct, maintenance-free replacement to the stock unit. To extend the life of your steering and suspension components, TRQ recommends replacing components in pairs, sets, or kits. All products are fit and road-tested in our Massachusetts R&D facility to ensure we deliver on our promise of Trusted Reliable Quality.
Install Tip: When replacing steering components, have a professional alignment performed afterwards. This ensures proper tracking and even tire wear.
Our steering and suspension components are pre-greased and sealed for long life and do not require the extra maintenance typically required by greaseable versions.
Attention California Customers:
WARNING: This product can expose you to chemicals including Lead and Lead Compounds, which are known to the State of California to cause cancer, and birth defects or other reproductive harm. For more information, go to www.P65Warnings.ca.gov.
This part fits 6 vehicles spanning 1997-2004.
| Year | Make | Model | Description |
|---|---|---|---|
| 1997-2002 | Ford | Expedition | Ford Expedition 4 Wheel Drive without Air Suspension Front 13 Piece Steering & Suspension Kit TRQ PSA27315 |
| 2004 | Ford | F150 Heritage Truck | Ford F150 Heritage Truck 4 Wheel Drive Front 13 Piece Steering & Suspension Kit TRQ PSA27315 |
| 1997-2003 | Ford | F150 Truck | Ford F150 Truck 4 Wheel Drive Front 13 Piece Steering & Suspension Kit TRQ PSA27315 |
| 1997 | Ford | F250 Truck | Ford F250 Truck 4 Wheel Drive with Independent Front Suspension Front 13 Piece Steering & Suspension Kit TRQ PSA27315 |
| 1998-1999 | Ford | F250 Truck | Ford F250 Truck 4 Wheel Drive Front 13 Piece Steering & Suspension Kit TRQ PSA27315 |
| 1998-2002 | Lincoln | Navigator | Lincoln Navigator 4 Wheel Drive without Air Suspension Front 13 Piece Steering & Suspension Kit TRQ PSA27315 |
| Brand Label | Part Number |
|---|---|
| NAPA Premium | 2605139M |
| Ford | F65Z5K483CC |
| NAPA Premium | 2605140 |
| DIY Solutions | SUS05052 |
| NAPA Premium | 2605139 |
| Raybestos Chassis | 502-1034 |
| Ford | 5L3Z3084C |
| Motorcraft | MCSOE27 |
| ACDelco | 45D1033 |
| TRW | JTC1508 |
| Mcquay-Norris | FA4066 |
| Precision Driveline | 4CB40019 |
| Centric Parts | 623.6506 |
| Centric Parts | 622.6506 |
| Mevotech | TXK8724T |
| Dorman - OE Solutions | 520-215 |
| DIY Solutions | SUS07420 |
| MOOG Chassis Products | K5345 |
| MasterPro | 4CB40240 |
| MOOG Chassis Products | ES3367T |
| Mevotech | GK8724T |
| Motorcraft | MCF2233 |
| DIY Solutions | SUS00100 |
| Ford | 5L3Z3085C |
| NAPA Premium | TXK8724T |
| MOOG Chassis Products | ES3366T |
| Mevotech | MES3366T |
| MOOG Chassis Products | K8771T |
| Mevotech | MK8700 |
| TRW | JTC1507 |
| DIY Solutions | SUS06358 |
| Mevotech | CMK8724T |
| MOOG Chassis Products | RK8722 |
| ACDelco | 45D1034 |
| Mevotech | TXK8722T |
| MOOG Chassis Products | K8694 |
| Ford | F65Z3A130BA |
| NAPA Premium | TXK8722T |
| Raybestos Chassis | 502-1033 |
| Crumex | K8722 |
| MOOG Chassis Products | ES3369T |
| MasterPro | 4CB40239 |
| DIY Solutions | SUS06778 |
| Ford | XL3Z3085BA |
| SYD | K8724 |
| DIY Solutions | SUS05051 |
| Centric Parts | 622.65061 |
| Mcquay-Norris | FA4067 |
| MOOG Chassis Products | CK8724T |
| Mevotech | MK8722T |
| MOOG Chassis Products | K8772 |
| DIY Solutions | SUS07419 |
| MOOG Chassis Products | X8722T |
| MOOG Chassis Products | K8722T |
| DIY Solutions | SUS07421 |
| Precision Driveline | 4CB40020 |
| Ingalls Engineering | CAK8722T |
| Ford | F75Z3084BA |
| MAS Industries | CB8724PR |
| Precision Driveline | CB40019 |
| Mevotech | CMK8722T |
| Ingalls Engineering | CAK8724T |
| MAS Industries | CB8722 |
| MOOG Chassis Products | K80771 |
| SYD | K8722 |
| Ford | F75Z3085BA |
| MOOG Chassis Products | RK8724 |
| Mevotech | MES3367T |
| MAS Industries | CB8724 |
| Mevotech | MK8724T |
| Ford | F65Z3A130AA |
| MOOG Chassis Products | K8695T |
| NAPA Premium | 2605140M |
| Dorman - OE Solutions | 520-216 |
| Ford | XL3Z3084BA |
| Precision Driveline | CB40020 |
| MOOG Chassis Products | K8700 |
| MOOG Chassis Products | ES3368S |
| MOOG Chassis Products | K8724T |
| Centric Parts | 623.65059 |
| MOOG Chassis Products | X8724T |
| Crumex | K8724 |
| Mevotech | MK8772 |
| MAS Industries | CB8722PR |
| Mevotech | GK8722T |
| DIY Solutions | SUS07418 |
| Mevotech | MES3370T |
| MOOG Chassis Products | CK8722T |
| MOOG Chassis Products | ES3370T |
| Mevotech | MES3369T |
| Mevotech | MK8695T |
| Motorcraft | MCSOE25 |
| Mevotech | MES3368S |
| Ford | F65Z3281BA |
| Ford | F65Z3281AA |
| Carquest | CA037B |
| Carquest | CA036B |
| QuickSteer | K8772 |
| Dorman - Premium | CB8724PR |
| Dorman - Premium | CB8722PR |
| Hollander | 511-01023BR |
| Hollander | 511-01023BL |
| Mevotech Supreme | MES3366T |
| Mevotech Supreme | CMK8724T |
| Mevotech Supreme | MES3367T |
| Mevotech Supreme | MK8722T |
| Mevotech Supreme | MK8724T |
| Mevotech Supreme | MES3368S |
| Mevotech Supreme | MES3370T |
| Mevotech Supreme | MES3369T |
| Mevotech Supreme | CMK8722T |
| Mevotech Supreme | MK8695T |
| Mevotech Supreme | TXK8724T |
| Mevotech Supreme | TXK8722T |
| Mevotech Supreme | GK8722T |
| Mevotech Supreme | MK8772 |
| Mevotech Supreme | GK8724T |
| Mevotech Supreme | MK8700 |
This item may be interchangeable with parts from other brands with the above part numbers. This information is provided only for reference and does not guarantee that the item you are purchasing is identical to parts with part numbers from the brands listed above. To confirm that this item fits your vehicle, use the above "Check Vehicle Fit" option.
Lifetime Warranty
This item is backed by our limited lifetime warranty. In the event that this item should fail due to manufacturing defects during intended use, we will replace the part free of charge. This warranty covers the cost of the part only.
FREE Shipping is standard on orders shipped to the lower 48 States (Contiguous United States). Standard shipping charges apply to Hawaii and Alaska.
Shipping is not available to a P.O. Box, APO/FPO/DPO addresses, US Territories, or Canada for this item.
Expedited is available on checkout to the United States, excluding Alaska, Hawaii.
Final shipping costs are available at checkout.

Created on:
Tools used
Hi, I'm Mike from 1A Auto. We've been selling auto parts for over 30 years. We're dedicated to delivering quality auto parts, expert customer service, fast and free shipping, all backed by our 100% satisfaction guarantee. Visit us at 1AAuto.com, your trusted source for quality auto parts.
So in order to start this project you want to go ahead and loosen the wheel and the lug nuts here. We're going to use a breaker bar with a 19 millimeter socket. So next we're going to go ahead and raise and support your vehicle. You can use a jack and jack stands. In this case here we're using a lift to make it a little bit easier. Just go ahead and remove the lug nuts here just by using that socket because we've already loosened those. With the lug nuts removed we can now go ahead and remove the wheel and tire.
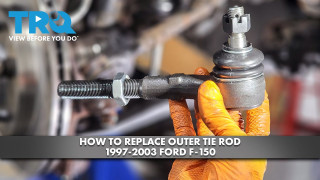
So this right here is your outer tie rod end. We have the nut here to anchor this on. This is the castle nut. Normally you would have a cotter pin through here, but this did not have it in there. So it must have rotted or fallen out. So we're going to go ahead and remove this nut off of the outer tie rod end, and we're going to use a 13/16” wrench for this here.
So in order to remove this outer tie rod end, this actually fits into a tapered hole. What we can usually do in our driveway at home is, if you use a hammer and you strike the front here, it normally causes this to pop out. So now that we have this out, you can see that this is a tapered base, and this fits tightly into the front of the steering knuckle. So when you tighten up the castle nut, it sucks it down inside and keeps it nice and tight.
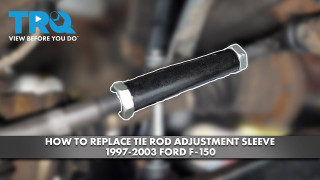
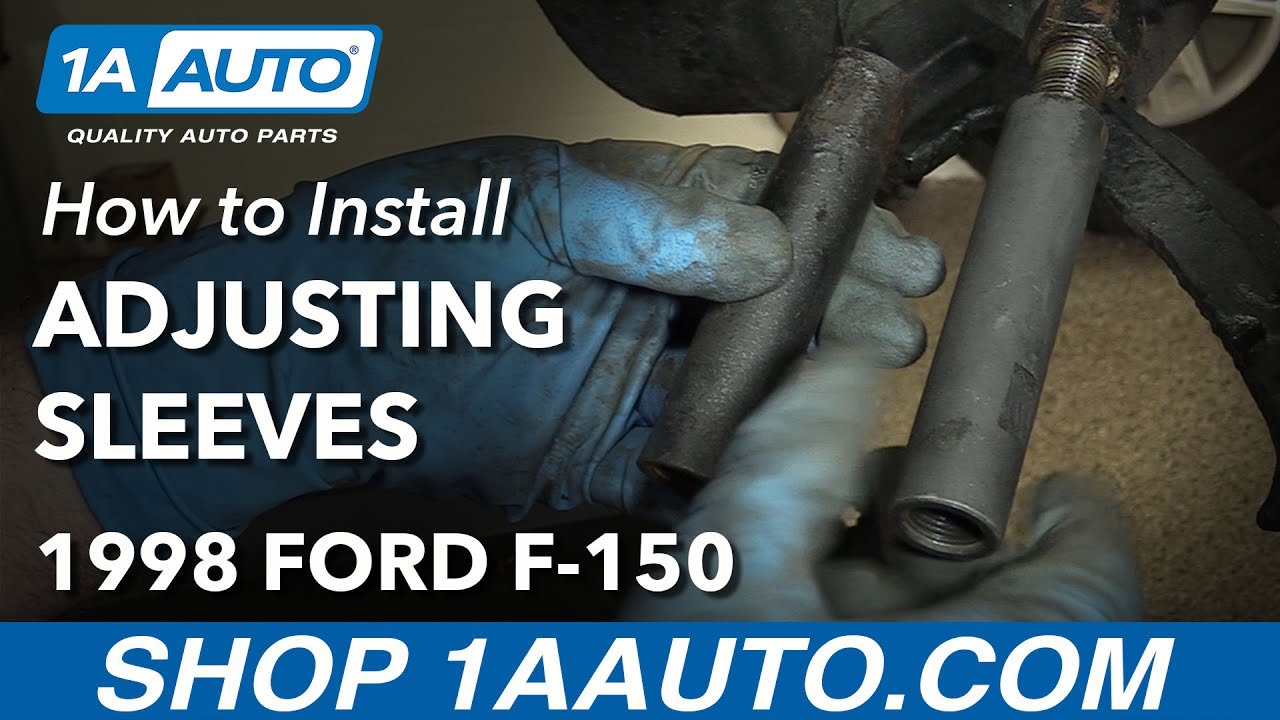
We're going to go ahead and replace the adjuster sleeve right here. We want to start by removing your outer tie rod end. Ideally, you want to count the amount of threads that this comes out on, so you have full rotation of this ball joint on your tie rod end.
Okay. We're going to use a 24 millimeter and we want to go ahead and basically unthread this off of the inner tie rod end. There we go. Now, because we're just replacing the adjuster sleeve, you can leave this jam nut right here, and when you take the new adjuster sleeve, just thread it right on up to that jam nut. There we go.
This here is the old part. This here is the new part from 1A Auto. If you notice, on the old part, we have the spot right here that has a flat section so you could put your wrench on there. Our part also has that. On the installation it is important to know that each side is a different diameter. The larger is the inner tie rod end port, and the smaller one is for the outer tie rod, so you can only put it on one way. Obviously if you have the smaller port, it just won't fit.
We're just going to go ahead and thread this on. When this threads on, you're going to notice that the wrench side is closer to the tie rod on the outer tie rod, but this here was closer to the inner. It doesn't matter. It's going to work the same exact way, it's just to give you an anchoring point for your wrench. Okay, you want to just crank that right up by hand up to that jam nut.
Now that we have the adjuster sleeve installed, because we don't actually have to replace this outer tie rod end, we can go ahead and get this installed now. In this component, we did count 31 full rotations. That means for the ball joint section facing down, a full rotation, that is one. We counted 31 of those there. In case you were installing a new outer tie rod end, you would have that count. I believe that was a 31. We'll just tighten up that jam nut by hand a little bit.
Then you're ready for your installation. Install your castle nut. You would tighten this up. Line up the castle nut with the hole in the outer tie rod end there. Use your cotter pin, feed it through, and then you're going to want to bend that over using a pair of pliers. Your adjuster sleeve may come with jam nuts. If your factory equipment is just fine, there's no need to replace them. Okay, so we're going to go ahead and tighten up these jam nuts.
All right, I'm going to go ahead and reinstall the tire. I'm going to go ahead and reinstall the lug nuts here. You want to get a few threads caught on all of these here. These lug nuts are 19 millimeters. So we're just going to snug these, bottom it out. Bottom the wheel out to the rotor. We're going to lower the vehicle down onto its own weight, and then do a final torque. With the vehicle on the ground, we're going to do a final torque of the wheel which is between 83 and 112 foot pounds. We're going to do it in a star pattern. All right, just double check the first one. She's all set.
Thanks for watching. Visit us at 1AAuto.com for quality auto parts, fast and free shipping, and the best customer service in the industry.

Tools used
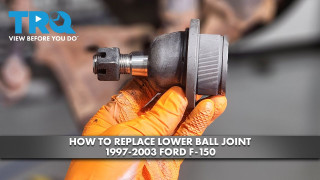
Brought to you by 1AAuto.com. Your source for quality replacement parts and the best service on the Internet. Thanks for tuning in, this is Part Two of a two part series. We're going to go through reinstalling your lower ball joint on this '97 Expedition. This procedure is similar for a whole bunch of different Ford trucks and SUVs. Here's a list of tools that we used on this Expedition. If you have a different vehicle some of the sizes may differ and one thing that is not on here, you will want a grease gun to grease up the ball joint after you install it.
We've got our control arm here. We're just going to put it right on there like that. Our ball joint, our collar and then that's going to go up and in. We put our press on there. I'm going to speed it up here so we use the press to push the ball joint up and in and you do this in two steps. This first step is just going to get the top of the ball joint flush with the top of the control arm. We're going to take this boot off. Now with this ramp here on top of it. I'll fast forward here again as we use that press to push the ball joint the rest of the way up into the control arm until it's nice and tight, the bottom is nice and tight against the bottom of the control arm and then put your protective boot back on. Now you want to lock it in place with a snap ring. You can get this on without snap ring pliers, but they certainly are a help. Just get this set up.
What I'm going to do is I'm just going to thread the nut on a little bit and then use a hammer to kind of knock the ball joint outward, that helps make it easier to get the other and just keep that protective boot up on there. That's just going to allow your knuckle down on there, your knuckle up, take your jack out of the way. Lift it up on the knuckle and bolt. Okay, I'm going to speed through putting the half shaft back in. One thing I did forget to do, I do a little bit later, is now is the best time to put the grease fitting on top of the ball joint, before you put that axel in there, but put the axel in place to get it into the hub and then get it lined up on the axel and start a couple of those 13 mm bolts. Once you get all the bolts in you want to torque them to 60 foot pounds and what I do is I use a black marker.
I mark the head of them after I torque them. Then you want to kind of go to the opposite side, torque the next bolt, mark it and just keep going until they're all torqued. I'm just putting the tie rod back on. Just put the nut on there and keep it in place. Now we want to tighten the ball joint nut to 98 foot pounds and that's for this '97 Expedition. It could be different for your vehicle. Okay, I put our cotter pin through, bend it down and around. I'm going to fast forward through putting the grease fitting on top. Like I said earlier a little bit easier to do this step before you put the axel in. Then continue to fast forward as a put a grease gun onto that fitting and fill the lower ball joint with grease. Okay, I'm going to tighten my tie rod nut to 60 foot pounds. Next the cotter pin through, bend it down. Here I'm going to install this sway bar link. I've already put a new link on the other side, then just started the nut on it. Bushing, the bushings always go towards the metal.
Okay, so I've got a bushing on the bottom going up to the mount control arm and a bushing above that. Then my shaft goes on there and then the washer, then the bushing pushing down and in. Make sure the bushing is centered in the stabilizer bar unit. Now bushing and washer, then my nut. Now you'll want to use your jack to put some pressure on the suspension and then tighten up the stabilizer to 15 to 17 foot pounds. Then we'll put on our center hub nut. We're just going to tighten that preliminarily. We're not going to torque it until the wheel's back on. Now you can let your suspension back down and you want to re-tighten your torsion bar and since we marked it we can tighten it right back up to where it was before. You can put your tire back on and start each lug nut one by one. Make sure you don't cross thread them. Tighten them down preliminarily. Torque the lug nuts to a hundred foot pounds using a star pattern. Okay, now using a 35 mm socket torque your lug nut to 220 foot pounds. Put the retainer back on and then the cotter pin, then your wheel cap. We recommend you have your alignment checked and adjusted if necessary.
We hope this helps you out. Brought to you by www.1AAuto.com, your source for quality replacement parts and the best service on the Internet. Please feel free to call us toll free 888-844-3393. We're the company that's with you on the Internet and in person.
Tools used
Hi, I'm Mike from 1A Auto. We've been selling auto parts for over 30 years. We're dedicated to delivering quality auto parts, expert customer service, fast and free shipping, all backed by our 100% satisfaction guarantee. Visit us at 1AAuto.com, your trusted source for quality auto parts.
So, when we're going to start this project, we're going to go ahead and loosen the lug nuts on the wheel. We're going to use a breaker bar with a 19 mm socket. Next, we're going to go ahead and raise and support your vehicle. You can use a jack and jack stands. In this case, here, we're using a lift to make it a little bit easier. We just go ahead and remove the lug nuts here, just by using that socket, because we already loosened those. With the lug nuts removed, we can now go ahead and remove the wheel and tire.
Right about here, we have your sway bar or anti-sway bar end link, here. Here's your sway bar. In most cases, here, you'll find these sway bar end links broken. What we're going to do is we're going to show you how to go ahead and remove this and do an installation for you. This component, here, can actually be removed and replaced with the tire still on the vehicle. We just happened to have the vehicle up in the air with the tire off so it just made it a little bit easier. This is something you can do with the tire still on there.
All right, so we're going to use a 14 mm on the head of the bolt down below, and we're going to use a 14 mm on the top. It may vary on your application. I'm going to go ahead and remove this nut here. Now, this does come off in stages. You have your main washer. You have your rubber of poly bushing. Then, obviously, you have the sway bar link here, or the sway bar itself, anti-sway bar. I'm going to try and just tap this down. This bolt will slide out through the bottom. What we don't want to lose is all these components in the middle here. We're going to show you what those do. Before we pull this out, we're going to go ahead and start pulling apart the internal pieces here.
Here is your complete anti-sway bar end link. You can actually see it just starts off with just a basic bolt. Then you have your metal collar here. You want to make sure that that slides on so that the dish part is facing upward. Then you're going to take your component here. Your bushing could be a poly or rubber bushing. Slide that down. Now, this is going to go up inside the control arm. What you want to do is sleeve the components together. What's going to happen next is your next bushing is going to go on, followed by your next dish. Now this is going to go the opposite way, so it's going to compress and squeeze against its matching component. This here is simply just a sleeve. It's not threaded. Slips right down. Your next component is that there. Slide this on, and once again we're going to sleeve the other component, which is your sway bar, your anti-sway bar. That'll slip on followed by that, and followed by the nut. That there is your complete unit. Our vehicle doesn't actually need replacement, but this is just your R & R process.
Here's the reinstallation. Going to slide this up through the bottom, and go ahead and slide your bushing down, followed by that spacer and that washer. We're going to now go ahead and put the sleeve on. It's going to be the next bushing. I'm sorry, it's actually your spacer, here, first, then the bushing. Now, you have the slide this up underneath like so. You want to push that up, push that bolt up through the middle. Now, you can see the base bolt is in.
You have your bushing, collar, sleeve, collar, bushing. The bushing and the collar right there. The last component is the nut. We're going to go ahead and get the threaded on. We're going to go ahead and tighten this up with a 14 mm. As you're tightening this here, you may be wondering, "How tight do I tighten this here?" Well, basically you want to get it so that the rubber bushing expands out to roughly the diameter of the metal washers there.
I'm going to go ahead and reinstall the tire. I'm going to go ahead and reinstall the lug nuts, here. You want to get a few threads caught on all of these, here. These lug nuts are a 19 mm. We're just going to snug these, bottom it out, bottom the wheel out to the rotor. We're going to lower the vehicle down onto its own weight, and then do a final torque. With the vehicle on the ground, we're going to do its final torque of the wheel, which is between 83 and 112 foot pounds. We're going to do it in a star pattern. I'll just double check the first one. She's all set.
Thanks for watching. Visit us at 1AAuto.com for quality auto parts, fast and free shipping, and the best customer service in the industry.
Was sent bad inner and outer tie rods for the passenger side threads came bad so I couldn't install the castle nut had to go to the parts store so I could make my alignment appointment on time, also both sway bar end links were bad
Tie rods were both the same side or improperly threaded. The prepacked ball joints fell out immediately. Very bad quality control on this one
I ordered the front suspension kit for Mt 1999 f150 lariat. All part were in great condition and all part fit great. I'm very thankful for 1a auto. Already getting my next order wrote down.
Worked great
PSA27315
877-844-3393
Monday - Friday 8:00am - 9:30pm ET
Saturday - Sunday 8:00am - 4:30pm ET
Check Your Email
We sent a verification email to .
Click the Verify Email button in the email to submit your question.
This extra step helps prevent spam.
Specify your vehicle's year, make and model to guarantee fit.
This part does not fit a .
Before proceeding,
select your Vehicle, to verify this Part will fit.
If your vehicle isn't listed, search Steering & Suspension Kits
This part will only fit a vehicle with these options.