
★★★★★
December 16, 2022
Good value
Product it described and delivered by date promised

Replaces


About TRQ:
TRQ is a trusted brand dedicated to making every repair a success story by combining premium parts with easy installation. Each TRQ part is engineered by a team of automotive experts to meet or exceed OEM standards, delivering enhanced performance and maximum longevity. With rigorous in-house testing, the brand ensures superior fit and function across every product line. TRQ also provides customers with best-in-class, step-by-step installation videos—so you can complete repairs with confidence, whether you're a first-time DIYer or an industry professional.
Attention California Customers:
 WARNING: This product can expose you to chemicals including Lead and Lead Compounds, which are known to the State of California to cause cancer, and birth defects or other reproductive harm. For more information, go to www.P65Warnings.ca.gov.
This part fits 5 vehicles spanning 1999-2016.
| Year | Make | Model | Description |
|---|---|---|---|
| 2000-2005 | Ford | Excursion | Ford Excursion Front Driver Side Black Exterior Door Handle Black, Textured TRQ DHA44284 |
| 1999-2016 | Ford | F250 Super Duty Truck | Ford F250 Super Duty Truck Front Driver Side Black Exterior Door Handle Black, Textured TRQ DHA44284 |
| 1999-2016 | Ford | F350 Super Duty Truck | Ford F350 Super Duty Truck Front Driver Side Black Exterior Door Handle Black, Textured TRQ DHA44284 |
| 1999-2016 | Ford | F450 Truck | Ford F450 Truck Front Driver Side Black Exterior Door Handle Black, Textured TRQ DHA44284 |
| 1999-2016 | Ford | F550 Truck | Ford F550 Truck Front Driver Side Black Exterior Door Handle Black, Textured TRQ DHA44284 |
| Brand Label | Part Number |
|---|---|
| Ford | F81Z 2522405 BAC |
| Ford | 4C3Z2522405AAA |
| DIY Solutions | BHS00530 |
| Partslink Numbering System | FO1310123 |
This item may be interchangeable with parts from other brands with the above part numbers. This information is provided only for reference and does not guarantee that the item you are purchasing is identical to parts with part numbers from the brands listed above. To confirm that this item fits your vehicle, use the above "Check Vehicle Fit" option.
Lifetime Warranty
This item is backed by our limited lifetime warranty. In the event that this item should fail due to manufacturing defects during intended use, we will replace the part free of charge. This warranty covers the cost of the part only.
FREE Shipping is standard on Orders shipped to the lower 48 States (Contiguous United States). Standard shipping charges apply to Hawaii, Alaska and US Territories. Shipping is not available to Canada.
Expedited is available on checkout to the United States, excluding Alaska, Hawaii and US Territories as well as P.O. Boxes and APO/FPO/DPO addresses. Final shipping costs are available at checkout.

Created on:
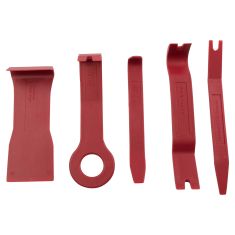
Tools used
Brought to you by 1AAuto.com, your source for quality replacement parts and the best service on the Internet.
Hi, I'm Mike Green. I'm one of the owners of 1A Auto. I want to help you save time and money repairing or maintaining your vehicle. I'm going to use my 20-plus years experience restoring and repairing cars and trucks like this to show you the correct way to install parts from 1AAuto.com. The right parts installed correctly: that's going to save you time and money. Thank you and enjoy the video.
In this video, we're going to show you outside door handle replacement on this '03 F250 Super Duty, the same as any '01 to '07. We do the driver's side. The passenger side is very similar. The handle is the same for '08 and later trucks, but the procedure is slightly different because the door panel comes off differently. Pretty basic tools are needed: 7, 10, and 11 millimeter sockets with a ratchet and extension; and a flat blade screwdriver.
If you wanted to prevent the battery from running down, if you have the doors open for an extended period of time, just disconnect your negative battery cable using an eight millimeter wrench. Loosen up the nut, and then pull the cable off.
Using a small flat blade screwdriver, take this lens, pop it off. Mine's actually broken. It should pry out here. Pop it off. Here you're going to do the same thing. You're going to just kind of pull it up with your hand or use your screwdriver a little bit, right in the front. Pull that up. Pull it forward. Then you disconnect all the harnesses. There's little push tabs on them. Push on the tabs with your thumb. Pull the harness here. Push on the tab right here, tab here, push on it. Remove it. Do the same thing here. You just pull down this trim panel. It's got two clips that hold it on. Now there are two seven millimeter bolts, one right there, and then one right there. Use a 7 millimeter socket with a ratchet and extension. A wrench would work, as well. Fast forward as I just remove those two bolts. Once those two bolts are out, just lift up on your panel and bring it out. Then, in behind, is your courtesy light. Just turn it counterclockwise and pull the socket out. Your door panel comes off. Now we'll pull back our water shield so we can see right in here.
If it's not already, just make sure that your window is rolled all the way up. You want to remove a 10 millimeter bolt right here. Separate or disconnect the lock rod by pulling it with your finger and then using a screwdriver to pry apart the clip with your hand, and then separate the teeth and pull it out. Now there's two 11 millimeter bolts. Since you took that bolt out down there, you can pull this out of the way. Here's one of them. Then right up here, remove this plug, and there's the other one in there. Using an 11 millimeter socket with a ratchet and extension, I'm just going to fast forward it as I remove those two 11 millimeter nuts. Now you can pull your handle out and then, using your screwdriver . there's a clip right down here. You can see a little green tab, right there. Pry against that, open that clip up, pull that rod out. Your door handle comes right out.
You'll want to switch your lock over to your new handle, so you just pry out on this clip here and remove it. Your lock comes right out. Also, remove this rod just by pulling out like that.
Here's a new handle from 1A Auto. I decided to go with the smooth black. We sell it in the textured black, as well as chrome. It's easy enough. You just take your lock cylinder, make sure that's set and press it right in. Make sure it's locked in place. Put the new rod in the new handle.
You just want to make sure that this rod, which is the lock rod, is kind of out of the way. You can just let that one drop down in there. It's easy enough to get it afterwards. Put the handle in. Put your bolt into your socket. Make it right in. Start the top one. Now, for the bottom one, move your channel over. I'll just fast forward as I start and tighten up those two nuts to hold the handle in place. Do a quick test. Make sure that your door is unlocked, and close it and open it. Put that bolt back in place. Ttighten it up right where it was scratching the door before.
Put your water shield back in and then put that little filler plug back in. To reinstall your door panel, what you want to do is take your bottom clips, and they're actually designed to just kind of go on here and rest in place. You can reach down and put in your courtesy light and turn it clockwise to lock it in. Then make sure all these harnesses come up through. Push it against. Lift it up a little bit. Make sure your door lock comes through. Press it against. You kind of lift it up just a little bit, push it in, and bring it down on. Make sure you're nice and tight against the door, nice and tight against the door over here. We'll speed it up again as I take those two 7 millimeter screws, put them in, and then tighten them up nice and firm. Now I'm going to clip the molding on up top to cover the mirror mounting holes. Then take my switch panel, and reconnect all my harnesses. Then I slide the tab back into the back first, and make sure no wires are getting pinched in there. Then clip it down in place and it's all set.
If you disconnected your battery, then reconnect it and tighten up the eight millimeter bolt.
We hope this video helps you out. Brought to you by www.1AAuto.com, your source for quality replacement parts and the best service on the Internet. Please feel free to call us toll-free, 888-844-3393. We're the company that's here for you on the Internet and in person.
Product it described and delivered by date promised
Easy install. 10 minutes max. Works great and saved me both money and time.
The handle is already broken and it hasnt been used very much at all.
I ordered this last summer as a replacement on my truck. The first unit lasted about 3 months before breaking. 1a replaced the unit no questions asked. that handle lasted about 6 months before breaking exactly the same way again. 1a is again replacing the handle. The handle you pull on to operate the door pivots on a metal shaft, that shaft anchors into the handle surround but the metal shaft just lands in a little plastic hole, no metal sleeve or pivot point. this is where its broken the last two times. Glad !a stands behind their product and offers replacements. Just a pain having to pull the door liner off each time to replace.
It was easy to order and exactly what I needed &1a auto was very good
Fit my drivers door where someone tried to steal my truck. Buy jimi jammers while youre in there.
I recommend this product, is coming with instructions and is a YouTube video ,posted from the company, fast delivery, good quality.
My truck has been broken into more times than I can count. Every time I have replaced the door handles with stock replacements. They all have the same flaw. There is no reenforcement around the lock mechanism. I came across an add for 1A Auto and decided to check it out. Ordered their replacements because I noticed there seemed to be some reenforcement in the problem area. I couldnt be more happy. When the handles shipped, they sent me a link to a YouTube video on step by step directions to replace them. 1A Auto has earned a new lifetime customer. I will point everyone in their direction for auto parts needs.
The handle had what seemed like a plastic tab and thicker lip on the inside of the handle. I had to take a chisel and remove the tab and shave some plastic in order to get a decent fit. OEM also has a seal around the edge this one does not.
I purchased this part from them because they had a youtube video showing exactly how to install for which I am grateful. Getting door panels off can be aggravating at best.

DHA44284
The lock cylinder from your old handle pops out and goes into the new handle.
Yes it does
