(2) Front Premium G-Coated Performance Brake Rotors
Brake Pad Bonding Type:
Premium Posi
Wheel Lug Count:
6 Lug
Friction Material Composition:
Ceramic
Brake Pad Friction Material Composition:
Ceramic
Brake Rotor Venting Type:
Vented
Brake Rotor Coating:
Premium G-Coated
Brake Rotor Diameter:
12.99 in. (330mm)
Surface Type:
Slotted X Drilled
Grade Type:
Performance
Product Line:
Performance
Item Condition:
New
About TRQ: TRQ is a trusted brand dedicated to making every repair a success story by combining premium parts with easy installation. Each TRQ part is engineered by a team of automotive experts to meet or exceed OEM standards, delivering enhanced performance and maximum longevity. With rigorous in-house testing, the brand ensures superior fit and function across every product line. TRQ also provides customers with best-in-class, step-by-step installation videos—so you can complete repairs with confidence, whether you're a first-time DIYer or an industry professional.
Product Features
Improved Stopping Power: Cross-drilled & slotted to reduce brake fade
Longer Lasting: True non-interference vane design for optimized cooling
Positive Molded: Less dust resulting in cleaner wheels
G3000 Casting Alloy - Reduced noise and improved wear resistance
Direct Replacement: No modifications necessary
Attention California Customers:
WARNING: This product can expose you to chemicals including Lead and Lead Compounds, which are known to the State of California to cause cancer, and birth defects or other reproductive harm. For more information, go to www.P65Warnings.ca.gov.
This part fits
5 vehicles spanning 2004-2008.
Fits these Makes
Select vehicle
Year
Make
Model
Description
2004
Ford
F150 Truck
Ford F150 Truck Rear Wheel Drive 11th Vin Digit F Front with 6 Lug Wheels Ceramic Premium G-Coated Brake Pad & Rotor Kit TRQ Performance BKA12659
2004
Ford
F150 Truck
Ford F150 Truck Rear Wheel Drive 11th Vin Digit N Front with 6 Lug Wheels Ceramic Premium G-Coated Brake Pad & Rotor Kit TRQ Performance BKA12659
2004
Ford
F150 Truck
Ford F150 Truck Rear Wheel Drive 11th Vin Digit K Front with 6 Lug Wheels Ceramic Premium G-Coated Brake Pad & Rotor Kit TRQ Performance BKA12659
2005-2008
Ford
F150 Truck
Ford F150 Truck Rear Wheel Drive Front with 6 Lug Wheels Ceramic Premium G-Coated Brake Pad & Rotor Kit TRQ Performance BKA12659
2006-2008
Lincoln
Mark LT
Lincoln Mark LT Rear Wheel Drive Front with 6 Lug Wheels Ceramic Premium G-Coated Brake Pad & Rotor Kit TRQ Performance BKA12659
Part Interchange
Brand Label
Part Number
Raybestos Brakes
SGD1083C
Raybestos Brakes
EHT1083H
Raybestos Brakes
MGD1083CH
Raybestos Brakes
680178
Aimco
54107
Wagner
BD126116
DuraGo
BR54107
Bendix
PRT5519
Ford
4L3Z2001AD
Ford
5L3Z2001A
Lincoln
6L3Z2001A
Lincoln
5L3Z2001A
Ford
6L3Z2001A
FMSI
CD1083
PowerStop
AR8594
This item may be interchangeable with parts from other brands with the above part numbers.
This information is provided only for reference and does not guarantee that the item you are
purchasing is identical to parts with part numbers from the brands listed above.
To confirm that this item fits your vehicle, use the above "Check Vehicle Fit" option.
Lifetime Warranty
This item is backed by our limited lifetime warranty. In the event that this item should fail due to manufacturing defects during intended use, we will replace the part free of charge. This warranty covers the cost of the part only.
FREE Shipping is standard on orders shipped to the lower 48 States (Contiguous United States). Standard shipping charges apply to Hawaii and Alaska.
Shipping is not available to a P.O. Box, APO/FPO/DPO addresses, US Territories, or Canada for this item.
Expedited is available on checkout to the United States, excluding Alaska, Hawaii.
Final shipping costs are available at checkout.
How To Replace Front Brakes 2004-08 Ford F-150
Created on:
Tools used
13mm Socket
Large C-Clamp
Socket Extensions
Torque Wrench
Hammer
Jack Stands
18mm Socket
21mm Socket
Flat Blade Screwdriver
White Grease
Ratchet
Wire Brush
Floor Jack
1. Removing the Wheel
Pry off the center cap with a flat blade screwdriver
Loosen the lug nuts with the vehicle on the ground
Raise the vehicle with a floor jack
Secure the vehicle on jack stands
Remove the lug nuts
Pull off the wheel
2. Inspecting the Brakes
Turn the rotor by hand or turn the steering wheel to turn the rotor
Check for gouges on both sides of the rotor
Check the thickness of the brake pads
Check the brake pad wear indicator
3. Removing the Brake Pads
Pry the brake pads into the caliper with a flat blade screwdriver to push in the pistons
Remove the two 13mm bolts from the brake caliper
Pull the caliper aside
Pry the brake pads off with a flat blade screwdriver
4. Removing the Brake Rotor
Remove two 18mm bolts from the brake caliper bracket
Pull off the brake caliper bracket
Pull the rotor off
If the rotor will not come off, thread one lug nut and tap the rotor loose with a hammer
5. Installing the Brake Rotor
Slide the rotor on
Thread on one lug nut to hold the rotor in place
Put an old pad in the caliper
Use a large C-clamp and the old pad to push the pistons back
Apply grease to the caliper slides
Remove the brake pad slides
Clean the slide mounting area with a wire brush
Put the bracket back into place
Start the two 18mm bolts by hand
Tighten the 18mm bolts to 95 foot-pounds of torque
6. Installing the Brake Pads
Put the brake pad slides into place
Push the brake pad slide tabs into place with a hammer and flat blade screwdriver
Apply grease to the brake pad tabs
Install the new brake pads into the bracket
Push in the brake pad clips
Put the caliper on
Thread the two 13mm bolts by hand
Tighten bolts to 25 foot-pounds
7. Reattaching the Wheel
Remove the placeholder lug nut
Slide the wheel into place
Start the lug nuts by hand
Tighten the lug nuts preliminarily
Lower the vehicle to the ground
Tighten the hub nut to X foot-pounds
Tighten the lug nuts to 110 foot-pounds in a crossing or star pattern
Reattach the center cap
8. Testing the Brakes
Pump your brakes repeatedly until they feel firm
Test your brakes at 5 miles per hour and then 10 miles per hour
Road test the vehicle
Brought to you by 1AAuto.com, your source for quality replacement parts and the best service on the Internet.
Hi, I'm Mike from 1A Auto. I hope this how-to video helps you out, and next time you need parts for your vehicle, think of 1AAuto.com. Thanks.
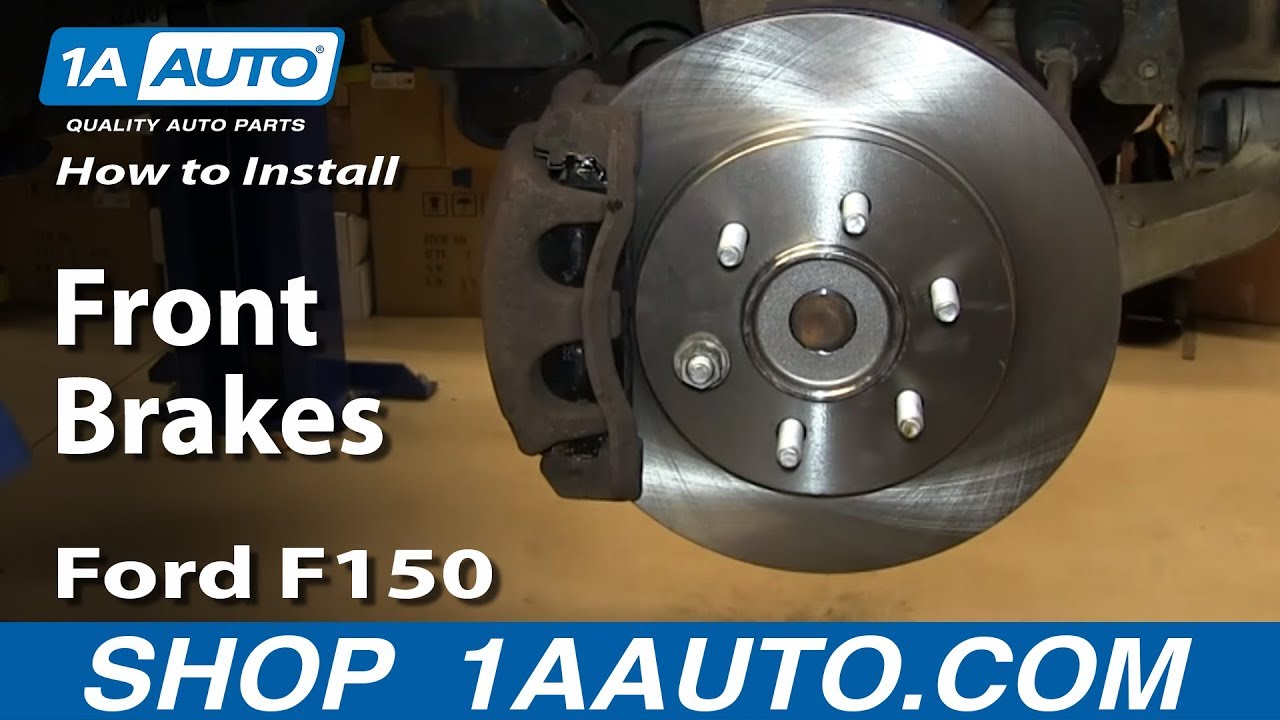
In this video, we're going to show you how to replace the front brakes on this 2005 Ford F150. We show you on the passenger's side but the driver's side is the same procedure. The items that you'll need for this are new brake pad and rotor kit from 1AAuto.com; a 13, 18 and 21mm socket and ratchet with a piece of pipe for extra leverage; flat blade screwdriver; pliers; jack and jack stands; large C-clamp; wire brush; brake grease; and a torque wrench.
Pry off the hub cap. Then, using your 21mm socket and ratchet loosen up each of the lug nuts. Now, raise the vehicle and remove the lug nuts the rest of the way and remove your wheel.
Turn the wheel so you can access the brakes better. Inspect your brakes. These brakes really actually look good. Take the back of your fingernail and run it up and down. You're feeling for any large grooves. Even though it looks like there's a groove there, there's really not anything there. There's going to be light grooves but you don't want anything large. Do the same thing on the back side. Then you can see the pads. See the pad right there. There's plenty of life left on this outer pad. The inner pad you can see through here and there's actually a little slot there. That's actually a wear mark, so there's actually good life left on these brakes but we're going to take them apart and put them back together just to show you.
To make it easier to get the caliper off, just take a large screwdriver and put it into the brake disc and pry out. You don't have to move it far, just enough to help you get things apart. Then, we're going to remove the two 13mm bolts: here and one up here. Push in the slides on the bracket and then pull the caliper up and off. Now, pry out your brake pads.
Now, remove these two 18mm bolts on the back of your caliper bracket. We'll just fast forward as Mike removes those. If your vehicle has a little rust and the rotor isn't coming off, put a lug nut on and use a hammer to hit the back of it and then remove the lug nut and remove the rotor.
On the left, are the old brake pads and rotor. On the right, are the new ones from 1A Auto. You can see they're identical and they'll fit exactly the same.
Put the rotor into place and then, replace a lug nut to just hold in place while you put the caliper bracket back on. Take an old brake pad and put into your caliper. Then, take a large C-clamp and you just want to twist the C-clamp and it'll push those pistons on your caliper back in. These should be nice and smooth. They are a little bit catchy so I'm going to take them out, clean them off and regrease them. Apply the brake grease. Push the slides back into your caliper bracket. Now, pull off your brake pad slides and, using a wire brush, just clean the area where the slides were. Now put the brake caliper bracket back into place and replace the two 18mm bolts that hold it there. We'll fast forward as he tightens those up. Then you want to torque both of those to 95 foot-pounds.
Push your new brake pad slides into place. All right I always find it's easier to adjust these a little bit. These ears here push and keep tension on the pads that way, but usually they just need to be bent in that way a little bit. Then it's always good to just take a screwdriver and bend these ears down some and then these ones up. Put some grease on the ends where they contact the slides. Now there's a small tab that comes down on these slides. Just bend that back up. Reinstall the inner pad, then you can use these clips and these are optional but these clips hold the pads out from the rotor while you're driving. You need to set the tabs in the slides to hold the brake pads in place while these clips are on.
Put your caliper back into place. Then, replace those two 13mm bolts and tighten them up. Now torque both of these to 25 foot-pounds.
Remove the lug nut and then put your wheel back into place. Then replace each of the lug nuts and tighten them up preliminarily and then lower the vehicle and tighten them the rest of the way. Torque each of the lug nuts to 110 foot-pounds in a crossing pattern. Replace your hub cap.
After doing any work on the brakes, you just want to pump the brake pedal until it firms up and then do a stopping test from 5 miles per hour and then 10 miles per hour.
We hope this video helps you out. Brought to you by www.1AAuto.com, your source for quality replacement parts and the best service on the Internet. Please feel free to call us toll-free, 888-844-3393. We're the company that's here for you on the Internet and in person.
Product Reviews
5.0/ 5
★★★★★★★★★★
2 reviews
5★
100%
4★
0%
3★
0%
2★
0%
1★
0%
Customer photos
★★★★★May 20, 2025
Best company I deal with love 1a
Super clean packaging no damage whatsoever unlike other I ordered from delivery was quick already put 4k miles no issues exactly as promised would buy again these brakes stop great and look great on my truck
★★★★★May 6, 2025
Amazing Upgrade
I am very happy with my brakes and rotors, they look fantastic and most importantly they operate perfectly. I would highly recommend them as a nice affordable upgrade that looks absolutely amazing??.
Showing 1–2 of 2 reviews
BKA12659
In Stock
Customer Q&A
Got a question about this part? Post it and get answers from our team.
DavidFebruary 20, 2018
Does this come with the spindle nut?
No it does not.
B · March 6, 2018
DaviddJanuary 31, 2018
Do these rotors come with wheel bearings In them?
Yes.
B · January 31, 2018
FredAugust 10, 2017
Do these rotors have studs in them?
Yes, these will have the studs and come in a pair to replace the passenger side and driver side.
Alex · August 11, 2017
Showing 1–3 of 3 questions
Customer service
877-844-3393
Monday - Friday 8:00am - 9:30pm ET Saturday - Sunday 8:00am - 4:30pm ET
Ask a Question
Check Your Email
We sent a verification email to .
Click the Verify Email button in the email to submit your question.
This extra step helps prevent spam.
Select Your Vehicle
Specify your vehicle's year, make and model to guarantee fit.







 WARNING: This product can expose you to chemicals including Lead and Lead Compounds, which are known to the State of California to cause cancer, and birth defects or other reproductive harm. For more information, go to www.P65Warnings.ca.gov.