Replaces
Replaces Chevrolet Colorado GMC Canyon Engine Cooling Fan Assembly TRQ RFA80161
$404.95
Replaces Chevrolet Colorado GMC Canyon Front 12 Piece Steering & Suspension Kit TRQ PSA56802
$399.95
Replaces Chevrolet Colorado GMC Canyon Front 10 Piece Steering & Suspension Kit TRQ PSA72663
$379.95
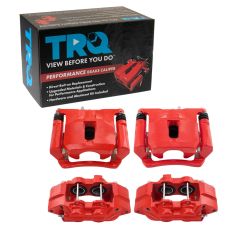
Replaces 2015-19 Chevrolet Colorado GMC Canyon Front & Rear 4 Piece Performance Brake Caliper Set TRQ Performance CLA82792
$364.95
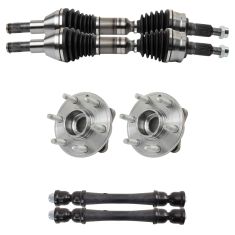
Replaces Chevrolet Colorado GMC Canyon Front 6 Piece Steering & Drivetrain Kit TRQ PSA25527
$359.95
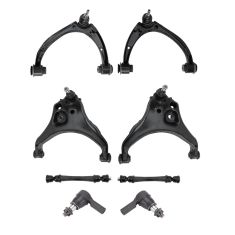
Replaces Chevrolet Colorado GMC Canyon Front 8 Piece Steering & Suspension Kit TRQ PSA72662
$359.95
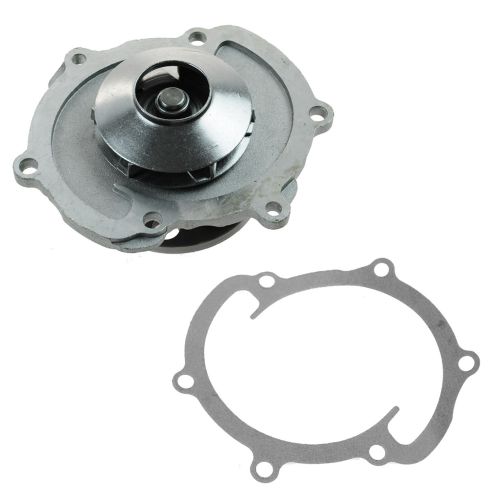
Part Details
Specifications
About TRQ:
TRQ is a trusted brand dedicated to making every repair a success story by combining premium parts with easy installation. Each TRQ part is engineered by a team of automotive experts to meet or exceed OEM standards, delivering enhanced performance and maximum longevity. With rigorous in-house testing, the brand ensures superior fit and function across every product line. TRQ also provides customers with best-in-class, step-by-step installation videos—so you can complete repairs with confidence, whether you're a first-time DIYer or an industry professional.
Attention California Customers:
 WARNING: This product can expose you to chemicals including Lead and Lead Compounds, which are known to the State of California to cause cancer, and birth defects or other reproductive harm. For more information, go to www.P65Warnings.ca.gov.
Lifetime Warranty
This item is backed by our limited lifetime warranty. In the event that this item should fail due to manufacturing defects during intended use, we will replace the part free of charge. This warranty covers the cost of the part only.
FREE Shipping is standard on orders shipped to the lower 48 States (Contiguous United States). Standard shipping charges apply to Hawaii and Alaska.
Shipping is not available to a P.O. Box, APO/FPO/DPO addresses, US Territories, or Canada for this item.
Expedited is available on checkout to the United States, excluding Alaska, Hawaii.
Final shipping costs are available at checkout.


Created on:
Tools used
Hi, I’m Mike from 1A Auto. We’ve been selling auto parts for over 30 years!
Go inside the vehicle, open up the hood. With the vehicle on the ground I'm going to use a breaker bar and a 22 millimeter socket to loosen the lug nuts. Raise and support your vehicle with a jack and jack stands, but we're using our two post lift. Use the socket to finish removing the lug nuts. All right, it's seized to the hub. Take a couple of lug nuts, just thread them on lightly. Use a dead blow or a rubber mallet. Hit on the tire and it will knock it free. Lug nuts will keep the wheel from falling off. Now it's loose so you can finish taking the lug nuts off. Just going to support it so it doesn't fall.
I'm just going to turn this knuckle out of the way. Remove these two push clips holding in this plastic shield. I'm going to use a flat bladed screwdriver to just pop them up to unlock them. They might break, and you'll have to get new ones. It's very common for them to break. I'll try to get this one first. They get old and brittle. I'm going to use a trim clip tool. Try to get underneath them, and I'll just break them off. I'll have to replace these with new ones afterwards. I'm just going to pop them through the holes. They're just plastic—it's not a big deal. I'm going to take a bungee cord and just hold this fender liner up and out of the way. I'll just bungee it over just like that.
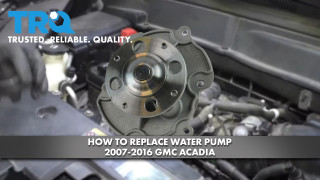
Water pump is located up towards the middle of the engine next to the frame rail. Kind of difficult to get to. That's the pulley and there are four bolts holding on the pulley. If you want to reuse the belt you can mark the direction that it's mounted in by just taking a paint marker and just putting an arrow to the outside. This has got a pretty broad tip but I'll know when in reinstall it I want that arrow facing out. The belt is already worn in and I want it to travel in the same direction. If you're going to replace the belt, don't worry about marking the direction.
Before you remove the water pump pulley, you'll need to have four new mounting bolts on hand as they are torqued to yield. There are four 10 millimeter bolts holding on the water pump pulley. I'm going to use a ratcheting wrench to remove them. I'm going to leave, well, I'm going to loosen them first. I'm not going to fully remove them, but I'm going to use the serpentine belt that's on here to hold the pulley still while I remove them. Otherwise, the pulley will spin on you if you take the belt off first. I'm just going to go up and just start loosening them, but not take them out all the way. Just be patient with this. It's tight quarters working on it. Those are all loose.
Now, I'll remove the belt. Belt tensioner is here. It has a 1/2 inch drive opening on it. You could use a 1/2 drive breaker bar. I'm going to use a 1/2 inch drive socket with a swivel head. Whatever you've got that will let you get in there and basically you're just going to line it up. You might have to turn it. That's why a ratchet might be easier than a breaker bar. Get it pushed into the opening.
Now we're going to push it to the back, take the tension off, and I'm going to pop it off of this idler pulley because it's a smooth pulley. Get the belt off just like that. You have to slide it underneath the tensioner pulley. Now I can slowly release the tensioner, and I'll just feed the belt out of the engine compartment. There's the drive belt, serpentine belt. I'm just going to use a little pry bar just to pop this out. I'm going to remove the water pump pulley. I'm going to thread out the bolts that are loose. That's one. Spin the pulley around and just keep removing them.
Hold the pulley so it doesn't fall, so you get the last bolt out. There's the last bolt. Take the pulley off and slide it out. There's the water pump pulley. Get our drain bucket in place to catch of and dispose of the coolant properly. You can either drain the coolant from the lower radiator hose attached to the radiator or you can remove the hose clamp and the hose from the top here, from the engine and then direct the hose down into the bucket which is what I'm going to do. The clamp will be the same on the bottom one.
I'm just using some slip joint pliers. If you squeeze it just the right way, it's got a little lock, it'll lock together. I can slide it down. Reach down and work on getting that hose off. You should always do this when the vehicle is cool. It's going to come gushing out here. This is the new water pump. It'll be sitting the vehicle like this. There are six bolts around the outer edge. There are 10 millimeter heads on them. You're going to remove all those. It's going to be difficult to see. That's why I'm showing you on the new pump. Once all those are removed, I'm going to pull the old pump off the engine and out of the vehicle.
Use a 10 millimeter socket ratchet extension, whatever you need to get in there. You might need to switch to some different stuff but start with this bottom one. They're not in here very tight, which is good. That one's loose. You will want to have new bolts on hand to replace these ones that come out. They are torqued to yield. Just be patient with this. It's very tight to work in there. I'm just going to go around and just get all six bolts. There are some bolts that are near the water pump. They are bigger than 10 millimeter but all the bolts holding the water pump are 10 millimeter. Don't try to remove any bolts that aren't 10 millimeter directly around the water pump. It's already leading, but I've got a rag here so it doesn't. Try not to splash myself in the face with coolant.
I'm going to reach up here and just pull it off the engine block. I'm not going to pull it out completely yet. I'm just going to let it drain some more. All right, I'm going to work that water pump out of the engine compartment here. There's almost enough space but not quite to get the water pump out between the engine and the frame rail. I'm going to use a large pry bar. I'm going to gently pry on the engine and move it over slightly. I'm also going to grab the water pump. I'm going to pry it over, slide it out of position just like that. Put the engine back and there's our old water pump.
Remove the old metal gasket. Reach up here. It might be stuck, but peel it up. Make sure it all comes as one piece. I'm going to discard this, and use a new one. The gasket did have some sealant on it from the factory. Some of that sealant has stuck to the engine block. You're going to make sure you want to clean all that off on the engine block before you install the new gasket, so it seals properly. Just going to use some brake parts cleaner on a rag and go up there and clean the service.
This is our old water pump from our vehicle. And you can see there is the weep hole there and it's actually dry. So what that does is this part of the water pump is sealed against the engine so there's coolant up against here and the shaft that drives the impeller here to pump your water. It goes all the way through, and it's turned by the drive belt that's on this pulley.
So there are seals inside on that shaft, and if they fail they will leak out here at the weep hole. This one appears that it was the seals had gone bad, and it was leaking out of this little pressed in fitting here. You can see it's corroded and it's wet with coolant. That's where our coolant leak was coming from. Typically if a water pump is failing internally you'll have coolant come out of that weep hole.
Here's our original water pump and gasket from our vehicle. This is our brand new one from 1AAuto.com. Comes with a new gasket and the new required hardware to bolt the water pump to the block. This will work great and fit great in our vehicle.
When installing this water pump, it's going to be hard to see because it's up against the frame rail, but after we thread in all the bolts by hand, we're going to torque them to 89 inch pounds. Going to start with this bolt here and go in a cross pattern so it'll be one, two, three, four, five, and six. All right, going to use our pry bar. I'm going to gently push the engine over. Take our new water pump. I don't have the gasket on it yet because I don't want the gasket to be damaged. I'm going to slide it up into position. Get it to slip up to where it needs to go.
There it is, and I'm just going to rest it on top of the crank pulley and pull the pry bar out. I'll take the gasket, and with this wide metal part facing towards the back of the car, grab our water pump and we'll slide the gasket into position behind the water pump. I'm just trying to push the water pump into the opening, but I'm also trying to position the gasket at the same time. Got it sort of lined up.
I'm going to take one of the new bolts, and I'll get the bottom bolt started. Now I'm going to get the top bolt caught, have to do this by feel. Reinstall the rest of the bolts by hand, make sure the gasket remains lined up. I'm going to torque these to 89 inch-pounds in a cross pattern starting with the top bolt. There's one. They're all torqued.
To get the water pump fully reinstalled, get it up into place. Going to start by just finding the threaded hole for one bolt. I've got one started. Turn to the next hole. It should be lined up. Tighten these afterwards with the belt in place.
Before you put the belt back on, you just want to make sure these pulleys are clean and dry from coolant. You can either take some water, spray it down, let it dry, or some brake parts cleaner will do the same. Since we're reusing the belt, I made an arrow to tell me the direction, because I want the belt to go in the same direction. So the arrow is pointing out this way, so I put the belt in the vehicle this way.
I'm going to reach up and get it around the power steering pulley first. Over the water pump pulley, bring it down around the alternator. I'll loosely put it around the idler pulley near the alternator. It's going to have to slide behind the tensioner between the tensioner and the block. So you actually have to flip it sideways and slide it up. Then it will go down around the AC compressor. We'll put it around the crank. I'll put it on the tensioner. Loosen the tensioner and then pop it over the idler and then release the tensioner. Torque for the water pump pulley bolts is 89 inch-pounds or 7.4 foot-pounds. I really can't get a torque wrench in here, but it's very light. I'm just going to do it by feel, and it should be right about when they stop. Just do all four of them the same way. Take the bungee cord out of the way. Put this splash shield back up with some new clips.
Now turn the knuckle straight, and reinstall the wheel and tire. Install the lug nuts by hand, just going to use the socket. Thread these down, we'll retorque them with the vehicle on the ground. Torque the lug nuts in a cross pattern to 140 foot-pounds.
Reinstall the lower radiator hose to the engine. Put that right in place. It'll go on right to that little stop right there. Get the clamp roughly where it was with a flat bladed screwdriver. Pry it down. There it is, snapped into place and it's sealed up. To remove this plastic shield that's in front of the engine compartment, there are 10 clips. Take a small flat bladed screwdriver or trip clip tool, and I'll pop them up. To loosen them, go in like this and pull them out. If the middle comes out, that's okay. Then this rubber seal is clipped in here. Just kind of pop it out. Use a small flat bladed screwdriver. Just pop it up. Use a trip clip tool. These may break when you're taking them out. You might want to have some new ones on hand.
If the middle comes out, it just pushes right back in there. Just repeat that for all the clips. These are a little trickier because they're deep inside here. Try to get this in here, and pry them up. Just go along, and do the same for all of them. This should just lift right off now, and we'll put it aside.
Remove the radiator cap. It just unscrews. We're going to fill this system at the radiator so that we're not you could fill it through the overflow bottle. It would just take a long time to fill so I'm going to fill up the radiator and then I'm going to top off the overflow. You could use a regular funnel. We've got a special funnel we're going to use but it doesn't really matter because it will pressurize and bleed through the overflow and we'll do that after we fill it.
Going to use a 50/50 mix of the appropriate coolant which is Dex-Cool and fresh water. The line is on the back of the reservoir. I've filled the radiator. I'm going to remove the funnel. Might lose a little bit of coolant. It's almost topped off at the cold level. I'm just going to let a little coolant in. There it is. Put this back into our bottle. Going to remove this and replace our radiator cap.
Our radiator is filled to the top which is right where I want it. I'm going to need to run the vehicle, check for leaks, and then bleed the system. I'm going to start the vehicle in a safe place to have it running, so outside. I'm going to bring the RPMs up to between 2,000 and 2,500 RPM till it comes up to operating temperature. I'm going to let it idle for three minutes and shut it off. Let the vehicle cool, and then we'll recheck the coolant level and top off as necessary. After that, the job will be complete.
Install the upper cover of the engine compartment. I'm going to slide it under that ground point. It's going to go over these rubber mounts here, both sides. Let's go under this weather strip. Same thing for both sides. Reinstall all the push clips. It's easier to push the clips in if you pull out the center part. This is the last one and that is complete. Close your hood.
Thanks for watching. Visit us at 1AAuto.com for quality auto parts, fast and free shipping, and the best customer service in the industry.
Tools used
Brought to you by 1AAuto.com, your source for quality replacement parts and the best service on the Internet.
Hi, I'm Mike from 1A Auto. I hope this how-to video helps you out, and next time you need parts for your vehicle, think of 1AAuto.com. Thanks.
In this video, we show you how to replace the water pump on this 2005 Cadillac CTS with the 2.8L V6. You'll need a new water pump from 1AAuto.com, a pair of pliers, a flat blade screwdriver, a 10mm socket, a ratchet, a half inch ratchet, a drip pan, emery cloth, a funnel, coolant, a torque wrench, and jack and jack stands.
Start off by removing your coolant reservoir cap. Next, you want to raise your vehicle, and then you want to remove these eight clips that hold in this panel here. Now, we use wire cutters, but don't actually cut the clips. You just want to pull out the center, and then they pull out. We'll fast-forward as Don does the others. Next, you want to remove these six clips here. For these ones, you just want to use a flat blade screwdriver, pry out the center, and then you want to pull it out.
We use some pliers to help pull those out. We'll just fast-forward as Don removes the other five. Once those clips are out, just remove that panel. Put a drip pan underneath the lower radiator hose, push the teeth on the hose connector together with a pair of pliers, and let the coolant drain out. You can hold it like this until it drains, or you can slide the clamp back and pull the hose off and let it drain right into the drip pan. Once that's finished, remove your oil cap, and pull that engine cover off.
Now, disconnect this hose from your air intake box, and loosen up this hose clamp here, and this hose clamp down here. You can see I'm just using a flat blade screwdriver to loosen those up, and then the air intake box pulls up and off. Using a half inch ratchet, you just want to put it into that square there and push down. That will release the slack on the belt. Then, you want to pull that belt off the pulleys and slowly let up on that ratchet. Then you have to tuck the belt behind the tensioner to get it out.
Right here is your water pump. On the pulley you'll see these four bolts. These are 10mm. Just go ahead and remove them. A helpful tip: loosen those bolts before you take the serpentine belt off. The pulley will pull right off. Now, using the new water pump as a reference, you can see there are six bolts that hold the pump in. We can show you some of them on the old water pump. You see there's two right there. They go all the way up and around. These are 10mm. Just go ahead and remove each of those. When you pull your water pump out, there will be coolant trapped behind there, so make sure you have your drip pan in place. Then, remove the gasket from the water pump. Use an emery cloth to just clean up where the gasket went.
Old water pump on the right, new one from 1A Auto on the left. You can see they're identical, and will mount up exactly the same. Take your new water pump, put the gasket into place, and feed the water pump down into place. Just twist those bolts in by hand to get it held on there. Now we'll just fast-forward as he replaces the other five bolts and tightens all of those up.
Now, go around and tighten each of those six bolts to 11 foot-pounds, and then go around again tightening each of them to 22 foot-pounds. Now put your pulley back into place and replace those four bolts. We'll just fast-forward as Don does this. Here's a belt diagram for this car. You just want to use this as a reference when you got to put your belt back on.
It's hard to show what we're doing here, so just use this picture. You want to start off by just feeding it down and under that crank, and fitting it up behind the tensioner pulley, and then over the actual pulley. Then, using that half inch ratchet, you want to push down on the tensioner. That will allow you to put your belt back up over the water pump. Then, carefully let up and remove that ratchet. Now, torque the pulley bolts on your water pump to 11 foot-pounds.
Next, put that intake box back into place and reattach those hoses. Then just tighten up those hose clamps. To replace that hose into the intake now, you want to lineup these holes with these pins and the pin on your engine cover with the hole on the engine. Remove your oil cap, push this down into place, and release your oil.
Now, replace that panel and replace those six clips along the front. Just push them in with the center still popped up, and push the center in to lock them. Then replace those other eight clips. Now, fill your coolant reservoir bottle up to the max filling. Now, replace the cap and start the vehicle, and let the coolant run through the engine. On these Cadillacs it's known that it's a little tough to get the air out of the coolant, and so you don't want to run the engine a little bit. Make sure your heat starts working. If your heat doesn't start working, that's a sign that the coolant is not flowing. So, run your engine; check the coolant level often. It actually did take up to about an hour to an hour and a half to work the air out of the system in this vehicle.
We hope this video helps you out. Brought to you by www.1AAuto.com, your source for quality replacement parts and the best service on the Internet. Please feel free to call us toll-free, 888-844-3393. We're the company that's here for you on the Internet and in person.