Brought to you by 1AAuto.com, your source for quality replacement parts and the best service on the Internet.
Hi, I'm Mike from 1A Auto. I hope this how-to video helps you out, and next time you need parts for your vehicle, think of 1AAuto.com. Thanks.
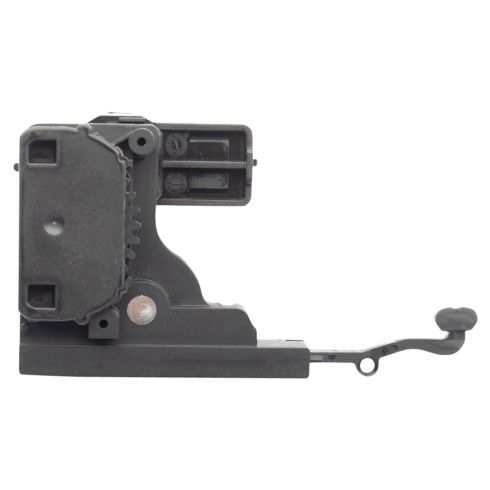
In this video, we're going to show you how to replace the lock actuator on one of the rear doors on this 2000 Buick LaSabre. Door actuators are available on our site, the DLA00005 is the driver side; the 6 is the passenger side. Tools you'll need are a flat blade screwdriver, Phillips screwdriver, door panel clip tool also available on our site, 10mm wrench or socket and ratchet, T30 Torx driver, and a T10 Torx driver as well as pliers. On some vehicle's how you get the door panel off may differ.
Start with a flat blade screwdriver and just carefully go right in behind here and pull out on this bezel. It comes forward and off. Next, you're going to want to take your screwdriver again and pry out on this courtesy light. You can see that comes straight out. You can pull the bulb like that. Phillips screwdriver, you can look right in here, you'll see a black Phillips screw, remove that.
Now there's a series of clips around the door panel. You want a door panel clip tool, and what you can do is pull out on the panel and slide it in. Then, usually, down until you come to a clip, pull it out, go right around the clip, pull on the door panel and on the tool at the same time, and then just keep doing that right around the whole panel. I'll speed it up here as I just work my way around the panel with the tool and pulling to release the clips. Then once you release the clips you'll want to actually just kind of pull the handle out or pull the panel out and pull it up and off of the bracket.
Pull the back clip out, pull the door panel up. Then come up to the front here, pull all these clips out, and you have to pull your door panel up and out. Then there's a little electrical connection here. Just press on the tab and disconnect that. The door panel comes off, and you can see right here, this is the clip in the middle, slides down on these clips here. What you'll want to do is once you have the panel off take your screwdriver and push up. There are basically two just little teeth that hold it on, push up, pull the clip off, and push down and that comes off. You can slide it right back into there. Fast-forward here as we remove the other clip and then put it back into the panel. Then the panel is ready to install when you have your project done.
Once the door panel's off, use some pliers or a screwdriver and pull the pins at the top of the water shield out. Carefully pull the water shield down to give you access to the part. Use your door panel clip tool or a pair of pliers and remove the pins and the big Styrofoam block that's kind of the lower part of the opening. Remove this bolt here and then just slide your handle forward and out. You pull these rods from there. You hold your handle like this, and then this rod pulls up and out, and then twist your handle and pull it off of the other rod here. Firmly pull, you rotate it this way at the same time.
Now there are three T30 screws. You'll need a T30 Torx driver, and you'll want a ratchet that goes like this. You want to remove these screws. We'll just speed up here as we remove those three screws. Now up inside you can see there's a gray clip here, and you can see my hand, but you want to reach in with your thumb and undo that clip. You can see right there, and then pull your rod out like that. Your harness, actually if you reach right here, there's a pin right here that's where your harness goes, and you just want to take your fingers or a screwdriver, pinch that, and force that through. Now, just basically, take this whole assembly and pull it right out.
Here are your two leads. There's just little tabs, so just pull the lead and you're disconnected. Here's your actuator and lock mechanism. The actuator's held in by two small T10 screws, so we're just going to use a T10 driver and remove those. Now your actuator can come off and out like that. Take your lock mechanism, your new actuator from 1A Auto, put them together a little bit diagonally and press this rubber grommet into the lock mechanism. Then put your actuator up into place, drop one screw in, drop the other screw in. We'll speed it up here again as we tighten those screws up.
Now to reconnect your leads, the black one goes on the bottom, this one that has the blue around it goes up on top. Then to put this back in, here's your child lock safety switch on the bottom toward the inside of the car. You have to feed it in a little bit, the Styrofoam here gets in the way some, feed it right in. Your lock rod or door latch rod from your door handle will be in there, so just make sure you pull that forward. Then feed the whole mechanism right up into place. Just start these in here.
Fast-forward here as we tighten up those three T30 Torx screws that hold the latch mechanism into the door. To reinstall the door handle, you'll want to do the yellow one first. Bring the handle in like this and push it on while you rotate it. Then this one, you just rotate the handle forward a little bit, get the rod in there and push it down. Bring your handle forward, make sure it's in the slot, and push it back. The last thing is just to put this, make sure it snaps back into here in place.
Now reinstall the Styrofoam block, insulation block, and carefully put your water shield back up. Put the pins back into place and make sure you press the outside edges into place. Before you put your door panel back on, you've got to make sure this bracket is in place, and then reconnect your harness. Now two of your lower pins are longer so you can actually put those in place. I'm just looking down, seeing those go in place. Those should pretty much line up, and then you can just rotate the panel onto the door. Watch everything go in. Peek back here, make sure that these pins are lined up. Ashtray fell out on the floor. Stick the back in a little bit and put that in. Make sure we take our Phillips screw and carefully put it in. Connect our courtesy light.
We hope this video helps you out. Brought to you by www.1AAuto.com, your source for quality replacement parts and the best service on the Internet. Please feel free to call us toll-free, 888-844-3393. We're the company that's here for you on the Internet and in person.