About TRQ: TRQ is a trusted brand dedicated to making every repair a success story by combining premium parts with easy installation. Each TRQ part is engineered by a team of automotive experts to meet or exceed OEM standards, delivering enhanced performance and maximum longevity. With rigorous in-house testing, the brand ensures superior fit and function across every product line. TRQ also provides customers with best-in-class, step-by-step installation videos—so you can complete repairs with confidence, whether you're a first-time DIYer or an industry professional.
Product Features
Direct Bolt-on Replacement: No modifications or special tools required
Complete Assembly: includes same mirror glass, housing, bracket and technology as the original unit
DOT Certified: Built to the highest quality standards
FMVSS-111 Compliant: Validated to be a dealership alternative
Description
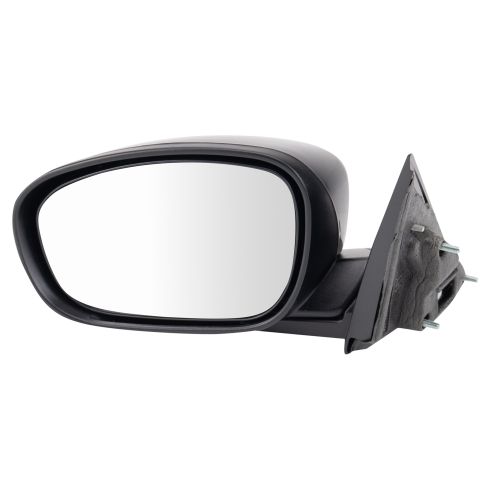
TRQ side mirrors and mirror components are designed to match the function, fixture, and performance of the original version for easy installation. TRQ mirrors are DOT certified, comply with all federal safety standards, and are independently lab tested to ensure our products comply with all government regulations. All products are fit and road-tested in our Massachusetts R&D facility to ensure we deliver on our promise of Trusted Reliable Quality.
Exact fit - To obtain proper fit and function confirm your vehicle has the exact mirror options listed.
Paint To Match Note:
"Paint-to-match finish" refers to a smooth, paintable surface. This item is not painted. Paint offers better coverage and adhesion, but it is not necessary for installation.
Attention California Customers:
WARNING: This product can expose you to chemicals including Lead and Lead Compounds, which are known to the State of California to cause cancer, and birth defects or other reproductive harm. For more information, go to www.P65Warnings.ca.gov.
This part fits
6 vehicles spanning 2005-2010.
Fits these Makes
Select vehicle
Year
Make
Model
Description
2005
Chrysler
300
Chrysler 300 Driver Side Power Heated Mirror with Heat, with Black Cover TRQ MRA05958
2006
Chrysler
300
Chrysler 300 Driver Side Power Heated Mirror Manual Folding, with Black Cover TRQ MRA05958
2007-2008
Chrysler
300
Chrysler 300 Driver Side Power Heated Mirror with Heat, Manual Folding, with Black Cover TRQ MRA05958
2006-2007
Dodge
Charger
Dodge Charger Driver Side Power Heated Mirror with Heat TRQ MRA05958
2009-2010
Dodge
Charger
Dodge Charger Driver Side Power Heated Mirror with Heat TRQ MRA05958
2005-2008
Dodge
Magnum
Dodge Magnum Driver Side Power Heated Mirror with Heat, with Black Cover TRQ MRA05958
Part Interchange
Brand Label
Part Number
Chrysler
XB811XRAK
Dodge
XB811XRAK
DIY Solutions
MIR01305
Partslink Numbering System
CH1320231
Dodge
1BY431XRAB
Partslink Numbering System
CH1320309
Hollander
128-01513L
Mopar
XB811XRAJ
This item may be interchangeable with parts from other brands with the above part numbers.
This information is provided only for reference and does not guarantee that the item you are
purchasing is identical to parts with part numbers from the brands listed above.
To confirm that this item fits your vehicle, use the above "Check Vehicle Fit" option.
Lifetime Warranty
This item is backed by our limited lifetime warranty. In the event that this item should fail due to manufacturing defects during intended use, we will replace the part free of charge. This warranty covers the cost of the part only.
FREE Shipping is standard on orders shipped to the lower 48 States (Contiguous United States). Standard shipping charges apply to Hawaii and Alaska.
Shipping is not available to a P.O. Box, APO/FPO/DPO addresses, US Territories, or Canada for this item.
Expedited is available on checkout to the United States, excluding Alaska, Hawaii.
Final shipping costs are available at checkout.
How to Install Side View Mirrors 2005-10 Chrysler 300
Created on:
Tools used
Phillips Head Screwdriver
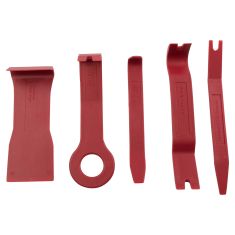
Trim Tool Set
Pick
1. Removing the Door Panel
Pry out the trim piece inside the door handle
Remove the Phillips screw behind the handle
Remove the circle clips by pressing in the center and prying out the clip
Remove the four Phillips head screws on the bottom of the panel
Pry out the panel below the door pull
Pry out the door panel with a door panel clip tool or putty knife
Release the door handle cable by popping the clip, rotating the handle, and popping the hook out
Disconnect the window switch wiring harnesses
Pop out the wire harness retainers
Unplug the courtesy light and its wire retainers
Lift the door panel up and off
2. Removing the Chrome Trim
Pry out the black clips by pressing the center
Remove the black trim panel along the top of the window frame
Remove the two T25 screws from the trim panel
Lift up and slide the chrome trim toward the rear
3. Removing the Mirror
Disconnect the electrical connector
Remove the three 8mm nuts from the mirror
Remove the mirror
4. Installing the Mirror
Insert the mirror into place
Tighten the three 8mm nuts to the mirror
Connect the electrical connector
5. Installing the Chrome Trim
Line up and press the trim into place
Tighten the T25 Torx screw to the trim
Press the black clips into the frame
Press the window frame trim into place
6. Installing the Door Panel
Connect the courtesy light
Clip in the wire harness retainers
Connect the window switch wiring harnesses
Insert the latch rod into the door handle
Slide the clip over the latch rod
Lift the panel up over the door lock
Press the panel into place
Press the clips into the door panel
Tighten the four Phillips screws to the bottom of the panel
Tighten the Phillips screws beneath the door pull
Tighten the Phillips screw into the door handle
Press on the trim buttons
Hi, I'm Mike from 1AAuto. We've been selling auto parts for over 30 years! We're dedicated to delivering quality auto parts, expert customer service, and fast and free shipping, all backed by our 100% satisfaction guarantee. So visit us at 1AAuto.com, your trusted source for quality auto parts.
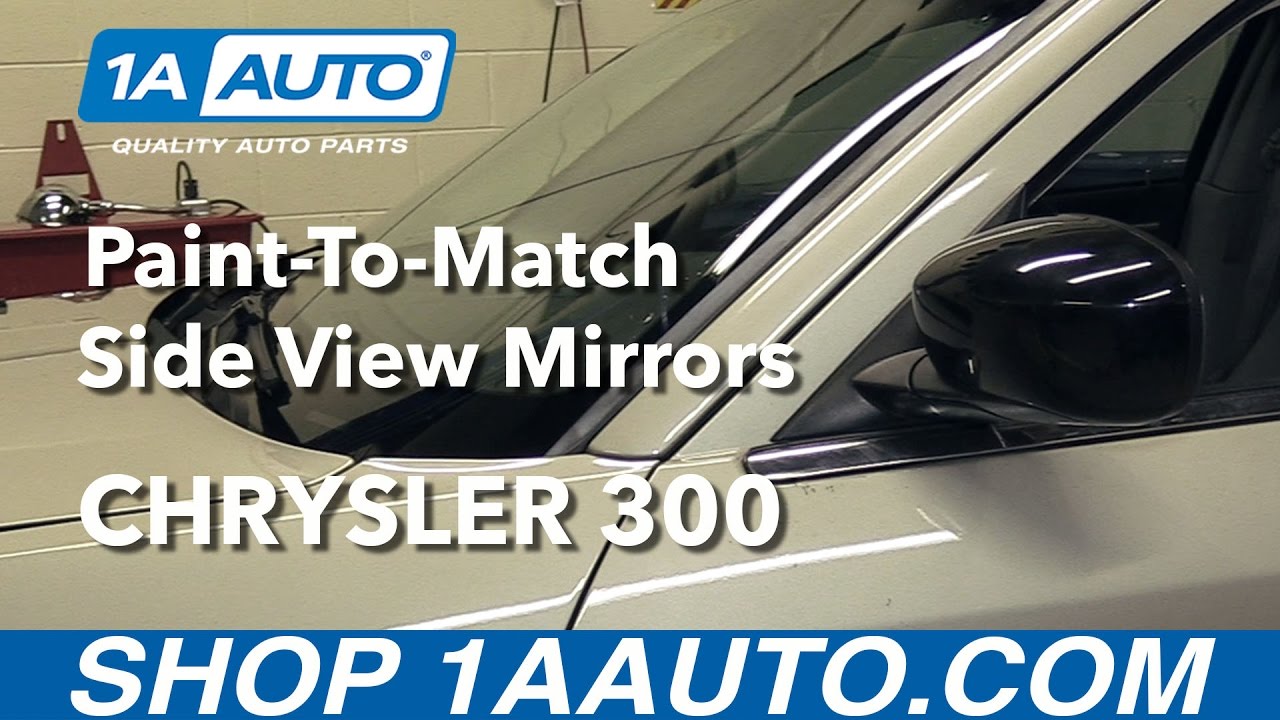
In this video we're going to be working with our 2006 Chrysler 300. We're going to show you how to remove and replace your interior door panel. While this process is being done on the driver's side, the passenger side front will be very similar. If you like this video please click 'subscribe,' we have a ton more information on this car as well many other makes and models and if you need parts for your vehicle, you can follow the link down in the description over to 1AAuto.com.
Here are the items you'll need for this repair: hooked pick, trim tools, Phillips screwdriver
Normally, there would be a little panel here that's broken off and missing from our vehicle. You would want to take a hook pick, put it in there, and just pop it down. Once that's out of the way, you can use a Phillips head screwdriver to remove the screw and the handle. Now, unless you're replacing the mirror, you'll only have to remove the three color matched clips: one here and two at the back of the panel. The black clips can stay in place since this piece of trim is all on its own.
To remove these clips, push the center in one click, and you can see there's a small hole in there. I find the easiest way to remove these is get a hooked pick, grab that, and pull it out. Repeat this process for the other two clips. And then three Phillips head screws along the bottom, as well as one above the side here in the front. We'll remove all of those with our Phillips head screwdriver. Below the door pull is another panel.
We'll have to pop down. Behind that panel is another Phillips head screw that we'll have to remove with our screwdriver. Grab the bottom of the panel, pop it out, release the door handle cable here by popping this clip off to the side rotating it and lifting the hook out. You should be able to lay it back enough to remove the connectors on the master window switch. And we'll want to pop out all the retainers, the wire harness down here. Unplug the courtesy light at the bottom of the panel as well. Again, this is another great place that our trim tools come in handy. Just reach it under there and pop ‘em out and set your panel off to the side.
Reconnect the courtesy light. Pop those two harness connection back into their proper locations. Reconnect the power mirror switch.
I know there are two gray connectors with a lot of similar colored wires going to them, but the one for the mirror switch is slight smaller and has a lot more connections on it, so we'll plug that in all the way at the front of the panel closest to me. The little black connector goes in the top of the power window switch and the large gray connector goes at the far end of the power window switch. Reinstall the lock rod. Slide that clip back over. Lift up and slide over the door lock, line up your panel and snap all the clips back into place.
To reinstall these clips you'll have to push the tab back out and through. Place it back into its opening in the door panel. Pop the tab back in in the center. Repeat that process with the other two clips at the back of the door. Reinstall the three screw along the bottom. The one up here at the front of the door, one under this panel, and one behind the door handle with our Phillips head screwdriver. Remember to close those cover panels on the door if your vehicle still has them.
Thanks for watching. Visit us at 1AAuto.com for quality auto parts, fast and free shipping, and the best customer service in the industry.
Product Reviews
5.0/ 5
★★★★★★★★★★
3 reviews
5★
100%
4★
0%
3★
0%
2★
0%
1★
0%
★★★★★March 28, 2023
Not perfect but, Hey it's not Mopar. I'm happy.
Looks good. Almost perfect. There's a slight gap between the plastic and the car body. Pro tip: make sure you remove the chrome trim. Do not skip this step and MAKE SURE YOU HAVE YOUR WINDOW ROLLED DOWN BEFORE DISCONNECTING DOOR PANEL SWITCHES! MAKES THE JOB MUCH EASIER.
★★★★★June 8, 2021
Great auto parts
I like buying from 1aauto fast and easy I get hard to fine parts for my cars everyone should try you will be happy you will get them fast so you can fix the car Ive been working on cars for 30 years they make life easier 100%
★★★★★October 28, 2019
good review
i would like to thank 1aauto for all the help and quality of there products thanks.
Showing 1–3 of 3 reviews
MRA05958
In Stock
Customer Q&A
Got a question about this part? Post it and get answers from our team.
No questions have been answered for this product yet.
Customer service
877-844-3393
Monday - Friday 8:00am - 9:30pm ET Saturday - Sunday 8:00am - 4:30pm ET
Ask a Question
Check Your Email
We sent a verification email to .
Click the Verify Email button in the email to submit your question.
This extra step helps prevent spam.
Select Your Vehicle
Specify your vehicle's year, make and model to guarantee fit.










 WARNING: This product can expose you to chemicals including Lead and Lead Compounds, which are known to the State of California to cause cancer, and birth defects or other reproductive harm. For more information, go to www.P65Warnings.ca.gov.