Replaces




Part Details
Specifications
About TRQ:
TRQ is a trusted brand dedicated to making every repair a success story by combining premium parts with easy installation. Each TRQ part is engineered by a team of automotive experts to meet or exceed OEM standards, delivering enhanced performance and maximum longevity. With rigorous in-house testing, the brand ensures superior fit and function across every product line. TRQ also provides customers with best-in-class, step-by-step installation videos—so you can complete repairs with confidence, whether you're a first-time DIYer or an industry professional.
Attention California Customers:
 WARNING: This product can expose you to chemicals including Lead and Lead Compounds, which are known to the State of California to cause cancer, and birth defects or other reproductive harm. For more information, go to www.P65Warnings.ca.gov.
This part fits 3 vehicles spanning 1999-2006.
| Year | Make | Model | Description |
|---|---|---|---|
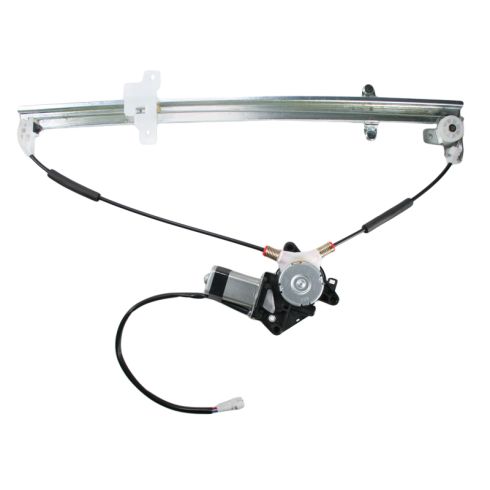
| 1999-2004 | Chevrolet | Tracker | Chevrolet Tracker Rear Passenger Side Power Power Window Motor & Regulator Assembly TRQ WRA51726 |
| 1999-2005 | Suzuki | Grand Vitara | Suzuki Grand Vitara Rear Passenger Side Power Power Window Motor & Regulator Assembly TRQ WRA51726 |
| 2002-2006 | Suzuki | XL-7 | Suzuki XL-7 Rear Passenger Side Power Power Window Motor & Regulator Assembly TRQ WRA51726 |
| Brand Label | Part Number |
|---|---|
| Suzuki | 8350165D10 |
| Dorman - OE Solutions | 741-977 |
| Kool Vue | S491703 |
| Echlin | WLA1317 |
| CARDONE Reman | 82183dr |
| ACI | 88451 |
| General Motors | 30021423 |
| ACDelco | 11A349 |
| Siemens | WL44222 |
| AISIN | RPAS020 |
| Hollander | 135-58399R |
| Hollander | 135-58387R |
This item may be interchangeable with parts from other brands with the above part numbers. This information is provided only for reference and does not guarantee that the item you are purchasing is identical to parts with part numbers from the brands listed above. To confirm that this item fits your vehicle, use the above "Check Vehicle Fit" option.
Lifetime Warranty
This item is backed by our limited lifetime warranty. In the event that this item should fail due to manufacturing defects during intended use, we will replace the part free of charge. This warranty covers the cost of the part only.
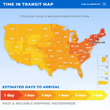
FREE Shipping is standard on orders shipped to the lower 48 States (Contiguous United States). Standard shipping charges apply to Hawaii and Alaska.
Shipping is not available to a P.O. Box, APO/FPO/DPO addresses, US Territories, or Canada for this item.
Expedited is available on checkout to the United States, excluding Alaska, Hawaii.
Final shipping costs are available at checkout.

Created on:
Tools used
Brought to you by 1AAuto.com, your source for quality replacement parts and the best service on the Internet.
Hi, I'm Don from 1A Auto. I hope this how-to video helps you out, and the next time you need a part for your vehicle, think of 1AAuto.com. Thanks.
In this video, we're going to show you how to replace a rear window regulator on this 2002 Suzuki XL7. We show you on the driver side, but the passenger side is a similar procedure. The items you'll need for this is a new rear window regulator from 1AAuto.com, a Phillips screwdriver, a flat blade screwdriver, and a 10mm socket and ratchet.
Start off by removing the Phillips screw in your interior door handle and the one down in the pull cup. Now we'll just fast-forward as Don removes these. Pull the door handle forward and push this clip off the door handle rod. Then pry the door handle rod up and out of the door handle. Pull out along the edges of the door panel. Then lift the door panel up and out of the window seal and over that loft rub. Push the tab on this harness and disconnect it. Remove these two Phillips screws from this bracket and pull it free. Pull back your water shield and you want to do this carefully, you don't want to rip the water shield.
Now, reach in behind this harness, push the tabs together, and pull the harness from the door. You can see the tabs right here. Now push on the tab on the harness and disconnect it. Next, you want to remove these two Phillips screws that hold the window to the regulator. If your window is stuck down, then you want to reach into this side area here. If it's stuck up, you're going to have to remove these two nuts, this 10mm nut, and these three 10mm nuts. Push the studs through and pull the whole assembly down. Then remove those Phillips screws.
We're going to show you with it in the center so we can show you the whole procedure. Once the window is separated, pull the window up into place and tape it. Next, remove these six 10mm nuts. Now, we'll fast-forward as Don does this. Now, push those studs through the door, angle the regulator, and pull it out through here.
On the left is the old window regulator; on the right I the new one from 1A Auto. You can see they're identical, and will mount exactly the same. Feed your new window regulator back into the door. Then wind up those studs with the holes and pull those studs through the door. Do the same thing with the motor. We'll just fast-forward here as Don replaces those six 10mm nuts. Reconnect the harness, remove that tape, and then lower the window down into place. Replace those two Phillips screws. To keep this harness out of the way, if you have a wire tie, we recommend wire tying this into place. It's not necessary, but it will keep the harness out of the way.
Replace the water shield. Make sure that your door handle rod comes through. Now replace this bracket and the two Phillips screws. Replace your door panel and reconnect this harness. Put the window seal up over the walk rod and down into the window seal. Just hit those clips in around the edge of the door panel. Now put the door handle rod into the door handle and re-clip it. Replace those two Phillips screws and you're all set.
We hope this video helps you out. Brought to you by www.1AAuto.com, your source for quality replacement parts and the best service on the Internet. Please feel free to call us toll-free, 888-844-3393. We're the company that's here for you on the Internet and in person.

WRA51726