
★★★★★
April 5, 2024
Was very happy with the product. That's why I keep coming back.

Replaces






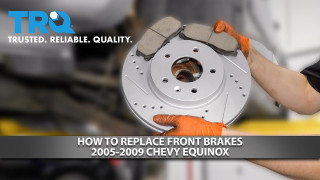
About TRQ:
TRQ is a trusted brand dedicated to making every repair a success story by combining premium parts with easy installation. Each TRQ part is engineered by a team of automotive experts to meet or exceed OEM standards, delivering enhanced performance and maximum longevity. With rigorous in-house testing, the brand ensures superior fit and function across every product line. TRQ also provides customers with best-in-class, step-by-step installation videos—so you can complete repairs with confidence, whether you're a first-time DIYer or an industry professional.
Product Features
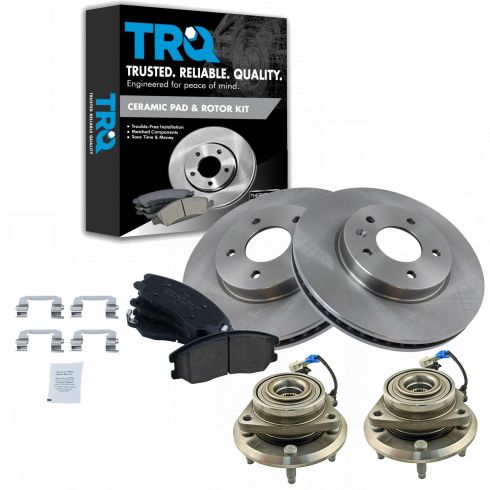
TRQ brake kits are designed to restore your brake system to like-new performance. TRQ brake pads are positive molded, thermal scorched, chamfered, and utilize a multi-layer shim for enhanced performance and service life. TRQ rotors have a non-directional finish that reduces the break-in period for new rotors as well as reducing vibrations throughout the rotor’s lifecycle. All products are fit and road-tested in our Massachusetts R&D facility to ensure we deliver on our promise of Trusted Reliable Quality.
Attention California Customers:
 WARNING: This product can expose you to chemicals including Lead and Lead Compounds, which are known to the State of California to cause cancer, and birth defects or other reproductive harm. For more information, go to www.P65Warnings.ca.gov.
This part fits 5 vehicles spanning 2007-2015.
| Year | Make | Model | Description |
|---|---|---|---|
| 2012-2015 | Chevrolet | Captiva Sport | Chevrolet Captiva Sport Front Ceramic Brake Pad & Rotor Kit with Wheel Bearings TRQ BKA52070 |
| 2007-2009 | Chevrolet | Equinox | Chevrolet Equinox Front Ceramic Brake Pad & Rotor Kit with Wheel Bearings TRQ BKA52070 |
| 2007-2009 | Pontiac | Torrent | Pontiac Torrent Front Ceramic Brake Pad & Rotor Kit with Wheel Bearings TRQ BKA52070 |
| 2008-2010 | Saturn | Vue | Saturn Vue Front Ceramic Brake Pad & Rotor Kit with Wheel Bearings TRQ BKA52070 |
| 2007-2009 | Suzuki | XL-7 | Suzuki XL-7 Front Ceramic Brake Pad & Rotor Kit with Wheel Bearings TRQ BKA52070 |
| Brand Label | Part Number |
|---|---|
| MOOG Hub Assemblies | 513276 |
| ACDelco | FW330 |
| Timken | HA590262 |
| ACDelco | FW356 |
| Timken | HA590332 |
| Raybestos Brakes | EHT1264H |
| Chicago Rawhide | BR930663 |
| Suzuki | 43421-78J00 |
| Raybestos Brakes | SGD1264C |
| Daewoo | 25903359 |
| Daewoo | 25903358 |
| General Motors | 19206599 |
| General Motors | 19150997 |
| Daewoo | 96626339 |
| Suzuki | 43421-78J01 |
| Beck/Arnley | 051-6384 |
| General Motors | 96626339 |
| Raybestos Brakes | MGD1264CH |
| Drive Tech America | NT513276 |
| Opel | 4809314 |
| SKF | BR930663 |
| Bendix | PRT5693 |
| DuraGo | BR900320 |
| Raybestos Brakes | 580547 |
| Wagner | BD126479 |
| Aimco | 55148 |
| DIY Solutions | BFS01231 |
| Suzuki | 5520078J01 |
| Saturn | 19168899 |
| Chevrolet | 19149903 |
| Chevrolet | 19168899 |
| Pontiac | 19168899 |
| Pontiac | 19149903 |
| Suzuki | 5520078J00 |
| FMSI | CD1264 |
| Raybestos Brakes | 580547R |
| Raybestos Brakes | 580547FZN |
| Raybestos Brakes | 580547P |
| Hollander | 538-00123 |
| Hollander | 530-50211 |
| Hollander | 530-00123 |
This item may be interchangeable with parts from other brands with the above part numbers. This information is provided only for reference and does not guarantee that the item you are purchasing is identical to parts with part numbers from the brands listed above. To confirm that this item fits your vehicle, use the above "Check Vehicle Fit" option.
Lifetime Warranty
This item is backed by our limited lifetime warranty. In the event that this item should fail due to manufacturing defects during intended use, we will replace the part free of charge. This warranty covers the cost of the part only.
FREE Shipping is standard on orders shipped to the lower 48 States (Contiguous United States). Standard shipping charges apply to Hawaii and Alaska.
Shipping is not available to a P.O. Box, APO/FPO/DPO addresses, US Territories, or Canada for this item.
Expedited is available on checkout to the United States, excluding Alaska, Hawaii.
Final shipping costs are available at checkout.
Created on:
Tools used
Hi, I'm Mike from 1AAuto. We've been selling auto parts for over 30 years! We're dedicated to delivering quality auto parts, expert customer service, and fast and free shipping, all backed by our 100% satisfaction guarantee. So visit us at 1AAuto.com, your trusted source for quality auto parts.
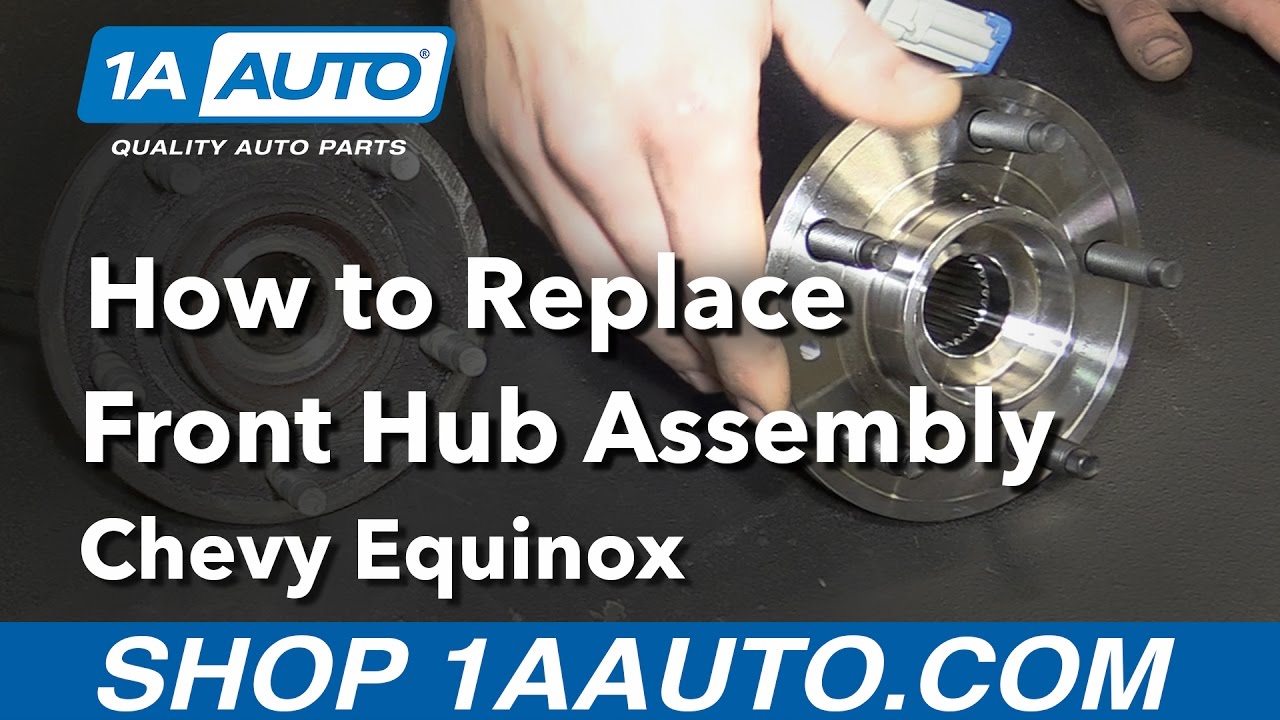
In this video, we're going to be working with our 2008 Chevy Equinox. We're going to show you how to remove and replace your front wheel hub and bearing assembly. Ours comes with a new ABS sensor so we'll be changing that out as part of the assembly as well.
If you like this video, please click subscribe. We have a ton more information on this and many other vehicles. If you need this part for your car, you can follow the link down in the description over to 1AAuto.com.
Here are the items you'll need for this repair: full metric set, ratchet, socket extensions, full wrench metric set, T13 Torx screwdriver, 35mm socket, torque wrench, ½ inch breaker bar, flat punch, hammer, wire brush, brake grease, rust penetrant, bungee cords, jack, jack stands
Using a 19mm socket and a breaker bar, break all of your lug nuts loose about one turn to make it easy to get them off once our vehicle is in the air. Raise and support your vehicle. We're using a lift to make it easier to show you what's going on, but this job can easily be done in your driveway or garage at home on a jack and jack stands. Finish removing your lug nuts and remove the wheel and tire from the vehicle.
Now we're going to show you a cool trick that works for both removing rotor screws and axle nuts. Sometimes you can get these axle nuts with the wheel on. You pop the center cap off, you put the socket in there, and do it with the weight of the car on so you can't move it when you're breaking this loose. However, this particular vehicle's center cap is smaller than the socket we need to take that off, so we're going to take a wrench, doesn't matter what size. I'm using a 16mm. Place it over a wheel stud with the wrench angle going in toward the vehicle. I'm going to put one lug nut on all the way by hand to protect the threads. Lay the wrench on it. I'm going to use this lug nut to center the back of the wrench. Now we'll rotate it, jam it into the caliper and that's not going anywhere.
We'll remove our rotor screw with a T30 Torx socket, and I like to use a little breaker bar for this, just because once we get it loose, you can use it like a screwdriver. Comes off a lot quicker. This will also work with a ratchet. We'll use a 35mm socket on our axle nut and our breaker bar. Now you just grab the top of the wrench, turn it back around, remove your wheel lugs, and you can take that wrench off. If you set those wheel nuts up the way I showed you there, you'll see that it doesn't damage any of the threads in the process, which is very important. Now we'll use a big flat punch, put it into this little divot in the middle of the axle. You just want to tap that with a hammer until it starts bouncing like that. That means we have it backed all the way out and that it's free from the studs and our wheel bearing.
Remove the two 18mm bolts securing your caliper bracket onto the spindle. We're going to remove the caliper and bracket as an assembly to minimize the amount of tear-down and reassembly in this process. We'll do this using an 18mm socket and ratchet. These do have a little bit of torque on them, but you should be able to break them loose just fine. When you remove the last caliper bolt, we'll slide everything up and off and secure it up out of the way with either mechanic's wire, some strong zip ties, or I like to use a bungee cord. Then we'll remove the rotor.
Spray some penetrating oil on the back of the studs for your wheel bearing. You'll see where they come through right behind the hub, and then I like to try to spray all around the edges, too, to kind of let it soak in and free up the hub itself from the spindle because this is a steel hub and an aluminum spindle. Dissimilar metals tend to seize together pretty well. Now we'll take and clean off the threads that are exposed here on the back of the hub. Just use a steel wire brush. You don't have to go crazy, but there's a good bit of corrosion on here, and anything we remove now will just make it easier to go through the threads later. You want to do that to all three.
Disconnect the connector for the ABS sensor. Push down and release this from its retainer, the backing plate. Now we'll remove the 15mm bolts securing the hub into the spindle from the back side with a deep socket and a ratchet. We're going to go nice and slow and easy with these. If you break them, it's a lot harder to remove the hub although once you get it out, as long as you have some new bolts, you can use those to secure the new hub. Now we want to be very careful of the backing plate here because these are just sheet metal and if you bend them, they're going to drag against the back of the rotor and make some noise, so we'll hit the back of the hub and try to knock this out of the spindle. Once you get it out a good ways, if it's still being stubborn, you can take a chisel or a striking pry bar like this, try to help wedge it out. Once you have it out, you may need to just gently tap end of the axle just to release it. Remove the sensor wire from the backing plate, place this somewhere safe.
Here we have our old wheel bearing and hub assembly that we removed from our vehicle and our new part from 1AAuto.com. As you can see, we have the same hub face. We have a nice little threaded hole for our rotor screw. We have five brand new wheel studs with the same bolt pattern and threads, so we can obviously bolt up our original wheels and reuse the factory wheel lugs. We have the same center bore, which will keep our wheel on there nice and straight. The same three bolt flange on the rear, as well as same bore of the bearing itself where it'll sit into the spindle. These holes already come nicely tapped and threaded. It even comes with a nice new ABS sensor because these are very prone to breaking off in the hub, so we don't have to worry about that extra headache and step when removing and replacing our part. Now if your wheel bearing has gone bad, it'll create a grinding sound more noticeable when turning and putting load on that particular bearing, so a new part from 1A Auto has a nice tight new bearing in there. You may even notice a little bit of up and down and side to side play if you were to grab the wheel and check for a bad wheel bearing. This part will go in direct fit just like our original equipment, fix you up right.
Now we'll take a wire brush and just clean off this hub surface to remove as much of the buildup and debris as we can; make sure that our new bearing sits in nice and smooth and straight, and seats in fully without putting too much force on it. Be sure to wear proper safety equipment like a dust mask and some safety goggles when doing this so you don't get all that debris in your eyes and mouth. Now we'll put some grease on the inside of the board here to make sure our bearing and hub assembly goes in smoothly, as well as trying to help prevent it from seizing in there in the future, should we ever have to remove or change it again. Send the ABS sensor back through your backing plate, line up your wheel bearing, make sure that this sensor isn't somewhere it's going to get pinched. Reconnect the retainer to the ABS sensor. Just snaps in.
Slide the hub and bearing assembly back onto the splines of the axle shaft, and then I like to leave these out a little way. Make sure your backing plate's lined up as well. I like to leave them out a little ways to make it easier to see how I'm lining the bolt up. If I don't push this in all the way yet, you can spin that rear flange and help line it all up. Tighten up the three bolts using your 15mm deep socket and ratchet again. You want to try and tighten these down pretty evenly because some of that buildup may be holding up certain parts of the bearing. We'll go around and get a few turns on each bolt, and then move to the next one. Just keep going around in a circle to make sure our bearing goes in nice, and straight, and smooth. Torque all of your wheel bearing hub bolts to 96 foot-pounds.
Reconnect your ABS sensor. Apply a thin coat of brake grease to the surface of your new hub to prevent the rotor from seizing onto it later. Make sure you get the center board here too. Reinstall your rotor, being sure to put that beveled hole over the threaded hole for your rotor screw, which we'll reinstall now. We'll get it started by hand and finish tightening it down with our T-30 Torx bit.
Remove your bungee cord or whatever you used to secure your caliper carrier out of the way. Reinstall the caliper carrier and start your two 18mm bolts by hand. Tighten the bolts down with your 18mm socket and ratchet. Torque the caliper bracket bolts to 137 foot-pounds. Set up your wrench the same way we did to loosen the lug nut, but on the opposite side of the caliper this time, so we have something to hold it while we torque.
Reinstall your axle nut. We'll get it down all the way tight with your 35mm socket breaker bar, then we'll torque it to 151 foot-pounds. Move your wrench setup. Remove the wheel lugs. Reinstall your wheel and tire. Get all of your lug nuts on as tight as you can by hand. Lower the weight of your vehicle back onto the tires. With the partial weight of your vehicle back on the tires, tighten up your lug nuts to 100 foot-pounds in a cross pattern.
Thanks for watching. Visit us at 1AAuto.com for quality auto parts, fast and free shipping, and the best customer service in the industry.
Tools used
Hi, I'm Mike from 1AAuto. We've been selling auto parts for over 30 years! We're dedicated to delivering quality auto parts, expert customer service, and fast and free shipping, all backed by our 100% satisfaction guarantee. So visit us at 1AAuto.com, your trusted source for quality auto parts.
In this video, we're going to be working with our 2008 Chevy Equinox 3.4-liter V6 all-wheel drive. We're going to show you how to remove and replace your vehicle's front brake pads and rotors. We recommend that these always be done together, as well as any pair. So, you do your pads and rotors on both your front left and front right wheel.
If you like this video, please click subscribe. We have a ton more information on this and many other vehicles. If you want these parts for your car, you can follow the link down in the description over to 1AAuto.com.
Here are the items you'll need for this repair: 14-19mm socket, ratchet, socket extensions, breaker bar, T-30 Torx bit, bungee cord, mechanic wire, hammer, wire brush, brake grease, brake cleaner, flat blade screwdriver, groove jaw pliers, torque wrench
Using a 19mm socket and breaker bar, loosen all of your lug nuts about one turn with the weight of the vehicle on the tire. This will make it easier to remove them once we raise and support the vehicle. Raise and support your vehicle.
We're doing this on a lift to make it easier to show you what's going on. However, this job could easily be done in your garage or driveway using a jack and jack stands. Remove the rest of your lug nuts by hand. Remove the wheel and tire from the vehicle. Sometimes they get a little stuck on there, because it's an aluminum wheel on a steel hub. You have to wiggle them a little bit to break them free.
Using the T30 Torx bit and a ratchet, loosen up that bolt. Thought I might've needed that pry bar to counter support it, so it wouldn't turn. However, this one came out nice and easy. Remove the two 14mm caliper bolts, one at the top and one at the bottom, with a 14mm socket and ratchet. Be sure to crack both of these loose before removing either one fully. Remove the caliper. Secure it up and out of the way with a bungee cord, zip ties, or mechanics wire. Remove the pads from the slides. You can use a flat blade screwdriver if you need a little more leverage here.
These are coming out pretty easy. Using an 18mm socket and breaker bar, loosen the caliper bracket bolts. Again, you're going to want to get both of these loose before you remove either one fully. Once you've cracked them loose, you should be able to remove them the rest of the way with a socket and ratchet. Remove the caliper bracket and place off to the side.
Remove the rotor. Ours is frozen on there pretty good. We're not reusing our rotors. We can hit it just about anywhere to make sure it pops off the hub. However, if you plan to reuse yours, hitting it in between the studs can get it off without damaging anything. Your rotors are really stuck on, you're just going to have to knock them off and replace them.
Here we have our old brake pads and rotors that we removed from our vehicle, and our new parts from 1AAuto.com. As you can see, these parts are exactly the same with the same size rotor. They're also vented. They have the same 5-bolt lug pattern, same centerbore. The same bolt location for your rotor screw. Same brake pads. You can see why it was time to change these out. That's almost completely worn away. These probably had a couple thousand miles left on them. It's a lot better to change your brakes just before they need it, rather than after the fact, to make sure that your vehicle is always operating and stopping safely.
Each side also comes with one of these brake squealers. Which is designed to start dragging against the rotor and making some noise to give you an audible alert that it's almost time to do your brakes. You can see we have some rust and corrosion build up. These marks are from removing it with a hammer. They were pretty well frozen on there. We have a nice, smooth, even surface on our new rotor. If your old brakes are squealing, not stopping the way they should be, grinding, or are creating a pulsating brake pedal from a warped rotor. These new parts from 1A Auto are going to go in direct fit just like your original equipment. We fix you up right.
Using a steel wire brush or some Emory cloth sandpaper, or something like that, to remove the rust build up on the face of your hub. Clean that, as well as the centerbore, to make sure that there's no rust build up that'll make our rotors sit unevenly or freeze on prematurely. Once you've removed the bulk of the rust, we're going to apply a thin coat of brake grease to the face of the hub, as well as around the centerbore of the hub. This will make sure that if we ever need to remove our rotor, should it be an axle, a wheel bearing, the spindle, or something else, that we need to take our hub off, that it comes of easily. We don't have to hit it with a hammer, like you saw earlier. Making sure that it's removable and reusable down the road. As well as, making future brake jobs easier.
Install the rotor onto the hub backwards. Spray it down with some brake cleaner. This removes the coating they use to keep these from rusting in storage. Turn it around. Make sure you line up that beveled hole. Put the threads in the hub for your rotor screw. Spray down this side as well. Lay the rotor flat on the hub. Reinstall your T30 Torx screw.
If your brake clips, or shims here, have some heavy corrosion or are cracked or broken in any way you'll need to replace them. Ours looks okay. We'll just pop them off. Go nice and easy to try not to bend them. It may help to use a flat blade screwdriver just to help pop that up, especially in the middle. We'll use this small wire brush to clean all the rust and corrosion out of the places that that shim rides on. Once that's cleaned up, we'll clean up the shim itself. We'll grease the contact surface. Again, just a thin coat of brake grease here. Reinstall the clip. Grease the clip itself. Remove the slide from its rubber boot by holding down the boot. Pulling the slide out, if there's old grease that looks bad on there, wipe that off with a paper towel. Ours is okay. We'll put a little thicker coat of grease on there.
Reinstall it into the slide. Repeat all these steps on the opposite side of the caliper carrier. Reinstall the caliper bracket with your 18mm bolts. Tighten the bolts down with your 18mm socket and ratchet. Torque the bolts to 137 foot-pounds. Install your brake pad. I'm placing the rear one with the squealer at the top. That's how it came off of the vehicle. Sometimes they will interfere with the caliper if you place them in certain ways. I like to just put them back however they came off. We'll apply a thin coat of grease to the back. Do the same thing with the pad on the front. Using a pair of groove jaw pliers, slowly compress each caliper piston. If you go too fast you'll start pushing the other one out. Make sure both are fully seated.
We'll remove our bungee cord, mechanics wire, zip tie, or whatever it is you used to secure your caliper. Place it back on to the caliper bracket and pads. Reinstall the two 14mm brake caliper bolts. These don't get a ton of torque. I'm just going to bring them down as far as I can by hand, go straight to the torque wrench. However, you can use a socket and ratchet if you're having a harder time. Torque the caliper bolts to 20 foot-pounds.
Reinstall your wheel and tire. Get all five of your lug nuts on as tight as you can by hand. Lower your vehicle until the weight is back on the tires. Torque your lug nuts to 100 foot-pounds in a cross-pattern. Match the brakes on the other side using this same procedure. You're good to go.
Thanks for watching. Visit us at 1AAuto.com for quality auto parts, fast and free shipping, and the best customer service in the industry.
Was very happy with the product. That's why I keep coming back.
Rotors are thinner than original.
All parts fit to OE specs and no issues. Plus the information and videos on the site are a definite plus.
This package was for an awesome price! Came within couple days after ordering! Wouldnt go anywhere else for parts when we need them!
Fit well. Everything seems good quality and saved a ton from buying elsewhere, free shipping was quick as well
I was a little sceptical about getting all of this for the price, but found the quality of the parts to be decent. The bearings were easy to install. So far we have put over 2 thousand miles on these parts and no issues. The break pads are wearing normally and the bearings are still in perfect shape.
got my product in the time that was i was told, fits my car great and now my car is safe to drive again

BKA52070
These will fit models with ABS.
No pressing involved.
