
★★★★★
April 11, 2026
Awesome kit
This channel and door sweep kit is well made and the fit and finish are great.

Replaces





About TRQ:
TRQ is a trusted brand dedicated to making every repair a success story by combining premium parts with easy installation. Each TRQ part is engineered by a team of automotive experts to meet or exceed OEM standards, delivering enhanced performance and maximum longevity. With rigorous in-house testing, the brand ensures superior fit and function across every product line. TRQ also provides customers with best-in-class, step-by-step installation videos—so you can complete repairs with confidence, whether you're a first-time DIYer or an industry professional.
Product Features
Attention California Customers:
 WARNING: This product can expose you to chemicals including Carbon black(airborne, unbound particles of respirable size), which is known to the State of California to cause cancer. For more information, go to www.P65Warnings.ca.gov.
This part fits 47 vehicles spanning 1981-1991.
| Year | Make | Model | Description |
|---|---|---|---|
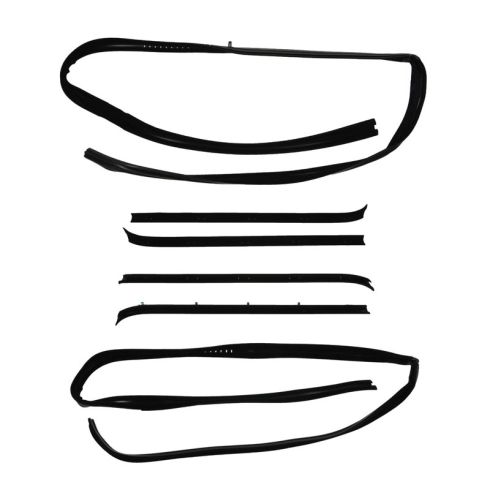
| 1987-1991 | Chevrolet | Blazer | Chevrolet Blazer Front Driver & Passenger Side Inner & Outer 6 Piece Window Sweep & Run Channel Weatherstrip Seal Set TRQ WSA74908 |
| 1981-1986 | Chevrolet | C10 | Chevrolet C10 Front Driver & Passenger Side Inner & Outer 6 Piece Window Sweep & Run Channel Weatherstrip Seal Set TRQ WSA74908 |
| 1981-1986 | Chevrolet | C20 | Chevrolet C20 Front Driver & Passenger Side Inner & Outer 6 Piece Window Sweep & Run Channel Weatherstrip Seal Set TRQ WSA74908 |
| 1981-1986 | Chevrolet | C30 | Chevrolet C30 Front Driver & Passenger Side Inner & Outer 6 Piece Window Sweep & Run Channel Weatherstrip Seal Set TRQ WSA74908 |
| 1981-1987 | Chevrolet | C50 | Chevrolet C50 Front Driver & Passenger Side Inner & Outer 6 Piece Window Sweep & Run Channel Weatherstrip Seal Set TRQ WSA74908 |
| 1981-1986 | Chevrolet | K10 | Chevrolet K10 Front Driver & Passenger Side Inner & Outer 6 Piece Window Sweep & Run Channel Weatherstrip Seal Set TRQ WSA74908 |
| 1981-1986 | Chevrolet | K20 | Chevrolet K20 Front Driver & Passenger Side Inner & Outer 6 Piece Window Sweep & Run Channel Weatherstrip Seal Set TRQ WSA74908 |
| 1981-1986 | Chevrolet | K30 | Chevrolet K30 Front Driver & Passenger Side Inner & Outer 6 Piece Window Sweep & Run Channel Weatherstrip Seal Set TRQ WSA74908 |
| 1981-1986 | Chevrolet | K5 Blazer | Chevrolet K5 Blazer Front Driver & Passenger Side Inner & Outer 6 Piece Window Sweep & Run Channel Weatherstrip Seal Set TRQ WSA74908 |
| 1981-1982 | Chevrolet | LUV | Chevrolet LUV Front Driver & Passenger Side Inner & Outer 6 Piece Window Sweep & Run Channel Weatherstrip Seal Set TRQ WSA74908 |
| 1987 | Chevrolet | R1500 Truck | Chevrolet R1500 Truck Front Driver & Passenger Side Inner & Outer 6 Piece Window Sweep & Run Channel Weatherstrip Seal Set TRQ WSA74908 |
| 1987 | Chevrolet | R20 | Chevrolet R20 Front Driver & Passenger Side Inner & Outer 6 Piece Window Sweep & Run Channel Weatherstrip Seal Set TRQ WSA74908 |
| 1987 | Chevrolet | R30 | Chevrolet R30 Front Driver & Passenger Side Inner & Outer 6 Piece Window Sweep & Run Channel Weatherstrip Seal Set TRQ WSA74908 |
| 1981-1986 | Chevrolet | Suburban C10 | Chevrolet Suburban C10 Front Driver & Passenger Side Inner & Outer 6 Piece Window Sweep & Run Channel Weatherstrip Seal Set TRQ WSA74908 |
| 1981-1986 | Chevrolet | Suburban C20 | Chevrolet Suburban C20 Front Driver & Passenger Side Inner & Outer 6 Piece Window Sweep & Run Channel Weatherstrip Seal Set TRQ WSA74908 |
| 1981-1986 | Chevrolet | Suburban K10 | Chevrolet Suburban K10 Front Driver & Passenger Side Inner & Outer 6 Piece Window Sweep & Run Channel Weatherstrip Seal Set TRQ WSA74908 |
| 1981-1986 | Chevrolet | Suburban K20 | Chevrolet Suburban K20 Front Driver & Passenger Side Inner & Outer 6 Piece Window Sweep & Run Channel Weatherstrip Seal Set TRQ WSA74908 |
| 1987-1988 | Chevrolet | Suburban R10 | Chevrolet Suburban R10 Front Driver & Passenger Side Inner & Outer 6 Piece Window Sweep & Run Channel Weatherstrip Seal Set TRQ WSA74908 |
| 1989-1991 | Chevrolet | Suburban R1500 | Chevrolet Suburban R1500 Front Driver & Passenger Side Inner & Outer 6 Piece Window Sweep & Run Channel Weatherstrip Seal Set TRQ WSA74908 |
| 1987-1988 | Chevrolet | Suburban R20 | Chevrolet Suburban R20 Front Driver & Passenger Side Inner & Outer 6 Piece Window Sweep & Run Channel Weatherstrip Seal Set TRQ WSA74908 |
| 1989-1991 | Chevrolet | Suburban R2500 | Chevrolet Suburban R2500 Front Driver & Passenger Side Inner & Outer 6 Piece Window Sweep & Run Channel Weatherstrip Seal Set TRQ WSA74908 |
| 1987-1988 | Chevrolet | Suburban V10 | Chevrolet Suburban V10 Front Driver & Passenger Side Inner & Outer 6 Piece Window Sweep & Run Channel Weatherstrip Seal Set TRQ WSA74908 |
| 1989-1991 | Chevrolet | Suburban V1500 | Chevrolet Suburban V1500 Front Driver & Passenger Side Inner & Outer 6 Piece Window Sweep & Run Channel Weatherstrip Seal Set TRQ WSA74908 |
| 1987-1988 | Chevrolet | Suburban V20 | Chevrolet Suburban V20 Front Driver & Passenger Side Inner & Outer 6 Piece Window Sweep & Run Channel Weatherstrip Seal Set TRQ WSA74908 |
| 1989-1991 | Chevrolet | Suburban V2500 | Chevrolet Suburban V2500 Front Driver & Passenger Side Inner & Outer 6 Piece Window Sweep & Run Channel Weatherstrip Seal Set TRQ WSA74908 |
| 1987 | Chevrolet | V1500 Truck | Chevrolet V1500 Truck Front Driver & Passenger Side Inner & Outer 6 Piece Window Sweep & Run Channel Weatherstrip Seal Set TRQ WSA74908 |
| 1987 | Chevrolet | V2500 Truck | Chevrolet V2500 Truck Front Driver & Passenger Side Inner & Outer 6 Piece Window Sweep & Run Channel Weatherstrip Seal Set TRQ WSA74908 |
| 1987 | Chevrolet | V30 | Chevrolet V30 Front Driver & Passenger Side Inner & Outer 6 Piece Window Sweep & Run Channel Weatherstrip Seal Set TRQ WSA74908 |
| 1981-1986 | GMC | C1500 Truck | GMC C1500 Truck Front Driver & Passenger Side Inner & Outer 6 Piece Window Sweep & Run Channel Weatherstrip Seal Set TRQ WSA74908 |
| 1981-1986 | GMC | C2500 Truck | GMC C2500 Truck Front Driver & Passenger Side Inner & Outer 6 Piece Window Sweep & Run Channel Weatherstrip Seal Set TRQ WSA74908 |
| 1981-1986 | GMC | C3500 Truck | GMC C3500 Truck Front Driver & Passenger Side Inner & Outer 6 Piece Window Sweep & Run Channel Weatherstrip Seal Set TRQ WSA74908 |
| 1981-1990 | GMC | C5000 | GMC C5000 Front Driver & Passenger Side Inner & Outer 6 Piece Window Sweep & Run Channel Weatherstrip Seal Set TRQ WSA74908 |
| 1990 | GMC | C5000 Topkick | GMC C5000 Topkick Front Driver & Passenger Side Inner & Outer 6 Piece Window Sweep & Run Channel Weatherstrip Seal Set TRQ WSA74908 |
| 1981-1987 | GMC | Caballero | GMC Caballero Front Driver & Passenger Side Inner & Outer 6 Piece Window Sweep & Run Channel Weatherstrip Seal Set TRQ WSA74908 |
| 1981-1991 | GMC | Jimmy | GMC Jimmy Front Driver & Passenger Side Inner & Outer 6 Piece Window Sweep & Run Channel Weatherstrip Seal Set TRQ WSA74908 |
| 1983-1991 | GMC | Jimmy S-15 | GMC Jimmy S-15 Front Driver & Passenger Side Inner & Outer 6 Piece Window Sweep & Run Channel Weatherstrip Seal Set TRQ WSA74908 |
| 1981-1986 | GMC | K1500 Truck | GMC K1500 Truck Front Driver & Passenger Side Inner & Outer 6 Piece Window Sweep & Run Channel Weatherstrip Seal Set TRQ WSA74908 |
| 1981-1986 | GMC | K2500 Truck | GMC K2500 Truck Front Driver & Passenger Side Inner & Outer 6 Piece Window Sweep & Run Channel Weatherstrip Seal Set TRQ WSA74908 |
| 1981-1986 | GMC | K3500 Truck | GMC K3500 Truck Front Driver & Passenger Side Inner & Outer 6 Piece Window Sweep & Run Channel Weatherstrip Seal Set TRQ WSA74908 |
| 1987 | GMC | R1500 Truck | GMC R1500 Truck Front Driver & Passenger Side Inner & Outer 6 Piece Window Sweep & Run Channel Weatherstrip Seal Set TRQ WSA74908 |
| 1987 | GMC | R2500 Truck | GMC R2500 Truck Front Driver & Passenger Side Inner & Outer 6 Piece Window Sweep & Run Channel Weatherstrip Seal Set TRQ WSA74908 |
| 1989 | GMC | R2500 Truck | GMC R2500 Truck Front Driver & Passenger Side Inner & Outer 6 Piece Window Sweep & Run Channel Weatherstrip Seal Set TRQ WSA74908 |
| 1987 | GMC | R3500 Truck | GMC R3500 Truck Front Driver & Passenger Side Inner & Outer 6 Piece Window Sweep & Run Channel Weatherstrip Seal Set TRQ WSA74908 |
| 1982-1987 | GMC | S-15 Pickup | GMC S-15 Pickup Front Driver & Passenger Side Inner & Outer 6 Piece Window Sweep & Run Channel Weatherstrip Seal Set TRQ WSA74908 |
| 1987 | GMC | V1500 Truck | GMC V1500 Truck Front Driver & Passenger Side Inner & Outer 6 Piece Window Sweep & Run Channel Weatherstrip Seal Set TRQ WSA74908 |
| 1987 | GMC | V2500 Truck | GMC V2500 Truck Front Driver & Passenger Side Inner & Outer 6 Piece Window Sweep & Run Channel Weatherstrip Seal Set TRQ WSA74908 |
| 1987 | GMC | V3500 Truck | GMC V3500 Truck Front Driver & Passenger Side Inner & Outer 6 Piece Window Sweep & Run Channel Weatherstrip Seal Set TRQ WSA74908 |
| Brand Label | Part Number |
|---|---|
| Fairchild Industries | KG2033 |
This item may be interchangeable with parts from other brands with the above part numbers. This information is provided only for reference and does not guarantee that the item you are purchasing is identical to parts with part numbers from the brands listed above. To confirm that this item fits your vehicle, use the above "Check Vehicle Fit" option.
Lifetime Warranty
This item is backed by our limited lifetime warranty. In the event that this item should fail due to manufacturing defects during intended use, we will replace the part free of charge. This warranty covers the cost of the part only.
FREE Shipping is standard on orders shipped to the lower 48 States (Contiguous United States). Standard shipping charges apply to Hawaii and Alaska.
Shipping is not available to a P.O. Box, APO/FPO/DPO addresses, US Territories, or Canada for this item.
Expedited is available on checkout to the United States, excluding Alaska, Hawaii.
Final shipping costs are available at checkout.

Created on:
Tools used
Brought to you by 1AAuto.com, your source for quality replacement parts and the best service on the internet.
Hi, I'm Mike Green. I'm one of the owners of 1A Auto. I want to help you save time and money repairing and maintaining your vehicle. I'm going to use my 20 plus years of experience repairing and restoring cars and trucks like this to show you the correct way to install parts from 1AAuto.com. The right parts installed correctly, that's going to save you time and money. Thank you and enjoy the video.
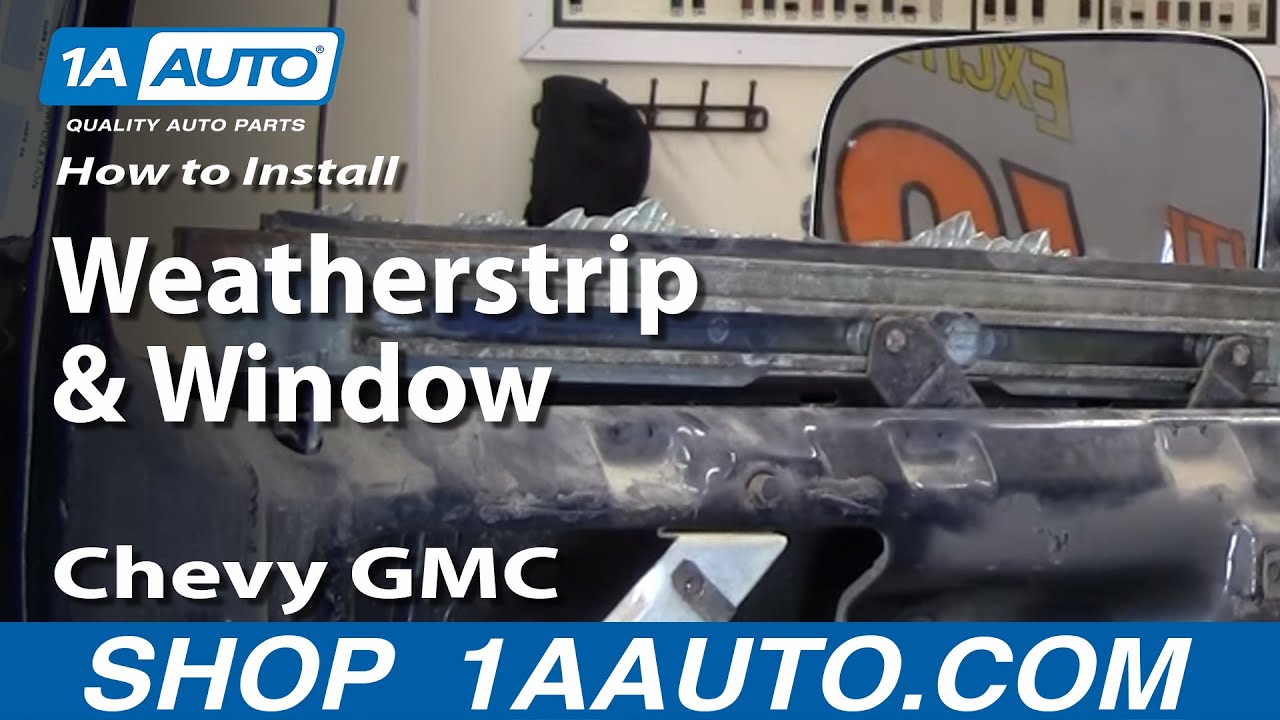
In this video, we're going to replace the weather strip on this 1986 GMC Jimmy. This is kind of three videos in one. Broke the window on this Jimmy accidentally because I hadn't replaced the weather strip. You're going to see how you remove the window and replace the run channel weather strips and the ledge weather strips in and out on the door panel. The processes in this video is basically the same for all the '73 to '87 Chevy and GMC pickups as well as the front doors on Suburbans and the crew cab pickups from '73 to '91 and also the '73 to '91 Blazer in full sized Jimmy. The tools you'll need are Philips screwdriver, a window crank removal tool or two paperclips. For more information on the paperclip method, we do have a window crank removal video that you can check out. 5/16 and 7/16 sockets with ratchets extensions, pliers and two regular screwdrivers, small and medium.
Okay, you start by removing the door panel. We do have a separate video for the door panel removal. It's pretty straightforward. You'll remove 11 screws in the window crank or power window, unhook your power window and power door locks. This video is in two parts. Basically cover taking apart the door in the first part, part one and then we cover putting everything back together in part two. Just bear with us here as we work fast to get the door panel off and then we'll get to the information on the weather strip and window and stuff like that.
Okay, so to get the old track out and get the new window back in, you need to remove the triangle window which one 7/16 bolt here and then three Philips screws, one at the top and then another one here and down here and they go in this way. I'm going to remove those three screws and that bolt and then we'll pull the vent window out. Okay, after we remove the vent window, there is a 5/16 bolt right acted to that hole right there. Okay, here I'm going to try and get one of these screws out. What I'm going to do as I got a screwdriver in here, I'm going to take my hand and twist the screwdriver some and then I'm going to bang it with a hammer and the bang actually kind of loosens up the screw a little bit and the screw will start turning.
Okay, so basically once we got those screws all removed, we're going to do some tugging to make it loose. What you're going to do is as this weather strip is hard in this truck, it keeps holding the, It's hard and brittle, it's the whole reason my window broke. I'll pull it out in here. In fact, it's holding my broken window at the top, it's so brittle. Okay, as I fumble with this here, I'm just going to tell you that the best way when you pull this vent window out is actually once you get it down to kind of what you have here, you rotate the front of the vent window, the lower front as you would say towards the outside of the truck and there's a little bracket on it and rotating it that way. You'll see it when I actually put it back later in the video, that's the easiest way to maneuver rit.
Pull the crank all the way down. You'll have the crank down to give us a little room. We got to turn it that way to get this part out. I'm going to pull it up some more and the whole thing comes up. I took off the outer weather strip and you can see it's nothing but little clips that clip into these little holes here. You can basically just pry it out and pull it up. I did bend this a little bit so I'm actually going to take probably a 1/4"� extension and just kind of pry those back so that it's not sticking up as much as we are. I can probably show you what I'm talking about here. You see these little clip holes right about here, okay.
You can see they're actually bent out and it will good to have it all nice and flattened so I'll take a screwdriver or an extension and just kind of pound those and bend them back in so that when the weather strip goes on here, it's night and tight and fresh. You put the weather strip on here and most likely it's going to have a little gap right there because it's how that formed. Okay, now we've got the weather strip off and the vent window out. You then just crank up the handle as far as it goes and then push it back, out and up and off.
The last thing you got to do just to prepare the frame is probably on your old weather strip when you pull that channel down, there is that little pin that stay behind. You just want to reach up there with some pliers and pull that pin out. I'm just going to take this whole run channel weather strip which is dried up and fallen apart out of the old vent window. Okay. The inner belt weather strip from the door panel. Just pull it right to reach in there and pry it all through teeth. I'm not worried about my door panel. That's really the best way. I'm trying to pull too hard on this and you'll end up breaking the plastic and now you'll tap it so it rise up.
Okay, so now your door is basically taken apart. Please check out the part two video to see how you get it all back together.
Brought to you by www.1AAuto.com, your source for quality replacement parts and the best service on the internet. Please feel free to call us toll-free, 888-844-3393. We're the company that serves you on the internet and in person. Thank you.
Tools used
Brought to you by 1AAuto.com, your source for quality replacement parts and the best service on the Internet.
Hi, I'm Mike Green. I'm one of the owners of 1A Auto. I want to help you save time and money repairing and maintaining your vehicle. I'm gonna use my twenty-plus years experience restoring and repairing cars and trucks like this to show you the correct way to install parts from 1AAuto.com. The right parts, installed correctly- that's gonna save you time and money. Thank you, and enjoy the video.
In this video, we're gonna replace the blower motor resistor in this Explorer. You know if you're having a resistor problem if your fan works- you know, say it works on low, but it doesn't work on two and three, and then it works on high- that's usually a sign that your resistor's gone bad. Or it works on some speeds except for high or low, or something like that. The tools you'll need are basically the same as for the blower motor. You gotta remove the blower motor and then get the resistor. Okay, so we're looking under the hood here, at the passenger side. And first thing we're gonna do is remove this little guy, which I believe is a servo-motor for your cruise control. Just a ten millimeter socket or wrench. Once you get the bolt out, kinda shake it out. Put it right up there for now.
Now that you have that aside, you're actually gonna want to unbolt your radiator bottle and washer fluid bottle, which means that, first, you have to remove your air box. So first you just want to undo the clips here on each side. And your air box comes up and slides over, and then you can lift it up and out. I'm just gonna kinda move it over here a little bit. Now you can just lift your air cleaner up and out. Okay, and then your air box is actually just into some rubber grommets here and here, and also, you can see, right into the fender here and here. So to get your air box out, what you're gonna want to do is just grab hold of it and you pull up really firmly and one will pop. And now take a screwdriver and put it under here and that'll help you to pop this one out. Kinda loosen on that screwdriver. Loosen up my air box. And another one pops. Okay, and now you pull it out this way from the fender.
Then you got to take out, off these rubber grommets. And you can see here's the things on the bottom that hold it into the bottom. And I'm gonna take these grommets and just gonna put them back into the fender here. Okay, now we're gonna remove the four nuts and bolts that hold the washer and radiator bottle in place. One there, one there. Okay... one right in there, and then one right down there. Okay, and interesting to note that the nuts that go down onto the fender, the lower nuts, are eleven millimeter, and then the two bolts that go into the side of the fender are actually ten millimeter. So I'll quickly just remove those.
And once you have them unbolted, you just want to lift it up. Pop the studs. And then just slide forward some just to give yourself a little more room to get to the blower. Okay, now here's your blower motor. You want to disconnect your harness here, just like that. Then this tube here, just a rubber band, kind of, that goes like that and comes away, and then you have four eight-millimeter bolts: one, two, three, and then way down there, four. Now you can pull your motor right up. Get your harness out of the way. And it comes up and out. Okay, now with the motor out of the way, you can see right down here is your resistor, and there's an eight-millimeter bolt right here that you want to take off. Okay, and there's another bolt right over here. Okay, now your resistor comes up and out, and basically the harness is pronged with two tabs, and you wanna just kinda pull. Try and work your thumb underneath each tab, and pull. And then on the opposite side, you may want to use, take a screwdriver, work it under one of the tabs. Pull some. Get your finger under the other tab, and pull.
Okay, and there are a few adjectives and adverbs I used during this, but really it's just a matter of working it in there and pulling it really hard and then you'll eventually get it apart. Should just be... the plastic is coming out but the... Ah, there we go. Okay, looking inside the contacts in this resistor, you can see, especially this one up here getting pretty rusty. And that's what happens- they get pretty rusty and then they take too much, they give too much resistance, and the fan doesn't work at certain speeds. Now this one is still working okay, so I'm gonna put it back in. Okay, and you can see- can't really do this incorrectly. Plug it back in. Okay, and I'm gonna just kinda speed up through putting it back in 'cause it's just a matter of plugging it back in and then putting it down in there and bolting it up. And then once you get them pretty close...
Okay, tighten them up. They don't have to be incredibly tight, but they should be nice and snug. Okay, and I'm gonna kick it into lightning speed here and just fast-forward through reinstalling the blower motor and getting everything back in place. If you want to see this in regular speed, just check out our video on removing and replacing the blower motor in an Explorer. Or, if you want, you can just follow my lightning-fast hands and probably glean enough information from this to do it. But, yeah, once this is done in a little bit, we appreciate it, and we hope this helps you out.
We hope this helps you out. Brought to you by www.1AAuto.com, your source for quality replacement parts and the best service on the Internet. Please feel free to call us toll free: 888-844-3393. We're the company that's here for on the Internet and in person.

This channel and door sweep kit is well made and the fit and finish are great.
Really sealed up the cab nice. All the old seals were dry rotten and falling apart. Going down the highway the truck was so loud inside. It sounded like I had the windows down. This kit took care of that. Easy to install and nice and quiet now. Thank you 1A auto
Install was nice and easy work great

WSA74908
