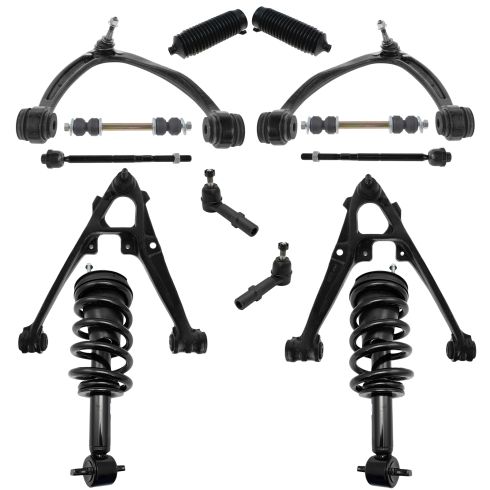
Parts came in a very timely matter. Parts were shipped very well being heavy parts. They were really close to OEM or better quality. So far very pleased with control arm and strut kit.
Replaces
PSA81017
This part doesn’t fit a . Select from parts that fit.
Specify your vehicle's year, make and model to guarantee fit.
This part does not fit a .
About TRQ:
TRQ is a trusted brand dedicated to making every repair a success story by combining premium parts with easy installation. Each TRQ part is engineered by a team of automotive experts to meet or exceed OEM standards, delivering enhanced performance and maximum longevity. With rigorous in-house testing, the brand ensures superior fit and function across every product line. TRQ also provides customers with best-in-class, step-by-step installation videos—so you can complete repairs with confidence, whether you're a first-time DIYer or an industry professional.
Product Features
TRQ suspension kits are manufactured using premium raw materials and coatings for extended service life. Each TRQ suspension component is designed to be a direct, maintenance-free replacement to the stock unit. To extend the life of your steering and suspension components, TRQ recommends replacing components in pairs, sets, or kits. All products are fit and road-tested in our Massachusetts R&D facility to ensure we deliver on our promise of Trusted Reliable Quality.
Replacing struts used to require specialized tools to compress, remove, and transfer the old spring and mount. Our Pre-assembled, complete strut & spring assemblies come with all new parts and make the job much quicker and easier for the do-it-yourself mechanic.
Strut & spring assembly contains:
Install Tip: When replacing steering components, have a professional alignment performed afterwards. This ensures proper tracking and even tire wear.
Our steering and suspension components are pre-greased and sealed for long life and do not require the extra maintenance typically required by greaseable versions.
Attention California Customers:
WARNING: This product can expose you to chemicals including Chromium (Hexavalent Compounds), which is known to the State of California to cause cancer, and birth defects or other reproductive harm. For more information, go to www.P65Warnings.ca.gov
This part fits 12 vehicles spanning 2007-2013.
| Year | Make | Model | Description |
|---|---|---|---|
| 2007-2008 | Chevrolet | Silverado 1500 | Chevrolet Silverado 1500 Front 14 Piece Steering & Suspension Kit TRQ PSA81017 |
| 2009-2013 | Chevrolet | Silverado 1500 | Chevrolet Silverado 1500 WT Front 14 Piece Steering & Suspension Kit TRQ PSA81017 |
| 2009-2013 | Chevrolet | Silverado 1500 | Chevrolet Silverado 1500 LS Front 14 Piece Steering & Suspension Kit TRQ PSA81017 |
| 2009-2013 | Chevrolet | Silverado 1500 | Chevrolet Silverado 1500 LT Front 14 Piece Steering & Suspension Kit TRQ PSA81017 |
| 2009-2013 | Chevrolet | Silverado 1500 | Chevrolet Silverado 1500 LTZ Front 14 Piece Steering & Suspension Kit TRQ PSA81017 |
| 2007-2008 | GMC | Sierra 1500 | GMC Sierra 1500 Front 14 Piece Steering & Suspension Kit TRQ PSA81017 |
| 2009-2013 | GMC | Sierra 1500 | GMC Sierra 1500 Denali Front 14 Piece Steering & Suspension Kit TRQ PSA81017 |
| 2009-2013 | GMC | Sierra 1500 | GMC Sierra 1500 WT Front 14 Piece Steering & Suspension Kit TRQ PSA81017 |
| 2009-2013 | GMC | Sierra 1500 | GMC Sierra 1500 SLT Front 14 Piece Steering & Suspension Kit TRQ PSA81017 |
| 2009-2013 | GMC | Sierra 1500 | GMC Sierra 1500 SLE Front 14 Piece Steering & Suspension Kit TRQ PSA81017 |
| 2009-2013 | GMC | Sierra 1500 | GMC Sierra 1500 SL Front 14 Piece Steering & Suspension Kit TRQ PSA81017 |
| 2010-2013 | GMC | Sierra 1500 | GMC Sierra 1500 XFE Front 14 Piece Steering & Suspension Kit TRQ PSA81017 |
| Brand Label | Part Number |
|---|---|
| DIY Solutions | SUS07711 |
| Mevotech | MK80669 |
| Centric Parts | 622.66069 |
| Dorman | 521-023 |
| Centric Parts | 623.66068 |
| NAPA | 260-5507 |
| NAPA | 260-5508 |
| Dorman - OE Solutions | 521-023 |
| MOOG Chassis Products | CK620956 |
| DIY Solutions | SUS05197 |
| MOOG Chassis Products | RK100215 |
| Unity Automotive | 11580 |
| DIY Solutions | SUS06873 |
| Centric Parts | 623.66069 |
| General Motors | 25918049 |
| MOOG Chassis Products | CK80670 |
| MOOG Chassis Products | RK80669 |
| Mcquay-Norris | FA4403 |
| MOOG Chassis Products | K80669 |
| Dorman - OE Solutions | 521-646 |
| General Motors | 20869200 |
| MOOG Chassis Products | ES800223 |
| Precision Driveline | CB50010 |
| MOOG Chassis Products | CK80669 |
| Mevotech | MS50820 |
| General Motors | 25812726 |
| Mevotech | GK80670 |
| Falcon Steering Systems | FK80669 |
| DIY Solutions | SUS05904 |
| Raybestos Chassis | 507-1300 |
| Gabriel | G57023 |
| Mevotech | CMK80670 |
| General Motors | 25812725 |
| MOOG Chassis Products | RK620889 |
| Monroe Shocks & Struts | 139104 |
| Mevotech | MK80670 |
| NAPA Premium | 2605507 |
| Monroe Shocks & Struts | 181784 |
| SYD | 1503015 |
| MAS Industries | CB90267PR |
| Chrysler | 5018278AA |
| DIY Solutions | SUS05903 |
| Mevotech | CMK80669 |
| MOOG Chassis Products | RK100214 |
| MOOG Chassis Products | K150270 |
| Monroe Shocks & Struts | 189105 |
| ACDelco | 45D3593 |
| MAS Industries | CB90268 |
| MOOG Chassis Products | K700432 |
| General Motors | 19178561 |
| Mevotech | MS50116 |
| DIY Solutions | SUS05196 |
| General Motors | 15096197 |
| DIY Solutions | SUS07712 |
| Mcquay-Norris | FA4404 |
| Precision Driveline | 4CB50010 |
| Dorman - OE Solutions | 521-024 |
| MOOG Chassis Products | EV800084 |
| Mevotech | GK80669 |
| General Motors | 22952194 |
| Centric Parts | 622.66068 |
| MOOG Chassis Products | CK620955 |
| General Motors | 20869199 |
| DIY Solutions | SUS07780 |
| MAS Industries | CB90267 |
| General Motors | 15096198 |
| MOOG Chassis Products | K80670 |
| Raybestos Chassis | 507-1301 |
| SYD | 1503014 |
| ACDelco | 45D3592 |
| NAPA Premium | 2605508 |
| MOOG Chassis Products | RK80670 |
| Monroe Shocks & Struts | 139105 |
| Chrysler | 5018279AA |
| General Motors | 22952193 |
| General Motors | 15254060 |
| Mevotech | CMS50152 |
| Dorman - OE Solutions | 521-645 |
| MOOG Chassis Products | RK620888 |
| Mevotech | CMS50153 |
| Precision Driveline | CB50011 |
| Dorman | 521-024 |
| KYB | SR4079 |
| MasterPro | 4CB50431 |
| MAS Industries | CB90268PR |
| Precision Driveline | 4CB50011 |
| General Motors | 15254061 |
| Falcon Steering Systems | FK80670 |
| Mevotech | MS50115 |
| MasterPro | 4CB50430 |
| MOOG Chassis Products | K700538 |
| Mevotech | MEV800084 |
| Mevotech | MK150270 |
| Mevotech | MES800223 |
| Mevotech | CMS501003 |
| Mevotech | CMS501004 |
| Mevotech | GS50153 |
| Mevotech | CA635 |
| Mevotech | TXMS50153 |
| MAS Industries | CB91103 |
| Mevotech | MS50109 |
| Delphi | TC5575 |
| MAS Industries | CB91104 |
| Mevotech | CA984B |
| Mevotech | CA985B |
| Mevotech Original Grade | GS50109 |
| Mevotech Original Grade | GS50153 |
| Mevotech | CA636 |
| Mevotech | CA635B |
| MAS Industries | CB91194 |
| ACDelco | 20869199 |
| MAS Industries | CB91193 |
| Mevotech | GS50152 |
| Mevotech | GS50109 |
| Mevotech Original Grade | GS50152 |
| ACDelco | 20869200 |
| Mevotech | CA636B |
| Mevotech | TXMS50152 |
| Delphi | TC5574 |
| ACDelco | 20869201 |
| ACDelco | 20869202 |
| Mevotech | MS50108 |
| Carquest | CA539B |
| Carquest | CA538B |
| QuickSteer | K700432 |
| EMPI | 88-1636-K |
| Delphi | TBR5028 |
| Dorman - OE Solutions | 531-420 |
| Raybestos Chassis | 430-1121 |
| Precision Chassis | 11CB50098 |
| TRW | JTC1950 |
| SYD | 1503035 |
| SYD | 1503034 |
| General Motors | 25788113 |
| SKP | SK521646 |
| General Motors | 15948967 |
| Precision Chassis | 11CB50099 |
| General Motors | 25868824 |
| Carquest | 820-258827B |
| Carquest | 820-258822B |
| General Motors | 25788112 |
| General Motors | 15948968 |
| General Motors | 25788114 |
| Mevotech TTX | CTXMS50153 |
| Mevotech Supreme | CMS50153 |
| General Motors | 20869201 |
| General Motors | 25868823 |
| SKP | SK521645 |
| Dorman - Premium | CB90268PR |
| General Motors | 25788115 |
| Mevotech Supreme | CMS50152 |
| NAPA Premium | 2606065 |
| TRW | JTC1974 |
| General Motors | 20869202 |
| NAPA Premium | 2606064 |
| Dorman - Premium | CB90267PR |
| Dorman - Premium | CB91194PR |
| Dorman - Premium | CB91193PR |
| Mevotech TTX | CTXMS50152 |
| Hollander | 512-00502L |
| Hollander | 511-00359L |
| Hollander | 511-00358R |
| Hollander | 512-00501R |
| MOOG Chassis Products | K150419 |
| Mevotech Supreme | TXMS50153 |
| Mevotech Supreme | CA636B |
| Mevotech Supreme | CA635 |
| Mevotech Supreme | MK80670 |
| Mevotech Supreme | MK80669 |
| Mevotech Supreme | MS50115 |
| Mevotech Supreme | TXMS50152 |
| Mevotech Supreme | MES800223 |
| Mevotech Supreme | CA984B |
| Mevotech Supreme | CMK80670 |
| Mevotech Supreme | MS50116 |
| Mevotech Supreme | CA636 |
| Mevotech Supreme | CA985B |
| Mevotech Supreme | GS50109 |
| Mevotech Supreme | GK80670 |
| Mevotech Supreme | MS50820 |
| Mevotech Supreme | CMK80669 |
| Mevotech Supreme | GS50152 |
| Mevotech Supreme | CA635B |
| Mevotech Supreme | MS50109 |
| Mevotech Supreme | GS50153 |
| Mevotech Supreme | MS50108 |
| Mevotech Supreme | GK80669 |
| Mevotech Supreme | MEV800084 |
| Delphi | TC5188 |
| Delphi | TC5189 |
| GMC | 15096198 |
| GMC | 15096197 |
This item may be interchangeable with parts from other brands with the above part numbers. This information is provided only for reference and does not guarantee that the item you are purchasing is identical to parts with part numbers from the brands listed above. To confirm that this item fits your vehicle, use the above "Check Vehicle Fit" option.
Lifetime Warranty
This item is backed by our limited lifetime warranty. In the event that this item should fail due to manufacturing defects during intended use, we will replace the part free of charge. This warranty covers the cost of the part only.
FREE Shipping is standard on orders shipped to the lower 48 States (Contiguous United States). Standard shipping charges apply to Hawaii and Alaska.
Shipping is not available to a P.O. Box, APO/FPO/DPO addresses, US Territories, or Canada for this item.
Expedited is available on checkout to the United States, excluding Alaska, Hawaii.
Final shipping costs are available at checkout.

Created on:
Tools used
Brought to you by 1AAuto.com, your source for quality replacement parts and the best service on the Internet.
Hi, I'm Mike from 1A Auto. I hope this how-to video helps you out, and next time you need parts for your vehicle, think of 1AAuto.com. Thanks.
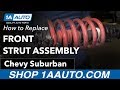
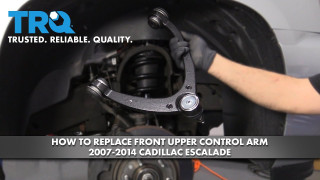
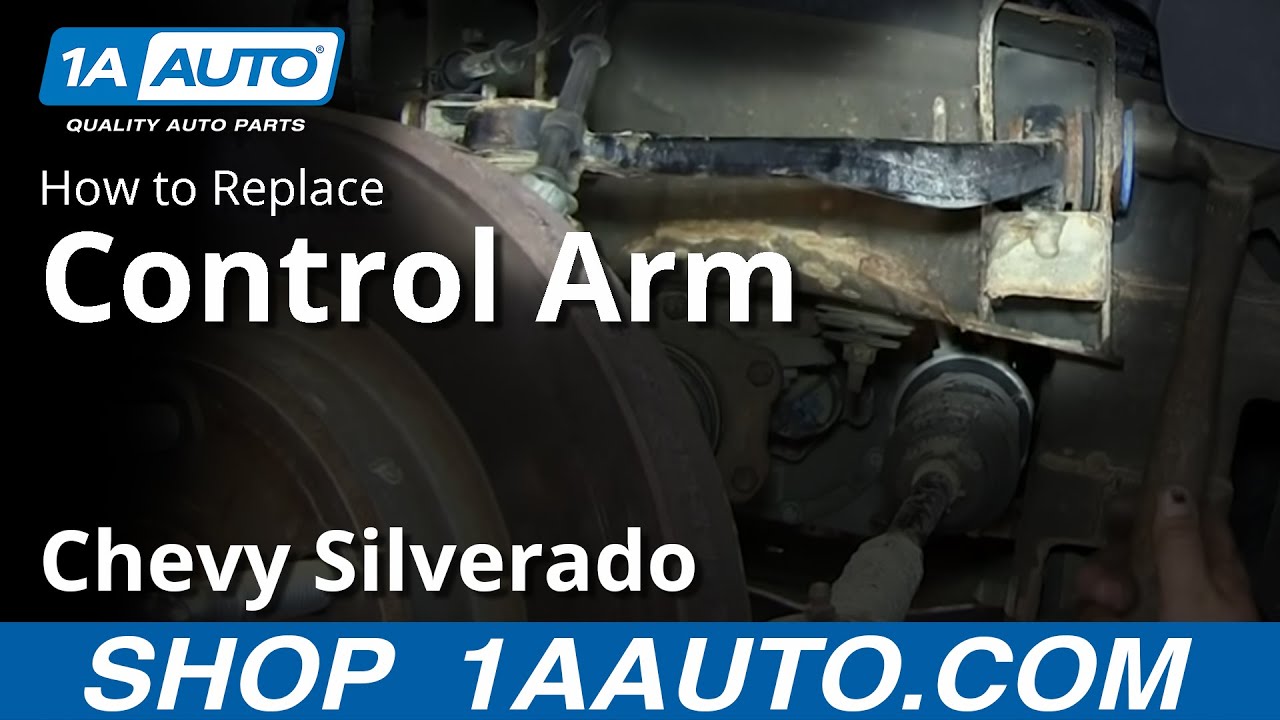
In this video, we're going to replace an upper control arm and ball joint assembly on this 2011 Chevy Silverado. This is a 1500 4-Wheel Drive; this procedure is the same for any 2007 to 2013 Silverado and Sierra 1500. The passenger side is basically the same as the driver's side.
You'll need a new control arm from 1A Auto.com, jack and jackstands, 10 to 22mm sockets with a ratchet and extension, an 18mm wrench, and an additional wrench for some extra leverage, breaker bar or pipe for extra leverage, penetrating oil, hammer, pry bar, and a torque wrench.
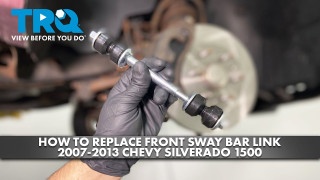
From the top, there are three 18mm nuts that hold the top of the strut in place: you see one there; one has a wire loom on it there that I'm going to reach down and grab, and just pull off. Apologies for the camera shot, but you just grab the wire clip and pull it up off the stud. Okay, so you have your other one there, and your third one, there. Now, use an 18mm socket with a long extension, and remove those three nuts. Remove the center cap just by prying with a screwdriver, and if you don't have the benefit of air tools, loosen the lug nuts with the vehicle on the ground, then raise and secure the vehicle, and then remove the lug nuts the rest of the way ... remove the wheel and tire, and they are 22mm lug nuts. Turn the wheel using hands, or use the steering wheel, and then you need to remove the stabilizer link; make sure you put some penetrating oil on the top end of it there, then use a wrench on the top side, and a socket wrench on the bottom side, and remove it all the way. I'm going to speed up here a little bit; we "cheat" a little bit by just using an impact wrench to take that off. That just speeds things up for us. Then, we'll remove the bolt the rest of the way: push down on the suspension, and pull the link out of there.
Up underneath, there are two 15mm bolts; hold the bottom of the shock strut in place. I was just using a 15mm socket and ratchet; you might want a breaker bar to break them loose, but they come apart pretty easy on this truck, and we'll fast forward as we just take those out. Take those bolts out, press down on the suspension some, and bring the strut down, and then up and out.
Now with some penetrating oil, spray down the ends of the two bolts that hold the control arm to the frame. There are little tabs that come out of the frame and go through these washers; and I'm using a paint marker to mark on the washers where those tabs are, so that when we re-assemble this, we can give it a good preliminary alignment. You will want to re-align your truck after you do this repair, but this at least gets it somewhere close to where it was originally. An 18mm nut holds the ball joint to the steering knuckle; put an 18mm wrench on there, and then hook another wrench onto it for extra leverage. Loosen it up. Here, you can see we still have the nut on the ball joint; we're going to put a big pry bar in there; pry between the steering knuckle and the ball joint, and hit the steering knuckle with a hammer until it pops apart.
There's a 10mm bolt on top of the control arm that holds the clip that holds the wire harness: remove that. Now, we're going to support the suspension with a jack. Remove the nuts that are on the end of the bolts that go into the frame; it's a 21mm socket with a ratchet, and we use a pipe for some extra leverage to get the bolts going and once we have them going, they come off easier than just with the ratchet, and I'll fast forward as we finish that up, and do the other side. As you see, here, use a hammer to start driving those bolts out, and then you can work them out by hand. You may have to use a punch and drive them further through. Now, remove the nut the rest of the way off of the top ball joint there, and then you should be able to pull the control arm up and then pull it out; you might need to use a crowbar or a large screwdriver to help pry it out.
The ball joint in our new control arm comes with a grease-able fitting, so we'll install that. Put the new control arm up in place, and you just kind of wiggle it up and down, I guess, to get the bolts to line up preliminarily with the frame. Now, put the bolts back in, get one bolt started in as much as you can, and then actually, if you start the other bolt in on the other side, this kind of lines things up; you should be able to get that bolt most of the way in. Use a hammer to tap it in if you need to, and then go back, and again, if you just move the control arm around a little bit, you should be able to push it in. I'm just going to fast forward as we start the nuts on ... And now, we're putting a wrench on the bolt end, and you can see we just pull it up, and re-align that mark with the tab on the frame, and just preliminarily tighten the nuts up just to hold it in place well. Here, we're just going to let the jack down some. This just relieves a little pressure so that we can then lift the upper control arm up, and get the ball joint lined up and then back into place, and then once it's all set, we'll actually jack the suspension back up until it's basically in the position it should be when the vehicle is riding on the ground.
You put the ball joint nut on, and start tightening it; most likely, it's going to start making the stud on the ball joint spin, and if that happens, you'll see here in a second, you can put a 6mm Allen wrench into the ball joint stud. Hold it; you need to be careful: sometimes as you pull the ball joint stud through, it can interfere with the axle, and you might need to undo the axle nut and push the axle through a little bit in order to get the wrench back out. Make sure you put the wrench on there, and put the second wrench on for some extra leverage, and tighten that nut right up.
Now again, we have the suspension up in the about the same position it's going to be when it rides on the ground; you want to make sure you have it up there, and then torque the bolts for the control arm to 100 foot-pounds, and just make sure that the marks on your washers and everything still line up. Now you can let your jack back down, reinstall the 10mm bolt that holds the wiring harness clip, and use a grease gun to put some grease into the ball joint, and we generally do it until we see the boot between the ball joint and the steering knuckle start to expand. Bring this strut back in: if you look on the top of the strut where the coil spring ends, that goes to the outside, and you put the strut back in, and then lift it up into place, and then you can just start the nuts onto the top. Install all of the lower bolts, and the strut, and tighten them up; you want to tighten them up between 70 and 75 foot-pounds. We speed up as we put the stabilizer link back in place; use a pry bar to lift up on the sway bar a little bit; put the link back in place, put the bolt up through, and then tighten the nut down on top.
The,n put our wheel back on, put the lug nuts back by hand first, then tighten them preliminarily, and with the vehicle back down on the ground and secure, torque the lug nuts to 110 foot-pounds using a crossing pattern. Tighten up and torque the top three nuts to 75 to 80 foot-pounds, and put that wire clip back in place, and you should be all set.
We hope this helps you out. Brought to you by www.1AAuto.com, your source for quality replacement parts and the best service on the Internet. Please feel free to call us toll-free, 888-844-3393. We're the company that's here for you on the Internet and in person.

Tools used
Tools used
Brought to you by 1AAuto.com, your source for quality replacement parts and the best service on the Internet.
Hi, I'm Mike from 1A Auto. I hope this how-to video helps you out, and next time you need parts for your vehicle, think of 1AAuto.com. Thanks.
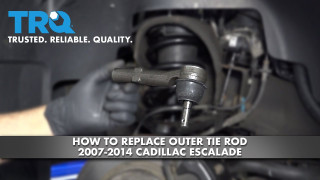
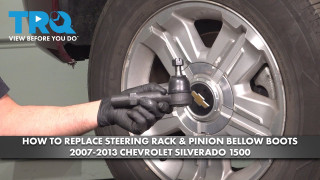
In this video, we're going to show you how to replace the outer tie rod on this 2011 Chevy Silverado 1500. It's the same part and process on most of the trucks and SUVs from GM, from 2007 to 2012. We show you this repair on the passenger's side but it's the same process on the driver's side. The items you'll need for this is a new outer tie rod from 1AAuto.com; jack and jack stands; flat blade screw driver; 7mm, 21mm, and 22mm socket and ratchet; a piece of pipe for leverage; a 15/16 inch wrench; a 16mm wrench; pliers; a hammer; tape measure; a grease gun; and a torque wrench.
The first thing that we need to do is remove the wheel. If you don't have an air wrench, you want to loosen up those lug nuts while the vehicle is still on the ground. Then, using your jack and jack stands, raise the vehicle, remove the lug nuts the rest of the way.
For a preliminary alignment, measure from a fixed point, which is usually the end of the boot, to the middle of your tie rod and record that measurement. Using a 15/16 wrench loosen up the lock nut for the tie rod. Now using a 21mm socket and ratchet, and piece of pipe for extra leverage if you need it, you want to loosen up the nut on the bottom of the outer tie rod. Then, using a hammer, just hit the knuckle there to loosen the outer tie rod. Then you can pull it up and out. Twist off the outer tie rod.
One the left, is the old outer tie rod; on the right, is the new one from 1A Auto. You'll see that they are identical and that they'll install exactly the same. The new tie rod installs the same way. Just put it on to the inner tie rod and twist it on. Twist it right up until you get to that locking nut and then back it off maybe a quarter of a turn. Then take the outer tie rod and push it back down into the knuckle there.
Now put your castle nut back on. Tighten it up until it's snug so that you can measure the tie rod again and make sure you got a good preliminary alignment. Now, just measure again from the same point and make sure that you get the center of the tie rod lined up in the same spot. If you need to adjust at all, just take the castle nut off, pull the tie rod up and out, and twist the tie rod either way to line it up correctly. This is a way to get a good preliminary alignment. We do recommend that you have your vehicle aligned after you do this repair.
Now put that grease fitting into your new outer tie rod and tighten it with a 7mm socket. Once you got it all set, torque the castle nut on, to 50-55 foot-pounds. Once that castle nut is tightened up into place, you want to slide the cotter pin in. Using a pair of pliers, bend the two ends outward to lock it. Hold the inner tie rod, with a 16mm, and then use your 15/16"� to tighten up the locking nut against the outer tie rod. Use a grease gun and put some grease into the tie rod. You will see the boot start expanding.
Fast forward here as we reinstall the wheel and tire. Put the lug nuts on by hand first and tighten them up preliminarily. Lower the vehicle onto the ground. You want to tighten the lug nuts to 100-110 foot-pounds, using a crossing pattern.Then put your cover back on.
We hope this video helps you out. Brought to you by www.1AAuto.com, your source for quality replacement parts and the best service on the Internet. Please feel free to call us toll-free, 888-844-3393. We're the company that's here for you on the Internet and in person.
Tools used
Tools used
Hi, I'm Mike from 1A Auto. We've been selling auto parts for over 30 years.
Remove the center cap with a large flat-bladed screwdriver or a plastic prying tool you can get from 1AAuto.com. Push in here and pop it off. Use a 22 millimeter socket and breaker bar to loosen the lug nuts while the vehicle is still on the ground. Raise and support the vehicle and finish removing the wheel.
Support the suspension arm assembly with a jack or a jack stand. We're using this because we're working on a two post lift. The suspension is going to want to drop when we remove the strut and spring assembly, so that's why we need to have it supported. At the top here, there are three studs with nuts. We will start by removing those. And then, loosen the two stud and nuts on the bottom and pull the strut assembly out.
I will spray some rust penetrant on the nuts and bolts here. Use a 15 millimeter wrench on the top ones. If they are stuck, use a dead blow, break them free. With those broken free, I'm going to switch to a ratcheting wrench, make things go a little quicker. These two lower mounting bolts go through the control arm. There is a 15 millimeter head on this side, and an 18 millimeter nut on this side. I'm going to try to break this nut free first. Take my wrench and then hit it with my mallet.
So it looks like it's actually turning the nut, and not the bolt, which is good. Free it up. I'm going to try to do the same for the other side. With the nut loose, I'm going to kind of hold it with my 18 millimeter, and take a 15 millimeter socket and ratchet. Now I've got it loose, I can undo it with my fingers. Slide the long bolt out. I'll put these together and put them aside. So repeat the removal for the other bolt. I'm going to hold the shock and I'll lower the suspension down. I'm going to capture one of the top nuts just so if the strut and shock combination comes loose, it doesn't fall completely out. I'm going to take a pry bar and sort of push against the bottom. Reach up, hold the strut up, and undo that top nut. Pull it out of the mount. It's not going to come down this way, so it's going have to come out through the top. We have our strut and spring assembly.
Here's our old strut and spring assembly from our vehicle, and our brand new assembled strut and spring from 1AAuto.com. So the nice things is you don't have to worry about swapping these springs, which can be very difficult. It comes fully loaded, ready to go. As you can see, it's got the same mounting bolt holes in the bottom. It has the same three studs on the top to mount. It has the same three mounting studs on the top as the original that came out. And this should go in your vehicle great and give you a good ride. This is just a warning sticker. You can remove this before you install it. You don't need to mess with this center nut. It's all set.
The spring is assembled. The warning's telling you not to undo it. Just leave it alone. You can take the sticker off. So we're going to go ahead and install this in the vehicle now. Before we install it, just remove these nuts that it comes with. Place them aside. I'm going to loosen this one and hold onto it, because when I install it, I'm going to use it to just hang the strut in place so it doesn't fall. So just keep that in a handy spot. When you install this, there are two mounting holes in the back. They are slotted, so they give you a little bit of room to work with.
I'm going to line the strut up with the two studs in the back and the one in the front, faced the way that it's already set up. And these are lined up to match up with the control arm. We're going to go in the reverse the way we took the old one out. Slide it up into place. That's why I kept the nut handy. I can reach up and capture one so it doesn't fall on me. I'm going to use that one nut I installed and a ratcheting wrench to just draw the strut up into place. I'm going to pry up on the suspension a bit, on the strut, do this. I have a large pry bar on one side of the suspension arm, so I basically just pried the control arm down, and then pried the shock into place. Take a punch and align the bolt holes.
You're going to have to spend some time moving the shock around to get these bolts to line up, either using an awl or a punch or a little pry bar to try and pry it around. This one doesn't quite line up. I've got the other one captured, so we'll take a pry bar and sort of pry the strut around. Try to wiggle it in. There it is. I captured the other two nuts on the top studs. These are locking nuts. And if they're torqued, they'll be locked in place. The bolts that we're replacing these with, the head is a 13 millimeter, the nut is still a 15. I'm just going to snug these up. And we'll use a 15 millimeter ratcheting wrench. Tighten up the top nuts. I torqued these lower bolts to 37 foot-pounds. Caught a hold of the top of the bolt and nut. Repeat the other one. Torque the top nuts to 37 foot-pounds using the deep socket and torque wrench.
Place the wheel back on the car. Thread the lug nuts on by hand. With the vehicle on the ground, I'm going to torque the lug nuts. Torquing these 140 foot-pounds. Going in a cross pattern. Reinstall the center cap. Line up this valve stem picture with the valve stem on the wheel. Just pushing it into place.
Thanks for watching. Visit us at 1AAuto.com for quality auto parts, fast and free shipping, and the best customer service in the industry.
Parts came in a very timely matter. Parts were shipped very well being heavy parts. They were really close to OEM or better quality. So far very pleased with control arm and strut kit.
My Silverado Ride Great with all The New Parts - Upper and Lower Control Arms / Tie Rod Ends and Struts
Perfect fit
Great little upgrade from my previous setup. Went from old rusty parts that made driving feel sloppy to now having a truck that feels like a brand new vehicle! Very impressed!
Installed on my 2011 Silverado. Seems to fit well, been 4 weeks and no complaints. The upper ball joints come with grease fitting but lowers do not, they should but other than that seems to be a good rebuild kit for an older truck. Saved about $700 by using 1A auto vs going to auto zone
front outer tie rod end where the wrong ones and way to long, had to pick up the correct ones from my local AutoZone. Other than that the kit seems very well bit and everything else was a perfect match
The only drawback is that the inner tie-rod bellow, or boot was the incorrect part. My truck design is without a vent tube. Had to get the correct parts (bellow) from the dealership. All else it was good experience and relative simple to install.
came in just like advertised really happy with my new suspension
Good fit on everything. easy to install, took care of the alignment issue! Quick shipment too.
Most of it was great had a few pieces that had to be replaced but they didnt hesitate to replace them and got them quickly!!
PSA81017
What is the make, model and trim of the vehicle? We can then check the fitment. We can also check with the VIN.
There typically is not any issues with a 2 inch strut spacer kit. We do also offer TRQ leveling kits that we are able to guarantee fit and function with this suspension kit.
This will be correct for your vehicle, only if it is equipped with cast iron lower control arms.
Maybe, most importantly the rubber boots will deteriorate after a few months. I would recommend not buying from this company.
These are not specific for engine size, so they will fit a 5.3L! Please be sure to review the fit chart to see if there is further info you need to confirm fitment.
Yes. Please check the 'Vehicle Fit' tab on the listing for any specifications required for fitment.
Please provide your full vehicle information or VIN number to confirm product availability and fitment.
877-844-3393
Monday - Friday 8:00am - 9:30pm ET
Saturday - Sunday 8:00am - 4:30pm ET
Check Your Email
We sent a verification email to .
Click the Verify Email button in the email to submit your question.
This extra step helps prevent spam.

Specify your vehicle's year, make and model to guarantee fit.
This part does not fit a .
Before proceeding,
select your Vehicle, to verify this Part will fit.
If your vehicle isn't listed, search Steering & Suspension Kits
This part will only fit a vehicle with these options.