Okay, so before we get started with this job, I just wanna make sure that you understand that you're gonna need a specialty tool. It's gonna look exactly like this. This is a timing light and you're gonna need it to set the timing after you remove and reinstall your distributor. With that said, let's get going.
One of the first things you need to do when you start this job is to remove the negative battery terminal. Set that aside so there's no way it can contact the battery. The next thing we need to do is get this air filter housing out of the way. Make sure you don't have any dirt or debris on top of here before you remove this. You don't want anything falling inside of the engine. Remove the air filter. And we're just gonna wiggle this so it'll pop off. Remove this as well.
The next thing we need to do is find cylinder number one. On this vehicle, the cylinder on the driver side front is cylinder one. So you would just follow that wire and it's gonna lead you all the way up here to this one right next to your coil. Mark that with number one. The next thing that I like to do is just go around and just mark each wire. And the way that this is gonna work is going by the firing order. So we're gonna start with cylinder one and then the next firing order is gonna go to cylinder eight which is on the back side, passenger side. So you can either draw a number eight or eight little lines, whatever you wanna do.
Once we've got that, we're gonna move along to cylinder four. This one's cylinder four. And then cylinder three. And then I went around with the firing order. So just mark them as needed. Once we've done that, we also wanna mark our new distributor. To figure out where cylinder one is gonna be located on this or the cylinder one wire, essentially, we're gonna have our wiring area. That's gonna be facing towards the back side or the firewall. Then what you're gonna notice is you're gonna have a bolt right here that holds the cover on to the distributor. The one that comes up right after that bolt. So you have where the wires are, you have the bolt and then the one that comes up right after that bolt, that's gonna be where cylinder one wire is gonna go to. Right there. Go ahead and mark that now.
At this point, now that everything's marked clearly, you wanna make sure that the markings cannot come off because it's gonna be a little bit more of a hassle. I'm just gonna start pulling these wires off of here.
Set all those wires aside. The next thing we're gonna do is use our 7/32nd socket. You can also use a Philips head screwdriver. And we're gonna remove the mounting bolts that hold the cap down. There's gonna be one over here and one on the other side of the distributor cap. [inaudible 00:03:03] little slot right down. Kind of like I do. Let's see if this comes up. There's our cap. We'll set this aside.
The next thing we wanna do is make sure we cover this up so no dirt or debris can get inside. And then we're gonna take a nice blowgun and just try to get down in this area right down here. That's where the adjustment and everything's gonna be. So we need to make sure that there's no crud there.
The next thing we need to do is take out the driver side front sparkplug. That's gonna be cylinder number one on this vehicle. So we'll just pop the wire out of its little holder there. Wiggle this around and take the wire off of the sparkplug. Now we're gonna remove the sparkplug. It's a great idea when you pull it out to just inspect it real quick to make sure it's in good condition, it's not worn. This one looks great.
So now the next thing that we're gonna wanna do is we're gonna wanna try to turn the crank over so we can find top dead center. Top dead center is basically when the piston on cylinder number one, which is the front cylinder on the driver side, comes all the way up on the compression stroke. When you feel the pressure with your gloved thumb coming from that hole, that's when we're paying attention for the compression stroke. I'm just gonna cup it with my thumb. Now we're gonna turn the crank over.
So now we're coming up on top dead center and the way we know that is because our rotor right here is coming spinning around and it's gonna land on where the first cylinder wire was which is pretty much directly where this coil wire was. As it comes around, at this point, I'm gonna have my finger over the plug hole and I'm gonna feel for a compression trying to blow my thumb off. Make sure you do it with a gloved finger and never use something metal inside of the cylinder where you could damage anything.
So now what we're gonna do, once we're sure that we have the rotor aiming right here, we're just gonna doublecheck it in comparison to where cylinder one is supposed to be on the cap. So I'm just gonna kinda set this back over the top so that the screws line up with the screw holes. That looks pretty good. Cylinder one is supposed to line up right here. So we'll lift it up nice and straight and we can tell that it is lined up perfectly with where cylinder one is supposed to be.
Now the next thing we need to do is mark a reference point for the base of the distributor. What I'm talking about is when you go to insert the distributor, as you turn it, that's gonna change the timing of the vehicle so what we need to do is have a reference point or a starting point that's gonna tell us that when we put the new distributor in, it's gonna at least be able to run so we can adjust the timing accordingly. If you were to look at your distributor, you're gonna see this nice, flat line right here, approximately where those wires connect in.
I'm gonna go ahead and take something nice and smooth and flat that looks just like this because that's what I've got. You can also use a ruler or anything else that's straight. I'm gonna go right along that line, that groove and then bring it right up to the actual firewall itself. And then of course, I'm gonna mark it. That tells me that when I put in my new distributor, when it comes time to line it up, I'm gonna set this back in the same exact way and as I turn it, I'm gonna make it so this lines back up with my line. If I install it and this is lined up right there, I know that I need to turn counterclockwise until it lines up perfectly here.
Okay. So now that we have everything nice and clearly marked, we have it aiming right here at the base and we have the rotor aiming where cylinder one's gonna be, we're gonna go ahead and disconnect the wiring here. You just lift up on this tab and then you can draw it away. I always like to take a peek at my wiring to make sure there's no funny colors. If you see any corrosion, you know you're gonna have an issue. These look great.
So what I'm gonna use here is something called a crow's foot. You can also get a nice bent wrench. It's a specialty tool. It's gonna cost you a couple of bucks. I have crow's feet around so this is what I'm gonna use. A nice extension and my three-eighths ratchet. I'm gonna go right down onto this bolt right here and that's actually holding a little horseshoe type tab and it's holding down the distributor. Couple of loving bonks just to make sure it's on there. There's our bolt and here's the piece that holds down the distributor.
So now what we really need to do is pay special attention down in there and make sure that there is no crud that's gonna be able to fall down into the engine. Are you gonna be able to make it perfectly clean? Probably not. But if you can make sure that there's no large debris that might fall in, that would be very helpful for your engine in the long run. Carefully lift up on this. As you lift up, it's gonna wanna spin and I'll show you why once it comes up. This is the reason why it's gonna need to spin as it comes up. So keep that in mind when it comes time to install.
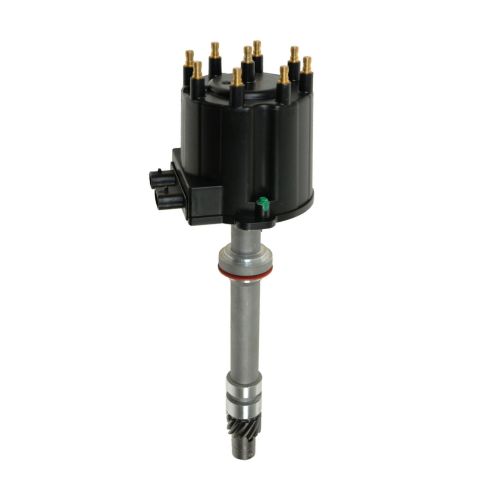
So now on our new distributor, we're gonna take the cap right off so that way there we can see what's going on with the rotor during install. Go ahead and use that same seven-thirty-seconds and remove bolt screws that hold the cover on. So now let's go ahead and take our old cap and our new cap. You're gonna notice that you have the flatlined area, right. That's where the wiring's gonna go. Line those up perfectly and then we're gonna make sure that we have a mark on our new cap on the same corresponding area.
So now just a quick note. I went ahead and I put this back inside the engine and when I was dropping it down, what I did is I started it right here so the rotor is aiming up this secondary hole. Not the one with the threads. The other one right there. As I slid this down, I lined the base up with my marking on the firewall. These grooves right here worked into the grooves that are inside the bottom of the engine or in the inside of the engine where the oil pump is and as they worked their way to where they were supposed to be, this spun and it lined up perfectly with cylinder number one. So with your new one, go ahead and line up your rotor to that second nonthreaded hole.
We have this. That's gonna be aiming diagonally but towards the firewall. And then we have that secondary hole. I'm gonna go ahead and give that a spin. Line it up so it looks like it's approximately or at least as close as it can be with that secondary hole. Before we go ahead and install this into the vehicle, it's important to remember that you do have a gasket. If, for some reason, your gasket's missing, you need to replace the gasket. You also need to pay attention to your old distributor and make sure that the old gasket is still either with the distributor or it's not on the engine particularly is what matters.
Just gonna go ahead and wipe down this base area right here. Grab a rag. Make sure you have a nice area for that seal to ride. You don't want any moisture or debris or anything getting inside of there. Gonna bring this down. Just get it lined up with the hole. And now before we go too much further, just kinda eyeball it. We've got our straight line here. Try to line it up there. Gonna bring this down. Now watch as I bring this straight down. Watch right here, the rotor. Should wanna slid into the grooves. I have it lined up with its corresponding hole. I'm gonna line this up right there. Let's see if this works right.
Okay. That slid all the way down. I can see the base is up against the engine. I'm gonna take my guide tool here or my straightedge. Put it down here right along that groove. Turn this just a teeny bit so it winds up. This, the rotor is aiming straight up where cylinder one should be. If, for some reason, the rotor was aiming over here or even back here, you're gonna wanna lift it back up and go ahead and reposition that rotor so that as you drop it down, it can spin clockwise and line up with cylinder one.
So now we're gonna take our bracket and our mounting bolt. Go ahead and put that bracket down inside the groove on the distributor and line it up with the bolt hole on the engine. Go ahead and start it in there by hand. Make sure you have a couple good threads before you try to tighten it down with a tool of any sort in case it's cross threaded. I'm gonna doublecheck to make sure I'm lined up because it's very easy to spin this right now. Line that up with the firewall. That works pretty perfect right there. I'm gonna try to leave my tool on there. It might fall down. But next thing I need to do is tighten up that bolt while the base is exactly where it needs to be and the rotor is also lined up with cylinder one.
Now when you tighten this up, you don't necessarily need to reef on it. Just keep that in mind because we are gonna have to re-loosen this up to be able to adjust the timing after we've done this. So just kinda snug it up so that there's no way that the base can move around on its own. Once you have it snugged, just doublecheck to make sure it is still lined up with exactly the line that you made on the firewall. Doublecheck this once again. This looks great. Let's continue on by connecting in our wiring harness.
Nice click. Give it a tug. If it's not secured, you need to find a way to secure it. Just take your nice new cap, inspect it to make sure that there is no debris inside from setting it down anywhere. I'm gonna go ahead and carefully slide it over the top of this, line it up. Now I'm gonna start in both of those two bolts before I tighten either of them down completely. Okay, both bolts are started in. Let's just snug them up. You don't need very much pressure.
That feels good. Give it a nice shake. Try to spin it. Make sure it's not spinning freely. If it is, you need to snug up that bolt a little bit more. Now it's gonna be time to get the wires back onto here. So I'll just take a look at your markings and make sure you can read them. So now we're just gonna use a little bit of dielectric grease and you can either go right onto the wires or if it's easier for you, you can just go right down along the line right there. Make sure you get that coil right in the center there. That's gonna be where the coil wire goes. This is great. This is gonna help keep moisture out and it's also gonna make the wires come off easier down the line.
So now it's time to get the wires on. We're gonna go with cylinder one to start. Cylinder one is the one closest to the coil wire here. Go ahead and put that right on. Now if you were to continue on by going clockwise, you're gonna go cylinder eight and then cylinder four, then cylinder three, then cylinder six, five, seven, two. Cylinder eight wire there. We're gonna find cylinder four which should also be from the passenger side. Continue on. We want cylinder three which will be from the driver side. I like to go right through the center area there.
Okay. Make sure they click on. If they don't click on, then they're no good. Now we're gonna do cylinder five. Next is gonna be cylinder seven. And then this one all the way over here is gonna be cylinder two. Nice long wire, just come straight across the top of the distributor cap. Don't forget this one right here. Your truck's not gonna run at all if you don't have that on there. Doublecheck to make sure everything's clicked in and it doesn't wiggle around too much. These all feel great.
All right. Let's go ahead and connect our negative battery terminal. Okay. That feels great. Now it's time to make sure we get our sparkplug back in there. Once you bottom it up, just go a teeny bit more. That should be good. Go ahead and grab that sparkplug wire, put it on the sparkplug, move it away from the exhaust and then make sure it's secure.
So I wanted to show you where the timing mark is gonna be. If you were to look down along the front side of the engine, you're gonna have your crank. Now if you were to look down where this brake line's headed, you're gonna see this area that has all these nice cutout notches. Right? You're also gonna notice that there's a nice large cutout notch right there. That's the one that we're gonna be aiming for, the one that has the yellow. Once we start this vehicle, what you're gonna see is there's gonna be a line that comes spinning around that's on...drawn onto the crank. As the timing light flashes, it's gonna flash at the specific time when that line should mark up with this mark right here.
Now on your timing light you're gonna have some wiring. You're obviously gonna have your positive and your negative lead and then you're gonna have this one right here. I wanted to point out on this that this is a very delicate piece of machinery right here. This is two magnets on the inside there and that's what's gonna be reading the pulse. It's gonna read the pulse from cylinder one's plug wire. So we're gonna find cylinder one plug wire right here. It's the one farthest to the front of the vehicle on the driver side.
We're gonna put it right over the wire just like this and latch it in. And of course, to protect our wire, I'm just gonna make sure that it's nice and clear of the belt so there's no way that it can get damaged. Now that I've done that, I'm gonna go ahead and connect this in. Black to the negative, red to the positive. That's basic but I'll say it anyway. Now you're gonna see that this is turning on. This is great. So now what I need to do is I need to get inside the vehicle and I'm gonna start it up. Once the vehicle's at operating temperature, we're gonna continue on.
Now the next thing that we're gonna wanna do is start the vehicle and we're gonna let it idle and we wanna let it get up to engine running temperature. So at the normal running temperature. You also wanna pay attention to your dash to make sure that your check engine light or service engine soon light stays off. So once I start the vehicle, it should turn off and it's gonna wanna stay off.
Now that we have the engine at operating temperature, we're gonna go ahead and turn it off. Come over to the passenger side to the glovebox. If you were to look underneath the glovebox right by your blow motor area, you're gonna find a single wire. Disconnect that wire. There we are. Okay. We got that off. That's great. The reason why we took that wire off is so that the PCM can't electronically time the vehicle. We want this to be just plain old mechanically timed by us at this point. So now we're gonna restart the vehicle.
Next, we're gonna take our timing light. You can see it flashing. That's as the spark is coming through the cylinder one wire. Okay? Now if you were to carefully come down here...be careful for the belt because obviously, the engine's running. Don't go anywhere near the belt. We're just gonna take this timing light and aim it straight down there where I was showing you before. You're gonna see that line on the crank spinning around and around. It should line up with the slot right there that I showed you, the biggest slot. That's gonna be zero.
All right. So let's get this plugged back in. Give it a nice tug, make sure it's not gonna fall out and tuck it away. Okay, so now that we have that re-plugged in, let's go ahead and start this back up and we wanna make sure that that check engine light turns back off. Just give it a couple of minutes here or a couple of seconds at least. Make sure the check engine light does not turn on. Just gonna carefully get this marking tape off of here.
Okay, so this engine's running great now. So the next thing we wanna do is just doublecheck our work. Make sure that you tightened up that adjustment bolt down there so it's completely snug. Make sure you push down on all these wires and none of them are loose in any way. That looks great. The next thing that we're gonna do is go ahead and get the air intake back on here. Let's just make sure that the mating surface is nice and clean. Let's grab our base. Slide it right over the top here. I'm gonna start this hose in while I can still move it around. Line this up so it's completely seated all the way around.
Next up, your air filter. And we're gonna go ahead and put this cap on here. You can see that there's a line with an arrow that says front. Well, we might as well point that towards the front. And then of course, put on our wing nuts. Those are nice and tight. The next I'm gonna do is I'm gonna hop up inside this vehicle and I'm gonna rev it.
The idle comes sitting right back down around 700, 800. You can't get much better than that. I noticed that the RPM meter or the tachometer is not fluctuating. That seems great. So now just take it for a road test.