
★★★★★
May 22, 2026
Perfect fit
This was a perfect fit for 87 gmc sierra. I've had this on for over 2 months and this working great.

Replaces






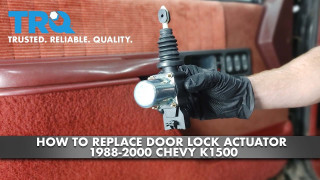
About TRQ:
TRQ is a trusted brand dedicated to making every repair a success story by combining premium parts with easy installation. Each TRQ part is engineered by a team of automotive experts to meet or exceed OEM standards, delivering enhanced performance and maximum longevity. With rigorous in-house testing, the brand ensures superior fit and function across every product line. TRQ also provides customers with best-in-class, step-by-step installation videos—so you can complete repairs with confidence, whether you're a first-time DIYer or an industry professional.
Returns: Parts with electrical components cannot be returned once installed.
Attention California Customers:
 WARNING: This product can expose you to chemicals including Lead and Lead Compounds, which are known to the State of California to cause cancer, and birth defects or other reproductive harm. For more information, go to www.P65Warnings.ca.gov.
This part fits 52 vehicles spanning 1985-2002.
| Year | Make | Model | Description |
|---|---|---|---|
| 1999-2000 | Cadillac | Escalade | Cadillac Escalade Front Driver Side Door Lock Actuator TRQ BDA81609 |
| 1985-1992 | Chevrolet | Astro | Chevrolet Astro Front Driver Side Door Lock Actuator TRQ BDA81609 |
| 1988-1994 | Chevrolet | Blazer | Chevrolet Blazer Front Driver Side Door Lock Actuator TRQ BDA81609 |
| 1988-1993 | Chevrolet | Blazer S10 | Chevrolet Blazer S10 Front Driver Side Door Lock Actuator TRQ BDA81609 |
| 1988-1999 | Chevrolet | C1500 Truck | Chevrolet C1500 Truck Front Driver Side Door Lock Actuator TRQ BDA81609 |
| 1988-2000 | Chevrolet | C2500 Truck | Chevrolet C2500 Truck Front Driver Side Door Lock Actuator TRQ BDA81609 |
| 1988-2000 | Chevrolet | C3500 Truck | Chevrolet C3500 Truck Front Driver Side Door Lock Actuator TRQ BDA81609 |
| 1991-2002 | Chevrolet | C3500HD | Chevrolet C3500HD Front Driver Side Door Lock Actuator TRQ BDA81609 |
| 1990-1991 | Chevrolet | C5500 Kodiak | Chevrolet C5500 Kodiak Front Driver Side Door Lock Actuator TRQ BDA81609 |
| 1990-1996 | Chevrolet | C60 Kodiak | Chevrolet C60 Kodiak Front Driver Side Door Lock Actuator TRQ BDA81609 |
| 1997-2002 | Chevrolet | C6500 Kodiak | Chevrolet C6500 Kodiak Front Driver Side Door Lock Actuator TRQ BDA81609 |
| 1990-1996 | Chevrolet | C70 Kodiak | Chevrolet C70 Kodiak Front Driver Side Door Lock Actuator TRQ BDA81609 |
| 1997-2002 | Chevrolet | C7500 Kodiak | Chevrolet C7500 Kodiak Front Driver Side Door Lock Actuator TRQ BDA81609 |
| 1988-1999 | Chevrolet | K1500 Truck | Chevrolet K1500 Truck Front Driver Side Door Lock Actuator TRQ BDA81609 |
| 1988-2000 | Chevrolet | K2500 Truck | Chevrolet K2500 Truck Front Driver Side Door Lock Actuator TRQ BDA81609 |
| 1988-2000 | Chevrolet | K3500 Truck | Chevrolet K3500 Truck Front Driver Side Door Lock Actuator TRQ BDA81609 |
| 1988-1995 | Chevrolet | LLV (Postal Truck) | Chevrolet LLV (Postal Truck) Front Driver Side Door Lock Actuator TRQ BDA81609 |
| 1988-1993 | Chevrolet | S10 Pickup | Chevrolet S10 Pickup Front Driver Side Door Lock Actuator TRQ BDA81609 |
| 2000 | Chevrolet | Suburban 1500 | Chevrolet Suburban 1500 Front Driver Side Door Lock Actuator TRQ BDA81609 |
| 1992-1999 | Chevrolet | Suburban C1500 | Chevrolet Suburban C1500 Front Driver Side Door Lock Actuator TRQ BDA81609 |
| 1992-1999 | Chevrolet | Suburban C2500 | Chevrolet Suburban C2500 Front Driver Side Door Lock Actuator TRQ BDA81609 |
| 1992-1999 | Chevrolet | Suburban K1500 | Chevrolet Suburban K1500 Front Driver Side Door Lock Actuator TRQ BDA81609 |
| 1992-1999 | Chevrolet | Suburban K2500 | Chevrolet Suburban K2500 Front Driver Side Door Lock Actuator TRQ BDA81609 |
| 1995-1999 | Chevrolet | Tahoe | Chevrolet Tahoe Front Driver Side Door Lock Actuator TRQ BDA81609 |
| 2000 | Chevrolet | Tahoe | Chevrolet Tahoe Limited Front Driver Side Door Lock Actuator TRQ BDA81609 |
| 2000 | Chevrolet | Tahoe | Chevrolet Tahoe Z71 Front Driver Side Door Lock Actuator TRQ BDA81609 |
| 1988-1999 | GMC | C1500 Truck | GMC C1500 Truck Front Driver Side Door Lock Actuator TRQ BDA81609 |
| 1988-2000 | GMC | C2500 Truck | GMC C2500 Truck Front Driver Side Door Lock Actuator TRQ BDA81609 |
| 1988-2000 | GMC | C3500 Truck | GMC C3500 Truck Front Driver Side Door Lock Actuator TRQ BDA81609 |
| 1991-2002 | GMC | C3500HD | GMC C3500HD Front Driver Side Door Lock Actuator TRQ BDA81609 |
| 1990-1991 | GMC | C5000 Topkick | GMC C5000 Topkick Front Driver Side Door Lock Actuator TRQ BDA81609 |
| 1990-1996 | GMC | C6000 Topkick | GMC C6000 Topkick Front Driver Side Door Lock Actuator TRQ BDA81609 |
| 1997-2002 | GMC | C6500 Topkick | GMC C6500 Topkick Front Driver Side Door Lock Actuator TRQ BDA81609 |
| 1990-1996 | GMC | C7000 Topkick | GMC C7000 Topkick Front Driver Side Door Lock Actuator TRQ BDA81609 |
| 1997-2002 | GMC | C7500 Topkick | GMC C7500 Topkick Front Driver Side Door Lock Actuator TRQ BDA81609 |
| 1988-1993 | GMC | Jimmy | GMC Jimmy Front Driver Side Door Lock Actuator TRQ BDA81609 |
| 1988-1991 | GMC | Jimmy S-15 | GMC Jimmy S-15 Front Driver Side Door Lock Actuator TRQ BDA81609 |
| 1988-1999 | GMC | K1500 Truck | GMC K1500 Truck Front Driver Side Door Lock Actuator TRQ BDA81609 |
| 1988-2000 | GMC | K2500 Truck | GMC K2500 Truck Front Driver Side Door Lock Actuator TRQ BDA81609 |
| 1988-2000 | GMC | K3500 Truck | GMC K3500 Truck Front Driver Side Door Lock Actuator TRQ BDA81609 |
| 1988-1990 | GMC | S-15 Pickup | GMC S-15 Pickup Front Driver Side Door Lock Actuator TRQ BDA81609 |
| 1991-1993 | GMC | S-15 Sonoma | GMC S-15 Sonoma Front Driver Side Door Lock Actuator TRQ BDA81609 |
| 1985-1992 | GMC | Safari | GMC Safari Front Driver Side Door Lock Actuator TRQ BDA81609 |
| 1992-1999 | GMC | Suburban C1500 | GMC Suburban C1500 Front Driver Side Door Lock Actuator TRQ BDA81609 |
| 1992-1999 | GMC | Suburban C2500 | GMC Suburban C2500 Front Driver Side Door Lock Actuator TRQ BDA81609 |
| 1992-1999 | GMC | Suburban K1500 | GMC Suburban K1500 Front Driver Side Door Lock Actuator TRQ BDA81609 |
| 1992-1999 | GMC | Suburban K2500 | GMC Suburban K2500 Front Driver Side Door Lock Actuator TRQ BDA81609 |
| 1991 | GMC | Syclone | GMC Syclone Front Driver Side Door Lock Actuator TRQ BDA81609 |
| 1992-1993 | GMC | Typhoon | GMC Typhoon Front Driver Side Door Lock Actuator TRQ BDA81609 |
| 1992-1999 | GMC | Yukon | GMC Yukon Front Driver Side Door Lock Actuator TRQ BDA81609 |
| 2000 | GMC | Yukon | GMC Yukon Denali Front Driver Side Door Lock Actuator TRQ BDA81609 |
| 1991-1993 | Oldsmobile | Bravada | Olds Bravada Front Driver Side Door Lock Actuator TRQ BDA81609 |
| Brand Label | Part Number |
|---|---|
| DIY Solutions | BSS00105 |
| General Motors | 16631627 |
| SKP | SK940102 |
| BWD | DLA1941 |
| Dorman - OE Solutions | 940-102 |
| Standard Motor Products | DLA1217 |
| A Premium | APDLA0185 |
This item may be interchangeable with parts from other brands with the above part numbers. This information is provided only for reference and does not guarantee that the item you are purchasing is identical to parts with part numbers from the brands listed above. To confirm that this item fits your vehicle, use the above "Check Vehicle Fit" option.
Lifetime Warranty
This item is backed by our limited lifetime warranty. In the event that this item should fail due to manufacturing defects during intended use, we will replace the part free of charge. This warranty covers the cost of the part only.
Returns: Parts with electrical components cannot be returned once installed.
FREE Shipping is standard on Orders shipped to the lower 48 States (Contiguous United States). Standard shipping charges apply to Hawaii, Alaska and US Territories. Shipping is not available to Canada.
Expedited is available on checkout to the United States, excluding Alaska, Hawaii and US Territories as well as P.O. Boxes and APO/FPO/DPO addresses. Final shipping costs are available at checkout.
Created on:
Tools used
Hi, I'm Mike from 1AAuto. We've been selling auto parts for over 30 years! We're dedicated to delivering quality auto parts, expert customer service, and fast and free shipping, all backed by our 100% satisfaction guarantee. So visit us at 1AAuto.com, your trusted source for quality auto parts.
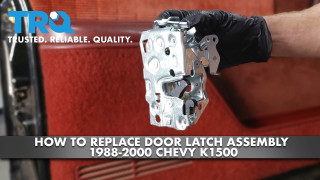
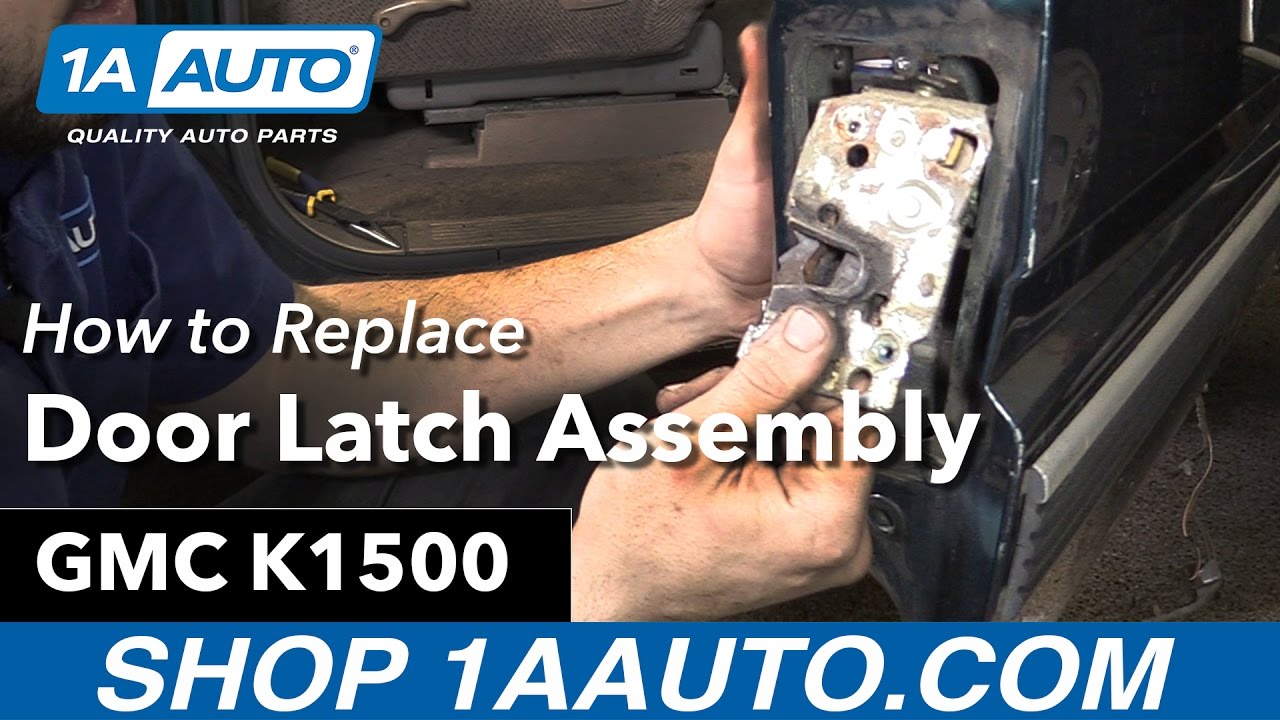
In this video we're going to be working with our 1996 GMC Sierra. We're going to show you how to remove and replace your vehicle's door latch mechanism. If you like this video, please click subscribe. We have a ton more information on this and many other vehicles. And if you ever need parts for your truck, you can follow the link down in the description over to 1AAuto.com.
Here are the items you'll need for this repair: In this video we're going to be working with our 1996 GMC Sierra. We're going to show you how to remove and replace your vehicle's door latch mechanism. If you like this video, please click subscribe. We have a ton more information on this and many other vehicles. And if you ever need parts for your truck, you can follow the link down in the description over to 1AAuto.com.
Here are the items you'll need for this repair: Interior trim removal tool, 7mm socket, 10mm socket, ratchet, socket extension, Phillips screwdriver, flat blade screwdriver, T30 socket, painter’s tape, pick tool
Remove the two Phillips head screws inside of the armrest on the door. Do this with a Phillips head screwdriver. To remove the bezel around the interior door handle, you need to kind of get in there with a trim tool or a flat blade screwdriver, and push down on the tab to release it. There are three: one at the top, one at the bottom, and one on the side.
Remove the extension at the top of the door panel by prying out with a trim tool. Using your trim tool, pry up at the back of the power window switch. Lift it up and pull back to release the hook at the front. Disconnect the connector for your tweeter. Pop up the tab on this two pin connector at the front of the window switch, and pop the connector out, and then push down on the tab for the main connector and remove that from the switch. I'm using a pick here. You could also use a small flat blade screwdriver or a trim tool if you had to, really whatever works best for you.
Using the trim tool, pop out on the door reflector and remote the connector. This is another one of the ones we'll have to lift up on the tab with a pick. Using a trim tool, pry out the bottom of the door. You may need to work it a little bit to figure out where the tabs are. You'll also need to pop out this pin at the top on the front of the door. Once all the tabs are out, lift the panel up and remove it from the door.
Peel off the inner water shield on the door. There's also a small piece over in the corner. Make sure your window is rolled all the way down. There are ten 7 millimeter screws around the perimeter of the inner panel. One under the speaker here that's a little tricky to see, and a 10 millimeter at the front. We'll need to remove all of those with a socket and ratchet. Pull the panel forward. Pull out the handle rod. It may help to have a tool to help you get some leverage on it. You'll also want to pop that out of its guide clip. Same thing with the lock rod down here. We'll also need to pop this out of its guide rod and pull it out of the lock actuator as well. Pop out the tab for the courtesy light in the door. Lift up on the cover for the door lock actuator, and remove that connector. You need to fish it out and around. Pop that retainer through, and then pop out all the rest of the retaining clips to remove the harness from the door.
You'll also need to unplug the window motor and the door speaker. Pull the harness through the door. Slide the door panel forward until the window roller is out of its channel, then slide the guide out of the back, and remove the assembly from your vehicle.
Lift up on the glass in the door. Bring it all the way up, and use some painter's tape to secure it in the up position. Move the 10 millimeter bolt on the door jamb side of the handle. You'll also need to remove the 10 millimeter bolt on the backside of the door handle. You'll need to remove both of the rods for the door handle, as well as the door lock. You may need a small flat blade screwdriver to help get the leverage you need to remove them. It's kind of tough to see, but you can sort of feel in there with a small screwdriver. Hopefully get enough leverage to pop that out. Remove the door handle from the door.
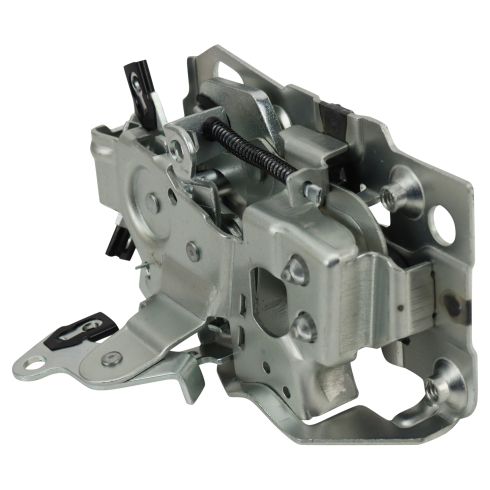
Now just like you did to remove your lock rod, you're going to want to pry this clip up, or you can just split it like I am here, and remove the latch from the vehicle. Using a T30 Torx socket and a ratchet, remove the three T-30 Torx bolts securing the latch mechanism into the door. Using a 7 millimeter socket and ratchet, we'll remove these three screws. You can then remove the door vent, drop down your latch mechanism, and remove it from the door.
Reinstall the door latch mechanism. Line it back up with its slots and reinstall the three T30 Torx screws. Reinstall the T30 Torx screws with your Torx bit and ratchet. Reinstall the door vent with all three of your 7 millimeter screws.
Reconnect the door latch rod, and reinstall the door handle into the vehicle. Line up your door handle and reinstall the two 10-millimeter bolts. Pop the lock rod back into its clip.
Remove the tape that's holding your window up, and support the window from the bottom side, then carefully lower your window and allow it to rest on the bottom stop.
Reconnect your door speaker and your window motor, and send the rest of your wiring harness back through the door. Slide the back half of your window regulator back into the window track. Once the back is in, slide forward and install the front part of the regulator into the glass as well. Reconnect the door lock as well as the door handle. Don't forget to engage the lock actuator, and snap both rods back into their guides.
Realign your door panel. Reinstall your wiring harness. Make sure that all the tabs and retainers go back in their appropriate places. Make sure you run the harness through, and reconnect the door actuator as well. Lock the clasp in for your reflector, courtesy light, and reinstall the ten 7 millimeter screws around the perimeter, as well as the one 10 millimeter. Reinstall the water shield. Sometimes this adhesive doesn't really want to stick a second time, if that's the case, it's all right to put some tape on there to secure the edges.
Pull your wire harness back through the door and lay the top edge into the door frame. Line up the plastic containers and push them all back into place. Reinstall the inner door handle bezel by lining it up and snapping it in. Reinstall your reflector. Place the upper door extension into place. Reinstall the two Phillips head screws in the armrest.
Reconnect your door speaker as well as the two electrical connections on the power window switch. Slide the front hook into the door panel. Snap the back into place, and you're good to go.
Remove the two Phillips head screws inside of the armrest on the door. Do this with a Phillips head screwdriver. To remove the bezel around the interior door handle, you need to kind of get in there with a trim tool or a flat blade screwdriver, and push down on the tab to release it. There are three: one at the top, one at the bottom, and one on the side.
Remove the extension at the top of the door panel by prying out with a trim tool. Using your trim tool, pry up at the back of the power window switch. Lift it up and pull back to release the hook at the front. Disconnect the connector for your tweeter. Pop up the tab on this two pin connector at the front of the window switch, and pop the connector out, and then push down on the tab for the main connector and remove that from the switch. I'm using a pick here. You could also use a small flat blade screwdriver or a trim tool if you had to, really whatever works best for you.
Using the trim tool, pop out on the door reflector and remote the connector. This is another one of the ones we'll have to lift up on the tab with a pick. Using a trim tool, pry out the bottom of the door. You may need to work it a little bit to figure out where the tabs are. You'll also need to pop out this pin at the top on the front of the door. Once all the tabs are out, lift the panel up and remove it from the door.
Peel off the inner water shield on the door. There's also a small piece over in the corner. Make sure your window is rolled all the way down. There are ten 7 millimeter screws around the perimeter of the inner panel. One under the speaker here that's a little tricky to see, and a 10 millimeter at the front. We'll need to remove all of those with a socket and ratchet. Pull the panel forward. Pull out the handle rod. It may help to have a tool to help you get some leverage on it. You'll also want to pop that out of its guide clip. Same thing with the lock rod down here. We'll also need to pop this out of its guide rod and pull it out of the lock actuator as well. Pop out the tab for the courtesy light in the door. Lift up on the cover for the door lock actuator, and remove that connector. You need to fish it out and around. Pop that retainer through, and then pop out all the rest of the retaining clips to remove the harness from the door.
You'll also need to unplug the window motor and the door speaker. Pull the harness through the door. Slide the door panel forward until the window roller is out of its channel, then slide the guide out of the back, and remove the assembly from your vehicle.
Lift up on the glass in the door. Bring it all the way up, and use some painter's tape to secure it in the up position. Move the 10 millimeter bolt on the door jamb side of the handle. You'll also need to remove the 10 millimeter bolt on the backside of the door handle. You'll need to remove both of the rods for the door handle, as well as the door lock. You may need a small flat blade screwdriver to help get the leverage you need to remove them. It's kind of tough to see, but you can sort of feel in there with a small screwdriver. Hopefully get enough leverage to pop that out. Remove the door handle from the door.
Now just like you did to remove your lock rod, you're going to want to pry this clip up, or you can just split it like I am here, and remove the latch from the vehicle. Using a T30 Torx socket and a ratchet, remove the three T-30 Torx bolts securing the latch mechanism into the door. Using a 7 millimeter socket and ratchet, we'll remove these three screws. You can then remove the door vent, drop down your latch mechanism, and remove it from the door.
Reinstall the door latch mechanism. Line it back up with its slots and reinstall the three T30 Torx screws. Reinstall the T30 Torx screws with your Torx bit and ratchet. Reinstall the door vent with all three of your 7 millimeter screws.
Reconnect the door latch rod, and reinstall the door handle into the vehicle. Line up your door handle and reinstall the two 10-millimeter bolts. Pop the lock rod back into its clip.
Remove the tape that's holding your window up, and support the window from the bottom side, then carefully lower your window and allow it to rest on the bottom stop.
Reconnect your door speaker and your window motor, and send the rest of your wiring harness back through the door. Slide the back half of your window regulator back into the window track. Once the back is in, slide forward and install the front part of the regulator into the glass as well. Reconnect the door lock as well as the door handle. Don't forget to engage the lock actuator, and snap both rods back into their guides.
Realign your door panel. Reinstall your wiring harness. Make sure that all the tabs and retainers go back in their appropriate places. Make sure you run the harness through, and reconnect the door actuator as well. Lock the clasp in for your reflector, courtesy light, and reinstall the ten 7 millimeter screws around the perimeter, as well as the one 10 millimeter. Reinstall the water shield. Sometimes this adhesive doesn't really want to stick a second time, if that's the case, it's all right to put some tape on there to secure the edges.
Pull your wire harness back through the door and lay the top edge into the door frame. Line up the plastic containers and push them all back into place. Reinstall the inner door handle bezel by lining it up and snapping it in. Reinstall your reflector. Place the upper door extension into place. Reinstall the two Phillips head screws in the armrest.
Reconnect your door speaker as well as the two electrical connections on the power window switch. Slide the front hook into the door panel. Snap the back into place, and you're good to go.
Thanks for watching. Visit us at 1AAuto.com for quality auto parts, fast and free shipping, and the best customer service in the industry.
This was a perfect fit for 87 gmc sierra. I've had this on for over 2 months and this working great.
Excellent part with a great video on how to install it
Perfect
It works perfectly!
The part is exactly the right one for my 1989 Chev Silverado. This is one of the most difficult replacements I have ever done. It would have been very very bad if the part were not the right one. Thank you 1A
Part fit very well. My only problem is the the latch that hits the door striker is really loose. you can hear how loose it is when opening door.
Fit well

BDA81609
