
★★★★★
September 24, 2026
Good quality and price.
This has been my go to place for years, good quality at a great price. The free shipping is also a plus.

Replaces






About TRQ:
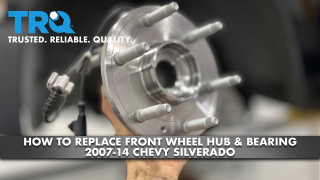
TRQ is a trusted brand dedicated to making every repair a success story by combining premium parts with easy installation. Each TRQ part is engineered by a team of automotive experts to meet or exceed OEM standards, delivering enhanced performance and maximum longevity. With rigorous in-house testing, the brand ensures superior fit and function across every product line. TRQ also provides customers with best-in-class, step-by-step installation videos—so you can complete repairs with confidence, whether you're a first-time DIYer or an industry professional.
Attention California Customers:
 WARNING: This product can expose you to chemicals including Lead and Lead Compounds, which are known to the State of California to cause cancer, and birth defects or other reproductive harm. For more information, go to www.P65Warnings.ca.gov.
This part fits 44 vehicles spanning 2007-2014.
| Year | Make | Model | Description |
|---|---|---|---|
| 2007-2014 | Cadillac | Escalade | Cadillac Escalade All Wheel Drive Front Passenger Side Wheel Bearing & Hub Assembly TRQ BHA48300 |
| 2007-2014 | Cadillac | Escalade | Cadillac Escalade All Wheel Drive Front Driver Side Wheel Bearing & Hub Assembly TRQ BHA48300 |
| 2007 | Cadillac | Escalade ESV | Cadillac Escalade ESV Front Passenger Side Wheel Bearing & Hub Assembly TRQ BHA48300 |
| 2007 | Cadillac | Escalade ESV | Cadillac Escalade ESV Front Driver Side Wheel Bearing & Hub Assembly TRQ BHA48300 |
| 2008-2014 | Cadillac | Escalade ESV | Cadillac Escalade ESV All Wheel Drive Front Passenger Side Wheel Bearing & Hub Assembly TRQ BHA48300 |
| 2008-2014 | Cadillac | Escalade ESV | Cadillac Escalade ESV All Wheel Drive Front Driver Side Wheel Bearing & Hub Assembly TRQ BHA48300 |
| 2007-2013 | Cadillac | Escalade EXT | Cadillac Escalade EXT Front Driver Side Wheel Bearing & Hub Assembly TRQ BHA48300 |
| 2007-2013 | Cadillac | Escalade EXT | Cadillac Escalade EXT Front Passenger Side Wheel Bearing & Hub Assembly TRQ BHA48300 |
| 2007-2013 | Chevrolet | Avalanche | Chevrolet Avalanche 4 Wheel Drive Front Passenger Side Wheel Bearing & Hub Assembly TRQ BHA48300 |
| 2007-2013 | Chevrolet | Avalanche | Chevrolet Avalanche 4 Wheel Drive Front Driver Side Wheel Bearing & Hub Assembly TRQ BHA48300 |
| 2007 | Chevrolet | Silverado 1500 | Chevrolet Silverado 1500 WT 4 Wheel Drive Front Driver Side Wheel Bearing & Hub Assembly TRQ BHA48300 |
| 2007 | Chevrolet | Silverado 1500 | Chevrolet Silverado 1500 LTZ 4 Wheel Drive Front Driver Side Wheel Bearing & Hub Assembly TRQ BHA48300 |
| 2007 | Chevrolet | Silverado 1500 | Chevrolet Silverado 1500 LT 4 Wheel Drive Front Driver Side Wheel Bearing & Hub Assembly TRQ BHA48300 |
| 2007 | Chevrolet | Silverado 1500 | Chevrolet Silverado 1500 LTZ 4 Wheel Drive Front Passenger Side Wheel Bearing & Hub Assembly TRQ BHA48300 |
| 2007 | Chevrolet | Silverado 1500 | Chevrolet Silverado 1500 LT 4 Wheel Drive Front Passenger Side Wheel Bearing & Hub Assembly TRQ BHA48300 |
| 2007 | Chevrolet | Silverado 1500 | Chevrolet Silverado 1500 WT 4 Wheel Drive Front Passenger Side Wheel Bearing & Hub Assembly TRQ BHA48300 |
| 2008-2013 | Chevrolet | Silverado 1500 | Chevrolet Silverado 1500 4 Wheel Drive Front Driver Side Wheel Bearing & Hub Assembly TRQ BHA48300 |
| 2008-2013 | Chevrolet | Silverado 1500 | Chevrolet Silverado 1500 4 Wheel Drive Front Passenger Side Wheel Bearing & Hub Assembly TRQ BHA48300 |
| 2007-2014 | Chevrolet | Suburban 1500 | Chevrolet Suburban 1500 4 Wheel Drive Front Driver Side Wheel Bearing & Hub Assembly TRQ BHA48300 |
| 2007-2014 | Chevrolet | Suburban 1500 | Chevrolet Suburban 1500 4 Wheel Drive Front Passenger Side Wheel Bearing & Hub Assembly TRQ BHA48300 |
| 2007-2013 | Chevrolet | Tahoe | Chevrolet Tahoe 4 Wheel Drive Front Passenger Side Wheel Bearing & Hub Assembly TRQ BHA48300 |
| 2007-2013 | Chevrolet | Tahoe | Chevrolet Tahoe 4 Wheel Drive Front Driver Side Wheel Bearing & Hub Assembly TRQ BHA48300 |
| 2014 | Chevrolet | Tahoe | Chevrolet Tahoe SSV 4 Wheel Drive Front Driver Side Wheel Bearing & Hub Assembly TRQ BHA48300 |
| 2014 | Chevrolet | Tahoe | Chevrolet Tahoe LS 4 Wheel Drive Front Driver Side Wheel Bearing & Hub Assembly TRQ BHA48300 |
| 2014 | Chevrolet | Tahoe | Chevrolet Tahoe PPV Rear Wheel Drive Front Passenger Side Wheel Bearing & Hub Assembly TRQ BHA48300 |
| 2014 | Chevrolet | Tahoe | Chevrolet Tahoe SSV 4 Wheel Drive Front Passenger Side Wheel Bearing & Hub Assembly TRQ BHA48300 |
| 2014 | Chevrolet | Tahoe | Chevrolet Tahoe LT 4 Wheel Drive Front Driver Side Wheel Bearing & Hub Assembly TRQ BHA48300 |
| 2014 | Chevrolet | Tahoe | Chevrolet Tahoe LTZ 4 Wheel Drive Front Driver Side Wheel Bearing & Hub Assembly TRQ BHA48300 |
| 2014 | Chevrolet | Tahoe | Chevrolet Tahoe LTZ 4 Wheel Drive Front Passenger Side Wheel Bearing & Hub Assembly TRQ BHA48300 |
| 2014 | Chevrolet | Tahoe | Chevrolet Tahoe LS 4 Wheel Drive Front Passenger Side Wheel Bearing & Hub Assembly TRQ BHA48300 |
| 2014 | Chevrolet | Tahoe | Chevrolet Tahoe LT 4 Wheel Drive Front Passenger Side Wheel Bearing & Hub Assembly TRQ BHA48300 |
| 2014 | Chevrolet | Tahoe | Chevrolet Tahoe PPV Rear Wheel Drive Front Driver Side Wheel Bearing & Hub Assembly TRQ BHA48300 |
| 2007-2013 | GMC | Sierra 1500 | GMC Sierra 1500 All Wheel Drive Front Driver Side Wheel Bearing & Hub Assembly TRQ BHA48300 |
| 2007-2013 | GMC | Sierra 1500 | GMC Sierra 1500 4 Wheel Drive Front Driver Side Wheel Bearing & Hub Assembly TRQ BHA48300 |
| 2007-2013 | GMC | Sierra 1500 | GMC Sierra 1500 All Wheel Drive Front Passenger Side Wheel Bearing & Hub Assembly TRQ BHA48300 |
| 2007-2013 | GMC | Sierra 1500 | GMC Sierra 1500 4 Wheel Drive Front Passenger Side Wheel Bearing & Hub Assembly TRQ BHA48300 |
| 2007-2014 | GMC | Yukon | GMC Yukon All Wheel Drive Front Driver Side Wheel Bearing & Hub Assembly TRQ BHA48300 |
| 2007-2014 | GMC | Yukon | GMC Yukon 4 Wheel Drive Front Driver Side Wheel Bearing & Hub Assembly TRQ BHA48300 |
| 2007-2014 | GMC | Yukon | GMC Yukon All Wheel Drive Front Passenger Side Wheel Bearing & Hub Assembly TRQ BHA48300 |
| 2007-2014 | GMC | Yukon | GMC Yukon 4 Wheel Drive Front Passenger Side Wheel Bearing & Hub Assembly TRQ BHA48300 |
| 2007-2014 | GMC | Yukon XL 1500 | GMC Yukon XL 1500 4 Wheel Drive Front Driver Side Wheel Bearing & Hub Assembly TRQ BHA48300 |
| 2007-2014 | GMC | Yukon XL 1500 | GMC Yukon XL 1500 4 Wheel Drive Front Passenger Side Wheel Bearing & Hub Assembly TRQ BHA48300 |
| 2007-2013 | GMC | Yukon XL 1500 | GMC Yukon XL 1500 All Wheel Drive Front Driver Side Wheel Bearing & Hub Assembly TRQ BHA48300 |
| 2007-2013 | GMC | Yukon XL 1500 | GMC Yukon XL 1500 All Wheel Drive Front Passenger Side Wheel Bearing & Hub Assembly TRQ BHA48300 |
| Brand Label | Part Number |
|---|---|
| MOOG Hub Assemblies | 515096 |
| ACDelco | FW346 |
| ACDelco | FW303 |
| Timken | SP500301 |
| Drive Tech America | NT515096 |
| Mevotech | H515096 |
| Chicago Rawhide | BR930661 |
| General Motors | 25918329 |
| SKF | BR930661 |
| General Motors | 25976819 |
| General Motors | 10393171 |
| Raybestos Brakes | 715096 |
| Hollander | 538-00128 |
| Mevotech Supreme | H515096 |
This item may be interchangeable with parts from other brands with the above part numbers. This information is provided only for reference and does not guarantee that the item you are purchasing is identical to parts with part numbers from the brands listed above. To confirm that this item fits your vehicle, use the above "Check Vehicle Fit" option.
Lifetime Warranty
This item is backed by our limited lifetime warranty. In the event that this item should fail due to manufacturing defects during intended use, we will replace the part free of charge. This warranty covers the cost of the part only.
FREE Shipping is standard on orders shipped to the lower 48 States (Contiguous United States). Standard shipping charges apply to Hawaii and Alaska.
Shipping is not available to a P.O. Box, APO/FPO/DPO addresses, US Territories, or Canada for this item.
Expedited is available on checkout to the United States, excluding Alaska, Hawaii.
Final shipping costs are available at checkout.
Created on:
Tools used
Brought to you by 1AAuto.com, your source for quality replacement parts and the best service on the Internet.
Hi, I'm Mike from 1A Auto. I hope this how-to video helps you out, and next time you need parts for your vehicle, think of 1AAuto.com. Thanks.
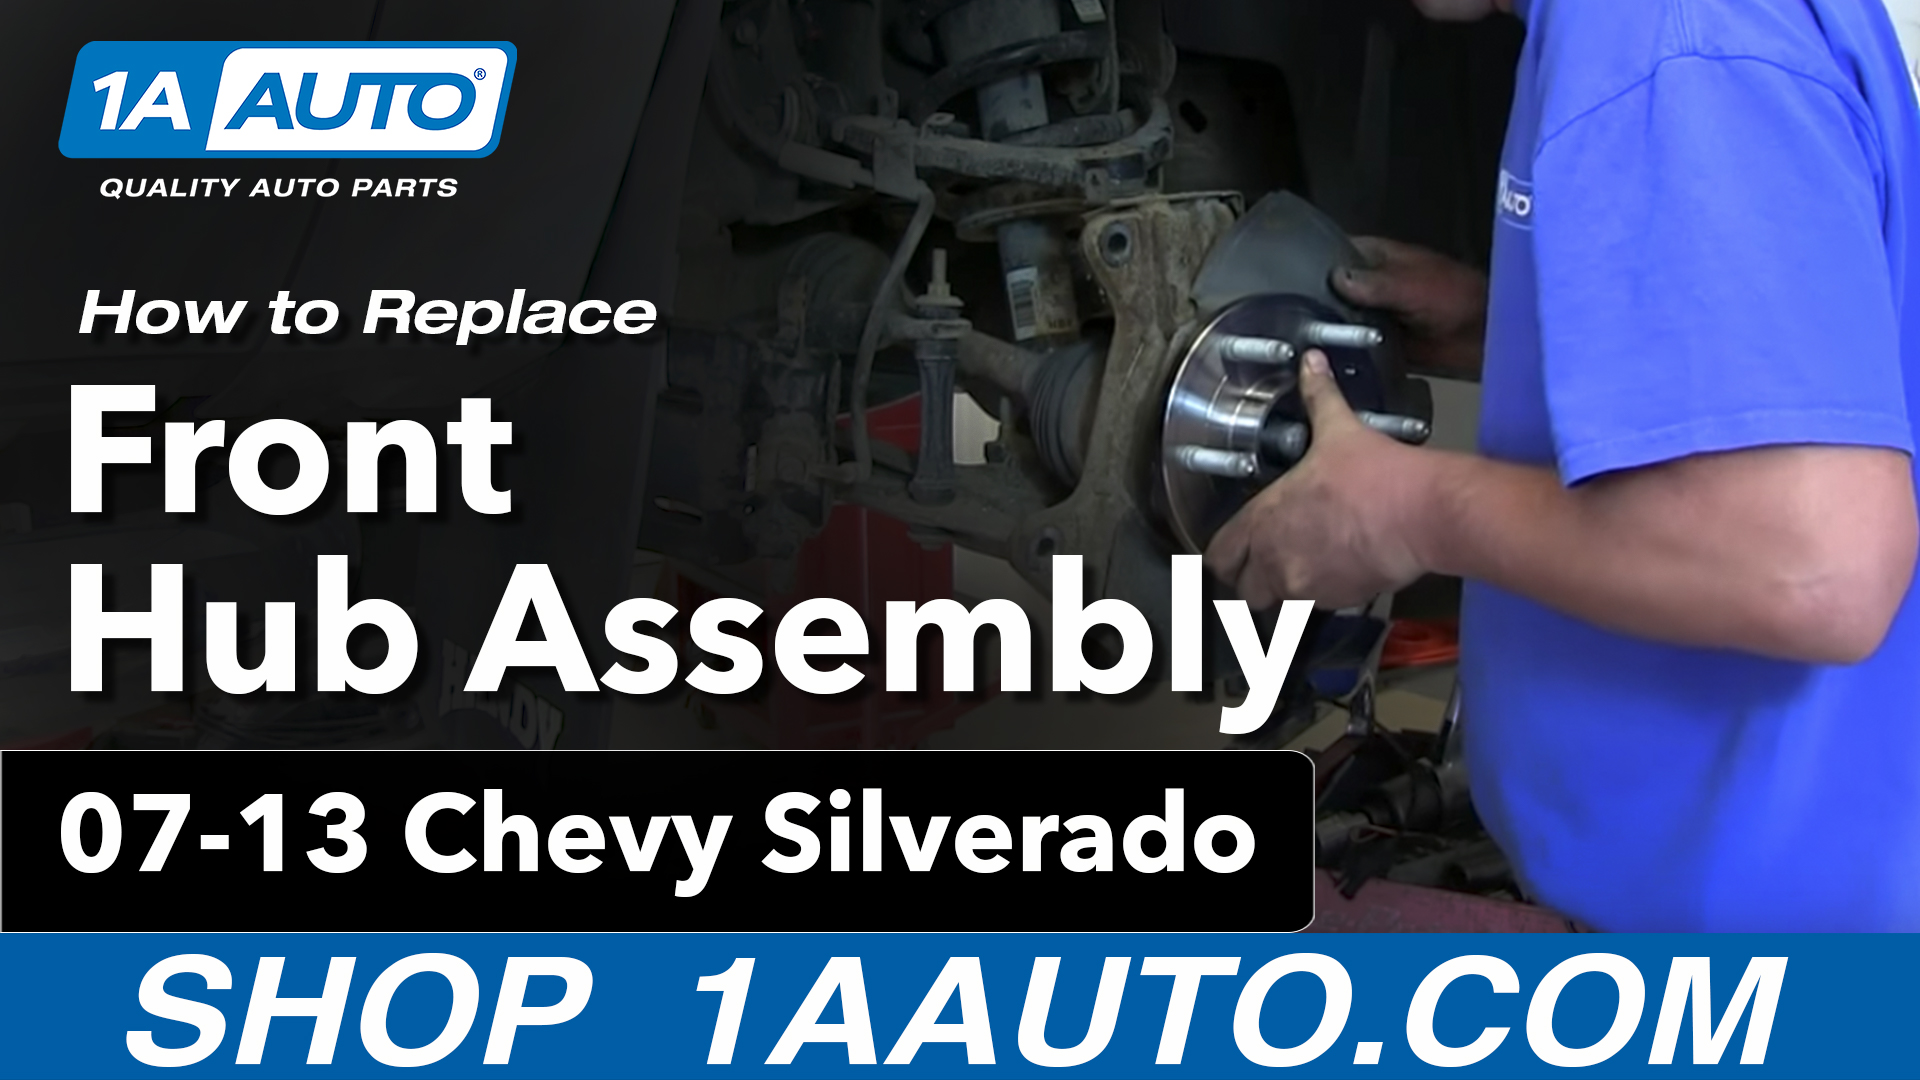
In this video, we're going to replace the front hub on this 2011 Chevy Silverado. It's a 1500, four-wheel drive. We're going to replace the right-hand or passenger side, the same procedure of the left-hand driver's side. This is the same for a 2007 through 2013 Silverado 1500 as well as GMC Sierra 1500 with four-wheel drive.
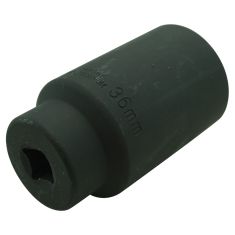
Items you'll need are a new hub or hubs from 1AAuto.com, jack and jack stands, 15 to 22mm sockets with ratchet. You'll need a breaker bar, and/or a pipe for some extra leverage, T-30 torx bit with driver, 36mm socket for the center hub nuts, some penetrating oil, wire brush, small pry bar, hammer, grease and a torque wrench.
Take your flat-blade screw driver and pry off the center cap. I apologize. I'm going a little bit out of order here. You can see we already have the wheel off. If you don't have the benefit of air tools, you're going to want to remove this cap by using a screw driver or a coal chisel and hammer or a large set of pliers, and remove that cap to expose that center nut. The center hub nut is 36mm. If you have an impact wrench do it that way. If not, you'll need a large breaker bar or a pipe for some extra leverage, 36mm socket, hold the brakes and remove the center hub nut. Once the nut is off, just make sure that your axle is free. After you get that nut off, then you can loosen your lug nuts and raise and secure the vehicle and remove your wheel and tire.
By hand, or using the steering wheel, turn so you can access the back of the caliper. Check for any abnormal wear. Make sure that the inside and outside pads are worn about the same amount. Also, on the rotor, make sure there's no deep grooves or uneven wear. This can indicate other problems with your brake system. There are two 19mm bolts that hold the caliper on up there and there. We'll fast-forward as we use a 19mm socket and a ratchet to remove those bolts. Once you have the bolts off, just put the caliper up and out of the way. Use a screwdriver and pry the brake pads out. You can see the outer one comes out pretty easily. We had a little trouble with the inner one. We actually switched to a larger screwdriver. You can see, after a little more force it comes out. This brake pad sticking in there like that indicates there's a problem, and you want to do some clean-up and some lubrication to prevent this. There are two 18mm bolts that hold the caliper bracket to the steering knuckle there and there. You can see here, we give it a try with just the socket and ratchet, but then we use a pipe for some extra leverage and loosen up that bottom one. Then, we'll loosen up the top one, and remove the bolts and remove that caliper bracket.
There's a T-30 Torx screw that holds the rotor to the hub. We're just using a T-30 torx bit with a ratchet to remove that. Then, on this truck, the rotor actually pulls off quite easily. If your rotors don't come off easy, douse the back side and around the studs with penetrating oil. Then, use two M-10 bolts. There's two threaded holes in the rotor. You put the bolts in, and tighten them up, and they press the rotor off.
Three 15mm bolts hold the hub in. You see them there and there Another one on here. You want to spray down the back side with penetrating oil. When I say the back side, I mean here where you can see the arrows are pointing. You want to douse the back side of the bolts where they come through the hub flange. The arrows are pointing at two of them. There's obviously one more for the third bolt that's morphed with the front. Here, we're using a 15mm socket with a ratchet and a small extension. You can see, you need a little bit of extra leverage with the pipe and the bolts come off. With some extra leverage they come out fairly easily. We'll fast-forward as he does the other two. Note here, as we work on the last one, don't take this bolt all the way out yet. You'll want to use a hammer. You might have to use a lot of force to get the hub to break free. Do that before you take that last bolt all the way out. That way the hub doesn't go flying.
Secure your brake caliper. Now, you can disconnect your ABS harness. Pull the connection out of the clip to the frame. There's a little button that you press to disconnect. Then, pull the rest of the clips from the control arm and steering knuckle. Now that we've got the thing free and disconnected, we're just taking that last bolt out the rest of the way. Then pull the hub off. Then, that last clip is easier to get to what the hub and backing plate out of the way. Just use a pair of pliers, squeeze the pins on the back and release the clip.
Here, you can see the worn-out part on the left, the new part from 1A Auto. Same connector, everything is going to bolt in exactly the same. Wire brush the steering knuckle to clean it up some, and grease the hub flange. Make sure you put the hub through the backing plate, then onto the axle and steering knuckle. Press it on there as you start the bolts in from the back side. Just a few notes as we speed up: Make sure you start all three bolts in first. You don't want to tighten any one of them up until you get them all started. Then, tighten them up evenly and you will want to torque them. Torque the three bolts to 133 foot-pounds. Now, route the ABS harness back in place and reconnect it.
Free your caliper. Then, reinstall your rotor. We're just going to put a lug nut on there to hold it in place, and start putting our brakes back together. We'll continue to fast-forward as we put the caliper bracket in place, and start the two bolts that hold it in place, and then tighten them up preliminarily. Use a torque wrench to tighten those up to 100 foot pounds.
Use brake grease or white lithium grease, and grease the ends of the pads where they'll sit in the caliper brackets. You can use mineral spirits or brake cleaner, even gasoline, anything that evaporates quickly, and clean off your brakes before putting the rest of it back together.
Put the rear pad in first. Put one side in first, and then press the other side in. It should go in fairly easily The same thing for the front pad.Now, you need to reset the caliper piston. We've put the old inner brake pad back in there. Then, just use a large sea clamp. As we tighten it up, you'll see the pistons go back into the caliper. Now, put the caliper back in place. Sometimes, those slide bolts will get stuck a little bit, so you have to push them in a little bit to get the caliper to slide down in correctly. Put the caliper in place and start the two bolts on that hold it. We're going to torque these two bolts to 50 foot pounds.
Fast-forward as we remove that lug nut, and then put our wheel back on. Put the lug nuts back on by hand first, then tighten them up preliminarily. Put that center bolt back on and tighten it to 156 foot pounds. Torque the lug nuts to 100 to 110 foot pounds each using a crossing pattern. Then, that center cap does have a little tongue that goes into a groove on the wheel. Put that in place. Them, most important pump your brakes a few times. Make sure that the brakes are working good before road-testing your vehicle.
We hope this helps you out. Brought to you by www.1AAuto.com, your source for quality replacement parts and the best service on the Internet. Please feel free to call us toll-free, 888-844-3393. We're the company that's here for you on the Internet and in person.
Tools used
Hi, I'm Mike from 1AAuto. We've been selling auto parts for over 30 years.
What's up guys? I'm Andy from 1AAuto. Today I'm going to be installing this TRQ hub in this two wheel drive 2008 Chevy Silverado. If you need this part or other parts for your vehicle click the link in the description and head over to 1AAuto.com. I'm going to take a pry bar. I'm going to take this center cap off, this hubcap, just slide it over. Some models it may be a little bit different. This releases like this. There's one more clip over here just like that that comes off.
Then I'm going to take my 22 millimeter socket, take this center cap off. We can also use a seven eighth's socket. Going to take that off. I'm going to take this 22 millimeter socket and a breaker bar and I'm going to crack all these lug nuts free before we lift the vehicle. All right. Now those are all cracked free. You're going to raise and support the vehicle. We're using a two post lift. If you're doing this at your house you can use a jack and jack stands. Take that same socket and we'll take these lug nuts off. Sometimes you can just spin them off by hand. That last lug nut off, now take the tire off.
Next, I'm going to take an 18 millimeter socket and we're going to take these two caliper bracket bolts off. I'm not going to take the caliper off of the bracket we'll just take those off. I'll use a breaker bar. We'll crack these free. These are normally on there pretty tight so use a long breaker bar so you have some leverage. All right. Once those are broken free I'm going to switch to a ratchet. Take these two bolts out. Take that bolt out, set it aside. Take that bolt down as well. There is a lock tight or a thread locker on these bolts. You can use a thread locker to reinstall them or if you get new bolts generally it comes with them.
Next I'm going to take a straight blade screwdriver. I'm just going to go in here in between the caliper a little bit and just pry. That's just compressing the piston a little bit. Just do it slowly and that'll make taking this caliper and bracket off together a little easier. Slide that off. And I'm going to take a bungee cord, slide the bungee cord around the upper control arm and into the bracket for the brakes, for the brake caliper. We'll just let that hang like that. You don't want to put any pressure on the hose. Keep that out of the way just like that.
Next, we'll take this rotor off, slide it off. If your rotor was stuck on there you can take a hammer and you can hit in these locations right here. Be careful not to hit the studs. Slide that off. Next, before we take the bolts out for the hub we're going to release the electrical wiring harness for the ABS. Up here there's a connector. Disconnect this electrical connector, there's a little button on top, a little bit hard to get to so we're going to release this first. Just going to use this little trim tool underneath here, release the connector to push down on the button, just push that down. Disconnect the connector. Slide this over here. You can use the trim tool again to slide under here. Pry up on this piece, pull that out, and then over here as well. I'm just going to cut it off. Sometimes the rust will cause some issues when you're trying to get these things off. It's almost out. There we go. Break that off. That's okay.
Next on the back side there is three 15 millimeter bolts we need to take out. I'm just going to use a 15 millimeter socket and a ratchet, take these bolts out. If they're really rusted use some rust penetrant. These aren't too bad. Take that one out and just loosen these up. I'm going to use a breaker bar, try to break these free first. There we go. All right. Once those are broken free switch back to the ratchet. Take that one out and then we'll take the other two out the same way. All right and then take this last one out just like that.
Next, this isn't too bad so I'm going to start with just taking a hammer. I'm going to tap it from the backside. Be careful. Once it loosens up it might fall to the ground so watch out for your feet. So, it's starting to separate a little bit because you can see the backing shield is loose so that's a good sign. So I'm just going to cap it from this side as well. Just go back and forth. There we go. Let it loose and pull it out. There is the old hub. Here is the new hub from 1AAuto.com. It's a TRQ hub. The sensor is the same, the backside looks the same, front studs, everything's machined the same. Get yours from 1AAuto.com and you'll be ready to rock and roll.
Before we install the hub I'm just going to take a wire brush and we'll just clean this area out. Get some of that rust off. Maybe take a die grinder also to be a little bit easier. And then, if there's any spots of rust on the backing shield you can clean that off. This one's not too bad. Now take the new hub, slide the wire harness through the shield just like that. We will reposition it in the correct location like that. Take the bolts, slide the bolts in your position. You may have to loosen up the hub, pull the hub out a little bit to get the holes to line up. It's a little easier once you get the first bolt started.
So, the first bolt is in. Now take the other two bolts, get those started. All right. Those are started. You want to keep in mind to watch out for the ABS harness. We don't want that to get tightened down. When you're tightening down the hub sometimes they get in the way and you can pinch a wire. Now we're going to take our 15 millimeter socket and ratchet. We'll snug these up. Got those snug, now I'm going to torque them. I'm going to torque those with a torque wrench to 133 foot pounds. First one, second one, and the last one. There we go.
Next we're going to install the ABS wiring harness. You can slide this connector right into here, this retainer. Make sure it's locked in there good. This one is going to go in this little bracket right there. We'll slide this under my bungee cord and then this one is going to go in here just like that. Part of that retainer broke off from before so I'll just take a screwdriver, push it down, use some wire cutters to try to pull it through. There we go. And we'll secure this to the frame. Make sure that lines up. That's good right there.
Now we're going to take our rotor. Before I put it on there I'm just going to take a wire brush and we're just going to clean any excessive rust build up on the backside of that because we're reusing this rotor. It looks pretty good. Make sure none of the rust got on the hub. Slide this rotor on. If you had a bolt that held down the rotor you're going to want to install that. This vehicle doesn't have one. Just take one of the lug nuts and put that on so it holds the rotor pretty good. Now we'll take the brake caliper off the bungee cord. Re-install that on the rotor just like that. Going to take the two caliper bolts, get that one started there. If you want to put some thread locker on you can do that.
I'll take a 18 millimeter socket and a ratchet, start snugging these bolts down. You're going to remember that when you do this job that you're going to want to pump the brake pedal a couple of times before you drive away. Even though you didn't do brakes in this job you did pull the brake caliper off and there is still going to be an air gap there so pump the brake pedal. All right, those are snug. Now we're going to torque those. Torque those two bolts to 129 foot pounds. This top one as well. Just like that.
Take our lug nut off. We installed the tire. Put the lug nuts on. Snug these lug nuts down. All right. Now we're going to lower the vehicle and torque those lug nuts. Now I'm going to torque these with a 22 millimeter socket and a torque wrench to 140 foot pounds. You're going to torque them in a star pattern that tightens the wheel down evenly. Just double checking they're nice and tight. Position the center cap. Take the socket, just tighten these down. Take this hubcap, now line this up with the valve, the tire valve. Push it on just like that. Now I'm going to pump the brake pedal because there is going to be an air gap between the brake pads and the caliper piston and this will get rid of that air gap so you'd be good to go.
Thanks for watching. Visit us at 1AAuto.com for quality auto parts, fast and free shipping, and the best customer service in the industry.


This has been my go to place for years, good quality at a great price. The free shipping is also a plus.
A1 Auto offered the part I needed at a fair price. The part was described well and came exactly as described. Most importantly, it fit perfectly.
good quality and perfect fit thanks
Price and shipping were great. It arrived on time like promised.
Great part, fast shipping, can't beat the price
It was great. It fit perfectly and was about half the price of a local store. It arrived in a couple of days.
Great quality fast shipping
Perfect fit no issue with hub assembly.
Exact Fit, hub bearing assembly includes the wheel speed position sensor, feels like good materials and quality were part of the build. thanks.
Great product and very easy to install. My first time changing a hub/wheel bearing. This made it easy and simple!

BHA48300
Yes, this part will fit your 07 GMC Sierra 1500 4 Wheel Drive.
Thats not true most of the parts that I have order it takes a few days to get them not weeks or months.
We would suggest torquing using the specifications of the vehicle on the sheet.
This part is listed to fit both the driver and passenger side.
We do not have a specific country of origin for the parts.
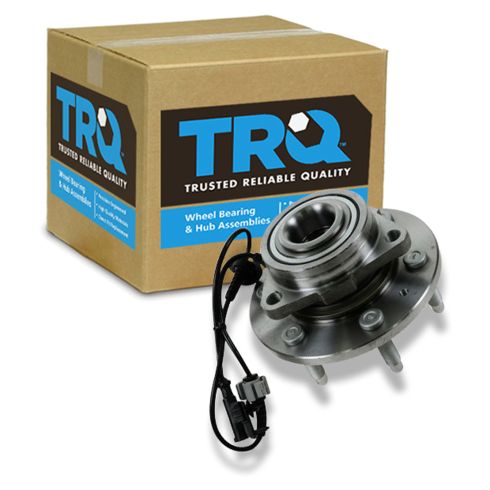
Yes, the Anti Lock Brake Sensor is included. The part will come as pictured.
Hello, that is a great question. It is common on most vehicles to have different wheel bearings front and rear.. but generally as long as the connector for the abs sensor connects in the wheel bearing for the front should work on the drivers or passenger side. I hope this helps. Drive safe
Yes, this will fit driver or passenger side for the vehicles listed. Just be sure to verify all of the information shown in the Vehicle Fit tab before ordering.
Yes it was a perfect fit
These are specific to 4WD or AWD applications. Please view our other listings for the appropriate replacement.
