Replaces


Part Details
Specifications
Attention California Customers:
 WARNING: This product can expose you to chemicals including Lead and Lead Compounds, which are known to the State of California to cause cancer, and birth defects or other reproductive harm. For more information, go to www.P65Warnings.ca.gov.
Lifetime Warranty
This item is backed by our limited lifetime warranty. In the event that this item should fail due to manufacturing defects during intended use, we will replace the part free of charge. This warranty covers the cost of the part only.
FREE Shipping is standard on orders shipped to the lower 48 States (Contiguous United States). Standard shipping charges apply to Hawaii and Alaska.
Shipping is not available to a P.O. Box, APO/FPO/DPO addresses, US Territories, or Canada for this item.
Expedited is available on checkout to the United States, excluding Alaska, Hawaii.
Final shipping costs are available at checkout.

Created on:
Tools used
Brought to you by 1AAuto.com, your source for quality replacement parts and the best service on the Internet.
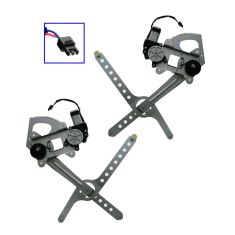
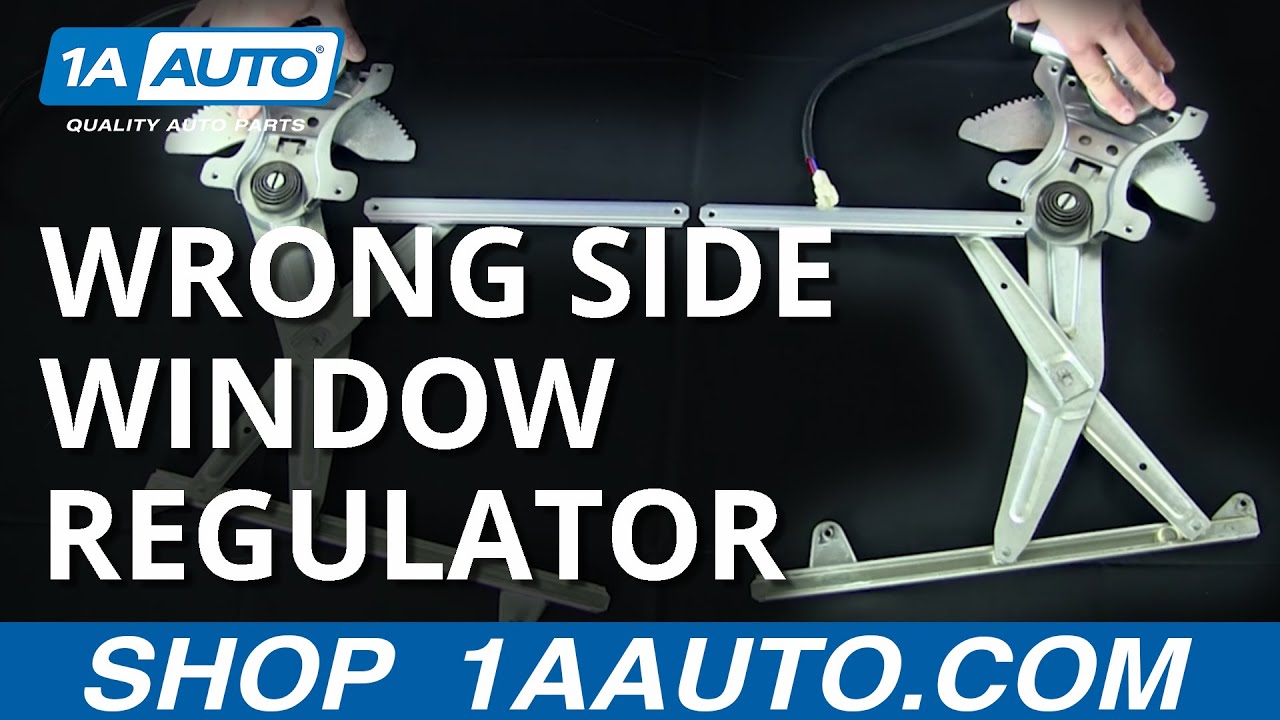
Hey, I'm Brian, I'm here to give you guys a little tutorial on some window regulators. The specific design is the scissor design. We actually get a lot of calls on these products here and the common question is: The part I received seems different than the part in my vehicle.
The scissor design actually has a flip design and we're actually going to show you how to fix this here. The most common thing that you want to do, or the first step you want to do is lay the parts out side by side. Try not to match them up in the car because this can get confusing. Take it out, lay them side by side, and what you actually see here is a same exact part for the same model vehicle in the same door. As the appearance shows here, they seem to be mirrored.
If you look down at the bottom here, we have the power window motor. This is the piece that is actually powered to lift and lower your glass. The next section down here is . you actually have your gear drive. Here's your mounting plates on both. As you can see, it's identical. You have your tension spring here. If you notice on the upper section here, it's kind of reversed. You're going to think normally, I get the wrong side door. You're going to give us a call and you want to express that to one of our customer service reps. I'm going to show you how to fix this.
Basically, pick this up by the base and you want to scissor or flip. This is how you're going to fix the issue. It's going to actually match the component as shown there. You can now see that both of these components here are the same part and you're ready for installation.
You should be good to go. Click on Subscribe or check us out at 1AAuto.com. We'd be more than happy to have you join on board and join the 1AAuto team.
Thanks for tuning in. We hope this video helps you out. Brought to you by www.1AAuto.com, your source for quality replacement parts and the best service on the Internet. Please feel free to call us toll-free, 888-844-3393. We're the company that's here for you on the Internet and in person.
Tools used
Brought to you by 1AAuto.com, your source for quality replacement parts and the best service on the Internet.
Hi, I'm Mike Green. I'm one of the owners of 1AAuto. I want to help you save time and money repairing and maintaining your vehicle. I'm going to use my 20 plus years experience, restoring and repairing cars and trucks like this to show you to correctly install parts from 1AAuto.com. The right parts installed correctly, that's going to save you time and money. Thank you and enjoy the video.
In this video, we're going to show you window regulator and door lock actuator replacement. It's pretty easy, actually. The toughest part is actually just getting to them, getting the panels off to access the regulator and lock actuator. Tools you'll need are seven-millimeter socket and ratchet or a Philips screwdriver, flat blade screwdriver, a putty knife or door panel clip tool, a ten-millimeter socket and ratchet or wrench, and a drill with a three-eighth inch drill bit.
This process is a multi-step process. First process is getting the interior door panels off. I'm fast-forwarding through it. We do have a video on this In regular motion, but you can either search for it or I've actually related it to this video. Once you get the door panel off, which is pretty simple, some screws, and couple of plates. Then I'm doing the pins, then you're on to your interior door panel. In the interest of the YouTube ten minutes, I'm just kind of fast-forwarding through this part.
We get in there, we're actually going to remove this whole plate. You're going to start by removing a series of seven-millimeter screws. One, two, three, four, five, six, seven, eight, nine I believe there's nine or ten seven-millimeter screws and there's one ten-millimeter screw up there. So, I'm going to pull those out. Now, what you want is you want your window all the way down, kind of pull out. Once you've pulled out, then you can see back in here. Just pull down this here and disconnect that from your door lock rod. Just pull that up and out. Then here's your lock rod, just pull that out. Then pull those rods from their guide clips here. You want to disconnect your lock actuator here. See, there are a bunch of little clips here with their wire harnesses using a regular pair of pliers, reaching back, and squeeze and connect the pins on the back side. I'm forcing them out. Take these harnesses, pull them back through here, and then disconnect the power window motor back here and your speaker. Then you're going to push all these wire harnesses back through the panel here.
So, now with the harnesses back in there, as you can see, I just kind of taped up those rods because they tend to get in the way. You can see down in there it's going to be hard to you can see that the rollers are in the track down at the bottom there, and that's what you do. You're sliding it forward. Get that roller out of the track, and once the front one comes out, then you take the whole thing, make sure you're not caught up on anything and wires like to get in the way a little bit take the whole plate, rotate it up like that, and then the whole thing comes out. It'll going to be a now you have access to your door lock actuator and your window regulator.
Most of the tough work is done. Now, the window regulator and door lock actuator are just riveted to this panel. What you're going to do is roll up those rivets, and since these weren't bad, they didn't remove them and replace them but you can see here, you just use a drill, press it in the center of the rivet, drill into it, basically until the rivet head pops off, and then you use a screwdriver or a putty knife or something to separate the parts. Then you bolt in the new ones. All of the parts of 1aauto will be the exact duplicates of the original parts, so they will install no problem. Then so, you bolt them in and then you ride and put them back together.
Before I put this together, I'm just going to take some white grease chance to remove that tracks on take my panel. Now this wheel, I would say, needs to into that track then followed by that wheel. I'm going to tip it, rotate it up, get it in there so that the wheel goes in. Now, before I even put that next wheel in, I reach back here and then let's take these long harnesses I'm going to put them through the hole, reach in here, and then I'm going to hook up my speaker and then I'm going to hook up my power window motor. I'm also going to take those harnesses, keep pulling these through. I'm going to put my big ones through as well, and then put this pin in here. Now, I'm going to get back to that wheel, get it right down in place, and push it in. That's in.
You want to place your and then reconnect my lock rod here, all there, push that in .Then I'm going to take this tape off, pull this up then connect my door rod there, put this snap that into place and just push that right through, and then lock that one in place. Now, I'm going to reconnect and reroute this whole harness. Pull this big pin right here. Actually, before I pin them together, what I'm going to do is reroute everything. This went down in here, came out there, this went here, landed there, went around, and then hook up to my door lock actuator.
So, now everything's hooked up. What I'm going to do is I'm actually going to run a test here. The door lock's working, and my window's working. Get these harnesses all pinned on the right spot in the interest of making the YouTube ten minutes, I'm just fast-forwarding, pinning the harness on there. Then you need to make sure you put in all the bolts, and there are ten seven-millimeter bolts, and a ten-millimeter bolt. Then you're putting on the door panel. Again, to install the door panel, we do have this video in regular time and it's related to this video. So, we hope this helps you out. We can get your door lock actuator fixed or your window regulator or both, and maybe those windows and locks won't give you quite so much frustration.
We hope this helps you out, brought to you by www.1AAuto.com, your source for quality replacement parts and the best service on the Internet. Please feel free to contact us toll free 888-844-3393. We're the company that's here for you on the Internet and in person.
Tools used
Hi, I'm Mike from 1AAuto. We've been selling auto parts for over 30 years! We're dedicated to delivering quality auto parts, expert customer service, and fast and free shipping, all backed by our 100% satisfaction guarantee. So visit us at 1AAuto.com, your trusted source for quality auto parts.
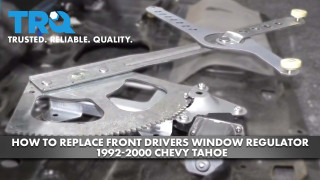
In this video we're going to be working with our 1996 GMC Sierra. We're going to show you how to remove and replace your vehicle's power window regulator. If you like this video, please click Subscribe. We have a ton more information on this and many other vehicles. And if you need this part for your truck, you can follow the link down in the description over to 1aauto.com.
Here are the items you'll need for this repair.
Remove the two Phillips head screws inside of the armrest on the door. Do this with a Phillips head screwdriver. To remove the bezel around the interior door handle, you need to kind of get in there with a trim tool or a flat blade screwdriver, and push down on the tab to release it. There are three: one at the top, one at the bottom, and one on the side.
Remove the extension at the top of the door panel by prying out with a trim tool. Using your trim tool, pry up at the back of the power window switch. Lift it up and pull back to release the hook at the front. Disconnect the connector for your tweeter. Pop up the tab on this two pin connector at the front of the window switch, and pop the connector out, and then push down on the tab for the main connector and remove that from the switch. I'm using a pick here. You could also use a small flat blade screwdriver or a trim tool if you had to, really whatever works best for you.
Using the trim tool, pop out on the door reflector and remote the connector. This is another one of the ones we'll have to lift up on the tab with a pick. Using a trim tool, pry out the bottom of the door. You may need to work it a little bit to figure out where the tabs are. You'll also need to pop out this pin at the top on the front of the door. Once all the tabs are out, lift the panel up and remove it from the door.
Peel off the inner water shield on the door. There's also a small piece over in the corner. Make sure your window is rolled all the way down. There are ten 7 millimeter screws around the perimeter of the inner panel. One under the speaker here that's a little tricky to see, and a 10 millimeter at the front. We'll need to remove all of those with a socket and ratchet. Pull the panel forward. Pull out the handle rod. It may help to have a tool to help you get some leverage on it. You'll also want to pop that out of its guide clip. Same thing with the lock rod down here. We'll also need to pop this out of its guide rod and pull it out of the lock actuator as well. Pop out the tab for the courtesy light in the door. Lift up on the cover for the door lock actuator, and remove that connector. You need to fish it out and around. Pop that retainer through, and then pop out all the rest of the retaining clips to remove the harness from the door.
You'll also need to unplug the window motor and the door speaker. Pull the harness through the door. Slide the door panel forward until the window roller is out of its channel, then slide the guide out of the back, and remove the assembly from your vehicle.
Drill out the heads of the four rivets securing the window motor to the door panel. There are two on the front and two on the back. If the centers are drilled out, you may still need to chisel off what's left of the heads. Once you free the window motor and bracket from the inner panel, slide the other leg out of its retainer and remove the assembly from your inner door panel.
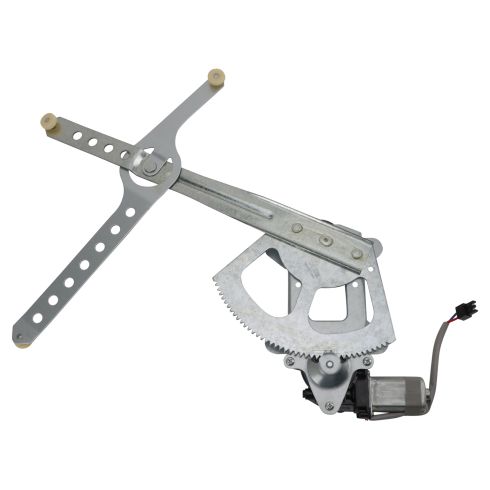
Here we have our old window motor and regulator that we removed from our truck and our new part from 1A Auto. As you can see these parts are almost identical. There are some very minor differences in the motor being its size. This actually comes with a harness to connect. It's the same as the plug that's on our old motor. It just makes it a little easier to get on and off, which is a nice feature to have. Other than that the same four hole mounting location for our rivets, we have the same leg for the other end of the guide over here, same two tabs on the back that will actually sit into our window to move it up and down, and the same toothed gear here to actually move it up and down in the door.
If your motor or regulator has gone bad and your window isn't going up and down at all, or straight and even, it's getting stuck, or it's just getting noisy, this new part from 1A Auto is going to go in direct fit, just like your original equipment and fix you up right.
We're going to put some white grease in the rails where our window regulator sits, just to make sure it runs smoothly and lasts a long time. We'll slide this end in. Now we don't have a rivet gun large enough to use the original style rivets, so we're just going to use some nuts and bolts to reinstall our window regulator. You can now install your rivets with a rivet gun, or if you've gone with nuts and bolts like we have, you can tighten them down with the appropriate size socket and ratchet. We'll put some white grease in the window track to help make sure our new window regulator rolls smoothly.
Reconnect your door speaker and your window motor, and send the rest of your wiring harness back through the door. Slide the back half of your window regulator back into the window track. Once the back is in, slide forward and install the front part of the regulator into the glass as well. Reconnect the door lock as well as the door handle. Don't forget to engage the lock actuator, and snap both rods back into their guides.
Realign your door panel. Reinstall your wiring harness. Make sure that all the tabs and retainers go back in their appropriate places. Make sure you run the harness through, and reconnect the door actuator as well. Lock the clasp in for your reflector, courtesy light, and reinstall the ten 7 millimeter screws around the perimeter, as well as the one 10 millimeter. Reinstall the water shield. Sometimes this adhesive doesn't really want to stick a second time, if that's the case, it's all right to put some tape on there to secure the edges.
Pull your wire harness back through the door and lay the top edge into the door frame. Line up the plastic containers and push them all back into place. Reinstall the inner door handle bezel by lining it up and snapping it in. Reinstall your reflector. Place the upper door extension into place. Reinstall the two Phillips head screws in the armrest.
Reconnect your door speaker as well as the two electrical connections on the power window switch. Slide the front hook into the door panel. Snap the back into place, and you're good to go.
Thanks for watching. Visit us at 1AAuto.com for quality auto parts, fast and free shipping, and the best customer service in the industry.
Tools used
Hi, I'm Mike from 1AAuto. We've been selling auto parts for over 30 years! We're dedicated to delivering quality auto parts, expert customer service, and fast and free shipping, all backed by our 100% satisfaction guarantee. So visit us at 1AAuto.com, your trusted source for quality auto parts.
In this video we're going to be working with our 1996 GMC Sierra. We're going to show you how to remove and replace your vehicle's power window regulator. If you like this video, please click Subscribe. We have a ton more information on this and many other vehicles. And if you need this part for your truck, you can follow the link down in the description over to 1aauto.com.
Here are the items you'll need for this repair.
Remove the two Phillips head screws inside of the armrest on the door. Do this with a Phillips head screwdriver. To remove the bezel around the interior door handle, you need to kind of get in there with a trim tool or a flat blade screwdriver, and push down on the tab to release it. There are three: one at the top, one at the bottom, and one on the side.
Remove the extension at the top of the door panel by prying out with a trim tool. Using your trim tool, pry up at the back of the power window switch. Lift it up and pull back to release the hook at the front. Disconnect the connector for your tweeter. Pop up the tab on this two pin connector at the front of the window switch, and pop the connector out, and then push down on the tab for the main connector and remove that from the switch. I'm using a pick here. You could also use a small flat blade screwdriver or a trim tool if you had to, really whatever works best for you.
Using the trim tool, pop out on the door reflector and remote the connector. This is another one of the ones we'll have to lift up on the tab with a pick. Using a trim tool, pry out the bottom of the door. You may need to work it a little bit to figure out where the tabs are. You'll also need to pop out this pin at the top on the front of the door. Once all the tabs are out, lift the panel up and remove it from the door.
Peel off the inner water shield on the door. There's also a small piece over in the corner. Make sure your window is rolled all the way down. There are ten 7 millimeter screws around the perimeter of the inner panel. One under the speaker here that's a little tricky to see, and a 10 millimeter at the front. We'll need to remove all of those with a socket and ratchet. Pull the panel forward. Pull out the handle rod. It may help to have a tool to help you get some leverage on it. You'll also want to pop that out of its guide clip. Same thing with the lock rod down here. We'll also need to pop this out of its guide rod and pull it out of the lock actuator as well. Pop out the tab for the courtesy light in the door. Lift up on the cover for the door lock actuator, and remove that connector. You need to fish it out and around. Pop that retainer through, and then pop out all the rest of the retaining clips to remove the harness from the door.
You'll also need to unplug the window motor and the door speaker. Pull the harness through the door. Slide the door panel forward until the window roller is out of its channel, then slide the guide out of the back, and remove the assembly from your vehicle.
Drill out the heads of the four rivets securing the window motor to the door panel. There are two on the front and two on the back. If the centers are drilled out, you may still need to chisel off what's left of the heads. Once you free the window motor and bracket from the inner panel, slide the other leg out of its retainer and remove the assembly from your inner door panel.
Here we have our old window motor and regulator that we removed from our truck and our new part from 1A Auto. As you can see these parts are almost identical. There are some very minor differences in the motor being its size. This actually comes with a harness to connect. It's the same as the plug that's on our old motor. It just makes it a little easier to get on and off, which is a nice feature to have. Other than that the same four hole mounting location for our rivets, we have the same leg for the other end of the guide over here, same two tabs on the back that will actually sit into our window to move it up and down, and the same toothed gear here to actually move it up and down in the door.
If your motor or regulator has gone bad and your window isn't going up and down at all, or straight and even, it's getting stuck, or it's just getting noisy, this new part from 1A Auto is going to go in direct fit, just like your original equipment and fix you up right.
We're going to put some white grease in the rails where our window regulator sits, just to make sure it runs smoothly and lasts a long time. We'll slide this end in. Now we don't have a rivet gun large enough to use the original style rivets, so we're just going to use some nuts and bolts to reinstall our window regulator. You can now install your rivets with a rivet gun, or if you've gone with nuts and bolts like we have, you can tighten them down with the appropriate size socket and ratchet. We'll put some white grease in the window track to help make sure our new window regulator rolls smoothly.
Reconnect your door speaker and your window motor, and send the rest of your wiring harness back through the door. Slide the back half of your window regulator back into the window track. Once the back is in, slide forward and install the front part of the regulator into the glass as well. Reconnect the door lock as well as the door handle. Don't forget to engage the lock actuator, and snap both rods back into their guides.
Realign your door panel. Reinstall your wiring harness. Make sure that all the tabs and retainers go back in their appropriate places. Make sure you run the harness through, and reconnect the door actuator as well. Lock the clasp in for your reflector, courtesy light, and reinstall the ten 7 millimeter screws around the perimeter, as well as the one 10 millimeter. Reinstall the water shield. Sometimes this adhesive doesn't really want to stick a second time, if that's the case, it's all right to put some tape on there to secure the edges.
Pull your wire harness back through the door and lay the top edge into the door frame. Line up the plastic containers and push them all back into place. Reinstall the inner door handle bezel by lining it up and snapping it in. Reinstall your reflector. Place the upper door extension into place. Reinstall the two Phillips head screws in the armrest.
Reconnect your door speaker as well as the two electrical connections on the power window switch. Slide the front hook into the door panel. Snap the back into place, and you're good to go.
Thanks for watching. Visit us at 1AAuto.com for quality auto parts, fast and free shipping, and the best customer service in the industry.

WRA51070