



★★★★★
July 7, 2025
Great replacement
Fit, looks and works great!

Replaces
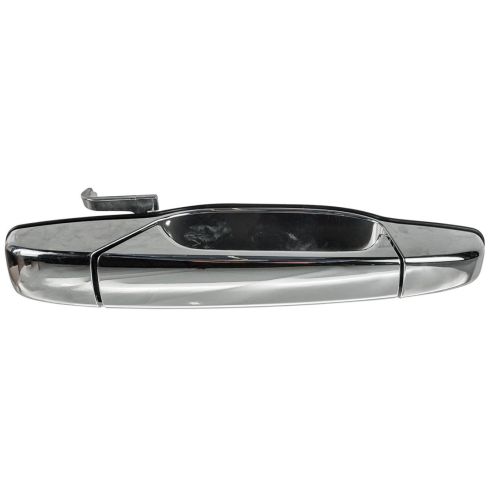
Genuine original equipment part (OEM) that was factory installed on your vehicle by the manufacturer.
This part fits 23 vehicles spanning 2007-2014.
| Year | Make | Model | Description |
|---|---|---|---|
| 2007-2014 | Cadillac | Escalade | Cadillac Escalade Front Passenger Side Exterior Door Handle General Motors OEM 84053436 |
| 2007-2014 | Cadillac | Escalade ESV | Cadillac Escalade ESV Front Passenger Side Exterior Door Handle General Motors OEM 84053436 |
| 2007-2013 | Cadillac | Escalade EXT | Cadillac Escalade EXT Front Passenger Side Exterior Door Handle General Motors OEM 84053436 |
| 2007-2013 | Chevrolet | Avalanche | Chevrolet Avalanche Front Passenger Side Exterior Door Handle General Motors OEM 84053436 |
| 2007 | Chevrolet | Silverado 1500 | Chevrolet Silverado 1500 Front Passenger Side Exterior Door Handle General Motors OEM 84053436 |
| 2008-2013 | Chevrolet | Silverado 1500 | Chevrolet Silverado 1500 Front Passenger Side Exterior Door Handle General Motors OEM 84053436 |
| 2007 | Chevrolet | Silverado 2500 HD | Chevrolet Silverado 2500 HD Front Passenger Side Exterior Door Handle General Motors OEM 84053436 |
| 2008-2014 | Chevrolet | Silverado 2500 HD | Chevrolet Silverado 2500 HD Front Passenger Side Exterior Door Handle General Motors OEM 84053436 |
| 2007 | Chevrolet | Silverado 3500 HD | Chevrolet Silverado 3500 HD Front Passenger Side Exterior Door Handle General Motors OEM 84053436 |
| 2008-2014 | Chevrolet | Silverado 3500 HD | Chevrolet Silverado 3500 HD Front Passenger Side Exterior Door Handle General Motors OEM 84053436 |
| 2007-2014 | Chevrolet | Suburban 1500 | Chevrolet Suburban 1500 Front Passenger Side Exterior Door Handle General Motors OEM 84053436 |
| 2007-2013 | Chevrolet | Suburban 2500 | Chevrolet Suburban 2500 Front Passenger Side Exterior Door Handle General Motors OEM 84053436 |
| 2007-2014 | Chevrolet | Tahoe | Chevrolet Tahoe Front Passenger Side Exterior Door Handle General Motors OEM 84053436 |
| 2007 | GMC | Sierra 1500 | GMC Sierra 1500 Front Passenger Side Exterior Door Handle General Motors OEM 84053436 |
| 2008-2013 | GMC | Sierra 1500 | GMC Sierra 1500 Front Passenger Side Exterior Door Handle General Motors OEM 84053436 |
| 2007 | GMC | Sierra 2500 HD | GMC Sierra 2500 HD Front Passenger Side Exterior Door Handle General Motors OEM 84053436 |
| 2008-2014 | GMC | Sierra 2500 HD | GMC Sierra 2500 HD Front Passenger Side Exterior Door Handle General Motors OEM 84053436 |
| 2007 | GMC | Sierra 3500 HD | GMC Sierra 3500 HD Front Passenger Side Exterior Door Handle General Motors OEM 84053436 |
| 2008-2014 | GMC | Sierra 3500 HD | GMC Sierra 3500 HD Front Passenger Side Exterior Door Handle General Motors OEM 84053436 |
| 2007-2014 | GMC | Yukon | GMC Yukon Front Passenger Side Exterior Door Handle General Motors OEM 84053436 |
| 2014 | GMC | Yukon XL | GMC Yukon XL Front Passenger Side Exterior Door Handle General Motors OEM 84053436 |
| 2007-2013 | GMC | Yukon XL 1500 | GMC Yukon XL 1500 Front Passenger Side Exterior Door Handle General Motors OEM 84053436 |
| 2007-2013 | GMC | Yukon XL 2500 | GMC Yukon XL 2500 Front Passenger Side Exterior Door Handle General Motors OEM 84053436 |
| Brand Label | Part Number |
|---|---|
| DIY Solutions | BHS04332 |
| General Motors | 84053436 |
This item may be interchangeable with parts from other brands with the above part numbers. This information is provided only for reference and does not guarantee that the item you are purchasing is identical to parts with part numbers from the brands listed above. To confirm that this item fits your vehicle, use the above "Check Vehicle Fit" option.
1 Year Warranty
This item is backed by our 1-year warranty. In the event this item should fail during intended use, we will replace the part free of charge. This warranty covers the cost of the part only.
FREE Shipping is standard on Orders shipped to the lower 48 States (Contiguous United States). Standard shipping charges apply to Hawaii, Alaska and US Territories. Shipping is not available to Canada.
Expedited is available on checkout to the United States, excluding Alaska, Hawaii and US Territories as well as P.O. Boxes and APO/FPO/DPO addresses. Final shipping costs are available at checkout.



Created on:
Tools used
Brought to you by 1AAuto.com, your source for quality replacement parts and the best service on the Internet.
Hi, I'm Mike from 1A Auto. I hope this how-to video helps you out, and next time you need parts for your vehicle, think of 1AAuto.com. Thanks.
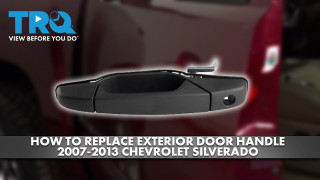
In this video, we're going to show you how to replace an exterior door handle on this 2011 Chevy Silverado 1500. It's a similar process on a large variety of GM SUVs and pickup trucks from 2007 to 2012. The tools that you'll need for this is a flat blade screwdriver, a 10mm socket and ratchet with an extension, and a pair of needle nose pliers.
Using a flat blade screwdriver, you want to remove these three panels. The one behind the door handle, this door pull handle panel, and that triangular panel at the top there. Once those are removed, you'll see there are three 10mm bolts here. We'll fast-forward as he removes those. You want to remove this little panel under this handle right here. Pry that out with your flat blade.
Now you want to remove these two 10mm bolts right here. You want to pry up that switch panel and disconnect these harnesses. Just push in the tab on the top and pull back on them. For this lead there's a tab on the back of it. You want to pry out that tab and then the clip will actually pull up and out. Now pull your lock up and there's a little panel right here, just a little clip. You want to pry that out with the flat blade screwdriver. Once you pry that out you can lift that right up and off.
Now you can start prying off the door panel. Reach behind it and give it a sharp pull to release those clips. You want to do this all the way around the panel. Once you do that you can lift it off and then you want to tilt it. Now if you go in behind the door panel here, you'll see this door handle cable door here. Using needle nose pliers, push the clip inward and you can pull that up and out. Carefully remove your water shield. We did speed the video up. You want to remove it nice and slow. Do your best not to rip or tear it.
Now you want to remove this 10mm bolt right here, and you want to release this yellow clip. And then up, further up in the door, there's this little red tab here. You want to push the rod away from it towards the outside of the door. To open that clip, you literally just pop it open. This one, like I said, push it straight back. We'll fast-forward as he removes that bolt. Now remove this cap and that 10mm bolt in there. Pull the handle out. and then push it forward a little bit. and then it's kind of a little bit moving it back and forth, up and down a little bit to get it to release out from the door.
As you can see, there's nothing wrong with our old door handle, so we're just going to show you how to do this. You would remove that rod and then install it in your new door handle, and then remove this clip. This clip holds the lock cylinder in. Use a flat blade screwdriver and pry it out. You could also use a pair of pliers. Pull it out, and then there are two ways to put it back together. You see the lock cylinder comes out. Put the lock cylinder into your new handle.
You could either do it this way, then put the clip in, or you could actually put the clip in first and then snap the lock into the door handle with the clip in it already. To reinstall the door handle, you want to put that rod back down through the door. Slide it back and push it into place. We'll fast-forward as he replaces and tightens up those 10mm bolts. You want to re-clip those rods back into place and replace that rubber cap.
You can put your water shield back. Make sure that the wire harnesses and the door cable are pulled through. You want to make sure that these door panel clips line up in those holes, and that these hooks line up in these slots. Now you want to take that door handle cable, put it back into its clip. Pull back on it and feed it into that little spot there and run all your harnesses up through where the door switch panel is.
You want to make sure that this lock tab goes up through the door panel. You want to align the door panel up on the window sill. Then once it's lined up, you can push in the clips all the way around. Take your lock, slide it back onto the tab there, and reapply that little square clip. We'll fast-forward as he replaces the two 10mm bolts under this handle here, as well as the 10mm bolt behind the door handle. Now reconnect the harnesses to the door switch panel and push it down into place. We'll continue to fast-forward as he replaces that pull handle and the two 10mm bolts to secure it. Now you want to replace those four trim panels.
We hope this video helps you out. Brought to you by www.1AAuto.com, your source for quality replacement parts and the best service on the Internet. Please feel free to call us toll-free, 888-844-3393. We're the company that's here for you on the Internet and in person.
Tools used
Hi, I'm Mike from 1A Auto. We've been selling auto parts for over 30 years. We're dedicated to delivering quality auto parts, expert customer service, fast and free shipping, all backed by our 100% satisfaction guarantee. Visit us at 1AAuto.com, your trusted source for quality auto parts.
We're going to actually hit our dome lamp override, which just turns off the dome lamp. Then we're going to start up here at the corner. You can use a plastic trim tool, but I can just get my fingers behind here, pull straight out and off. You want to avoid pulling it this way, because as you can see this broke off in there. It still has two clips left though, so it'll secure fine. Then we're going to remove three other trim panels. And behind the door handle, put a small screwdriver in here, pry the bottom out and bring that out. You can see a 10mm bolt there. Then behind the door pull, use a small screwdriver to pull that out. Two more 10mm bolts are in there. Then your door lock, you want to kind of pull up a little bit and pry with a small flat blade screwdriver. That comes up and off. Make sure you retrieve that little piece if it flies out. If this comes out, just retrieve it and don't put it all the way in. Just put it like that. Additionally, you need to pull up your trim panel, plastic trim tool available on 1AAuto.com and put it in the back and pull up.
Okay, and then work it in at the front as well. You can see there's two clips at the front and rear. If you don't have a trim tool, but you have strong fingernails, you can get it out, and then just pull straight up on front as well. Then there's four harnesses to disconnect and you might have more. If you have more options, just press the tabs and pull out. Use a 10mm socket with ratchet and extension, and remove those three 10 mm bolts. These ones may stay in there after you get them loosened up. And in that case, they'll just fall down, and you can retrieve them after you take the door panel off.
Now, there's a series of clips around the edge. I usually start at the top, pull straight out, and just work your hand down. Pull firmly. Then the bottom and the side, and then door panel can come up and off. And then you'll want to disconnect your door handle, which is a matter of pressing on the tabs. There's two tabs, so press one, pull through, rotate around. Press on the other one. That allows you to move that back, bring it up and around, and your door panel comes off.
We're going to take our window master switch, and we're going to plug it back in so we can put the window up. These plugs here are coded, meaning they have little slots that line up, so they'll only plug in one way because we've only got three plugs, but there's more than three spots. This has some ears here that match up with this connector here. The same thing for this one. It only matches with these, so if you try to put in the wrong ones, it won't fit. You got to find the right. It will slide in. I'm just going to turn the ignition on and put the window up. Then we turn the ignition off. You can unplug this switch again so it's not dangling and in your way. Just put it aside so it doesn't get broken.
Now, to get to the bolts that are on the backside here, we have to pull this water barrier off. It's got some sticky like strip caulk stuff. Just peel it off. It'll just go back on there. If it's really sticky, you can take a razor blade and just cut it as you're pulling it away, but just gently work it off, so you don't rip this foam. For the most part, you can reuse this. It will still be sticky, but you may want to get some new strip caulk to put on here when we replace it, so just be aware of that when you take it off.
The first thing we're going to do before we loosen the outside door handle is to undo it from this lock rod while it's still attached to the car will make it a little bit easier. We'll use a flat headed screwdriver. There's a little lock tab. Just got to kind of push it out and at the same time, and try to pop it off. See if I can get another hand in there just like this. There it is. It's a little tricky, but once you get it, it pops right off, so now that's nice and free. Now we need to get to the two bolts that hold the outside door handle on. There's one in here. There's one underneath this rubber cover. We're just going to use our plastic prying tool to just pop this cap off. Just put that aside so you don't lose it. Then we take our 10 millimeter socket and ratchet, put it through that opening in the door panel. I'm going to start to loosen it. Try not to drop the bolts in there, but door the door panel's pretty wide open if you drop it. Now we're going to do the other 10 millimeter bolt. Now what you want to do with your hand that you're not using with the ratchet is just put it on the outside door handle so it doesn't fall as you loosen it.
To get this door handle out now, we have to slide it to the front, and then lift if out. I may have to go around the backside and help feed it out. It's got another little tab, so if you twist it down, and then you need to feed out. Disconnect it from this arm here. There you go. That's how you remove the door handle.
Now we're going to reinstall the door handle. You start by fishing in the door lock actuator rod. Then you want to connect it to this one. That just pushes over like that. You need to sort of maneuver it in. This you can push, it's spring loaded, to get it to go under there.
Now, remember, there was a hook on the back of this. It kind of has to go to the forward position a little bit and then slide back. That's installed from the outside. Now we need to go to the backside and install the 10 millimeter bolts that hold it on. The torque for the little bolts that hold the door handle on is 53 inch-pounds. If you don't have an inch pound torque wrench, just make sure you tighten them very gently. Use your wrist, not your arm as you tighten them down. As you just feel them to get tight, you should stop, because if you go too far, they will strip out the plastic or crack the plastic.
To put these 10 millimeter bolts back through the door, to help you not drop them into the door while you're trying to feed them in there, you can take a little bit of blue masking tape and just sort of tape them so they stay in there. Just fold that over so it fits through. You just have to fish it in.
See, the hole is basically straight in from this opening. I recommend doing this by hand first to make sure you don't cross thread them. You'll just feel it. Just hold your hand on the outside door handle so you don't push it out, and just start to thread them in. The torque on these is going to be 53 inch pounds, so I'm just going to thread them in as strong as I can by my fingers, and then I'll come back with the torque wrench once I have the other side in. We got the other bolt in. Have to feed it around the window regulator cable. That one feels pretty tight. Now I'm going to take our inch pound torque wrench I've set to 53 inch pounds. That's it. It doesn't take a lot of torque. Now that these bolts are tight, you're going to take that grommet, put it back in the hole. All right, after you reinstall the door handle, you now need to reconnect the door handle actuator rod to latch the actuator assembly. That's just going to slide in here. You just kind of roll it up and over. It will lock down.
All right, now we're ready to install this back on the door handle. Just going to feed our wires through for the door switches and mirror. See the little channel that it was in. You just sort of push it down in.
First, you want to just make sure that your bolts come out and you retrieve them. There are two tabs here that just go right in to the door and rest conveniently so that's supported. Then you can put this up. Make sure you have four harnesses that poke up through the opening, here, or more if you have more options on your truck. Then reconnect your cable, slide the ball in, pull out, and push.
Make sure all your harnesses are up and through. Now that your cable's on, this ridge actually needs to go down into this channel here. So, hit the panel up into place. A little higher, you see it slides down. It should go down even. This should come right up through your lock rod. Then, if you look back in, you can actually see this pin here lines right up, and you can just go right around and lock the pins into place. So we want to be able to take these bolts and put them in. They’re a little bit loose, though. So, if you just take a piece of painter's tape, put it on the head of the bolt, stuff your socket on there, and it stays much better. You can guide it right in and start it out. If the painter's tape does stay behind, it's not a big deal, but tighten it by hand first to make sure it's in, and then tighten it up.
This one is pretty easy to get into place. Put the lockdown on. Snap that in place. This one, the round side goes underneath. Put this into place. Switch panel, these all only go in one way. So, like this one won't plug into there. It won't plug into there. It'll only plug into there. Then this one will only plug into there. This one can go in place. The last one, again, it has three tabs. One of ours is broken. Make sure it goes right straight in, kind of look in behind.
Thanks for watching. Visit us at 1AAuto.com for quality auto parts, fast and free shipping, and the best customer service in the industry.
Fit, looks and works great!
Perfect fit
Easy installation with !A Auto video excellent tutorial.
Originally ordered one from AMAZON for about USD20.00. Didn't fit very well and had a gap between handle and body at the end. Decided to order this OEM from 1A Auto and it fit perfectly. Yes more than 5 times more expensive but it fits and much stronger
Everything showed up on time as described. Even used suppliers YouTube video to understand steps to install.
