Anytime I'm working on a customer's vehicle, I always suggest ordering their parts from 1A-Auto for Quality, Durability and Long lasting performance. 1A-Auto is the Right choice. They are wonderfully staffed and fast delivery of orders.
Replaces
BRA75139
This part doesn’t fit a . Select from parts that fit.
Specify your vehicle's year, make and model to guarantee fit.
This part does not fit a .
About TRQ:
TRQ is a trusted brand dedicated to making every repair a success story by combining premium parts with easy installation. Each TRQ part is engineered by a team of automotive experts to meet or exceed OEM standards, delivering enhanced performance and maximum longevity. With rigorous in-house testing, the brand ensures superior fit and function across every product line. TRQ also provides customers with best-in-class, step-by-step installation videos—so you can complete repairs with confidence, whether you're a first-time DIYer or an industry professional.
Product Features
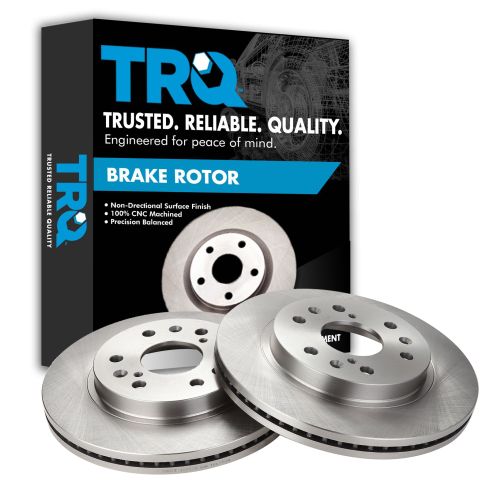
TRQ brake rotors are manufactured using premium G3000 casting alloy to reduce noise while braking and enhance service life. TRQ rotors have a non-directional finish to minimize the break-in period for new rotors and reduce vibrations throughout the rotor’s lifecycle. TRQ recommends replacing brake pads when you replace rotors to ensure even wear and improved component performance. All products are fit and road-tested in our Massachusetts R&D facility to ensure we deliver on our promise of Trusted Reliable Quality.
Attention California Customers:
WARNING: This product can expose you to chemicals including Lead and Lead Compounds, which are known to the State of California to cause cancer, and birth defects or other reproductive harm. For more information, go to www.P65Warnings.ca.gov.
This part fits 37 vehicles spanning 2005-2020.
| Year | Make | Model | Description |
|---|---|---|---|
| 2007-2020 | Cadillac | Escalade | Cadillac Escalade Front Driver & Passenger Side 2 Piece Brake Rotor Set TRQ BRA75139 |
| 2007-2020 | Cadillac | Escalade ESV | Cadillac Escalade ESV Front Driver & Passenger Side 2 Piece Brake Rotor Set TRQ BRA75139 |
| 2007-2013 | Cadillac | Escalade EXT | Cadillac Escalade EXT Front Driver & Passenger Side 2 Piece Brake Rotor Set TRQ BRA75139 |
| 2013-2019 | Cadillac | XTS | Cadillac XTS Front Driver & Passenger Side with 6 Lug Wheels 2 Piece Brake Rotor Set TRQ BRA75139 |
| 2007-2013 | Chevrolet | Avalanche | Chevrolet Avalanche Front Driver & Passenger Side 2 Piece Brake Rotor Set TRQ BRA75139 |
| 2009-2014 | Chevrolet | Express 1500 Van | Chevrolet Express 1500 Van Front Driver & Passenger Side 2 Piece Brake Rotor Set TRQ BRA75139 |
| 2005-2006 | Chevrolet | Silverado 1500 | Chevrolet Silverado 1500 Front Driver & Passenger Side with Rear Drum Brakes 2 Piece Brake Rotor Set TRQ BRA75139 |
| 2007-2013 | Chevrolet | Silverado 1500 | Chevrolet Silverado 1500 Front Driver & Passenger Side 2 Piece Brake Rotor Set TRQ BRA75139 |
| 2014-2018 | Chevrolet | Silverado 1500 | Chevrolet Silverado 1500 Front Driver & Passenger Side without Brembo Brake Package 2 Piece Brake Rotor Set TRQ BRA75139 |
| 2007 | Chevrolet | Silverado 1500 Classic | Chevrolet Silverado 1500 Classic WT Front Driver & Passenger Side 2 Piece Brake Rotor Set TRQ BRA75139 |
| 2007 | Chevrolet | Silverado 1500 Classic | Chevrolet Silverado 1500 Classic SS Front Driver & Passenger Side 2 Piece Brake Rotor Set TRQ BRA75139 |
| 2007 | Chevrolet | Silverado 1500 Classic | Chevrolet Silverado 1500 Classic LT Front Driver & Passenger Side 2 Piece Brake Rotor Set TRQ BRA75139 |
| 2007 | Chevrolet | Silverado 1500 Classic | Chevrolet Silverado 1500 Classic LS Front Driver & Passenger Side 2 Piece Brake Rotor Set TRQ BRA75139 |
| 2019 | Chevrolet | Silverado 1500 Legacy | Chevrolet Silverado 1500 Legacy Front Driver & Passenger Side without Brembo Brake Package 2 Piece Brake Rotor Set TRQ BRA75139 |
| 2015-2016 | Chevrolet | Suburban | Chevrolet Suburban Front Driver & Passenger Side 2 Piece Brake Rotor Set TRQ BRA75139 |
| 2017-2019 | Chevrolet | Suburban | Chevrolet Suburban Front Driver & Passenger Side without Brembo Brake Package 2 Piece Brake Rotor Set TRQ BRA75139 |
| 2020 | Chevrolet | Suburban | Chevrolet Suburban Front Driver & Passenger Side 2 Piece Brake Rotor Set TRQ BRA75139 |
| 2007-2014 | Chevrolet | Suburban 1500 | Chevrolet Suburban 1500 Front Driver & Passenger Side 2 Piece Brake Rotor Set TRQ BRA75139 |
| 2007-2018 | Chevrolet | Tahoe | Chevrolet Tahoe Front Driver & Passenger Side 2 Piece Brake Rotor Set TRQ BRA75139 |
| 2019 | Chevrolet | Tahoe | Chevrolet Tahoe Front Driver & Passenger Side without Brembo Brake Package 2 Piece Brake Rotor Set TRQ BRA75139 |
| 2020 | Chevrolet | Tahoe | Chevrolet Tahoe Front Driver & Passenger Side 2 Piece Brake Rotor Set TRQ BRA75139 |
| 2009-2013 | GMC | Savana 1500 Van | GMC Savana 1500 Van Front Driver & Passenger Side 2 Piece Brake Rotor Set TRQ BRA75139 |
| 2014 | GMC | Savana 1500 Van | GMC Savana 1500 Van G134 Rear Wheel Drive Front Driver & Passenger Side 2 Piece Brake Rotor Set TRQ BRA75139 |
| 2005-2009 | GMC | Sierra 1500 | GMC Sierra 1500 Front Driver & Passenger Side 2 Piece Brake Rotor Set TRQ BRA75139 |
| 2010 | GMC | Sierra 1500 | GMC Sierra 1500 Rear Wheel Drive Front Driver & Passenger Side 2 Piece Brake Rotor Set TRQ BRA75139 |
| 2010 | GMC | Sierra 1500 | GMC Sierra 1500 4 Wheel Drive Front Driver & Passenger Side 2 Piece Brake Rotor Set TRQ BRA75139 |
| 2011-2013 | GMC | Sierra 1500 | GMC Sierra 1500 Front Driver & Passenger Side 2 Piece Brake Rotor Set TRQ BRA75139 |
| 2014-2018 | GMC | Sierra 1500 | GMC Sierra 1500 Front Driver & Passenger Side without Brembo Brake Package 2 Piece Brake Rotor Set TRQ BRA75139 |
| 2007 | GMC | Sierra 1500 Classic | GMC Sierra 1500 Classic WT Front Driver & Passenger Side 2 Piece Brake Rotor Set TRQ BRA75139 |
| 2007 | GMC | Sierra 1500 Classic | GMC Sierra 1500 Classic SLT Front Driver & Passenger Side 2 Piece Brake Rotor Set TRQ BRA75139 |
| 2007 | GMC | Sierra 1500 Classic | GMC Sierra 1500 Classic SLE Front Driver & Passenger Side 2 Piece Brake Rotor Set TRQ BRA75139 |
| 2007 | GMC | Sierra 1500 Classic | GMC Sierra 1500 Classic SL Front Driver & Passenger Side 2 Piece Brake Rotor Set TRQ BRA75139 |
| 2007 | GMC | Sierra 1500 Classic | GMC Sierra 1500 Classic Denali Front Driver & Passenger Side 2 Piece Brake Rotor Set TRQ BRA75139 |
| 2019 | GMC | Sierra 1500 Limited | GMC Sierra 1500 Limited Front Driver & Passenger Side without Brembo Brake Package 2 Piece Brake Rotor Set TRQ BRA75139 |
| 2007-2020 | GMC | Yukon | GMC Yukon Front Driver & Passenger Side 2 Piece Brake Rotor Set TRQ BRA75139 |
| 2015-2020 | GMC | Yukon XL | GMC Yukon XL Front Driver & Passenger Side 2 Piece Brake Rotor Set TRQ BRA75139 |
| 2007-2014 | GMC | Yukon XL 1500 | GMC Yukon XL 1500 Front Driver & Passenger Side 2 Piece Brake Rotor Set TRQ BRA75139 |

| Brand Label | Part Number |
|---|---|
| Wagner | BD180409 |
| Bendix | PRT5903 |
| Raybestos Brakes | 580279 |
| Aimco | 55097 |
| Bendix | PRT5582 |
| DuraGo | BR55097 |
| Raybestos Brakes | 580721 |
| Wagner | BD126358 |
| Raybestos Brakes | 580721P |
| AutoZone | 55097 |
| Dynamic Friction Company | 604-48050 |
| General Motors | 23144341 |
| General Motors | 25928787 |
| Dura Corp | BR5509702 |
| BrakeBest | 580279RGS |
| Newtek Automotive USA | 55170 |
| Wagner Brake | BD126358 |
| Centric Parts | 127.66057CL |
| PowerStop | AR82132EVC |
| Brembo | 09.A406.10 |
| BrakeBest | 25011469 |
| Wagner Brake | BD180812E |
| Qualis | 55097 |
| BrakeBest | 580721R |
| Monroe Brakes | BD126358 |
| Winhere | 6621026 |
| Raybestos Brakes | 580279P |
| Centric Parts | 128.66057R |
| General Motors | 88963556 |
| AutoZone | 55097DG |
| Advance Auto Parts | G12518SD |
| Centric Parts | 121.66057 |
| Centric Parts | 126.66057CSR |
| BrakeBest | 521710RGS |
| Winhere | 6620538 |
| UAP | 55097 |
| Centric Parts | 126.66057SL |
| Autopartsource | 593715 |
| Centric Parts | 127.66057R |
| ACDelco | 177-0918 |
| Casting Numbers | 18048387 |
| Centric Parts | 227.66057R |
| BrakeBest | 580721 |
| Centric Parts | 126.66057CSL |
| Centric Parts | 128.66057CR |
| Wagner Brake | BD180409E |
| Centric Parts | 128.66057CL |
| Advance Auto Parts | YH290676P |
| Bosch | 25010621 |
| Dura Corp | BR55170 |
| BrakeBest | 580721FZN |
| General Motors | 22950036 |
| Autoxtra | AX55097 |
| DuraGo | BR5509702 |
| General Motors | 22818355 |
| BrakeBest | 580721RGS |
| General Motors | 22950037 |
| Promax | 14-55170 |
| Autoxtra | 80580279 |
| Centric Parts | 126.66057SR |
| Centric Parts | 120.66057CRY |
| AutoZone | 55097DL |
| Centric Parts | 125.66057 |
| BrakeBest | 521581RGS |
| Wagner Brake | BD180409 |
| Advance Auto Parts | YH290676 |
| Ultra Brake | 55402 |
| Newtek Automotive USA | 55097 |
| Centric Parts | 127.66057L |
| Raybestos Brakes | 580279FZN |
| Centric Parts | 120.66057 |
| Raybestos Brakes | 580721FZN |
| Raybestos Brakes | 580721R |
| Bosch | 25011469 |
| Centric Parts | 227.66057L |
| Advance Auto Parts | YH145582 |
| Advance Auto Parts | YH290676C |
| Advance Auto Parts | YH145582P |
| Centric Parts | 128.66057L |
| BrakeBest | 81-126358 |
| Promax | 14-55097 |
| General Motors | 25819670 |
| Wagner Brake | BD126358E |
| Advance Auto Parts | YH145582C |
| Dura Corp | BR55097 |
| Performance Friction | 326.056.01 |
| BrakeBest | 25010621 |
| General Motors | 23144340 |
| Quality Brand | Q4214 |
| Advance Auto Parts | 290676 |
| Casting Numbers | 326223 |
| Centric Parts | 127.66057CR |
| VIPAR - Vehicle Indusrty Parts & Manufacturing | X51681 |
| Promax | 20-55097 |
| Brembo | 27416 |
| PowerStop | AR8654EVC |
| Centric Parts | 320.66057 |
| Advance Auto Parts | BD126358 |
| Mighty Distributing System | 55097 |
| Bendix | 145582 |
| Centric Parts | 125.66057CRY |
| Raybestos Brakes | 580279R |
| Raybestos Brakes | 580279PER |
| Hollander | 530-02186 |
| WABCO - Archived | PS126358 |
This item may be interchangeable with parts from other brands with the above part numbers. This information is provided only for reference and does not guarantee that the item you are purchasing is identical to parts with part numbers from the brands listed above. To confirm that this item fits your vehicle, use the above "Check Vehicle Fit" option.
Lifetime Warranty
This item is backed by our limited lifetime warranty. In the event that this item should fail due to manufacturing defects during intended use, we will replace the part free of charge. This warranty covers the cost of the part only.
FREE Shipping is standard on orders shipped to the lower 48 States (Contiguous United States). Standard shipping charges apply to Hawaii and Alaska.
Shipping is not available to a P.O. Box, APO/FPO/DPO addresses, US Territories, or Canada for this item.
Expedited is available on checkout to the United States, excluding Alaska, Hawaii.
Final shipping costs are available at checkout.

Created on:
Tools used
Brought to you by 1AAuto.com your source for quality replacement parts and the best service on the internet.
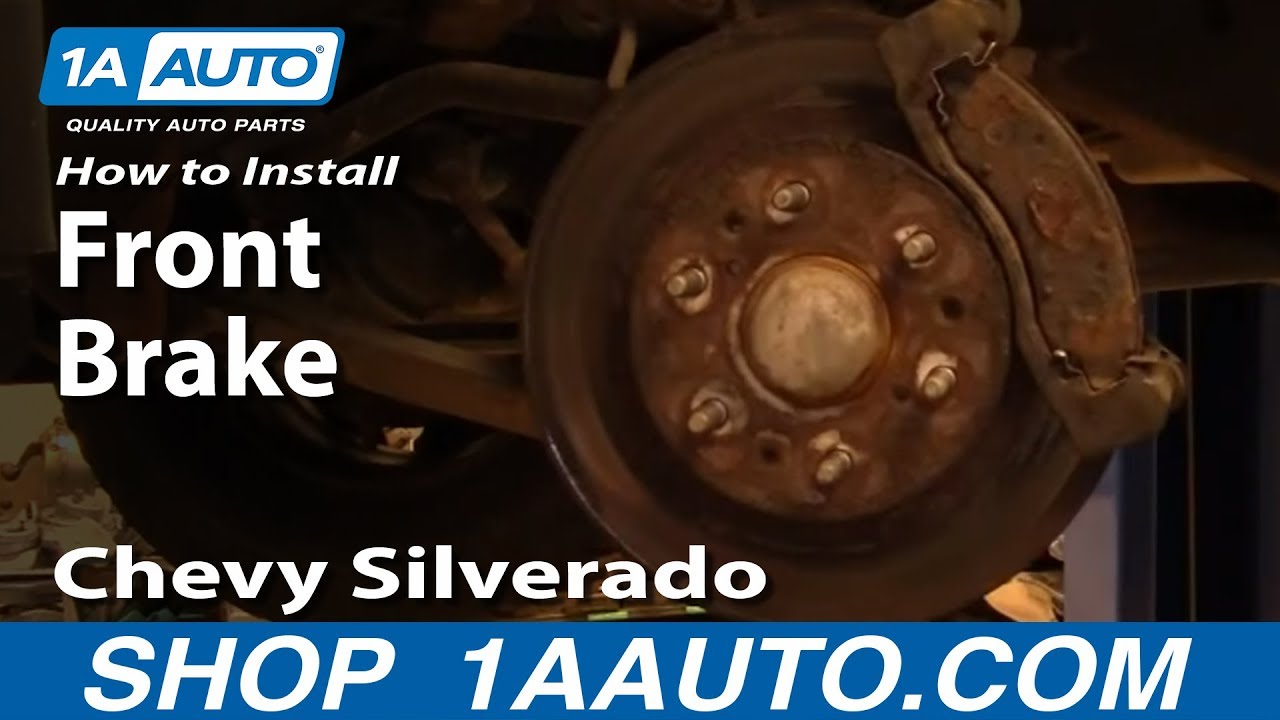
Hi, I'm Mike from 1A Auto. I hope this how-to video helps you out and next time you need parts for your vehicle think of 1AAuto.com. Thanks. In this video I'm going to show you how to do the front brakes on this 2005 Chevy Silverado. This truck is a 4x4 with the drum rear brakes, there are some differences in the brakes as far as the calipers and the rotors they use. But, generally the procedure for re-doing the brakes is the same for, pretty much any '99 to present actually to 2013 or so Silverado, Sierra, even the Cadillac Escalade, Yukon, Suburban, Yukon Excel, generally the procedure is the same for all of these trucks.
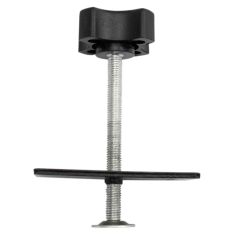
The tools may differ in size a little bit, but what I use for this truck are Jack and Jack Stands, you'll need your lug wrench or 22mm socket with a breaker bar or something else that you could get a good leverage on. 18mm and 19mm sockets with a ratchet, again, you'll need a breaker bar or pipe for some extra leverage on some of those bolts. A small wire brush to clean things up as you put them together. A large C-Clamp, a large hammer, I use the big hammer, big sledge hammer to get my rotor off. You can also use I believe it's an M-12 17mm bolts that you can thread into the rotors and kind of press them off. I just use the big hammer method. Cold chisel, I have that starred because on this vehicle a couple of my slides, my lower slides were in rough shapes so I had to kind of pound them out, you'll see what I mean and you may not have that issue on your vehicle. Then you'll need a torque wrench to get everything back together.
Start off my removing the wheel and tire. If you don't have the benefit of air tools you want to start with the vehicle on the ground, loosen take off the hubcap, the center cap, loosen lug nuts. Then raise and support the vehicle. Remove the lug nuts all the way. Remove the wheel and tire. Turn by hand or use a steering wheel to turn the brakes so you can get to them easily.
Now you're going to inspect the brakes with the wheel off and you can see my brakes are in pretty rough shape. The rotors show that there's only about 30% of the contact pad actually working, their pads are worn. We're going to remove two 19mm bolts to remove the caliper. These 19mm bolts should come off pretty easy. You see I'm just using regular hand tools and they come right off. I'll fast forward here a little bit as I just take those bolts out.
Now you can remove the caliper just buy lifting up. You may want to use a large screwdriver and pry out on the caliper a little bit that will help loosen things up and then the pads should come out fairly easily. See my back ones come out and then I struggle with the front one or the outside one, the inside one came out I struggle with the outside one. Then I look for something to pry it with and just end up using the back pad and pry that other pad right out.
You want to make sure this slides in and out really easily and that one does and this one is totally frozen off from where I can see. I think it's so bad I'm actually going to take my Twin Pack. So, I use my Impact wrench to get it moving and you can use a ratchet and socket 19mm work as well, get it turning and then you can use a hammer and some type of punch and you'll see in the next scene to get it out the rest of the way.
Just using a punch, actually it's a cold chisel to get that out of there. What I do pull it out, clean it all up, put some grease on it, push it back in and basically you go in and out with it a bunch of times, just keep cleaning it off. Use a pick or something to try and clean out inside the hole. You can get it freed up. If you're not happy with that you can also order a new set of the caliper brackets from 1A Auto as well as the slide pins.
Now there's a set of stainless steel slides and you pull those off and we're going to wire brush those and clean them up a little bit later. Now we're going to remove the caliper bracket and there's two 18mm bolts. There's one right there and one there, these will be tighter you'll need a little more leverage to get them off.
As you can see here I'm going to put the 18mm socket on there, put my ratchet on and then use a piece of pipe to basically extend the length of the ratchet give me some more leverage and just pull nice and evenly and they end up coming loose. You can use if you have a breaker bar that's good or if you have the benefit of air tools, obviously that's the way to go. But, this comes off usually with a little extra leverage. I'm just going to fast forward here as I remove them the rest of the way.
Here, I've just threaded the lug nuts on a few threads. That's just to protect the wheel studs. Make sure when you hit it with a hammer you don't damage the threads on the wheel studs. Basically, I'm showing you if you want to keep your old disc, you want to hit the front first that loosens it up and then you can hit it from the back side lighter and it comes off, as you can see it's coming off. I actually know I'm going to junk this disc because it's in pretty rough shape. Also you can see that the lug nuts being threaded on there help you as you hit it off. Make sure that the disc doesn't go flying and hurt somebody.
Here I've removed the lug nuts so I can take the old rotor off and then I've got the new rotor from 1A Auto ready to go back on. It's going to go on there just the same as the original, obviously, in much better shape. Provide much greater breaking service area than the old one did.
Here I'm just using a wire brush. I want to clean up the slots where those stainless steel slides go in as well as where the brakes shoes go in. I'm just cleaning those up get the rusty and scale out of there so everything fits together well. I'm actually going to speed it up here as I put the bracket back in place and start the bolts in. I'm just going to tighten them permanently. I'm actually going to next scene I'm going to tighten them up with a torque wrench to between 90 and 95 foot pounds.
Here are my stainless steel slides that I've cleaned up with a wire brush and sometimes the brake pads will come with new slides. Just make sure you install those correctly and they get seeded right down into the caliper bracket. New brake shoes from 1A Auto. There is a front and a rear, the rear has the larger metal backing and you want to put the squeak tab, a little tab, put that down lower and it should slide right in.
Now you want to take your old inner pad and put it against the caliper and then put your use a large C-Clamp and you're basically resetting the caliper. You can see as I tighten up the C-Clamp, the pistons in the caliper go back in and reset. I just slowly tighten up that C-Clamp and push the pistons back into the caliper.
Remember back when we checked those slides and the one was stuck. Now, here's where you can figure out how well you did as far as cleaning them out. You'll have to take the caliper, push it against the slide on the inside a little bit and then get it to come down over the brake pads and that should go right on. I'm going to fast forward here as I just put those 19mm bolts back in to hold the caliper to the caliper slides.
Now you want to torque this to between 55 and 60 foot pounds. I'm just going to fast forward and straighten out the wheels. Put the wheel and tire back on. Put the lug nuts all on, I always thread the first few turns by hand. Make sure you got the lug nut going on correctly and then just kind of tighten them preliminarily.
Here I'm torqueing the lug nuts on the wheel. Always do your brakes in pairs. I'm just going to show the passenger side, but obviously the next thing I do is the driver's side. Then after you torque the lug nuts, when you torque the lug nuts make sure that you do it in a crossing pattern. Torque one then go across the wheel to the next one. Put the cap and all the trim back on the wheel and then there's one more step. After you do brake work make sure you pump the brakes a few times, making a hard solid pedal.
We hope this helps you out. Brought to you by www.1AAuto.com, your source for quality replacement parts and the best service on the internet. Please feel free to call us toll-free, 888-844-3393. We're the company that's here for you on the internet and in person.
Tools used
Brought to you by 1AAuto.com, your source for quality replacement parts and the best service on the Internet.
Hi, I'm Mike from 1A Auto. I hope this how-to video helps you out, and next time you need parts for your vehicle, think of 1AAuto.com. Thanks.
In this video, we're going to show you how to service the front brakes on this 2011 Chevy Silverado. It's the same procedure for this truck from 2007 to 2013 Chevy Silverado as well as the GMC Sierra. This is the 1500. We're going to show you on the right-hand or passenger side. The left-hand or driver side is the same, and we do always recommend that you service your brakes in pairs. You'll need new brake rotors and pads from 1AAuto.com, jack and jack stands, 18mm to 22mm sockets and ratchet, breaker bar or pipe for some extra leverage since a couple of those bolts are pretty tight, and a T30 Torx bit and driver. If you have some rust you may need a couple of M10 bolts to help you get the disc or the rotor off. You'll also need a wire brush, brake or white grease, and a large C-clamp.
Remove the center cap just by prying with a screwdriver. If you don't have the benefit of air tools, loosen the lug nuts with the vehicle on the ground, then raise and secure the vehicle and then remove the lug nuts the rest of the way. Remove the wheel and tire. They are 22mm lug nuts.
By hand or using a steering wheel, turn so you can access the back of the caliper. Now check for any abnormal wear. Make sure that the inside and outside pads are warn about the same amount. Also on the rotor, make sure there are no deep grooves or uneven wear. This can indicate other problems with your brake system.
There are two 19mm bolts that hold the caliper on: up there and there. We'll fast-forward as we use a 19mm socket and ratchet to remove those bolts. Once you have your bolts off, just put the caliper up an out of the way. Use a screwdriver and pry the brake pads out. You can see the outer one comes out pretty easily. We have a little trouble with the inner one. We actually switched to a larger screwdriver, and you can see after a little more force it comes out.
Now this brake pad sticking in there like that indicates there's a problem, and you want to do some cleanup and some lubrication to prevent this. Remove the little stainless steel slides from the caliper bracket. There are two 18mm bolts that hold the caliper bracket to the steering knuckle: there and there. You can see here, we give it a try with just the socket and ratchet, but then we use a pipe for some extra leverage and loosen up that bottom one. Then we'll loosen up the top one, remove the bolts, and remove that caliper bracket. There's a T30 Torx screw that holds the rotor to the hub, and we're just using a T30 Torx bit with the ratchet to remove that.
Then, on this truck, the rotor actually pulls off quite easily. If your rotor doesn't come off easily, make sure you douse the back side with penetrating oil as well as around the studs. Use two M10 bolts, and you can tighten them up through the threaded holes and press the rotor off. Here you see old brakes on the left and new brakes from 1A Auto on the right. They're exactly the same.
The inner pad does have a straight edge at the bottom. Put the new rotor in place and then we just use a lug nut to put it in place, kind of just holds things together while you assemble it. Use a wire brush and clean out the grooves where the brake pads go in the caliper brackets. The slide bolts should move in and out nice and easy. If they don't, you can pull them out, clean them, and grease them. Here we are reinstalling the stainless steel slides into the caliper bracket. Then we'll use a wire brush to clean those as well.
We'll continue to fast-forward as we put the caliper bracket in place and start the two bolts that hold it in place. Then tighten them up preliminarily. Use the Torx wrench to tighten those up to 100 foot-pounds. Use brake grease or white lithium grease, and then grease the ends of the pads where they'll sit in the caliper brackets. You can use mineral spirits, or brake cleaner, even gasoline, anything that evaporates quickly and clean up your brakes before putting the rest of them back together.
Put the rear pad in first. Put one side in first and then press the other side in. Make sure it's going fairly easily, and the same thing for the front pad. Now you need to reset the caliper piston. We've put the old inner brake pad back in there, and I'm just going to use a large C-clamp, and as we tighten it up you'll see the pistons go back into the caliper. Now put the caliper back in place. Sometimes those slide bolts will get stuck a little bit, so you have to push them in a little bit to get the caliper to slide down in correctly. Put the caliper in place and start the two bolts on that hold it. We're going to Torx these two bolts to 50 foot-pounds.
Fast-forward as we remove that lug nut and then put our wheel back on. Put the lug nuts back on by hand first, then tighten them up preliminarily, and with the vehicle back down on the ground, secure and tighten those lugs. Torque the lug nuts to about 110 foot-pounds using a crossing pattern. There's a groove on the wheel and there's another tongue in the cap that line it up. Put the cap back on.
Most importantly, pump your brakes up and do test stops from five and ten mph. Make sure everything is working correctly before you road test your vehicle.
We hope this video helps you out. Brought to you by www.1AAuto.com, your source for quality replacement parts and the best service on the Internet. Please feel free to call us toll-free, 888-844-3393. We're the company that's here for you on the Internet and in person.
Anytime I'm working on a customer's vehicle, I always suggest ordering their parts from 1A-Auto for Quality, Durability and Long lasting performance. 1A-Auto is the Right choice. They are wonderfully staffed and fast delivery of orders.
Great part
Works as it should.
They work. A little heavy on the oil used to prevent rusting (?) But otherwise fine.
The brake rotors worked perfectly and are good quality! I definitely will use A-1 again. Great customer service!
Seems to have good build quality and for the price! Installs smooth and operates quietly
Very nice solid and heavy duty rotors mated up nicely and operate smoothly. I will buy again! The video for the install was particularly helpful.
Fit perfectly. No problem. Thanks??????
Great quality parts at a great price. Thank you 1A Auto.
Good
BRA75139
Yes, these parts will fit the 4x4 models. Please be sure to match all of the specifications in the fit chart with your vehicle prior to ordering.
Front but I wouldnt purchase this product I had to replace after only having them on a month they wear super fast made very cheap and lowest of quality.
If you can provide us with the year, make and model we confirm fit for you.
877-844-3393
Monday - Friday 8:00am - 9:30pm ET
Saturday - Sunday 8:00am - 4:30pm ET
Check Your Email
We sent a verification email to .
Click the Verify Email button in the email to submit your question.
This extra step helps prevent spam.
Specify your vehicle's year, make and model to guarantee fit.
This part does not fit a .
Before proceeding,
select your Vehicle, to verify this Part will fit.
If your vehicle isn't listed, search Brake Rotors
This part will only fit a vehicle with these options.