About TRQ: TRQ is a trusted brand dedicated to making every repair a success story by combining premium parts with easy installation. Each TRQ part is engineered by a team of automotive experts to meet or exceed OEM standards, delivering enhanced performance and maximum longevity. With rigorous in-house testing, the brand ensures superior fit and function across every product line. TRQ also provides customers with best-in-class, step-by-step installation videos—so you can complete repairs with confidence, whether you're a first-time DIYer or an industry professional.
Product Features
Application Specific: Utilizes original mounting points and connections
Improved Design: Re-engineered for optimal reliability
Upgraded Materials: Utilize PA66 plastics and custom rubber formulas to extend service life
Reduced Vibrations: Improved gas mileage, road-feel, and tire wear
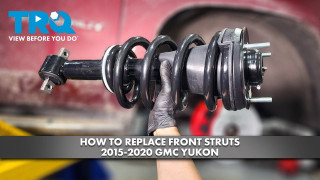
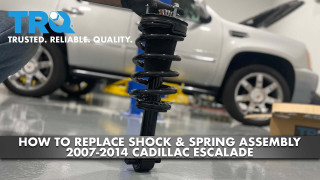
Replacing struts used to require specialized tools to compress, remove, and transfer the old spring and mount. Our Pre-assembled, complete strut & spring assemblies come with all new parts and make the job much quicker and easier for the do-it-yourself mechanic.
Strut & spring assembly contains:
Upper Strut Mount
Strut Bearing
Coil Spring
Boot & Bumper Kit
Gas-charged Strut
Returns: Parts with electrical components cannot be returned once installed.
Attention California Customers:
WARNING: This product can expose you to chemicals including Lead and Lead Compounds, which are known to the State of California to cause cancer, and birth defects or other reproductive harm. For more information, go to www.P65Warnings.ca.gov.
This part fits
8 vehicles spanning 2007-2014.
Fits these Makes
Select vehicle
Year
Make
Model
Description
2007-2014
Cadillac
Escalade
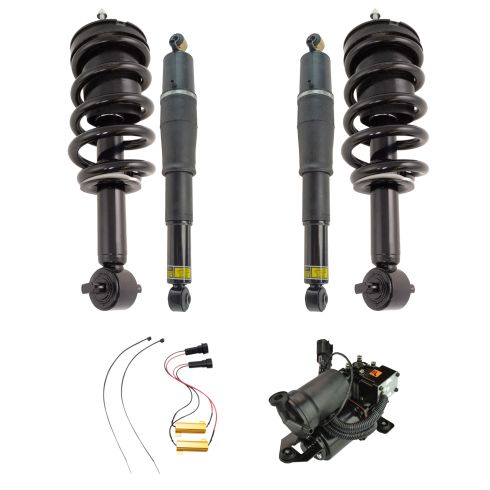
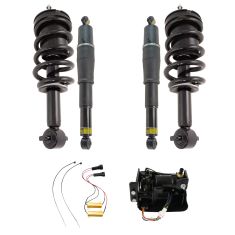
Cadillac Escalade without Electronic Suspension Front & Rear Electronic Suspension Bypass 5 Piece Air Suspension Kit with Bypass Resistors TRQ PAA30842
2007-2014
Cadillac
Escalade ESV
Cadillac Escalade ESV without Electronic Suspension Front & Rear Electronic Suspension Bypass 5 Piece Air Suspension Kit with Bypass Resistors TRQ PAA30842
2007-2013
Cadillac
Escalade EXT
Cadillac Escalade EXT without Electronic Suspension Front & Rear Electronic Suspension Bypass 5 Piece Air Suspension Kit with Bypass Resistors TRQ PAA30842
2007-2013
Chevrolet
Avalanche
Chevrolet Avalanche without 22 Inch Wheels without Electronic Suspension Front & Rear Electronic Suspension Bypass 5 Piece Air Suspension Kit with Bypass Resistors TRQ PAA30842
2007-2014
Chevrolet
Suburban 1500
Chevrolet Suburban 1500 without 22 Inch Wheels without Electronic Suspension Front & Rear Electronic Suspension Bypass 5 Piece Air Suspension Kit with Bypass Resistors TRQ PAA30842
2007-2014
Chevrolet
Tahoe
Chevrolet Tahoe without 22 Inch Wheels without Electronic Suspension without Police Package Front & Rear Electronic Suspension Bypass 5 Piece Air Suspension Kit with Bypass Resistors TRQ PAA30842
2007-2014
GMC
Yukon
GMC Yukon without 22 Inch Wheels without Electronic Suspension without Police Package Front & Rear Electronic Suspension Bypass 5 Piece Air Suspension Kit with Bypass Resistors TRQ PAA30842
2007-2014
GMC
Yukon XL 1500
GMC Yukon XL 1500 without Electronic Suspension Front & Rear Electronic Suspension Bypass 5 Piece Air Suspension Kit with Bypass Resistors TRQ PAA30842
Part Interchange
Brand Label
Part Number
Arnott Industries
AS-2708
Unity Automotive
20-015104
Unity Automotive
11590
Monroe Shocks & Struts
40034
Unity Automotive
14-510900
Gabriel
G57125
DIY Solutions
SHO00003
Monroe Shocks & Struts
181784
Monroe Shocks & Struts
139104
CARDONE Certified Pre-owned OEM
4J-0005S
Dorman - OE Solutions
949-052
Arnott Industries
AS-2700
Arnott Industries
AS-2715
Arnott Industries
AS-3430
Arnott Industries
SK-2954
Hollander
522-01029
General Motors
20930288
General Motors
22941806
FCS
1345555
GSP
810341
GMC
22187156
This item may be interchangeable with parts from other brands with the above part numbers.
This information is provided only for reference and does not guarantee that the item you are
purchasing is identical to parts with part numbers from the brands listed above.
To confirm that this item fits your vehicle, use the above "Check Vehicle Fit" option.
Lifetime Warranty
This item is backed by our limited lifetime warranty. In the event that this item should fail due to manufacturing defects during intended use, we will replace the part free of charge. This warranty covers the cost of the part only.
Returns: Parts with electrical components cannot be returned once installed.
FREE Shipping is standard on orders shipped to the lower 48 States (Contiguous United States). Standard shipping charges apply to Hawaii and Alaska.
Shipping is not available to a P.O. Box, APO/FPO/DPO addresses, US Territories, or Canada for this item.
Expedited is available on checkout to the United States, excluding Alaska, Hawaii.
Final shipping costs are available at checkout.
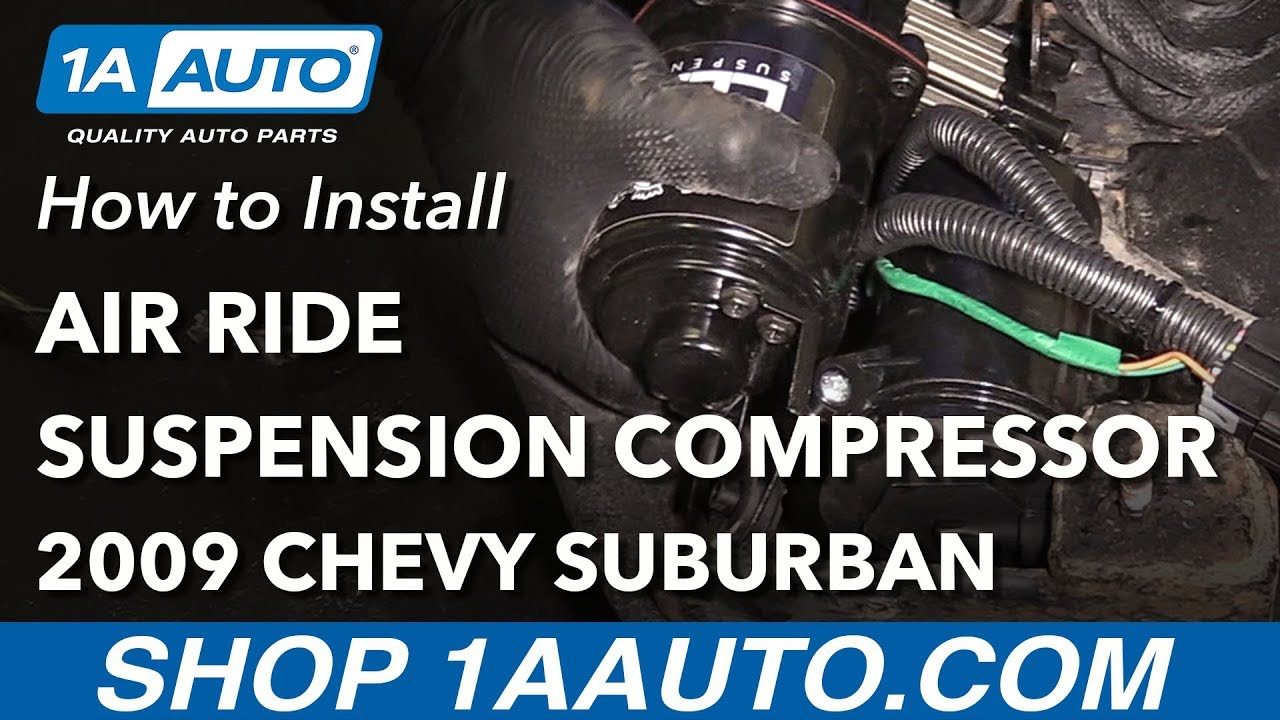
How to Replace Air Ride Suspension Compressor 2007-14 Chevy Suburban
Created on:
Tools used
13mm Socket
24mm Wrench
Socket Extensions
Rust Penetrant
Jack Stands
Ratchet
Floor Jack
Trim Tool Set
T25 Torx Driver
1. Removing the Air Suspension Pump
Raise the vehicle with a jack
Secure the vehicle on jack stands
Remove the 13mm bolt from the frame
Pry the pick-up filter from the wire clip
Maneuver the pick-up filter free
Remove the 13mm bolt in the frame
Loosen the 13mm bolt from the compressor bracket
Lower the compressor off
Disconnect the connectors from the pump
2. Preparing the New Pump
Pry the clips out from the cover
Remove the cover from the bracket and old compressor
Remove the T25 Torx bolts from the bracket
Pry the old airlines out of the clips on the bracket
Remove the pump from the bracket
Remove the old air connector hose
Slide the connector hose onto the new compressor
Remove the plastic band from the new connector
Place the pump into the bracket
Tighten the T25 Torx bolts to the bracket
Press the cover onto the bracket
Place on the new pressure sensor and locking washer with a 24mm wrench
Connect the electrical connector to the pressure sensor
3. Installing the Air Suspension Pump
Slide the two studs into the holes in the frame
Tighten the 13mm bolt into the frame
Insert the pick-up filter into place and clip it in
Connect the connectors to the pump
Hi, I’m Mike from 1A Auto. We’ve been selling auto parts for over 30 years!
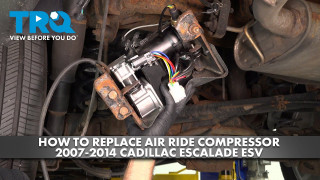
Raise and support the vehicle. The air pump for the air suspension is behind the driver's side rear tire, located on the frame. These two bolts here, you actually don't loosen them. There are little studs that will slide off. There is a bolt up here. You're going to have to go through the frame. It's 13 millimeters. Unbolt it. Once that's unbolted, we'll knock this free. It'll come backwards. We'll pull it down. Unclip from the connectors. But before we do that, we're going to follow this line up and there's actually a little pick up, probably where it picks ups air. It's up here on the filler neck with a clip. I'm going to take a prying tool and pry off the barbed clip that it's on. There it is. There it is. Slink through a couple of other things here. Fish it out of here.
Now I'm going to remove the 13 millimeter bolt that's up and through the frame, and we'll get this pump loose. Bring it down and unhook the connectors on top. Spray some rust penetrant as best I can. It's a hole through the frame. I can feel the nut. I can't see it. Spray some rust penetrant in there. I know it's on a stud, so I'm going to use a 13 millimeter deep socket and an extension in a ratchet. So it actually wasn't that tight. These are studs that go through the frame and hold onto it. I shouldn't really have to loosen them, but maybe to relieve a little bit of pressure with this rust, I'm going to spray some rust penetrant on them. Spray back here, too, to help them slide. Just give them a little loosen. They're 13 millimeter. It's coming loose. I'll grab it with both hands. Try to work it back and forth. There it is up. And up and out their slots that come right out.
It's still connected to the top, so I'm not going to let go of it. This line's actually already been disconnected. Disconnect the electrical connector. Disconnect this line here. This plastic tab off. Get this off. Pull the air pump out.
Here's our old air suspension pump we pulled from the vehicle and our brand new one from 1AAuto.com. As you can see, it doesn't come with a bracket, so we'll have to swap the bracket to our new pump. But, other than that, it is pretty much identical. It's got the same style electrical connector. Adjust it just like that. This electrical connector is the same. It will connect to the sensor up here. It comes with a sensor we will install up here.
We'll swap over this airline. Reconnect the airline that's over here in the back side of the pump. So if your air suspension isn't working, this will fix you up and get you on the road. Let's spray some rust penetrant on the backside of these bolts here. Torque bolt here and then another one in here. Get a better look at them. Have to remove this rubber protector. I'll take a trim prying tool and just pry these Christmas tree clips out of here. Pry them out. Bend the cover back. That should be enough.
So there's actually a bolt here, here, and here. Going to remove those. These are T25 Torx. Remove this first one. Stuck in there with rust. This is the side, it came out with a little bushing part. That's okay.
This airline is attached, so I'm going to slide it out of the clip. And this airline is attached here. Spread the spring clip out that's holding on. Should slide off. The spring clip is removed. The spring clip back where it was so it doesn't get lost. Pump out of here. There's our brackets separated. I need to swap this air hose for the little filter where it sucks in air. This hose here on the new pump goes through this little block right into the pump.
On this original one, it's capped off and then they used a Y fitting so that it ends up being connected from here to here. Basically, the same exact thing except I'm going to remove it from here. Actually, if it's too hard to remove from here, you can cut this off here and then just place it on the new pump. I'm going to use some hose cutters. Just cut this. Place that on the new pump. Take this elastic band off. We don't need it anymore. Place our new pump back into the original bracket. Feed this hose down like this. Fiddle with the bracket a little bit. Put this hose back into the clip. Take this other piece off.
Reinstall this screw. T25 Torx. Just going to get one started. And then line up the other one, so the way the pump is not holding on the screw. This is a rubber bushing, so I'm just going until I feel it get tight and then I will stop. The last one at the bottom. Little trickier with the rubber piece here, which I get started by hand first. Going to pull out this other clip that's in here. Give me a little more space. That's easier. Push our clips back in, our rubber protector. Go ahead and clip on this airline. Put this clamp down over it. These go into the car. Need to add this pressure sensor. It has a lock in washer, just like original, and an O-ring on there. Doesn't matter what direction you install that washer. Get it threaded by hand to get it started.
I installed the pump into the bracket first so it would be easier to hold it while I tighten it. You can use an adjustable wrench or this is 24 millimeter. I'm just going to tighten it down. Don't over tighten it because it is just going into plastic. That O-ring will seal, so as you feel it start to get tight, be able to turn more with the wrench a little bit. That feels good. Install the electrical connector into it. It connectors here. It sits like this in the car.
Now it's ready to go back up into the car. Slide these two studs back in the holes in the frame while lining this one up. I'll reach in from the back side of the frame and put in this 13 millimeter nut and we'll reconnect the lines. Going to be all set. Slides up here. Slide forward to lock it in. Using a 13 millimeter deep socket and extension, reach up into the frame. And tighten it.
Feel like it's tight. I'll stop. Place our air inlet tube back up onto the filler neck where it came from. Clip it back into place. Reconnect the airlines and the electrical connection on top. And the pump is replaced.
Thanks for watching. Visit us at 1AAuto.com for quality auto parts, fast and free shipping, and the best customer service in the industry.
PAA30842
In Stock
Product Reviews
4.7/ 5
★★★★★★★★★★
18 reviews
5★
78%
4★
17%
3★
6%
2★
0%
1★
0%
★★★★★June 7, 2026
Great Ride!
Installation was easy after watching the video for specific information, especially torque specs. Make sure after installation you get an alignment. The rear shocks and compressor did not take long at all. But, make sure you check your fuses and replace your relay because that was an issue for me with my Escalade. Once both were replaced compressor worked without any issues. The ride is slightly different from using the electromagnetic shocks but I am pleased with the overall quality! Thanks 1A Auto. No issues with delivery.
★★★★★May 7, 2026
Great quality, easy process.
The ordering to the delivery to the install. It was all seamless. And the fitment was perfect. This is why 1A auto is my go to. Suspension running like new again.
★★★★★November 25, 2025
Product Review
Excellent product packaged extremely well worth the price
★★★★★November 16, 2025
Great kit.
Whole job took 5 hours by my self. Everything fit and improved the ride. 2008 Yukon Denali.
★★★★★September 20, 2025
Great package deal. Only issue I have is the bypass module did not clear my dash sensor lights. My dash is lit up like a Christmas tree
★★★★★July 21, 2025
My truck rides 1,000 times better
★★★★★May 25, 2025
2007 suburban 1500 Ltz with the z55 suspension
Easy to install bolts right in and resistors worked no check suspension light on would recommend
★★★★★March 23, 2025
Excellent purchase to restore ride conditions.
Fit well and restored original ride conditions. Only issue I came across, rear left air line had to be lengthened, due to air port a little lower on this product. It fit, but was tight upon lowering vehicle. So I extended it about 3" to relax the little plastic air line.
★★★★★February 9, 2025
Good product
Works good just as intended
★★★★★September 29, 2024
great does the job at a reasonable price
Showing 1–10 of 18 reviews
Customer Q&A
Got a question about this part? Post it and get answers from our team.
JohnOctober 31, 2025
are the front struts air leveling still?
The front are not air leveling.
Andra · November 25, 2025
JohnSeptember 20, 2025
Are these the proper parts for a 2010 Chevy Suburban LTZ with air and electric suspension without 22 in. wheels?
Yes it all fits. Only problem I had was all the dash lights came on and the bypass module did not clear the lights. Maybe it requires two? I dont know. The suspension is great
Shane · September 20, 2025
JohnMarch 15, 2025
If my 2014 Escalade hasMagnetic Ride Control (MRC)suspension system., can I replace with these?
It should work and you just plug in the resistors to keep the service suspension light from coming on. I installed these on my 2007 and worked great without any lights coming on and they ride great.
travis · March 15, 2025
IanDecember 7, 2024
Will this fit a 2012 GMC Yukon XL Denali with Z55 suspension?
Yes, this part will fit your vehicle.
Jessica · December 10, 2024
tannerJune 9, 2024
07 escalade esv here, how smooth is the ride? is it comparable to stock magnetize?
Our parts are exact replacements for your vehicle's OEM parts. As long as your vehicle specifications match up with our listing, these parts will directly fit and function like the originals.
Kemal · June 10, 2024
ChadJune 6, 2024
What's the difference between this and the original air ride system on my 07 escalade esv?
This is a passive conversion kit. They will fit like the original, bypass the factory sensors, and create a more consistent ride, thanks to a revised gas shock design. These kits include an Electronic Bypass Module, which was designed to eliminate suspension dashboard warning lights.
Andra · June 6, 2024
RandyMay 13, 2024
Will the service supension light stay on all the time?
It should go off after installation
Nathanial · June 6, 2024
peterMay 13, 2024
Will this work just like factory suspension on my 2012 avalanche ltz. It has the automatic adjustment set up?
Yes
Nathanial · June 6, 2024
JasonMarch 18, 2024
If this is a conversion kit why do we need a new compressor? Would the conversion deem the compressor obsolete?
The compressor is for the rear. The conversion in the front
Zuriel · March 19, 2024
CliftonMarch 5, 2024
Will this fit my 2009 Chevy suburban ltz? Cause Im only asking because I have 24in rims on my truck..
They worked fine on my 2010 but it is still stock wheels and ride height
mark · March 6, 2024
Showing 1–10 of 19 questions
Customer service
877-844-3393
Monday - Friday 8:00am - 9:30pm ET Saturday - Sunday 8:00am - 4:30pm ET
Ask a Question
Check Your Email
We sent a verification email to .
Click the Verify Email button in the email to submit your question.
This extra step helps prevent spam.
Cadillac is a registered trademark of General Motors Company. 1A Auto is not affiliated with or sponsored by Cadillac or General Motors Company.See all trademarks.
Select Your Vehicle
Specify your vehicle's year, make and model to guarantee fit.










 WARNING: This product can expose you to chemicals including Lead and Lead Compounds, which are known to the State of California to cause cancer, and birth defects or other reproductive harm. For more information, go to www.P65Warnings.ca.gov.