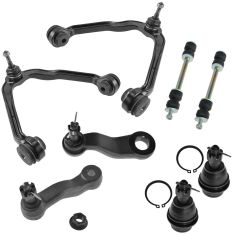
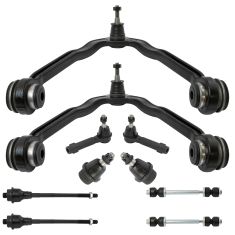
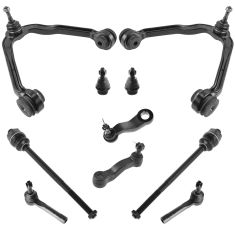
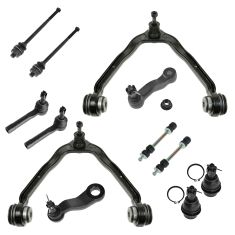
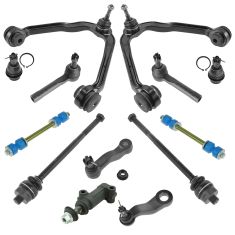
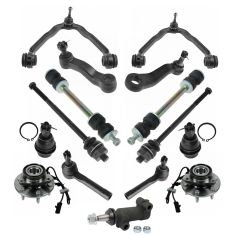
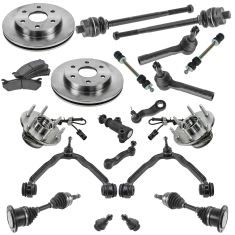
/2006 GMC Yukon with 4 Groove Pitman Arm with Cast Iron Lower Control Arms without Aluminum Steering Knuckles Front 13 Piece Steering & Suspension Kit TRQ PSA58760
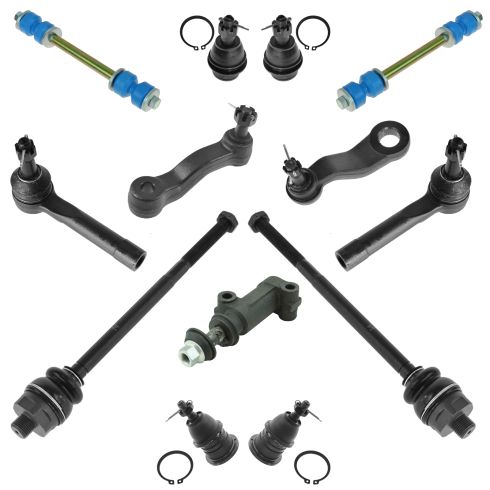
2006 GMC Yukon with 4 Groove Pitman Arm with Cast Iron Lower Control Arms without Aluminum Steering Knuckles Front 13 Piece Steering & Suspension Kit TRQ PSA58760
Application Specific Design: No modifications necessary
Anti-Corrosion Coated: Enhanced surface life
Pre-greased: No additional maintenance required
Kitted for Restored Performance: Improved road-feel and handling
Description
TRQ suspension kits are manufactured using premium raw materials and coatings for extended service life. Each TRQ suspension component is designed to be a direct, maintenance-free replacement to the stock unit. To extend the life of your steering and suspension components, TRQ recommends replacing components in pairs, sets, or kits. All products are fit and road-tested in our Massachusetts R&D facility to ensure we deliver on our promise of Trusted Reliable Quality.
Install Tip: When replacing steering components, have a professional alignment performed afterwards. This ensures proper tracking and even tire wear.
Our steering and suspension components are pre-greased and sealed for long life and do not require the extra maintenance typically required by greaseable versions.
Attention California Customers:
WARNING: This product can expose you to chemicals including Lead and Lead Compounds, which are known to the State of California to cause cancer, and birth defects or other reproductive harm. For more information, go to www.P65Warnings.ca.gov.
Lifetime Warranty
This item is backed by our limited lifetime warranty. In the event that this item should fail due to manufacturing defects during intended use, we will replace the part free of charge. This warranty covers the cost of the part only.
FREE Shipping is standard on orders shipped to the lower 48 States (Contiguous United States). Standard shipping charges apply to Hawaii and Alaska.
Shipping is not available to a P.O. Box, APO/FPO/DPO addresses, US Territories, or Canada for this item.
Expedited is available on checkout to the United States, excluding Alaska, Hawaii.
Final shipping costs are available at checkout.
How to Replace Tie Rods 2001-10 GMC Sierra 2500 HD Truck
How to Replace Sway Bar Link 2000-06 Chevy Suburban
Created on:
Tools used
Adjustable Wrench
35mm Socket
Torque Wrench
Tie Rod Fork
Jack Stands
Grease Gun
Rubber Mallet
Tie Rod Puller
7mm Socket
Lug Wrench
Ratchet
Floor Jack
Needle nose pliers
1. Remove the wheel
Loosen the lug nuts.
Raise and secure the vehicle.
Remove the wheel.
2. Remove the tie rod assembly
Remove the tie rod bolt.
Use a pickle fork and hammer to separate it.
Use an adjustable wrench and a fitted wrench to remove the tie rod assembly.
3. Install the new tie rod assembly
Adjust your new tie rod assembly to match the old one for a preliminary alignment.
Mount the new tie rod assembly and tighten it in with a wrench.
Tighten the nut on the tie rod stud to 65 ft lbs.
Install the cotter pin.
Use a 7 mm wrench to install the grease fitting
With a grease gun, grease the inner and outer joints.
4. Put the wheel back on
Preliminarily tighten the lug nuts.
Lower the car and torque the lug nuts to 120 ft lbs using a star pattern.
Brought to you by 1A Auto.com, your source for quality replacement parts and the best service on the internet. Hi, I'm Mike Green. I'm one of the owners of 1A Auto. I want to help you save time and money repairing and maintaining your vehicle. I'm going to use my 20-something years experience restoring and repairing cars and trucks like this, to show you the correct way to install parts from 1A Auto.com. The right parts, installed correctly, that's going to save you time and money. Thank you, and enjoy the video.
In this video I'm going to show you inner and outer tie rod replacement. This truck actually just needed the inner, but if you're replacing the inner, you might as well replace the outer as well. These tie rods fit this whole generation of GM trucks and SUV's - trucks from 98 - 06 and SUV's from 99 - 07. The tools you'll need are a jack and jack stands, a 22 mm lug wrench or socket and ratchet. You'll need either a 35 mm wrench or a 12 inch adjustable wrench that can go to 35 mm and then you'll need a second adjustable wrench as well, a tie rod removal tool, a grease gun, torque wrench, and pliers. The clunking noise was the inner tie rod. You can see here, when I shake the tire back and forth you'll see the inner tie rod move but that steering arm inside doesn't move, so you know there's play in there and it needs to be replaced.
Start out by raising and securing the vehicle on a jack stand and then remove your cap and wheel. We're going to remove this bolt. We've got a ratchet. If you don't have a breaker bar, use a ratchet and a piece of pipe. The bolt should come off pretty easily. Take the bolts off most of the way. I'm planning on replacing the outer tie rod as well, so I'm going to use a pickle fork to separate it. The best way to go about this is to get the wrench on it from underneath and push. That should break her free. I'm just going to speed up as I pull that out. You want to make sure that your outer tie rod spins with the wrench so the whole assembly spins and you don't shorten or lengthen the tie rod -- the inner and outer tie rod assembly.
There's your whole assembly out. If you can see here, I've got my old assembly, inner tie rod and outer tie rod, and I want to measure right from the edge of this surface here right to the end. I'm taking my new inner tie rod and outer tie rod and I put them together, just to compare. This will give you a good preliminary alignment. We'll put this nut a little closer. We can put it together now. It will be a good preliminary alignment until you can get your vehicle to a shop where you can get a real alignment.
I'm just leaving my nut right there and spinning my outer tie rod off. The nut marks the place where your tie rod was and then taking off that outer tie rod just makes it easier to get the inner one on. That allows me put my inner tie rod on. Speed it up here as I use the wrench to tighten the tie rod up. Then I can put my outer tie rod right back on and go right up to the nut. Then I'll just fast-forward here as I put that outer tie rod back on the inner tie rod. Now I'm just taking the nut or just getting the outer tie rod in place. Take the nut off the new tie rod, and I'm just going to get some of the debris off the steering knuckle there, and then you can push on the stud on the tie rod and get it lined up with the steering knuckle, and then push it up and in, and start your nut back on.
We'll tighten this up to 65 foot-pounds. Pull a little tighter here and we can get this cotter pin through. We'll fast-forward here as we install the cotter pin and bend the end over and then use a 7 mm wrench and install our grease fitting. We'll take a wrench screw up here. The other one holds the outer tie rod and just tighten up the block nut. Now you want to use a grease gun and grease both the joint for the outer tie rod and the inner tie rod.
Use some more fast-forward here. As you put the wheel and tire back on, start all the lug nuts one by one by hand first, then use your wrench to preliminary tighten them, then you can lower the vehicle back down on the ground, torque the lug nuts to 120 foot-pounds. I'm using a crossing pattern and then I do it one more time, go around all eight and make sure they're tight. Then you can put your center cap back on and you should be all set.
We hope this helps you out. Brought to you by www.1AAuto.com, your source for quality replacement parts and the best service on the internet. Please feel free to call us toll-free, 888-844-3393. We're the company that's here for you on the internet and in person.
Tools used
Reciprocating Saw
Hammer
Torque Wrench
14mm Socket
Jack Stands
Ratchet
22mm Socket
1. Removing the Wheel
Remove the hub cap by loosening the lug nuts
Remove the lug nuts and tire
2. Removing the Stabilizer Link
Using locking pliers to clip onto the top of the stabilizer link
Then remove 14mm bolt from bottom of the stabilizer link
Remove the stabilizer link with a hammer or reciprocating saw
3. Replacing the Stabilizer Link
Put the stabilizer piece back into place
Use four washers, four grommets, and a tube
Use a jack stand to help push it through till it appears through the top
Tighten the 14mm bolt on the stabilizer link
4. Replacing the Wheel
Put the tire in place
Replace and tighten each lug nut
Torque each lug nut in a crossing pattern to 100 ft/lbs
Torque the center hub nut to 160 ft/lbs
Replace the hub cap and tighten the lug nut caps
Brought to you by 1AAuto.com, your source for quality replacement parts and the best service on the Internet.
Hi, I'm Don from 1A Auto. I hope this how-to video helps you out, and the next time you need a part for your vehicle, think of 1AAuto.com. Thanks.
In this video, we're going to show you how to replace a sway bar link on this 2002 Chevy Suburban, and it's the same part and similar process on these Suburbans from 2000 and 2006. We show you on the passenger's side, but on the driver's side it's the same procedure. The items you need for this include a new sway bar link from 1AAuto.com, a 14mm and 22mm socket and ratchet, locking pliers, a hammer, and a reciprocating saw depending on the condition of your vehicle.
Remove your hubcap by loosening up these lug nut caps and pulling the hub cap. Now, you want to remove the lug nuts. If you don't have air powered tools, you want to do this while the vehicle is on the ground. You can loosen them preliminarily, raise the vehicle and remove the lug nuts the rest of the way, and pull the wheel out. Using locking pliers, clip on to the top of your stabilizer link, and then remove this 14mm bolt. We'll just fast forward as Mike does this.
Now, you want to just hammer the link through. If the link doesn't move, you may have to use a reciprocating saw and cut it. Up top is the old part; below is the new part from 1A Auto. You can see they're identical, and they'll fit exactly the same. You want to put your stabilizer link back into place, starting with a washer and a grommet, then through the hole, then another grommet, then a washer, then the tube; then, before going through the next hole, another washer and grommet; then, on the top another grommet and another washer, then the nut.
Here, we just put the jack underneath the link. That's just to push it up through and compress the washers a little bit so that you can get the nut on the other end. Once I get another nut on, you'll see I just release the jack. You want to obviously be supporting the vehicle with jack stands, and then use your jack to push the bolt of the link up through. Then, you want to tighten up the sway bar link, and you basically want to tighten it up until the rubber bushings are compressed enough so that they're the same diameter as the washers.
Put the wheel back in place, then replace each of your lug nuts and tighten them up. You want to tighten them preliminarily, lower the vehicle, then tighten them the rest of the way. Torque each lug nut in a crossing pattern to 100 foot-pounds. Replace the hubcap, and just tighten up those lug nut caps.
We hope this video helps you out. Brought to you by www.1AAuto.com, your source for quality replacement parts and the best service on the Internet. Please feel free to call us toll-free, 888-844-3393. We're the company that's here for you on the Internet and in person.
PSA58760
In Stock
Product Reviews
Loading reviews
4.41/ 5.029
29 reviews
5 Stars
4 Stars
3 Stars
2 Stars
1 Star
21
3
2
2
1
quality at low price
Matt
September 14, 2017
had pretty much everything you need. came with castle nuts and cotter pins. same quality you'd expect from economy sets from you normal auto stores. everything was made from cast steel and then machined. no flimsy aluminum or plastic as I've seen in some other cases. worked out well, best price ever! I drive high mileage vehicles and highly reccommend these for that or budget. I would still got with moog if you are doing a front end on a 5 year or newer car. I think these will last me another 3 to 5 years which is probably longer than my yukon will.
Frankie
August 7, 2018
Fast delivery and friendly agent when I called in super happy with parts will order again
Good Quality For A Good Price
Brandon
February 21, 2019
I usually order most of my parts from 1A Auto and there parts have a OEM like quality to them, good materials and very strong strength, I recommend not only getting front end parts from them but overall parts throughout the store to purchase for a good quality restoration of a vehicle!
Excellent
Patrick
April 4, 2019
Excellent quality parts and amazing prices. Definitely be ordering again
Steering assembly for 2006 chevrolet truck
G
July 20, 2019
Part fit and was easy to install at a good price. Fast and easy delivery
Parts
J
August 2, 2019
I ordered a new front suspension kit the parts were high quality and made my front end feel new again....trucks happy I'm happy fast shipping as well
Not greased enough
W
October 2, 2019
In the product description it says pre greased for longevity but thats not the case. When I pulled the rubber boots off there was only a couple small daps of grease on each joint. I ended up adding a sufficient amount of grease and put the boots back on.
Good delivery and parts
Alex
October 5, 2019
Good parts and good delivery
quality
JONATHAN
January 23, 2020
good quality parts at a very reasonable price. fitment was just right
Great front end kit
M
May 3, 2020
There front end parts are as good as OEM. Everything went together like a dream. No my front end is like new again.
Did the job
Z
May 6, 2020
I wish I ordered the full front end in one purchase instead of just the smaller set
Suspension kit and wheel bearings
C
May 13, 2020
Very dependable parts. Mechanic had no issues.i would recommend these parts.
All parts fit
D
May 19, 2020
All the parts fit, with all the work required to install them, I wish I would have purchased greasable parts.
great products
C
August 3, 2020
everything was as it should be, installed with no problems and seems to be great products.
Perfect
A
August 4, 2020
No issues with installation, everything fit 100%. Would highly recommend
great parts
E
August 11, 2020
i just wanted to say thank you for the great quality parts at a not so quatlity price . everything fit perfect
Great
M
August 25, 2020
A1 auto worked out great didn't trust at first but it was worth the effort and the waiting the part stores really get over by over pricing for the same parts they order for you
Everything fits.
M
August 28, 2020
All I can say is that the parts arrived in a timely manner and all the part fit just like they were supposed to. Only thing they could have done better is to have sent someone to put them on for me.
Pure trash
Mike
September 27, 2020
Pure trash. After 3 months the inner tie rods are shot. Guess should have known better and went with name brand parts from the local store or dealership never again will 1a get a dime from me
Pretty good
D
November 18, 2020
Ball joints don't fit. Too tight. everything else was pretty good.
Direct fit
C
January 26, 2021
All parts were a direct fit , everything is working perfectly ! Shipping was fast and all the pieces were complete
Chevrolet GMC Cadillac Steering & Suspension Kit
G
February 28, 2021
Everything fit like a glove, great quality parts, shipped promptly and worked out great. Have a great confidence in 1A Auto will go back again for other parts needed.
The right parts the first time.
R
March 12, 2021
I've used a1 auto two times so far and both times I received the right parts and on time, I will continue to use a1 auto for my auto needs, thanks
Steering components avalanche
W
March 18, 2021
I received parts as ordered in a timely manner. All parts as described. Watched video on installation. Vehicle handles like brand new.
My opinion
Will
April 30, 2021
Am I bringing these are the most cheaply made parts for Chevrolet they could ever be manufactured what I mean is none of these parts have grease fittings for continued grazing which with you expand the life of these parts but seeing how they dont have grease fittings because they are just standard piece of junk Am I opinion they deserve one star goes for a few dollars more I couldve got legit parts with grease fittings built into them where they could degrees and expand the life of them at least a half
Austin
August 20, 2021
Good product for the price.
Spend that extra money on quality parts instead
daniel
December 1, 2021
installed before taking a 500+ mile road trip driver side ball joints wasted/junk need replacing again Should have stayed away from low priced important car parts,got what i paid for. lesson learned, never again will purchase this brand.
MARK
May 13, 2022
Everything was good.
Antwan
November 20, 2023
Front end is 10 times better than before and my wheels ?? are not riding funny anymore. Thanks too yall.
Customer Q&A
Will this fit a 2002 tahoe with aluminum lower control arms and a 4 spline pitman?May 18, 2016
David W
Is there a way to find out if my vehicle has a 3-groove or 4-groove pitman arm without having to remove it?July 7, 2018
Robert P
10
Thank you for your interest in 1A Auto. You should be able to find out that information by contacting the dealership with your 17-digit VIN. Thank you.
July 7, 2018
Jessica D
10
I was able to google it in my case. The 4WD and 2WD had different amount of grooves. Also, possible try using the AutoZone parts finder. Figuring out which one is for 2WD and which is 4WD should do it for you though.
July 7, 2018
Matt R
10
3 groove will have a 33-spline vs the 4 grove having a 32-spline, youll have to remove the nut to do the count, besides that I think 1/2 tons have the 4 and 3/4 HDs have the 3.
July 7, 2018
Albert R
Would this fit a 2003 Chevrolet Tahoe Z71?April 7, 2020
Y A
10
Yes, according to the information you provided, this part will fit your vehicle given you have the 4 groove pitman arm rather than the 3 groove. Please let us know if you have any other questions!
April 7, 2020
Curtis L
Will this fit 2002 4wd chevy tahoe with 6 in lift kit on tires 33in with 20in rims?May 4, 2020
Carlos T
10
Thank you for the inquiry. Our parts are not made to work on vehicles with lift kits installed on them. If you have any other questions, let us know.
May 4, 2020
Christa R
AutoZone listed 3 and 4 groove pitman arms to fit my 2005 Chevy Silverado 1500 5.3L 8 cylinder 4 wheel drive???May 5, 2020
Tyler S
10
Thank you for your inquiry! This particular kit is equipped with the 4 groove pitman arm. If your vehicle is equipped with the 3 groove pitman arm then this would not be correct. Please let us know if you have any further questions, thank you.
May 5, 2020
Jessica D
Can you tell me which parts I need to install first and what order i should install each part included in this 13 piece steering and suspension kit? You have how to video for each part but there is no video that shows all of the parts being installeAugust 5, 2020
C O
10
Thanks for your inquiry. Written and video installation instructions are found on the product page under the "How-To & Tools" tab.
We're constantly adding new installation video instructions. If we do not have one for your vehicle on the product listing page, please check again at a later time or check our Video Library to see similar repairs here: https://www.1aauto.com/videos
August 5, 2020
Emma F
What brand are these parts?September 5, 2020
Adrian F
10
Thank you for your inquiry. These are manufactured by TRQ, TRQ is a high quality, high-end name brand that we offer and back with our 1A Auto Limited Lifetime Warranty. Please let us know if you have any further questions.
September 5, 2020
Curtis L
Does this fit a 2wd 2004 suburban?December 31, 2021
John D
10
Yes, this part will fit your vehicle.
January 3, 2022
T I
Customer service
877-844-3393
Monday - Friday 8:00am - 9:30pm ET Saturday - Sunday 8:00am - 4:30pm ET
GMC is a registered trademark of General Motors Company. 1A Auto is not affiliated with or sponsored by GMC or General Motors Company.See all trademarks.
Enter Vehicle Year Make Model
Specify your vehicle's year, make and model to guarantee fit.
Year
Make
Model
Options
Drivetrain
This part doesn’t fit a . Select from parts that fit.