

★★★★★
January 17, 2026
Fresh look on my 2003 Chevy Tahoe
Delivered on time and as advertised. Passed Md inspection. Thanks

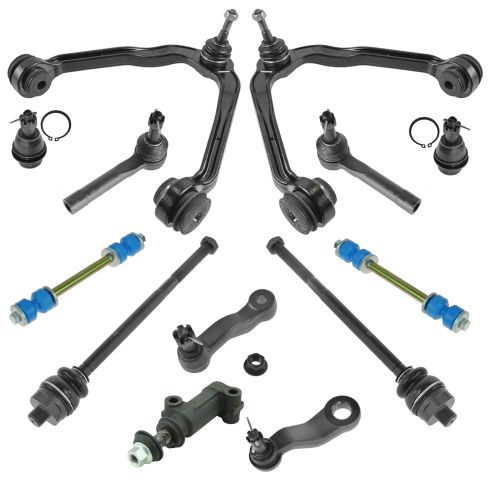
Replaces








About TRQ:
TRQ is a trusted brand dedicated to making every repair a success story by combining premium parts with easy installation. Each TRQ part is engineered by a team of automotive experts to meet or exceed OEM standards, delivering enhanced performance and maximum longevity. With rigorous in-house testing, the brand ensures superior fit and function across every product line. TRQ also provides customers with best-in-class, step-by-step installation videos—so you can complete repairs with confidence, whether you're a first-time DIYer or an industry professional.
Product Features
TRQ suspension kits are manufactured using premium raw materials and coatings for extended service life. Each TRQ suspension component is designed to be a direct, maintenance-free replacement to the stock unit. To extend the life of your steering and suspension components, TRQ recommends replacing components in pairs, sets, or kits. All products are fit and road-tested in our Massachusetts R&D facility to ensure we deliver on our promise of Trusted Reliable Quality.
Install Tip: When replacing steering components, have a professional alignment performed afterwards. This ensures proper tracking and even tire wear.
Our steering and suspension components are pre-greased and sealed for long life and do not require the extra maintenance typically required by greaseable versions.
Attention California Customers:
 WARNING: This product can expose you to chemicals including Lead and Lead Compounds, which are known to the State of California to cause cancer, and birth defects or other reproductive harm. For more information, go to www.P65Warnings.ca.gov.
This part fits 19 vehicles spanning 1999-2007.
| Year | Make | Model | Description |
|---|---|---|---|
| 2002-2006 | Cadillac | Escalade | Cadillac Escalade with 4 Groove Pitman Arm with Cast Iron Lower Control Arms without Aluminum Steering Knuckles Front 13 Piece Steering & Suspension Kit TRQ PSA58753 |
| 2003-2006 | Cadillac | Escalade ESV | Cadillac Escalade ESV with 4 Groove Pitman Arm with Cast Iron Lower Control Arms without Aluminum Steering Knuckles Front 13 Piece Steering & Suspension Kit TRQ PSA58753 |
| 2002-2006 | Cadillac | Escalade EXT | Cadillac Escalade EXT with 4 Groove Pitman Arm with Cast Iron Lower Control Arms without Aluminum Steering Knuckles Front 13 Piece Steering & Suspension Kit TRQ PSA58753 |
| 2002-2006 | Chevrolet | Avalanche 1500 | Chevrolet Avalanche 1500 with 4 Groove Pitman Arm with Cast Iron Lower Control Arms without Aluminum Steering Knuckles Front 13 Piece Steering & Suspension Kit TRQ PSA58753 |
| 1999-2003 | Chevrolet | Silverado 1500 | Chevrolet Silverado 1500 with Steering Gear 4 Wheel Drive with 4 Groove Pitman Arm with Cast Iron Lower Control Arms without Aluminum Steering Knuckles Front 13 Piece Steering & Suspension Kit TRQ PSA58753 |
| 2004-2006 | Chevrolet | Silverado 1500 | Chevrolet Silverado 1500 with Steering Gear 4 Wheel Drive with 4 Groove Pitman Arm with Cast Iron Lower Control Arms without Aluminum Steering Knuckles Front with 6 Lug Wheels 13 Piece Steering & Suspension Kit TRQ PSA58753 |
| 2007 | Chevrolet | Silverado 1500 Classic | Chevrolet Silverado 1500 Classic with Steering Gear 4 Wheel Drive with 4 Groove Pitman Arm with Cast Iron Lower Control Arms without Aluminum Steering Knuckles Front with 6 Lug Wheels 13 Piece Steering & Suspension Kit TRQ PSA58753 |
| 2000-2006 | Chevrolet | Suburban 1500 | Chevrolet Suburban 1500 with 4 Groove Pitman Arm with Cast Iron Lower Control Arms without Aluminum Steering Knuckles Front 13 Piece Steering & Suspension Kit TRQ PSA58753 |
| 2000 | Chevrolet | Tahoe | Chevrolet Tahoe LT with 4 Groove Pitman Arm with Cast Iron Lower Control Arms without Aluminum Steering Knuckles without Z71 Package Front 13 Piece Steering & Suspension Kit TRQ PSA58753 |
| 2000 | Chevrolet | Tahoe | Chevrolet Tahoe Base Model with 4 Groove Pitman Arm with Cast Iron Lower Control Arms without Aluminum Steering Knuckles without Z71 Package Front 13 Piece Steering & Suspension Kit TRQ PSA58753 |
| 2000 | Chevrolet | Tahoe | Chevrolet Tahoe LS with 4 Groove Pitman Arm with Cast Iron Lower Control Arms without Aluminum Steering Knuckles without Z71 Package Front 13 Piece Steering & Suspension Kit TRQ PSA58753 |
| 2001-2006 | Chevrolet | Tahoe | Chevrolet Tahoe with 4 Groove Pitman Arm with Cast Iron Lower Control Arms without Aluminum Steering Knuckles Front 13 Piece Steering & Suspension Kit TRQ PSA58753 |
| 1999-2003 | GMC | Sierra 1500 | GMC Sierra 1500 with Steering Gear 4 Wheel Drive with 4 Groove Pitman Arm with Cast Iron Lower Control Arms without Aluminum Steering Knuckles Front 13 Piece Steering & Suspension Kit TRQ PSA58753 |
| 2004-2006 | GMC | Sierra 1500 | GMC Sierra 1500 with Steering Gear 4 Wheel Drive with 4 Groove Pitman Arm with Cast Iron Lower Control Arms without Aluminum Steering Knuckles Front with 6 Lug Wheels 13 Piece Steering & Suspension Kit TRQ PSA58753 |
| 2007 | GMC | Sierra 1500 Classic | GMC Sierra 1500 Classic with Steering Gear 4 Wheel Drive with 4 Groove Pitman Arm with Cast Iron Lower Control Arms without Aluminum Steering Knuckles Front with 6 Lug Wheels 13 Piece Steering & Suspension Kit TRQ PSA58753 |
| 2000 | GMC | Yukon | GMC Yukon SLE with 4 Groove Pitman Arm with Cast Iron Lower Control Arms without Aluminum Steering Knuckles Front 13 Piece Steering & Suspension Kit TRQ PSA58753 |
| 2000 | GMC | Yukon | GMC Yukon SLT with 4 Groove Pitman Arm with Cast Iron Lower Control Arms without Aluminum Steering Knuckles Front 13 Piece Steering & Suspension Kit TRQ PSA58753 |
| 2001-2006 | GMC | Yukon | GMC Yukon with 4 Groove Pitman Arm with Cast Iron Lower Control Arms without Aluminum Steering Knuckles Front 13 Piece Steering & Suspension Kit TRQ PSA58753 |
| 2000-2006 | GMC | Yukon XL 1500 | GMC Yukon XL 1500 with 4 Groove Pitman Arm with Cast Iron Lower Control Arms without Aluminum Steering Knuckles Front 13 Piece Steering & Suspension Kit TRQ PSA58753 |
| Brand Label | Part Number |
|---|---|
| ACDelco | 45D1103 |
| MOOG Chassis Products | ES3493T |
| NAPA | 260-5308 |
| Centric Parts | 623.66064 |
| Mevotech | RMS20268 |
| Mcquay-Norris | FA4181 |
| MOOG Chassis Products | CK80826 |
| MOOG Chassis Products | K6723 |
| MOOG Chassis Products | K80826 |
| MOOG Chassis Products | RK80826 |
| Mevotech | GS20268 |
| NAPA Premium | 2643804 |
| MOOG Chassis Products | K6534 |
| Raybestos Chassis | 502-1103 |
| MOOG Chassis Products | RK80942 |
| MAS Industries | CB90006PR |
| NAPA Premium | 2605308M |
| MAS Industries | CB90270 |
| Dorman - OE Solutions | 520-116 |
| General Motors | 15047200 |
| MAS Industries | CB90136 |
| SYD | 12475485 |
| MasterPro | 4CB50432 |
| MOOG Chassis Products | ES3488 |
| General Motors | 12475485 |
| General Motors | 15864153 |
| Mevotech | TXMS20268 |
| NAPA Premium | TXMS20268 |
| Ingalls Engineering | CAK80826 |
| NAPA | 2605308M |
| Precision Driveline | 4CB50026 |
| Mcquay-Norris | FA4181E |
| MAS Industries | CB90136PR |
| MOOG Chassis Products | K6541 |
| MAS Industries | CB90006 |
| Precision Driveline | CB50026 |
| Mevotech | CMS20268 |
| Mevotech | MS20268 |
| MOOG Chassis Products | K80942 |
| Falcon Steering Systems | FK80942 |
| MOOG Chassis Products | K6536 |
| MOOG Chassis Products | K80631 |
| NAPA Premium | 2605308 |
| Mevotech | CMS501238 |
| MOOG Chassis Products | CK80942 |
| MOOG Chassis Products | RK621782 |
| Mevotech | MK6659 |
| DIY Solutions | SUS06880 |
| DIY Solutions | SUS05321 |
| DIY Solutions | SUS06360 |
| DIY Solutions | SUS07407 |
| DIY Solutions | SUS05070 |
| DIY Solutions | SUS00174 |
| DIY Solutions | SUS07379 |
| DIY Solutions | SUS05330 |
| General Motors | 15167767 |
| General Motors | 12471378 |
| General Motors | 15840266 |
| General Motors | 12471379 |
| General Motors | 10385580 |
| General Motors | 12542993 |
| General Motors | 12475478 |
| General Motors | 19149617 |
| General Motors | 26059210 |
| General Motors | 15070821 |
| General Motors | 15835052 |
| General Motors | 12546193 |
| General Motors | 15295861 |
| General Motors | 15245582 |
| General Motors | 19149615 |
| General Motors | 15922557 |
| Hollander | 511-01044 |
| MOOG Chassis Products | K6536HD |
| MOOG Chassis Products | K80631, K6428 |
| ACDelco | 46D2272A |
| ACDelco | 45D2272 |
| MOOG Chassis Products | K700539 |
| Mevotech | MK6541 |
| Mevotech | MES3488 |
| Mevotech | MK80631 |
| Mevotech | MK6536 |
| Mevotech | MES3493T |
| Mevotech | MK6534 |
| Mevotech | MK80964 |
| General Motors | 20869200 |
| Dorman | B6541XL |
| Mcquay-Norris | FA2166 |
| General Motors | 19209396 |
| Dorman | BJ92165XL |
| Import Direct Chassis | K6541 |
| General Motors | 20869199 |
| Firestone | K6541 |
| Driveworks | DW-K6541 |
| MAS Industries | BJ91255 |
| Parts Master | K6541 |
| Centric Parts | 610.66017 |
| Dorman | B6541RD |
| Duralast | FA2166 |
| Mevotech | TXK6541 |
| NAPA Chassis Parts | 260-1528 |
| Carquest Premium Chassis Parts | 410-94917 |
| MAS Industries | B6541 |
| MasterPro Chassis | K6541 |
| NAPA Proformer | 104327 |
| NAPA Chassis Parts | 2601528 |
| Dorman | 533-015 |
| Delphi | TC1642 |
| Mcquay-Norris | FA2166E |
| Precision Chassis | K6541 |
| General Motors | 12472819 |
| MAS Industries | BJ92165 |
| TRW Steering and Suspension Parts | 104267 |
| Raybestos Brakes | 505-1272 |
| Carquest | CA165B |
| MOOG Chassis Products | K6723P |
| QuickSteer | K80631 |
| Dorman - OE Solutions | 533-015 |
| Dorman - Premium | B6541XL |
| Dorman - Premium | BJ92165XL |
| Dorman - Premium | CB90006PR |
| Dorman - Premium | B6541RD |
| Dorman - Premium | CB90136PR |
| Delphi | TA5729 |
| Dorman - OE Solutions | 541-194 |
| Mevotech Supreme | MK6659 |
| Mevotech Supreme | RMS20268 |
| Mevotech Supreme | CMS501238 |
| Mevotech Supreme | MS20268 |
| Mevotech Supreme | MES3488 |
| Mevotech Supreme | GS20268 |
| Mevotech Supreme | MK6536 |
| Mevotech Supreme | MK6534 |
| Mevotech Supreme | TXK6541 |
| Mevotech Supreme | MK6541 |
| Mevotech Supreme | MK80631 |
| Mevotech Supreme | MES3493T |
| Mevotech Supreme | CMS20268 |
| Mevotech Supreme | TXMS20268 |
| Mevotech Supreme | MK80964 |
| Dorman - OE Solutions | 541-134 |
| Delphi | TA2407 |
| Suspensia 1 | X06ID0015 |
This item may be interchangeable with parts from other brands with the above part numbers. This information is provided only for reference and does not guarantee that the item you are purchasing is identical to parts with part numbers from the brands listed above. To confirm that this item fits your vehicle, use the above "Check Vehicle Fit" option.
Lifetime Warranty
This item is backed by our limited lifetime warranty. In the event that this item should fail due to manufacturing defects during intended use, we will replace the part free of charge. This warranty covers the cost of the part only.
FREE Shipping is standard on orders shipped to the lower 48 States (Contiguous United States). Standard shipping charges apply to Hawaii and Alaska.
Shipping is not available to a P.O. Box, APO/FPO/DPO addresses, US Territories, or Canada for this item.
Expedited is available on checkout to the United States, excluding Alaska, Hawaii.
Final shipping costs are available at checkout.
Created on:
Tools used
Brought to you by 1AAuto.com, your source for quality replacement parts and the best service on the Internet.
Hi, I'm Mike from 1A Auto. I hope this how-to video helps you out, and next time you need parts for your vehicle, think of 1AAuto.com. Thanks.
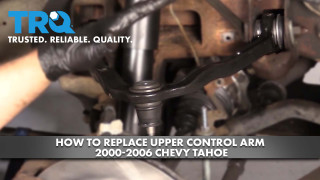
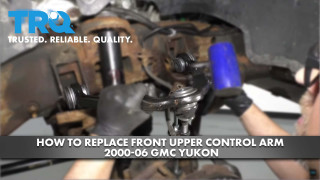
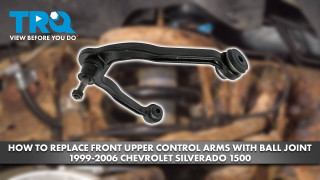
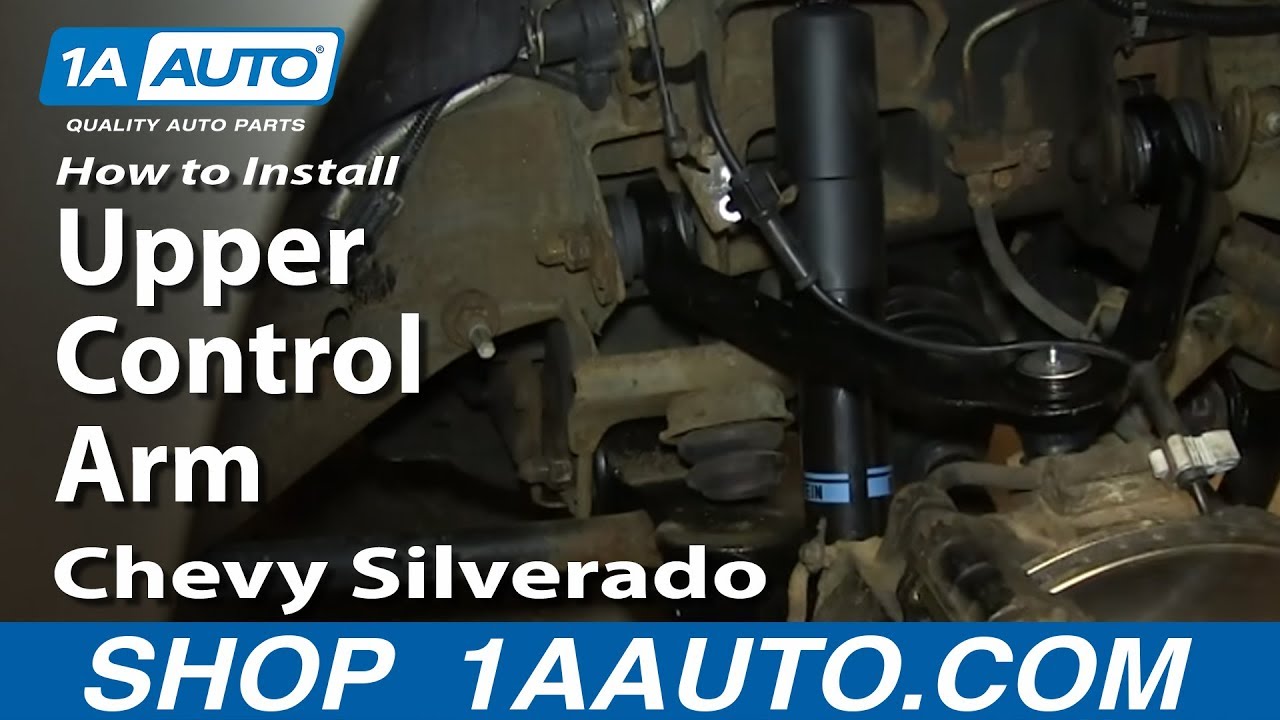
In this video, we're going to show you how to replace an upper control arm on this 2002 Chevy Suburban. We show you on the passenger side, but the driver side has the same procedure. The items you'll need are a new upper control arm from 1AAuto.com, a 10mm, 21mm, and 22mm socket and ratchet, 18mm and 21mm wrench, a marker, a torque wrench, jack and jack stands, a grease gun, a hammer, and an air hammer depending on the condition of your vehicle. After completing this procedure you will need to get a professional alignment done.
Start out by removing the hubcap. You want to remove the lug nuts. If you don't have air powered tools, you'll want to do it while the vehicle is on the ground. Loosen them preliminarily, raise the vehicle, and remove the lug nuts the rest of the way. On these brackets, you'll see a tab coming through from the upper control arm. Mark where that tab is. Remove these two 10mm bolts. Next, remove this 18mm nut, and you can see Mike uses an 18mm wrench and another wrench for some extra leverage to break it free and then removes it the rest of the way with the 18mm wrench. Hit the wheel knuckle and control arm to break them free. Then remove the 21mm nuts on either side.
Jack up your wheel, and you want to do this underneath the wheel knuckle. Remove the upper control arm nut and then remove these bolts and the bracket that's on them. Our first one pulled out no problem, this one's a bit more difficult. We tried using a hammer, that doesn't work. We tried using a wrench to help break it free, but it's in there really good. If you have this same problem, we put a nut back on it and use an air hammer to knock it out. Now that those bolts are out, you want to remove the control arm up and down while pulling out and it'll pull free.
Take your new upper control arm and push it back into place. Then push the bolts in to hold it into place. You want to make sure that you have those brackets on either side and that they're lined up. Now, angle the control arm down into the wheel knuckle. Once it's pressed down into place replace that 18mm nut. We'll fast forward as Mike tightens all of those up. Replace and tighten up those two 10mm bolts. Using a grease gun put it into place on the end of your control arm and fill it up. Put the wheel back into place and then replace each wheel lug nut and tighten them up. You want to tighten them preliminarily, lower the vehicle, and then tighten them the rest of the way. Torque each lug nut in a crossing pattern to 100 foot-pounds. Replace the hubcap and tighten up those lug nut caps.
We hope this video helps you out. Brought to you by www.1AAuto.com, your source for quality replacement parts and the best service on the Internet. Please feel free to call us toll-free, 888-844-3393. We're the company that's here for you on the Internet and in person.
Tools used
Brought to you by 1AAuto.com, your source for quality replacement parts and the best service on the Internet.
Hi, I'm Don from 1A Auto. I hope this how-to video helps you out, and the next time you need a part for your vehicle, think of 1AAuto.com. Thanks.
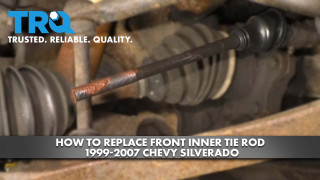
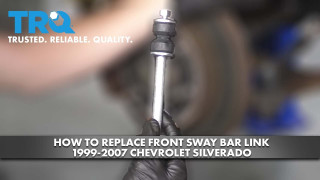
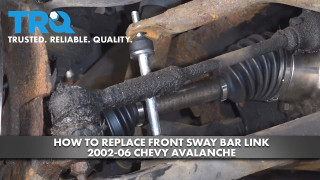
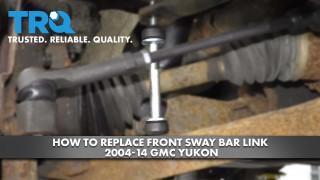
In this video, we're going to show you how to replace a sway bar link on this 2002 Chevy Suburban, and it's the same part and similar process on these Suburbans from 2000 and 2006. We show you on the passenger's side, but on the driver's side it's the same procedure. The items you need for this include a new sway bar link from 1AAuto.com, a 14mm and 22mm socket and ratchet, locking pliers, a hammer, and a reciprocating saw depending on the condition of your vehicle.
Remove your hubcap by loosening up these lug nut caps and pulling the hub cap. Now, you want to remove the lug nuts. If you don't have air powered tools, you want to do this while the vehicle is on the ground. You can loosen them preliminarily, raise the vehicle and remove the lug nuts the rest of the way, and pull the wheel out. Using locking pliers, clip on to the top of your stabilizer link, and then remove this 14mm bolt. We'll just fast forward as Mike does this.
Now, you want to just hammer the link through. If the link doesn't move, you may have to use a reciprocating saw and cut it. Up top is the old part; below is the new part from 1A Auto. You can see they're identical, and they'll fit exactly the same. You want to put your stabilizer link back into place, starting with a washer and a grommet, then through the hole, then another grommet, then a washer, then the tube; then, before going through the next hole, another washer and grommet; then, on the top another grommet and another washer, then the nut.
Here, we just put the jack underneath the link. That's just to push it up through and compress the washers a little bit so that you can get the nut on the other end. Once I get another nut on, you'll see I just release the jack. You want to obviously be supporting the vehicle with jack stands, and then use your jack to push the bolt of the link up through. Then, you want to tighten up the sway bar link, and you basically want to tighten it up until the rubber bushings are compressed enough so that they're the same diameter as the washers.
Put the wheel back in place, then replace each of your lug nuts and tighten them up. You want to tighten them preliminarily, lower the vehicle, then tighten them the rest of the way. Torque each lug nut in a crossing pattern to 100 foot-pounds. Replace the hubcap, and just tighten up those lug nut caps.
We hope this video helps you out. Brought to you by www.1AAuto.com, your source for quality replacement parts and the best service on the Internet. Please feel free to call us toll-free, 888-844-3393. We're the company that's here for you on the Internet and in person.
Tools used
Brought to you by 1AAuto.com, your source for quality replacement parts and the best service on the Internet.
Hi, I'm Don from 1A Auto. I hope this how-to video helps you out, and next time you need parts for your vehicle, think of 1AAuto.com. Thanks.
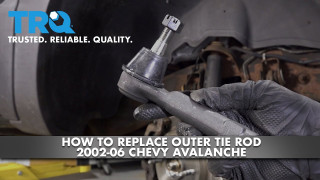
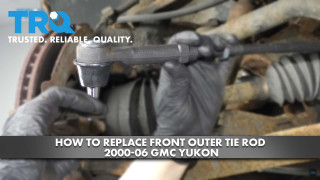
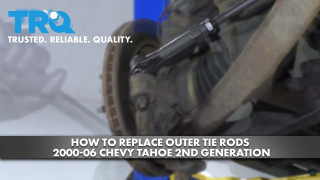
In this video, we're going to show how to replace an outer tie rod on this 2002 Chevy Suburban, and it's the same part and similar process on these Suburbans from 2001 to 2006. We show you on the passenger side, but the driver side is the same procedure. The items you'll need for this are a new outer tie rod from 1AAuto.com; 7mm, 13mm, 18mm and 22mm socket and ratchet; flat-blade screwdriver; adjustable wrench; tape measure; pliers; hammer; and a grease gun.
You want to just loosen up these 22mm caps, and then pull the hubcap free. Then, you want to loosen these lug nuts while the vehicle is on the ground, then raise the vehicle and remove them the rest of the way, unless you have air-powered tools. Then, you can do it while it's in the air.
Now you want to measure from the boot on your inner tie rod to the edge of your outer tie rod and just remember that measurement. Now, using your adjustable wrench, loosen up this nut right here, and then you want to remove this 18mm nut down here. Now just hit on your knuckle with a hammer and this is going to break up that outer tie rod and make it easier to pull out. Now just hold this nut with the adjustable wrench, pull the outer tie rod off and just twist it until it comes free. We'll fast forward as Don does this. You want to make sure that the inner tie rod doesn't spin while you're removing the outer tie rod.
Now, put the grease fitting into your new outer tie rod and just tighten that 7mm grease fitting up. Then twist the outer tie rod back onto your inner tie rod and push it down into place. Now, replace the castle nut and just tighten that up. Then push the cotter pin through and, using your pliers, just bend the ends of it. Now, using your grease gun, fill the tie rod with grease. Measure, and you should get about the same distance. That's a good preliminary alignment. You should have your car aligned after this. Tighten up the lock nut to hold it in place.
Now replace your wheel and then replace those lug nuts and tighten them preliminarily. Lower the vehicle and tighten them the rest of the way. Now torque the lug nuts in a crossing pattern to 100 foot-pounds. Replace the hubcap and tighten up those caps.
We hope this video helps you out. Brought to you by www.1AAuto.com, your source for quality replacement parts and the best service on the Internet. Please feel free to call us toll-free, 888-844-3393. We're the company that's here for you on the Internet and in person.
Tools used
Hi, I'm Mike from 1AAuto. We've been selling auto parts for over 30 years! We're dedicated to delivering quality auto parts, expert customer service, and fast and free shipping, all backed by our 100% satisfaction guarantee. We've created thousands of videos to help you install our parts with confidence. That saves you time and money, so visit us at 1AAuto.com, your trusted source for quality auto parts.
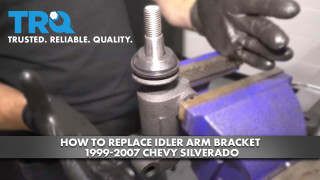
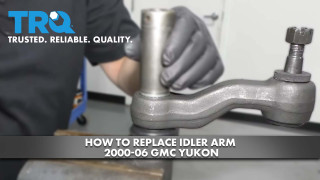
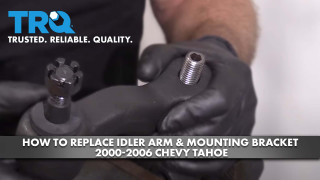
All right, to find the idler arm on your truck—it's on the passenger side—is to start at the tie rod end and just follow the arm all the way to your inner tie rod and then up to your idler arm. The idler arm is on the passenger side, and it bolts to the frame of the vehicle and to the steering itself. You can watch the play in it by just moving the tire back and forth forcefully with your hand. There shouldn't be any sort of play in between the idler arm and the steering shaft itself. That is actually the problem here. The vehicle failed inspection because there's too much play here. It's actually to a point where it's actually becoming dangerous, because this is actually going to break apart pretty soon. We want to get in here and replace the idler arm.
The first step to removing the idler is removing the cotter pin that holds the nut in place. I think to use a pair of cutters to grab it with. It's usually the easiest thing to do, although I may prove myself wrong. There we go. Then you can also use a pair of locking pliers to pull it from the other side. Then you'll take your 21-millimeter socket with an extension, and I'm using a 1/2 inch ratchet because it's going to be pretty tight, and we'll crack it loose. Luckily it's greasy, so once you crack it loose it usually spins right off.
Ideally, you want to have a puller, which you can get from your local hardware store or auto parts store. You can usually rent them. You'll want to put it on like this. We're using a two jaw puller. It wraps up on both sides of the steering arm, and then the center bolt pushes right on the idler arm. Then in our case it's a 16-millimeter right here, but depending on the puller it could be a different size. At that point, you want to just tighten up your puller until the idler arm breaks free. We're going to be pulling off the idler arm with the idler arm bracket, so we need to take out the lower nut right here and then the upper one right up here.
In New England, we like to spray everything with rust penetrator because we take it off because it just makes life a lot easier. On the front side of the bracket, there's the actually heads of the bolt that we're going to put a socket on. Right here is the lower one. Then up here is the upper one. We're going to use a 21-millimeter with an extension and a little wobble adapter so that we can get on there. It's not the easiest thing to reach, but once you're on there it should stay there. Then on the backside we'll put a wrench to hold the nut in place, and hopefully turn it.
Now we're heading for the top bolt on the idler arm bracket. We have our 21-millimeter wrench on the backside and then 21-millimeter socket and extension on the front. At this point, we'll be able to just pull the whole idler arm and its bracket right out of the truck like so. With the idler arm off the truck, we put it in a vice, and you can see how much movement there is in it. There obviously shouldn't be any. That should be nice and tight.
We've cleaned up our idler arm and idler arm bracket. Both are well used, but we're going to show you how to separate the idler arm from the bracket itself. In our case, there's a 24-millimeter nut on here. That may differ depending on if your car has an original OEM part or if it's been replaced before. In our case, it's 24-millimeter. We're going to throw it in the vice and put our 24 millimeter socket on with a 1/2 inch ratchet because you want plenty or torque, and hopefully we can crack this loose. With the nut off, now we have to pull the idler arm off the idler arm bracket.
Once again I'm going to reposition this in the vice. Get a puller, which you can rent from a local hardware store or an auto parts store, or they're actually not too expensive if you just buy them and you think you might be doing this more than once. It might be worth buying a kit to do this. Then you'll tighten down the center bolt. In our case, we have a 16-millimeter on the top of the puller, which we will once again use our 1/2 inch ratchet to tighten up. You always want to wear your safety glasses when you're doing these things, safety gloves, because things tend to spring off when you're least expecting it, kind of like that. Now that it's broken loose, you can pull it right off.
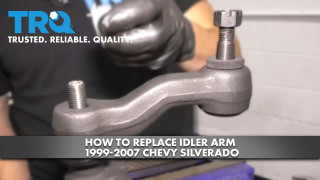
Here are the idler arms. You can see the old one right here. This one has a ton of play in this section. I think it's probably due to the fact that somebody didn't grease this on a regular basis. Usually, if you put the grease in and then forget about it for the next 100,000 miles, it's going to wear out the inside, and you're going to need to replace the whole thing again. This one obviously comes with a new greaseable fitting on the top. The key is you just want to make sure that you properly grease these on a regular basis, and it'll pretty much last as long as you take care of it. It also does come with a little foam piece on the bottom like the original has. Yeah, it looks, feels, and acts just like the original.
In our case, we're going to be replacing the idler arm bracket and the idler arm, and this is the same process, whether you're replacing one or the other, but we always recommend doing them both at the same time since you have them both out of the vehicle. It's just a really easy thing and it doesn't cost a whole lot more, or a whole lot more money to swap them both at the same time. To do this, we'll hook the idler arm bracket into the vice and we'll slide the idler arm right onto the bracket. Put the nut on there. This happens to be a 24-millimeter. Depending on what kind of part you have in your car, it may vary. The size may vary a little bit.
At this point, we can tighten this up. We started tightening the nut, and we found that the whole thing was spinning, like you can see here. That's why they put a hex on the top of this, so that you can put a wrench here and a wrench on the bottom, and then you can tighten down the nut much easier. While the idler arm bracket and idler arm are out of the vehicle, we're going to put the grease in them. That way it's a little bit easier on us once they're installed. Now we can slide the whole assembly right back in. There's one bolt in place. Now we'll do the lower bolt, which is a little trickier.
All right, with the top, or with the idler arm bracket bolts in place, then you can push the idler arm into the steering and tighten up the castle nut, or hand tighten the castle nut. Now we're going to take our 21-millimeter socket and extension and place it on the upper bolt and put a wrench on the backside. Of course, we want to turn the ratchet in the proper direction, and we'll start tightening up that bolt. All right, then we'll go for the lower one, which again 21-millimeter with a ratchet and extension and 21-millimeter on the back.
Now we have the 21-millimeter idler arm nut that we are going to use a ratchet and extension and socket on. We want to get it tight enough so that it is held in place, but we also want to line up the castle nut with the hole in the idler arm so that we can get the cotter pin through. Now you can slide the cotter pin through the hole and bend it over so that it stays in place. Now you'll see that when we move the wheels back and forth, the play between the idler arm and the steering bracket no longer exists.
Thanks for watching. Visit us at 1AAuto.com for quality auto parts, fast and free shipping, and the best customer service in the industry.
Tools used
Hi, I'm Mike from 1AAuto. We've been selling auto parts for over 30 years! We're dedicated to delivering quality auto parts, expert customer service, and fast and free shipping, all backed by our 100% satisfaction guarantee. We've created thousands of videos to help you install our parts with confidence. That saves you time and money, so visit us at 1AAuto.com, your trusted source for quality auto parts.
You can replace the idler arm bracket by itself. To find the idler arm on your truck, in this case it's on the passenger side, but another easy way is to start at the tie rod end and just follow the arm all the way to your inner tie rod, and then up to your idler arm.
The first step to removing the idler is to remove the cotter pin that holds the castle nut in place. I like to use a pair of cutters to grab it with. It's usually the easiest thing to do, although I may prove myself wrong. There we go. And then you can also use a pair of locking pliers to pull it from the other side. Then you'll take your 21mm socket with an extension, and I'm using a 1/2" ratchet, because it's going to be pretty tight, and we'll crack it loose.
Luckily it's greasy, so once you crack it loose, it usually spins right off. So, ideally you want to have a puller, which you can get from your local hardware store or auto part store. You can usually rent them. And you'll want to put it on like this. We're using a two jaw puller. It wraps up on both sides of the steering arm, and then the center bolt pushes right on the idler arm. Then, in our case, it's a 16mm right here, but depending on the puller, it could be a different size. And at that point, you want to just tighten up your puller until the idler arm breaks free. We're going to be pulling off the idler arm with the idler arm bracket, so we need to take out the lower nut right here, and then the upper one right up here.
In New England we like to spray everything with rust penetrant before we take it off, because it just makes life a lot easier. On the front side of the bracket, there's the actual heads of the bolt that we're going to put a socket on. Right here's the lower one, and then up here's the upper one. So, we're going to use a 21mm with an extension, and a little wobble adapter so that we can get on there. It's not the easiest thing to reach, but once you're on there, it should stay there. And then on the back side, we put a wrench to hold the nut in place, and hopefully turn it.
Now we're heading for the top bolt on the idler arm bracket. We have our 21mm wrench on the back side, and then 21mm socket and extension on the front. At this point, we'll be able to just pull the whole idler arm, and its bracket, right out of the truck.
We've cleaned up our idler arm and idler arm bracket. Both are well used. But we're going to show you how to separate the idler arm from the bracket itself. In our case, there's a 24mm nut on here. That may differ depending on if your car has a original OEM part or if it's been replaced before. In our case, it's 24mm. So we're going to throw it in the vise, and put our 24mm socket on with a 1/2" ratchet -- because you want plenty of torque -- and hopefully we can crack this loose. With the nut off, now we have to pull the idler arm off the idler arm bracket.
So once again, I'm going to reposition this in the vise. Get a puller, which you can rent from a local hardware store, or an auto parts store, or they're actually not too expensive if you just buy them and you think you might be doing this more than once. It might be worth buying a kit to do this. And then you'll tighten down the center bolt. In our case, we have a 16mm on the top of the puller, which we will, once again, use our 1/2" ratchet to tighten up. So, you always want to wear your safety glasses when you're doing these things, safety gloves, because things tend to spring off when you're least expecting it. Kind of like that. So now that it's broken loose, you can pull it right off.
Here you can see the old idler arm bracket and the new idler arm bracket. You can see, the old one is really easy to turn. That's how you know it's worn out, because the insides of it are actually worn out. My guess is that somebody didn't grease this appropriately on a regular basis, and that's something that you need to do if you want to keep these things to lasting a long time. The new one is nice and tight like it should be, and we'll obviously grease this when we install it on the car, and then keep up with the greasing.
You know, probably every oil change we'll put some grease in this and make sure it stays in good shape for a long time. You can see that the mounting brackets are exactly the same. You can line them up, they fit the same. It comes with a new seal on the end, and of course, a new nut. In our case, we're going to be replacing the idler arm bracket and the idler arm. And this is the same process, whether you're replacing one or the other, but we always recommend doing them both at the same time since you have them both out of the vehicle. It's just a really easy thing, and it doesn't cost a whole lot more money to swap them both at the same time.
So to do this, we'll put the idler arm bracket into the vise, and we'll slide the idler arm right onto the bracket. Put the nut on there. This happens to be a 24mm. Depending on what kind of part you have in your car, it may vary. The size may vary a little bit. And at this point, we can tighten this up. So we started tightening the nut, and we found that the whole thing was spinning, like you can see here. So that's why they put a hex on top of this, so that you can put a wrench here and a wrench on the bottom, and then you can tighten down the nut much easier.
While the idler arm bracket and idler arm are out of the vehicle, we're going to put the grease in them, that way it's a little bit easier on us once they're installed. Now we can slide the whole assembly right back in. There's one bolt in place. Now we'll do the lower bolt, which is a little trickier. All right. With the top ... or, with the idler arm bracket bolts in place, then you can push the idler arm into the steering, and tighten up the castle nut, or hand tighten the castle nut. Now we're going to take our 21mm socket and extension and place it on the upper bolt. Put a wrench on the back side. Of course, we want to turn the ratchet in the proper direction, then we'll start tightening up that bolt. And then we'll go for the lower one, which again, 21mm with a ratchet and extension, and a 21mm on the back. And now we have the 21mm idler arm nut that we are going to use a ratchet and extension and socket on.
We want to get it tight enough so that it is held in place, but we also want to line up the castle nut with the hole in the idler arm, so that we can get the cotter pin through. And now you can slide the cotter pin through the hole, and bend it over so that it stays in place.
Thanks for watching. Visit us at 1AAuto.com for quality auto parts, fast and free shipping, and the best customer service in the industry.
Tools used
Hi, I'm Mike from 1AAuto. We've been selling auto parts for over 30 years! We're dedicated to delivering quality auto parts, expert customer service, and fast and free shipping, all backed by our 100% satisfaction guarantee. We've created thousands of videos to help you install our parts with confidence. That saves you time and money, so visit us at 1AAuto.com, your trusted source for quality auto parts.
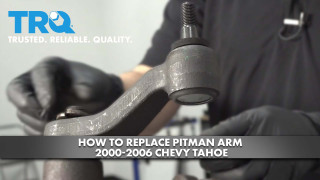
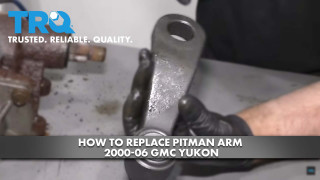
The pitman arm is attached to the steering box itself, and you can find it right up on the driver side of the vehicle. It is right here attached to the steering box, and then attached to part of the steering linkage as well. Typically, these wear out right at the ball joint end of it. It comes as a whole lot of slop in your steering wheel.
To access the large nut on the bottom of the Pitman arm, you have to actually loosen or remove the steering box from the frame of the truck, and we'll start that by removing the three 21 millimeter bolts that are on the driver side of the frame that hold the steering box to the frame itself. We'll start grabbing a 21 millimeter socket and a large ratchet. There's going to be a lot of force on these, so we want to use a long ratchet to do it. Right here on the ball joint end of the Pitman arm, you're going to want to remove this 21 millimeter nut with a socket and an extension. Hopefully it goes on.
With the nut off, now we have to separate the Pitman arm from the steering linkage. There's a couple ways to do this. You could use a pickle fork. I actually prefer using a puller because that is usually the most successful way that I have. You can usually rent these from a hardware store or a local auto parts store, or they're actually not too expensive to just purchase. We'll put a 16 millimeter on the puller and start putting some force on it. You basically swing it up your steering box, pull down on the linkage, and now it is somewhat out of the way.
Now you have access to the 34 millimeter nut on the bottom of the Pitman arm. This 34 millimeter nut is really, really tight, and the steering box is obviously loosened from the frame. So we need to hold the steering box in place somehow while we loosen this nut with a very large ratchet. I think what I'm going to do is I'm going to take a large wrench, put it on this side of the frame, and run one of the steering box bolts through it and back into the steering box. Now I'm going to put a 34 millimeter socket on there with a breaker bar or a half inch drive ratchet that's quite long, and hopefully we can crack this loose.
Now we're going to take our puller and put it on the Pitman arm itself. Going to have to wiggle the steering box around a little bit and kind of get things out of the way to make sure that you have room to actually use the puller. You always want to make sure it's centered on the bolt as well because the puller won't work if it's crooked. We're going to use a ratcheting wrench in this case to tighten up the puller. The Pitman arm is not coming off with the puller, so we're going to throw a little heat on it to try and loosen it up. All right. With the Pitman arm loose, you should be able to pry it right off the steering box and hopefully pull it out of the truck.
As you can see, we got the old Pitman arm and the new Pitman arm. If you're buying a Pitman arm for one of these trucks, you'll need to know if it's a four-spline or a three-spline. What that means is inside here, in this case there's four wider splines so it can only go on one of four directions. You can see there's one here, there's one on here, and if you turn it 90 degrees you can see there's one here and one here. On the three-spline, it's triangular. You can see that they are essentially the same part. The new one comes with the castle nut and the cotter pin so that you can set it up right. It'll look and fit and function just like the original.
I prefer to have it greased before I put it in the truck because it's a little easier to grease now than when it's installed, so I have it clamped in the vice, put the grease can on it, and then just add the grease until it's full. You'll know it's full because it kind of oozes out the bottom seal. You don't want to blow out the seal completely, but as soon as you see it pop up the seal you know it's full. All right, before we put the Pitman arm back in, I'm going to take this bolt out of the steering box that I was using earlier to hold it in place. It'll give me a little freedom to work around it.
Now we can take our new Pitman arm and slide it up into place. The Pitman arm only fits on one of four ways, so there's a very good chance that you're just going to plop it on and get it right the first time. If it was wrong, it would be 90 degrees off in either direction, so I'm very confident that we have it right because it is a four-spline setup and this is really the way it came off. Next we can take the washer and the large 34 millimeter nut and put it onto the steering box.
All right, with the bolt loosely in place we can get the steering box to a place where we can get our 34 millimeter socket onto there. Then we can tighten it up. You're going to want to tighten this basically as tight as you can. If you have some air tools, air tools work really great for this. Now we're going to put this ball joint end of the Pitman arm back into the steering linkage just like that, and we'll hand tighten the castle nut onto the Pitman arm.
Now we can put in the three steering box bolts. We're just going to hand tighten them each for now. Now we're going to take your 21 millimeter socket and ratchet and we can tighten up these steering box bolts. Now we can tighten up this one. The new one actually has a 19 millimeter nut on it, so we'll just tighten that up. You'll want to line it up with the hole in the center of the bolt so that we can put a cotter pin through it to hold it in place.
Thanks for watching. Visit us at 1AAuto.com for quality auto parts, fast and free shipping, and the best customer service in the industry.


Delivered on time and as advertised. Passed Md inspection. Thanks
Worked so well, I sold the truck. It works and fits extremely well. Tested on tons of potholes and still holding strong.
Im a bit skeptical about the quality of these parts, after installing one of the upper control arms, While tightening the nut i noticed it keep spinning . Upon inspection i also noticed that the tread was also spinning along with the nut. The other arm installed without a flaw, but now worried if it would last. Either way i need another control arm. ???????
One of the ball joints was bad right out of the box. Way to much play and we had to go to local auto store to purchase one to complete the job.
Was awesome to have all of this available in one kit. Driving experience was improved after new parts installed.
Terrible pitman arm..... I've had the pitman arm installed no longer than 4 months. I purchased the kit August 2024 and installed it in September 2024, then today 1-16-24 I was taking my kids to school and turned into a small street when I completely lost my ability to steer and nearly crashed into oncoming traffic. The shaft that goes into the center link of my Silverado completely sheared... Sure there's a lifetime warranty, but at what cost. I don't think I'll be able to reinstall any 1aauto parts into my vehicles anymore because of the lack of trust I now have.
All the parts were wore out in a month on a factory lift and tire truck
Everything fit great and my 2004 suburban drives like it's brand new.
Thank you ??
Fit good

PSA58753
This kit will fit if your vehicle has the 4 Groove Pitman Arm with Cast Iron Lower Control Arms without Aluminum Steering Knuckles.
Yes, this part will fit your vehicle. The only thing you would need to confirm is if you have a 3 or 4 groove pitman arm. This kit included a 4-groove pitman arm.
3 hrs
Yes
I believe so as I put it on a 2002 burn 4x4. So far after a year on it the kit seems to be holding up with the exception of the sway bar links, those got replaced 1 month later as the rubber started to rot already.
Hello, this is listed to fit 2001-2006 Chevrolet Tahoe with 4 Groove Pitman Arm
New hardware is not included with this item. You may be able to reuse your original hardware if it is in good condition.
The pitman arm is the only item in this kit that is specific to the 4 or 3 groove specification.
These are manufactured by TRQ, TRQ is a high quality, high-end name brand that we offer and back with our 1A Auto Limited Lifetime Warranty. The parts are direct replacements of the original equipment and will fit and function the same.
This kit is listed to only fit models with a 4 groove pitman arm (not the 3 groove). If you are unsure which your vehicle has, you will need to physically check the one on your vehicle or contact your local dealer with the VIN number and they can give you that information.
