Replaces


Part Details
Lifetime Warranty
This item is backed by our limited lifetime warranty. In the event this item should fail due to manufacturing defects during intended use, we will replace the part free of charge. This warranty covers the cost of the part only.
FREE Shipping is standard on Orders shipped to the lower 48 States (Contiguous United States). Standard shipping charges apply to Hawaii, Alaska and US Territories. Shipping is not available to Canada.
Expedited is available on checkout to the United States, excluding Alaska, Hawaii and US Territories as well as P.O. Boxes and APO/FPO/DPO addresses. Final shipping costs are available at checkout.
Created on:
Tools used
Brought to you by 1AAuto.com, your source for quality replacement parts and the best service on the Internet.
Hi, I'm Mike from 1A Auto. I hope this how-to video helps you out, and next time you need parts for your vehicle, think of 1AAuto.com. Thanks.
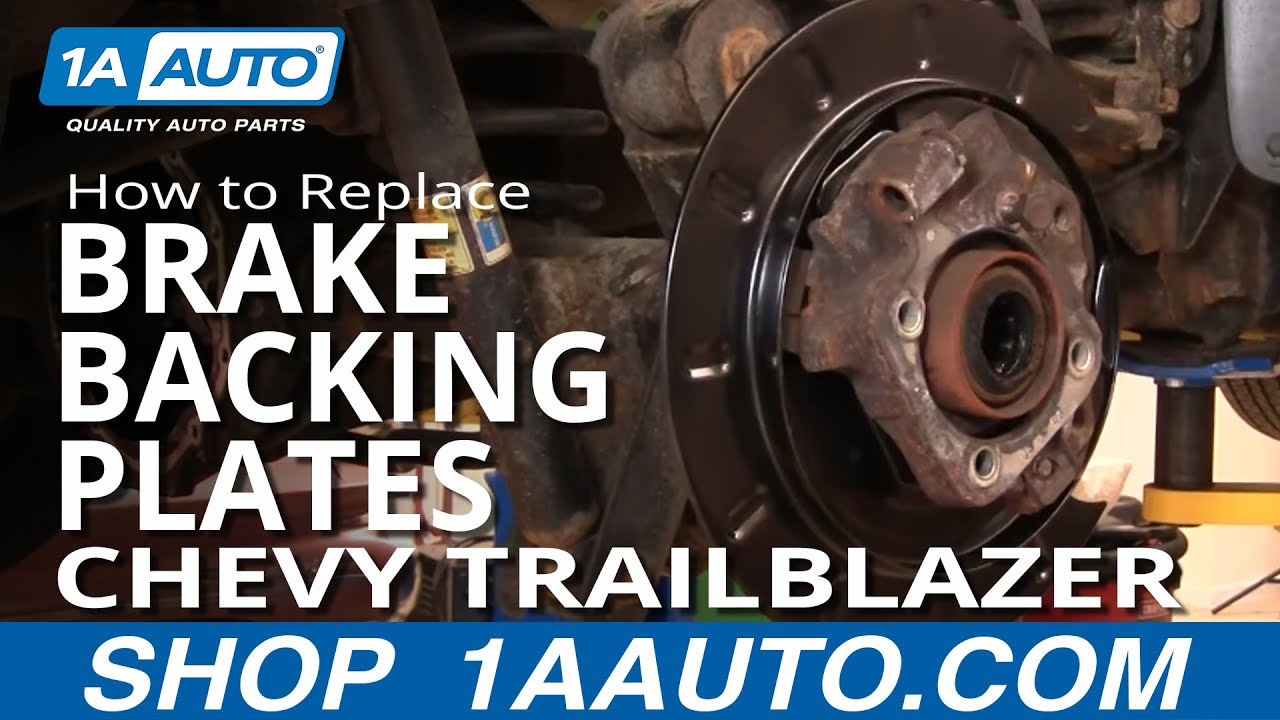
This is part two of a two part series replacing the rear disc brake backing plates on a 2004 Trailblazer, same as any '02 to '09 Trailblazer, Envoy, Bravada, Rainer, Isuzu Ascender and a Saab 9-X. Here's a quick review of all the tools you're going to need and we are going to start out with reconnecting the emergency brake cable.
You want to put your emergency brake back together. Put this on here, first, and then you can push it down, and push it into the cylinder here. There's a little rod that goes in and that goes in right there. Take your brake shoes. They're going to go into a little clip down here and then on there. Now I'm grabbing hold of my spring again. Slip the cable down. Push it into place. It actually goes together a lot easier than it came apart.
I'm going to put the axle back in. You want to lift up on it so it doesn't drag against your seal. Just kind of move it around a little bit and push it in. It just has to find its way on the inside. Here, what you're really hoping is nothing has moved. So, we're going to take our C clamp and the side that has the groove near the center is the one you want to put towards the center. So you just put that on to the axle that's pushing out through right there. Then, you can actually push the axle back by hand. Make sure you have this shaft nice and clean. Put it up in with the hole located at the bottom. This is where you're hoping that these gears didn't move around at all; it would appear that they did just a little bit. I'm going to line it up with my finger. It goes in. Push this in. Start it into place and your axle's locked back in place. As that's going in I'm just going to hit it with a little dab of Loctite. Being greasy and stuff, it's not going to stick that well but that's okay. You want to tighten this up probably about 8 to 10 foot pounds which is tight with this little wrench. That's good.
Now we're going to get back in to cleaning everything up and putting it back together. So, I just wiped down the inside as much as I can. Get as much dirt and everything out of there as possible. Now clean up and wipe down your rear end cover and there's a little triangle, I mean a rectangle there. That's the magnet. Make sure you get that wiped off really well. Right there, I'm displaying it. You can see I cleaned it up better. On this one, you do reuse your gasket and I put just a little bit of sealant on the cover just to help with some of the crustiness from the rust. Now, we'll put our cover up there, start it with a couple of bolts, then start all the bolts by hand and then tighten them preliminarily with a wrench, after that. Now, we skip forward, you want to torque these bolts to about 12-foot pounds. It's not very much but it's enough to seal it. You don't want to over-torque it, because you'll get leaks because you warp your differential cover. About 12-foot pounds, I tighten them kind of using an opposite pattern and then I just go around one by one and just make sure they're all tight.
Now we're going to refill the rear end. There's a plug right on the passenger side. Use a 3/8ths ratchet with an extension, remove that plug and then fill it with 80W90 gear oil. I use a little tube; helps get the bottle in a position so that you can fill it easier. Once you've filled it and the fluid starts dripping down, put your plug back in, and tighten it up. You don't have to tighten it incredibly tight but get it nice and snug and then wipe down all the grease off the rear end so you can check for leaks later.
Now I'm going to put the brakes back together, if you want to see this in regular speed just check out our other videos for the Trailblazer rear brake installation and you can see I've got both a new backing plate and new brakes on there and if you want to see those, just check out our other videos on the whole process for that. So, we'll get through that.
Very important: you've had your brakes apart, you obviously want to torque your lug nuts on there properly and you want to pump your brakes afterwards, make sure that you get your brakes reset and make sure that they're working properly before you test drive the vehicle. Torque the lug nuts to between 100 and 120 foot pounds, kind of use a crossing star type pattern and then you can put your cap back on.
Always make sure after you've had your brakes apart that you pump the pedal a bunch of times working the pressure back up and make sure you work the brake caliber pistons back into place.
We hope this video helps you out. Brought to you by www.1AAuto.com, your source for quality replacement parts and the best service on the Internet. Please feel free to call us toll-free, 888-844-3393. We're the company that's here for you on the Internet and in person.
Tools used
Brought to you by 1AAuto.com, your source for quality replacement parts and the best service on the Internet.
Hi, I'm Mike Green. I'm one of the owners of 1A Auto. I want to help you save time and money repairing or maintaining your vehicle. I'm going to use my 20-plus years experience restoring and repairing cars and trucks like this to show you the correct way to install parts from 1AAuto.com. The right parts installed correctly: that's going to save you time and money. Thank you and enjoy the video.
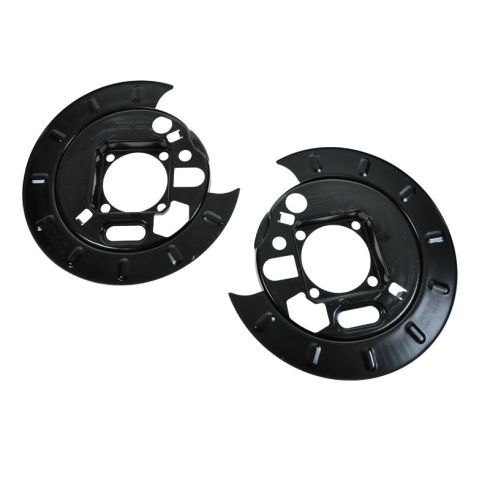
In this video we're going to show you how to fix a common problem on these GM mid-size SUVs, the rear disc backing plates tend to rust just because of their design. This is the same for any of these mid-size GM SUVs: the Trailblazer, Envoy, Bravada, Rainier, Saab 97x, and Isuzu Ascender.
There's a wide range of tools needed. Various size metric and standard sockets and wrenches from 5/16 inch to 19 millimeter, ratchets and extensions, breaker bar or pipe for leverage for some of those harder to move bolts. A catch pan, jack and jack stands, flat blade screw driver, 2 M10 by 7 centimeter bolts, 3/8 driver ratchet with extension hammer and torque wrench. This is an involved repair. I wouldn't call extremely difficult. You do have to take a part and put together a few things. The hardest part of it, probably, is some of the bolts are going to be quite tight and you need to make sure that you have something that you can get some leverage to get those bolts apart.
For your tire, lug nuts are 19 millimeters. If you don't have air tools, you want to start with the vehicle on the ground, loosen the lug nuts, raise it, support with jack stands and then remove the lug nuts. Okay, we'll use some fast forward as we remove the rest of the lug nuts and the wheel. We want to use a screw driver. What I'm doing is point out on the caliper that just helps to get it off the brake pads. You remove 2 bolts and then remove the caliper. And on this vehicle those are 14 millimeter bolts. Pull off the caliper, put it up and out of your way and then you can just pry out the brake pads. You actually can skip this step, you can just pull the bracket off, then you want the pad bracket, two 18 millimeter bolts on this vehicle. I'm going to use a piece of pipe along with my ratchet and the pipe actually just gives you some extra leverage and then on the lower bolt on this vehicle, it has a clearance issue, so I'm going to put on my 18 millimeter wrench and then I'm going to hook another 17 millimeter wrench onto it and pull down. Okay, then finish off taking those bolts out. Now the bracket comes off and then hopefully your disc will just pull off, on this vehicle it doesn't but the vehicle has 2 threaded holes, you insert some M10 metric bolts and use your wrench to tighten those bolts up which forces the disc off of the hub.
You could see a pretty common issue on these vehicles. The backing plate here is actually just kind of rusted and falling apart. Remove your emergency brake shoes by pushing them down and off of a clip first and then push them right up and off. Now we're going to remove the axle for each side and you start by removing the ten 13 millimeter bolts on the back of the rear differential and as I start removing them, get to the last 2, the fluid starts leaking out, allow some time for the fluid to drain out and then remove them the rest of the way.
Now you want to turn your drive shaft with your vehicle in neutral until you have a good angle at that bolt right there. I'm using a 5/16 inch wrench and I'm going to remove this bolt. As you remove this bolt, you want to hold this pin up here, pull that bolt out and let that slowly slide down. That will allow you to actually push your axle in. It then allows you to pull out a C-clamp. This will fall down here. Magnet. That C-clamp comes out, which now allows you to pull out slowly your axle.
With this backing plate missing and all is a really good angle here. You want to force your emergency break cable back up through this bracket by prying on a couple of tabs. Okay and pull your cable out, you need to pull on this. There are basically two opposing forces going here. Unfortunately I don't film it very well because my shoulder gets in the way, but you pull with your right hand, pull on the cable and then with your left hand you pull that spring, you just need to uncover about 1/4 inch of the cable and it goes right up through a little slot in the bracket.
That allows your cable to come up and out of there. Okay, with your axle out, now you can use whatever tools you need to, to get these off. I do have Loctite on them, so I'll use a large breaker bar, or a piece of pipe for leverage. Make sure the caliper stays up there, pull that out.
Now, we need to take and pry these, there's 2 tabs, one here and one here. Pry those tabs up. Give this whole thing a couple taps with a hammer and then to get that out, just kind of pull it up and out like that. Clean all out pieces of the old backing plate off. I want to save this, it's a rubber grommet on here. I'm just kind of peeling all the metal off so I can save that. What I'm going to do is just use this little screw driver, just hit the rusty metal and it'll hopefully go off. I got my new backing plate, put this in, twist it down. After it's in I'm going to put this rubber grommet right there. Make sure that's all together. I'm just going to stop here due to some technical difficulties I didn't get to film. There is another small rubber, kind of triangular piece that goes in under the arm. Just make sure you put that back in where it belongs. It's actually pretty self explanatory the way it's shaped. This'll all go on like so. Okay, before I start my other bolt, I'm just going to put a little bit of Loctite on them. Pull this out. Now here, I'm just tightening the bolts preliminarily with my impact wrench. Now I'm going to torque these to 90 foot pounds. Okay, we're going to end part 1 here. If you'd like to see the rest of it and putting it all back together, just see the video with the same title but says part 2.
We hope this helps you out. Brought to you by www.1AAuto.com, your source for quality replacement parts and the best service on the Internet. Please feel free to call us toll-free, 888-844-3393. We're the company that's here for you on the Internet and in person.

924-208
