
★★★★★
October 2, 2022
Easy Peesy...
Great fit, easy install.

Replaces



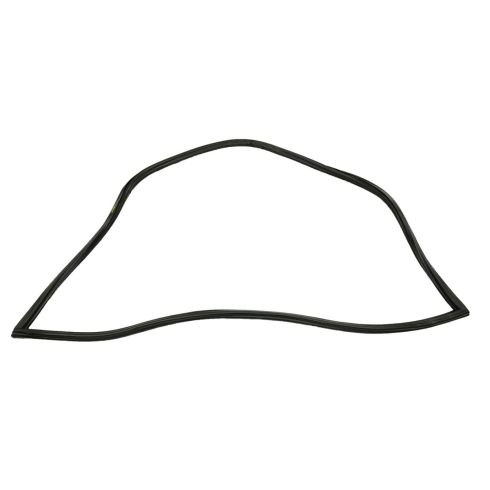
This Chevy Corvette rear window hatch seal is a new, aftermarket replacement weatherstrip that has the following specifications:
If your weatherstripping is causing leaks allowing damaging rain and irritating wind in, then this seal is for you. Why not replace your old, hardened, rotted seal with this new, ready to install weatherstrip and bring back the luster to your modern day muscle car - The CHEVY CORVETTE!!
Attention California Customers:
 WARNING: Cancer and Reproductive Harm - www.P65Warnings.ca.gov.
This part fits 3 vehicles spanning 1984-1996.
| Year | Make | Model | Description |
|---|---|---|---|
| 1984-1985 | Chevrolet | Corvette | Chevrolet Corvette Trunk Weatherstrip Seal Precision Replacement Parts TS 108 SA |
| 1986 | Chevrolet | Corvette | Chevrolet Corvette Base Model Trunk Weatherstrip Seal Precision Replacement Parts TS 108 SA |
| 1987-1996 | Chevrolet | Corvette | Chevrolet Corvette Hatchback Trunk Weatherstrip Seal Precision Replacement Parts TS 108 SA |
| Brand Label | Part Number |
|---|---|
| DIY Solutions | WSS01089 |
| Precision Replacement Parts | TS 108 SA |
This item may be interchangeable with parts from other brands with the above part numbers. This information is provided only for reference and does not guarantee that the item you are purchasing is identical to parts with part numbers from the brands listed above. To confirm that this item fits your vehicle, use the above "Check Vehicle Fit" option.
Lifetime Warranty
This item is backed by our limited lifetime warranty. In the event this item should fail due to manufacturing defects during intended use, we will replace the part free of charge. This warranty covers the cost of the part only.
FREE Shipping is standard on orders shipped to the lower 48 States (Contiguous United States). Standard shipping charges apply to Hawaii and Alaska.
Shipping is not available to a P.O. Box, APO/FPO/DPO addresses, US Territories, or Canada for this item.
Expedited is available on checkout to the United States, excluding Alaska, Hawaii.
Final shipping costs are available at checkout.


Created on:
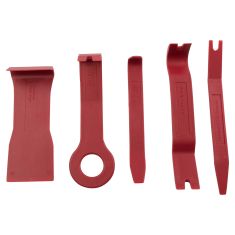
Tools used
Brought to you by 1AAuto.com, your source for quality replacement parts and the best service on the Internet.
Hi, I'm Don from 1A Auto. I hope this how-to video helps you out, and next time you need parts for your vehicle, think of 1AAuto.com. Thanks.
In this video we're going to show you how to replace the rear hatch seal on this 1985 Chevy Corvette. You'll need an 8mm wrench to disconnect and reconnect the battery. After that you'll need some cleaners, warm soapy water, as well as mineral spirits or something of that sort to get as much of the old seal off as possible. Then you'll need a Phillips screwdriver and you'll also need some weather strip adhesive, and some silicone lubricant.
After un-hatching your rear hatch, you may want to disconnect the negative battery cable. Next, you're going to remove a series of screws in the panels that surround the inside of the window. The only panel that you actually remove is the rear one closest to the back. All the others, you just remove the screws so that they're loose and you can get the weather strip off. Take a Phillips screwdriver, and we'll fast forward as we remove those screws and that rear panel. There's a small trim piece that's not part of the main seal. Remove from the top and then pull that back panel out and away. We've speeded up the film a little bit here, but you can see at this point, it's a matter of pulling it off. The bottom side comes off. It's obviously ripped in the corner, so you just pull it off in two pieces. Then you'll see a little more struggle with the top piece because, like on many cars, this seal was probably leaking, so one of the owners at some point probably said, "Oh, let me just put a bunch of goop, or glue up there and see if that helps hold it together better and stop the leaking," which, usually it doesn't. Usually, it makes the leaking a whole lot worse.
Use a shop vac to clean out any loose dirt all the way around the perimeter of the seal and the channel. Next up, is to use some good strong cleaner and spray it in the channel all the way around. I have a bucket of warm soapy water. I'm dipping the sponge in the water and cleaning out the channel really well. Then use an old towel or something to dry out the channel. Now, take something stronger like mineral spirits and just do the next step of cleaning. Just be careful not to get this all over the paint to your vehicle. Now, you can see, going really fast here, that's a straight razor blade in my hand. I'm cutting off a lot of the extra residue. As I said before, somebody used a lot of glue to put this on, or to try to re-seal this at some point. I'm cutting off as much of that as I can. Then I'll re-clean it with the mineral spirits and try to get as much off as I can. The better and the cleaner you get the pinch weld, the better your seal will fit, and the better your seal will work.
To put the seal on, you'll need to take the hatch supports off. You just use a small screwdriver, pry out on a clip, then pull the hatch support off. Make sure you have the seal lined up correctly. Put the seal over the hatch support. Snap the support back on. Then repeat the same thing for the other side. First, get the seal to fit well down into the corners as far as you can. You may have to take the lower trim panel out a little further just to get that seal all the way down in there. Then you can start fitting it up the side. We're using some black weather strip adhesive on the pinch weld of the vehicle. After you have both sides properly fit, then take your adhesive and put it across the top of the vehicle and fit the seal onto the top. Then do the same thing for the bottom part of the seal. Do the side first, then use the weather strip adhesive. I apply the weather strip adhesive to the tip of the pinch weld. Then, pull the weather strip down on top of it. We'll kick it in high gear here, as Don puts the trim back into place and reinstalls all the screws that hold the trim in place. Use a silicone based lubricant to lubricate the corners of the seals. This is where they undergo the most stress. Put the hatch down carefully. Just make sure that the corners . again, pay attention to the corners ., are going in correctly. Check one corner. I'll reach around and check the other corner. Then your hatch will probably close pretty firmly. Leave it closed for a while to compress the new seal down.
We hope this video helps you out. Brought to you by www.1AAuto.com, your source for quality replacement parts and the best service on the Internet. Please feel free to call us toll-free, 888-844-3393. We're the company that's here for you on the Internet and in person.
Great fit, easy install.
The weatherstrip main rear seal came in the box with no information or part specs. After spending an hour trying to get the seal to fit with no success I decided to measure the two seals and came to the conclusion that the seal I purchased from 1A Auto was 3 inchs too long. After calling the company and speaking to a ref they wanted me to take pictures of measurements of both the old seal in the news seal and send them to them so they could make me a new seal. Too much time and too much effort to put into something that's supposed to be GM manufacturer spec. I end up shipping the seal back and getting a refund
I followed the direction of the video, and with alittle patience had it installed. Without their video I would been lost.
This hatch back gasket is just what my corvette needs to Renue it's waterproofing ability. Mine's toast. Thanks 1aauto

TS 108 SA
