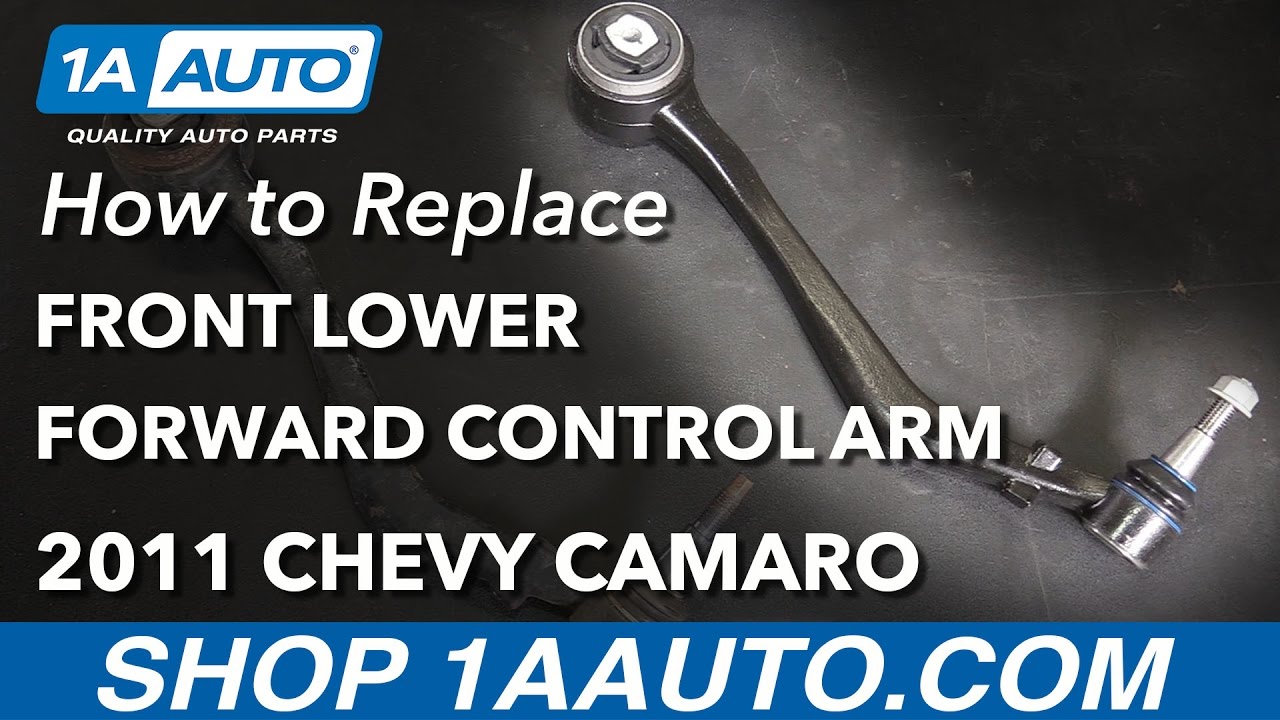
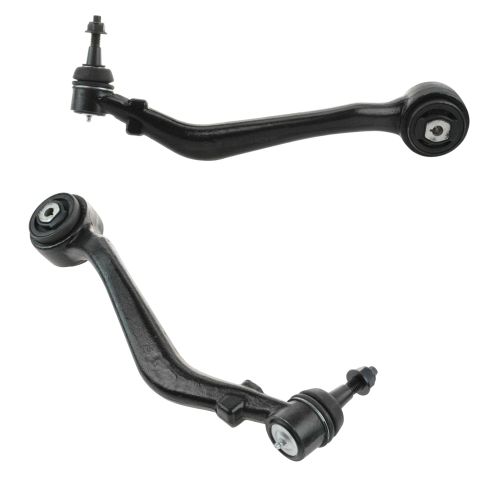
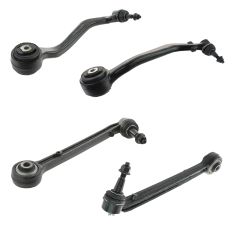
(1) Front Driver Side Lower Forward Control Arm with Ball Joint
(1) Front Passenger Side Lower Forward Control Arm with Ball Joint
Quantity:
2 Piece
Item Condition:
New
Specifications
Side Location
Driver & Passenger Side
Upper or Lower Location
Lower
Forward or Rearward Location
Forward
Location
Front
About TRQ: TRQ is a trusted brand dedicated to making every repair a success story by combining premium parts with easy installation. Each TRQ part is engineered by a team of automotive experts to meet or exceed OEM standards, delivering enhanced performance and maximum longevity. With rigorous in-house testing, the brand ensures superior fit and function across every product line. TRQ also provides customers with best-in-class, step-by-step installation videos—so you can complete repairs with confidence, whether you're a first-time DIYer or an industry professional.
Our control arms are designed to be direct replacements for the original factory parts. They are 100% brand new and require no modifications for installation. No special tools are required because all of the bushings come pre-installed.
Our steering and suspension components are pre-greased and sealed for long life and do not require the extra maintenance typically required by greaseable versions.
Attention California Customers:
WARNING: This product can expose you to chemicals including Lead and Lead Compounds, which are known to the State of California to cause cancer, and birth defects or other reproductive harm. For more information, go to www.P65Warnings.ca.gov.
This part fits
5 vehicles spanning 2010-2015.
Fits these Makes
Select vehicle
Year
Make
Model
Description
2010-2013
Chevrolet
Camaro
Chevrolet Camaro Front Driver & Passenger Side Lower Forward 2 Piece Control Arm with Ball Joint Set TRQ PSA62513
2014-2015
Chevrolet
Camaro
Chevrolet Camaro ZL1 Front Driver & Passenger Side Lower Forward 2 Piece Control Arm with Ball Joint Set TRQ PSA62513
2014-2015
Chevrolet
Camaro
Chevrolet Camaro LS Front Driver & Passenger Side Lower Forward 2 Piece Control Arm with Ball Joint Set TRQ PSA62513
2014-2015
Chevrolet
Camaro
Chevrolet Camaro LT Front Driver & Passenger Side Lower Forward 2 Piece Control Arm with Ball Joint Set TRQ PSA62513
2014-2015
Chevrolet
Camaro
Chevrolet Camaro SS Front Driver & Passenger Side Lower Forward 2 Piece Control Arm with Ball Joint Set TRQ PSA62513
Part Interchange
Brand Label
Part Number
ACDelco
45D1936
ACDelco
45D1937
Dorman
522-062
Dorman
522-061
General Motors
92195445
MAS Industries
CB90114
NAPA Premium
2606610
SYD
1503054
Mcquay-Norris
FA3610
Mcquay-Norris
FA3611
Mevotech
MS501127
Mevotech
MS501128
General Motors
92236899
Mevotech
CMS501127
Mevotech
GS501128
Mevotech
CMS501128
MOOG Chassis Products
RK621478
Precision Driveline
CB50348
NAPA
2606610
Dorman - OE Solutions
522-061
MAS Industries
CB90113
General Motors
92236899LH
Mevotech
GS501127
General Motors
92195444
Dorman - OE Solutions
522-062
MOOG Chassis Products
RK621479
SYD
1503053
NAPA Premium
2606611
Precision Driveline
CB50349
MAS Industries
CB90114PR
MAS Industries
CB90113PR
General Motors
92236898
General Motors
92236898RH
NAPA
2606611
DIY Solutions
SUS02705
DIY Solutions
SUS05931
DIY Solutions
SUS05930
Dorman - Premium
CB90113PR
Dorman - Premium
CB90114PR
Hollander
512-00614L
Hollander
512-00613R
Mevotech Supreme
GS501127
Mevotech Supreme
CMS501127
Mevotech Supreme
GS501128
Mevotech Supreme
MS501128
Mevotech Supreme
MS501127
Mevotech Supreme
CMS501128
GMC
92236899
GMC
92236898
This item may be interchangeable with parts from other brands with the above part numbers.
This information is provided only for reference and does not guarantee that the item you are
purchasing is identical to parts with part numbers from the brands listed above.
To confirm that this item fits your vehicle, use the above "Check Vehicle Fit" option.
Lifetime Warranty
This item is backed by our limited lifetime warranty. In the event that this item should fail due to manufacturing defects during intended use, we will replace the part free of charge. This warranty covers the cost of the part only.
FREE Shipping is standard on orders shipped to the lower 48 States (Contiguous United States). Standard shipping charges apply to Hawaii and Alaska.
Shipping is not available to a P.O. Box, APO/FPO/DPO addresses, US Territories, or Canada for this item.
Expedited is available on checkout to the United States, excluding Alaska, Hawaii.
Final shipping costs are available at checkout.
How to Replace Front Lower Forward Control Arm 2010-13 Chevy Camaro
Created on:
Tools used
21mm Socket
21mm wrench
Hammer
Torque Wrench
Jack Stands
22mm Wrench
10mm Wrench
Ratchet
Floor Jack
1/2 Inch Breaker Bar
22mm Socket
1. Removing the Wheel
Loosen the five 22mm lug nuts
Raise and secure the vehicle
Remove the lug nuts
Pull off the wheel
2. Removing the Control Arm
Loosen the 21mm nut that holds the ball joint to the wheel spindle
Leave the nut flush with the end of the ball joint stud
Strike the wheel spindle with a hammer to loosen the ball joint stud
Remove the ball joint nut
Hold the 21mm nut at the frame end of the control arm with a wrench
Remove the 21mm nut and bolt at the frame end of the control arm
3. Installing the Control Arm
Line up the control arm
Insert the bolt through the frame end of the control arm
Insert the ball joint stud into the wheel spindle
Start the 21mm nut onto the ball joint stud
Hold ball joint stud with a 10mm wrench
Tighten the ball joint nut with a 21mm nut
Tighten the ball joint nut to 30 foot-pounds of torque
Tighten the ball joint nut an additional 90 degrees
Start the 21mm nut at the frame end of the control arm
Raise the suspension with a jack
Hold the 21mm nut with a wrench
Tighten the 21mm bolt to 37 foot-pounds
Tighten the 21mm bolt an additional 120 degrees
Remove the jack from the suspension
4. Installing the Wheel
Slide the wheel into place
Start the lug nuts by hand
Lowr the vehicle to the ground
Tighten the lug nuts to 140 foot-pounds in a star pattern
Hi, I'm Mike from 1A Auto. We've been selling auto parts for over 30 years. We're dedicated to delivering quality auto parts, expert customer service, fast and free shipping, all backed by our 100% satisfaction guarantee. Visit us at 1AAuto.com, your trusted source for quality auto parts.
In this video, we're going to be working on our 2011 Chevy Camaro. We're going to show you how to remove and replace your vehicle's front lower forward control arm. If you like this video, please click subscribe. We have a ton more information on this and many other vehicles. If you need this part for your car, you can follow the link down in the description over to 1AAuto.com. Here are the items you'll need for this repair.
Using a 22 millimeter socket and a breaker bar, we'll loosen all of our lug nuts. Raise and support your vehicle. We're doing this on the lift to make it easier to show you what's going on, but this can easily been done at home on a jack and jack stands. With the tire off the ground, go ahead and finish removing your lug nuts and the wheel and tire assembly.
This is the passenger side forward lower control arm. To remove this, we'll start by loosening this 21 mm nut. We'll use a breaker bar to start it, then a socket and ratchet to finish removing it. For now, we're just going to leave that flush with the end of the bolt.
There are a few different ways to remove the ball joint. You could use a ball joint separating fork or pickle fork, which tends to destroy the boot. If you're removing this and intending to reuse it, you'll want to either hit the side of the control arm here to shock it loose and pop the ball joint out, or since we set the nut flush with the end of the bolt, we can hit the end here and not worry about damaging our threads or mushrooming the head of our bolt.
On the subframe side, we'll use a 21 mm wrench to secure the nut on the lower control arm bushing, and a 21 mm socket and a breaker bar on the front to loosen it. Once we get it loose, we'll finish removing that with a ratchet. Hold the control arm, remove the bolt, remove your control arm from the vehicle.
Here we have our old front lower forward control arm that we removed from our vehicle and our new part from 1AAuto.com. As you can see, these parts are exactly the same. We have a nice new bushing in here, the same body of the control arm, and the ball joint which is actually one piece with this. The ball joints on this vehicle cannot be changed separately. They are a part of the arm. Your two major fail points that you're going to have on these are the rubber bushings which you can see are starting to separate just a little on the back here. This isn't awful. The ball joint itself can go bad and create some unnecessary or unwanted up and down play as well as a lot of alignment issues, as can the bushing. These parts are exactly the same. Our new one from 1A Auto are going to go in direct fit just like our original equipment. Whether we have a bad bushing or a bad ball joint this part is going to fix us up right.
Reinstall the control arm. You'll want to line up the bushing first and send that bolt through. It may take a little bit of wiggling to get that to line up. We'll then line up the ball joint. Pull that through and start the new nut onto there. Tighten that down with a 21 mm socket and ratchet. If you hold it toward you to keep that tapered fit into the control arm, you should be able to tighten down without the stud spinning. Ours is turning a little bit, so we'll hold the stud with our 10 mm wrench and tighten the nut with our 21 mm. Some people will use a 10 mm socket and ratchet or 10 mm socket and an impact tool to spin this counterclockwise while holding the nut. I don't recommend doing that because you're just putting unnecessary strain and wear on the ball and socket joint by rotating it. It's probably not going to destroy it the first time, but for a few extra minutes of work here, we're really going to help the longevity of our new part. Torque the ball joint nut to 30 foot pounds. We'll now use an angle finder to add 90 degrees to this torque. Now 90 degrees is something that you can eyeball fairly easily, but for the most precise tension, be sure to use an angle gauge.
We'll get the 21 mm nut started on the backside. Hold that with our wrench and then tighten this bolt down. But we are not going to tighten it up all the way. We're just going to get it close, and then we'll load up our suspension to ride height and torque it at that point.
We're going to use a screw jack because our vehicle's on a lift, but you could do this same process using a floor jack at home. We're just going to compress the vehicle suspension by lifting up on the bottom of the hub simulating weight of the vehicle on the wheel. Once we're at that ride height position, we can torque our bolt and not preload the bushing. Torque the bolt first to 37 foot pounds. We'll then set up our torque angle finder and torque to 120 degrees. You can now remove the load from your suspension.
Reinstall your wheel and tire, and get all five of your lug nuts on as tight as you can by hand. You may also use a 22 millimeter socket to help you spin these in. Lower your vehicle back onto its wheels. You can now torque your lug nuts to 140 foot-pounds in a cross pattern.
Thanks for watching. Visit us at 1AAuto.com for quality auto parts, fast and free shipping, and the best customer service in the industry.
PSA62513
In Stock
Product Reviews
5.0/ 5
★★★★★★★★★★
2 reviews
5★
100%
4★
0%
3★
0%
2★
0%
1★
0%
★★★★★October 29, 2019
Well made, great quality parts. Just as good as oem if not better!
Product is a quality replacement, no pitting on surface which is a tell-tell sign of bad forging. Installed in about an hour and ride quality has improved immensely. Will buy from A-1 again in the future.
★★★★★September 25, 2018
It fit perfectly, you guys are my heroes
I love when I get parts from you guys. Everything I got from you fit just perfect I cant ask for more when I am buying part for my Camaro. Your the only ones the I trust. Thank you so much for making my life easy and simply ??????????
Showing 1–2 of 2 reviews
Customer Q&A
Got a question about this part? Post it and get answers from our team.
No questions have been answered for this product yet.
Customer service
877-844-3393
Monday - Friday 8:00am - 9:30pm ET Saturday - Sunday 8:00am - 4:30pm ET
Ask a Question
Check Your Email
We sent a verification email to .
Click the Verify Email button in the email to submit your question.
This extra step helps prevent spam.
Chevrolet is a registered trademark of General Motors Company. 1A Auto is not affiliated with or sponsored by Chevrolet or General Motors Company.See all trademarks.
Select Your Vehicle
Specify your vehicle's year, make and model to guarantee fit.








 WARNING: This product can expose you to chemicals including Lead and Lead Compounds, which are known to the State of California to cause cancer, and birth defects or other reproductive harm. For more information, go to www.P65Warnings.ca.gov.