
★★★★★
May 23, 2025
still working great

Replaces





About TRQ:
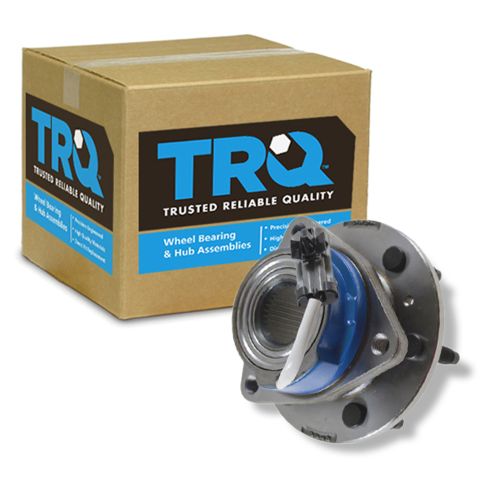
TRQ is a trusted brand dedicated to making every repair a success story by combining premium parts with easy installation. Each TRQ part is engineered by a team of automotive experts to meet or exceed OEM standards, delivering enhanced performance and maximum longevity. With rigorous in-house testing, the brand ensures superior fit and function across every product line. TRQ also provides customers with best-in-class, step-by-step installation videos—so you can complete repairs with confidence, whether you're a first-time DIYer or an industry professional.
Attention California Customers:
 WARNING: This product can expose you to chemicals including Lead and Lead Compounds, which are known to the State of California to cause cancer, and birth defects or other reproductive harm. For more information, go to www.P65Warnings.ca.gov.
This part fits 22 vehicles spanning 2006-2008.
| Year | Make | Model | Description |
|---|---|---|---|
| 2006 | Buick | Terraza | Buick Terraza Front Wheel Drive Front Driver Side Wheel Bearing & Hub Assembly TRQ BHA54021 |
| 2006 | Buick | Terraza | Buick Terraza All Wheel Drive Rear Driver Side Wheel Bearing & Hub Assembly TRQ BHA54021 |
| 2006 | Buick | Terraza | Buick Terraza Front Wheel Drive Front Passenger Side Wheel Bearing & Hub Assembly TRQ BHA54021 |
| 2006 | Buick | Terraza | Buick Terraza All Wheel Drive Rear Passenger Side Wheel Bearing & Hub Assembly TRQ BHA54021 |
| 2007 | Buick | Terraza | Buick Terraza Front Passenger Side Wheel Bearing & Hub Assembly TRQ BHA54021 |
| 2007 | Buick | Terraza | Buick Terraza Front Driver Side Wheel Bearing & Hub Assembly TRQ BHA54021 |
| 2006 | Chevrolet | Uplander | Chevrolet Uplander All Wheel Drive Rear Passenger Side Wheel Bearing & Hub Assembly TRQ BHA54021 |
| 2006 | Chevrolet | Uplander | Chevrolet Uplander Front Wheel Drive Front Passenger Side Wheel Bearing & Hub Assembly TRQ BHA54021 |
| 2006 | Chevrolet | Uplander | Chevrolet Uplander All Wheel Drive Rear Driver Side Wheel Bearing & Hub Assembly TRQ BHA54021 |
| 2006 | Chevrolet | Uplander | Chevrolet Uplander Front Wheel Drive Front Driver Side Wheel Bearing & Hub Assembly TRQ BHA54021 |
| 2007-2008 | Chevrolet | Uplander | Chevrolet Uplander Front Passenger Side Wheel Bearing & Hub Assembly TRQ BHA54021 |
| 2007-2008 | Chevrolet | Uplander | Chevrolet Uplander Front Driver Side Wheel Bearing & Hub Assembly TRQ BHA54021 |
| 2006 | Pontiac | Montana | Pontiac Montana All Wheel Drive Rear Passenger Side Wheel Bearing & Hub Assembly TRQ BHA54021 |
| 2006 | Pontiac | Montana | Pontiac Montana All Wheel Drive Rear Driver Side Wheel Bearing & Hub Assembly TRQ BHA54021 |
| 2006 | Pontiac | Montana | Pontiac Montana Front Driver Side Wheel Bearing & Hub Assembly TRQ BHA54021 |
| 2006 | Pontiac | Montana | Pontiac Montana Front Passenger Side Wheel Bearing & Hub Assembly TRQ BHA54021 |
| 2006 | Saturn | Relay | Saturn Relay All Wheel Drive Rear Passenger Side Wheel Bearing & Hub Assembly TRQ BHA54021 |
| 2006 | Saturn | Relay | Saturn Relay Front Wheel Drive Front Passenger Side Wheel Bearing & Hub Assembly TRQ BHA54021 |
| 2006 | Saturn | Relay | Saturn Relay Front Wheel Drive Front Driver Side Wheel Bearing & Hub Assembly TRQ BHA54021 |
| 2006 | Saturn | Relay | Saturn Relay All Wheel Drive Rear Driver Side Wheel Bearing & Hub Assembly TRQ BHA54021 |
| 2007 | Saturn | Relay | Saturn Relay Front Driver Side Wheel Bearing & Hub Assembly TRQ BHA54021 |
| 2007 | Saturn | Relay | Saturn Relay Front Passenger Side Wheel Bearing & Hub Assembly TRQ BHA54021 |
| Brand Label | Part Number |
|---|---|
| MOOG Hub Assemblies | 513236 |
| Timken | HA590157 |
| ACDelco | FW294 |
| Delphi | BK10131-40L1 |
| Raybestos Brakes | 713236 |
| SKF | BR930627 |
| General Motors | 25999685 |
| Chicago Rawhide | BR930627 |
| General Motors | 12413247 |
| General Motors | 7467707 |
| GMB | 730-0319 |
| SKF | BAR-5159 |
| General Motors | 88967258 |
| Drive Tech America | NT513236 |
| Hollander | 538-00104 |
This item may be interchangeable with parts from other brands with the above part numbers. This information is provided only for reference and does not guarantee that the item you are purchasing is identical to parts with part numbers from the brands listed above. To confirm that this item fits your vehicle, use the above "Check Vehicle Fit" option.
Lifetime Warranty
This item is backed by our limited lifetime warranty. In the event that this item should fail due to manufacturing defects during intended use, we will replace the part free of charge. This warranty covers the cost of the part only.
FREE Shipping is standard on orders shipped to the lower 48 States (Contiguous United States). Standard shipping charges apply to Hawaii and Alaska.
Shipping is not available to a P.O. Box, APO/FPO/DPO addresses, US Territories, or Canada for this item.
Expedited is available on checkout to the United States, excluding Alaska, Hawaii.
Final shipping costs are available at checkout.

Created on:
Tools used
Hi, I'm Mike from 1AAuto. We've been selling auto parts for over 30 years! We're dedicated to delivering quality auto parts, expert customer service, and fast and free shipping, all backed by our 100% satisfaction guarantee. So visit us at 1AAuto.com, your trusted source for quality auto parts.
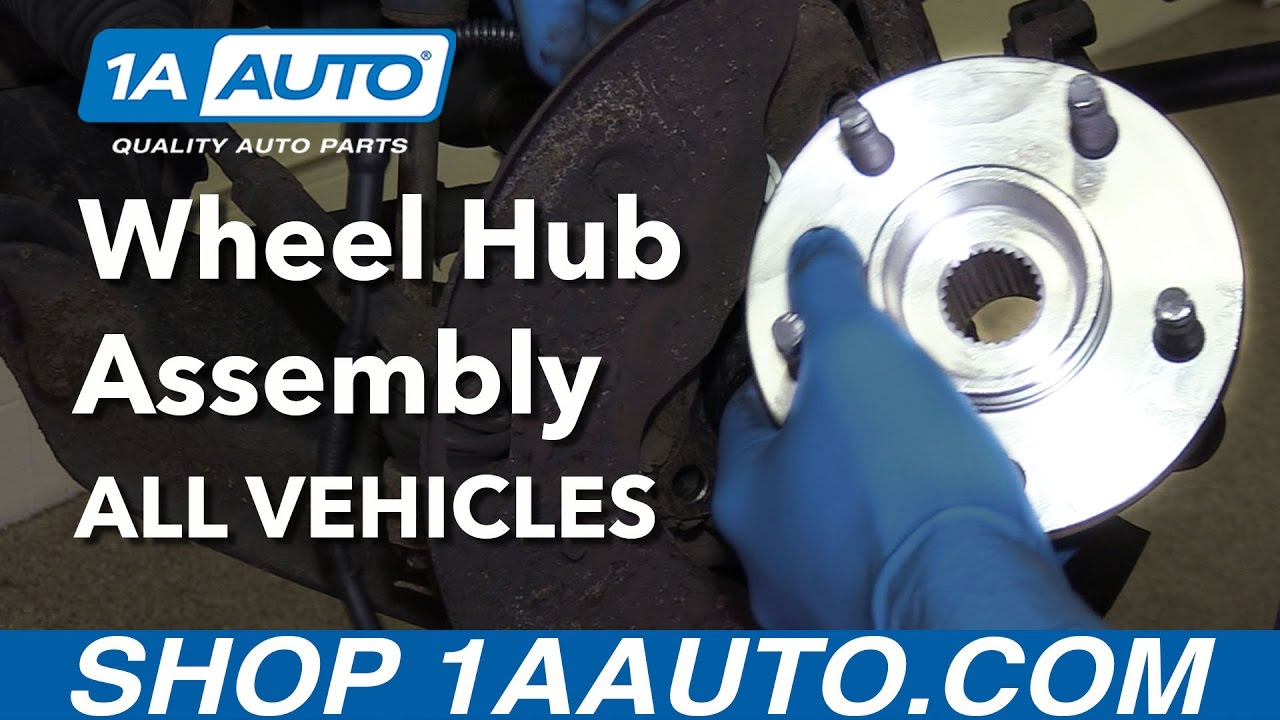
In this video, we're going to give you a general overview of how to replace a bolt-in style wheel bearing and hub assembly. While this vehicle may not be identical to yours, the steps and procedures will be very similar, if not the same, on a wide variety of aches and models. The only major differences will be the exact hardware used and their torque specifications. This information can be found on a wide variety of online resources to make sure your specific vehicle gets fixed right.
If you like this video, please click subscribe. We have a ton more general overview repairs, as well as specific installations for your make and model. If you need wheel bearings for your car, we have a wide selection available from 1AAuto.com. You can follow the link down in the description. Thanks for watching.
If your vehicle has a center cap or a full hubcap covering the lug nuts, hubcaps can be removed by grabbing and pulling, where center caps usually need a screwdriver or a small pry bar. Pop them off the wheel. Before removing your wheel and tire or jacking up the vehicle, loosen your axle nut or bolt in the center of the wheel with a breaker bar and the appropriate socket. Occasionally, the axle nut will have a cotter pin and lock cap in it. All you have to do is straighten out the tabs on the cotter pin, remove the cotter pin and the lock cap so you can access your axle nut.
When you go to put it back on, simply line up that lock cap so the holes line up with the hole in the axle. Install a new cotter pin through the opening, bend the legs over. Remove your lug nuts from the vehicle with the appropriate socket and a breaker bar. Make sure the tire is still on the ground at this point to prevent it from spinning when you go to remove the nuts. Just crack them loose one turn. This'll keep the wheel from falling off, but allow us to easily remove it once the pressure is off the car. If you have a wheel lock key, insert it into a lock lug if you have one. Loosen that up the same way.
Raise and support your vehicle. We're using a lift in the shop, but if you're doing this at home, it can easily be done with a jack and jack stands. If you're not sure on where to lift your vehicle, you can check a variety of online resources or the owner's manual in your vehicle if you still have one. Since we've already cracked our lug nuts loose, you should be able to just spin them off by hand once the vehicle's raised and supported. Make sure when removing the last lug you keep a hand on the wheel and tire, then remove them and set it off to the side.
Remove the two bolts on the back of the caliper. These are usually a regular hex bolt, but occasionally they're an Allen key with a little rubber cap you'll have to pop off to access them. You may need a screwdriver or a small pry bar to free the caliper from the pads. Then, using a zip tie, a bungee cord, or some mechanics wire, go ahead and secure the caliper up and out of the way so it doesn't get damaged while we finish our repair. Remove the pads. You may have to pop them out with a flat blade screwdriver if they're stuck in there. Remove the two bolts on the back of the spindle, securing the caliper bracket. Make sure that both are cracked loose before removing either one fully. Once the bolt is out, remove the caliper bracket from the spindle.
Some rotors may have a Phillips-head or torque screw securing the rotor to the hub. Remove that if necessary, and if your rotor is frozen to the hub from rust and corrosion, tap it on the face of the rotor. You can hit the outer edge if you're not reusing the rotor. If you are, tap between the studs, free up the rust, and remove the rotor from the hub. Finish removing your axle nut by hand or axle bolt on some vehicles. Once this has been removed, there's usually a small hole in the center here. We'll place a punch in that hole. Just tap the axle to release it from the splines inside of the hub. Normally there are a few bolts, in this case three, securing the hub onto the spindle. These bolts can be accessed from the back with either a socket and ratchet or a wrench if it's tight. Place a drain bucket or some cardboard or paper towels underneath the hub, and spray the backside of the bolts with some penetrating oil. Give that a little bit to soak in. Double check that your axle is released from the hub.
Using a chisel, we're going to wedge between the hub and the spindle. Once it starts coming out, we'll keep tapping that axle to make sure it's releasing from the splines. On this particular vehicle, we can now access the ABS sensor, which we'll have to remove before our hub can finish coming out. We could have removed this dust shield to access our ABS sensor more easily. However, the bolts are very corroded, and we didn't want to risk breaking anything, so we'll remove the bolt securing our sensor into the hub. This is usually just one bolt. Be very careful with these. If we're replacing our hub, it's not as big of a deal if this bolt breaks. We can always replace it with another one. However, we do want to be careful not to break our sensor while removing it. I find the easiest way to remove these sensors is to grab them with a pair of pliers, simply twist them back and forth while carefully pulling out. Once it's released, we'll hold it out of the way and remove our hub from the vehicle.
Reinstall the hub onto the axle. If you had an ABS sensor, reinstall that into the hub as well, along with the bolt. Tighten that bolt down. Now, I find it's easiest to realign the hub by sending the bolts through partway. Then, without fully installing the hub, you can just get a couple of threads started on each one by hand. Once you have them all started and lined up, you can tighten down all of your bolts.
Reinstall your axle nut or axle bolt, and get it on as tight as you can by hand.
Reinstall your rotor and rotor screw if necessary. If your vehicle doesn't have a rotor screw, to make it easier, press your rotor in flat, and using some washers or an old axle nut works perfect. Install a lug nut by hand as tight as you can into that axle nut. This'll keep the rotor upright while we reinstall the rest of our parts, making it that much easier. Reinstall the caliper bracket and the two bolts that secure it. Start both bolts by hand, then tighten them down with the appropriate socket and ratchet. Install your brake pads and apply a thin coat of grease to the backside of them. Release your caliper from whatever you used to secure it out of the way.
Using a large pair of groovelock pliers, carefully compress each piston one side at a time, going nice and slow so you don't push the other piston out in the process. You may have to go back and forth a couple of times if you have dual piston calipers like these. Once it's fully compressed, slide it back over the pads, push the pins in to allow the caliper back into place, reinstall your hardware. Once they're in by hand, go ahead and tighten them down with the appropriate socket and ratchet.
If you've used the axle nut and lug nut trick to secure your rotor, go ahead and remove that now.
Reinstall your wheel and tire. Reinstall your lug nuts as tight as you can by hand. Now you're all set to lower your vehicle. Tighten your lug nuts and then torque them to spec in a cross pattern. If you don't know what this torque spec is, you may be able to find it in your owner's manual or in a variety of online resources.
Once you've got your wheel and tire back on the ground and all your lug nuts are tight, torque your axle nut, which you can use the same resources to locate. Once you're done, simply pop on your center cap or hubcap. Make sure you pump your brakes until you get a nice firm pedal back to allow that compressed caliper to seat before moving the vehicle.
Thanks for watching. Visit us at 1AAuto.com for quality auto parts, fast and free shipping, and the best customer service in the industry.
still working great
Parts come fast very easy to install in fit exactly The way they were supposed to very satisfied with 1 A auto we're always recommended to others to use them and I will use them myself in the near future. Very satisfied with 1 A auto
I love 1aauto I've been buying from them for a while now the parts are always correct and fit perfect and they work perfectly out of the box the prices and the quality is second to none I would recommend them to everyone
It fit and worked great.
I had ordered a wheel bearing on e-bay and it didn't last a year. The one from 1A Auto appears to be better quality, better packaged and should certainly stand up to the rigors for which it is designed. It even feels heavier which is a good sign.
I was floored - floored! When I saw the price of the wheel bearing that I needed for my Saturn Relay. Locally, all the Big Corporate Stores (Reilly's, Autozone, etc) wanted over $140.00 for this part. So I decided to just drive that damn bearing straight into the ground until it would melt and fuse together - however, my wife of course didnt like that idea. So...I then decided to check the internet and BAM! 1A Auto price hit me in the face immediately. They wanted under half of the price- including shipping costs - that these other stores were given me. So it was a done deal. I bought that part in seconds; afraid someone else would and that would be the last one... The part is installed and working perfectly! I have already sent four friends to their website. 3 of them got their parts really cheap and another couldn't find what they needed - BUT STILL - I would recommend 1A Auto as the first place to check if you are trying to keep costs down.
Very good spare part. Fast ship and cheap. Sory, o know little english. I want to much write but :) little english. Good company and qualty and cheap.
Fast delivery parts arrived in two days. Part fit exactly on vehicle. Everything went smoothly. Will use a 1 auto for future parts needs.
So far has pretty good haven't had any issues yet. Half the price of one from a auto parts store. Actually less than half.
Great price and a perfect fit arrived on time I will be buying all my auto parts at 1a

BHA54021
