About TRQ: TRQ is a trusted brand dedicated to making every repair a success story by combining premium parts with easy installation. Each TRQ part is engineered by a team of automotive experts to meet or exceed OEM standards, delivering enhanced performance and maximum longevity. With rigorous in-house testing, the brand ensures superior fit and function across every product line. TRQ also provides customers with best-in-class, step-by-step installation videos—so you can complete repairs with confidence, whether you're a first-time DIYer or an industry professional.
Product Features
Application Specific Design: No modifications necessary
Anti-Corrosion Coated: Enhanced surface life
Pre-greased: No additional maintenance required
Kitted for Restored Performance: Improved road-feel and handling
Description
TRQ suspension kits are manufactured using premium raw materials and coatings for extended service life. Each TRQ suspension component is designed to be a direct, maintenance-free replacement to the stock unit. To extend the life of your steering and suspension components, TRQ recommends replacing components in pairs, sets, or kits. All products are fit and road-tested in our Massachusetts R&D facility to ensure we deliver on our promise of Trusted Reliable Quality.
Our steering and suspension components are pre-greased and sealed for long life and do not require the extra maintenance typically required by greaseable versions.
Attention California Customers:
WARNING: This product can expose you to chemicals including Lead and Lead Compounds, which are known to the State of California to cause cancer, and birth defects or other reproductive harm. For more information, go to www.P65Warnings.ca.gov.
This part fits
12 vehicles spanning 1997-2016.
Fits these Makes
Select vehicle
Year
Make
Model
Description
1997-2005
Buick
Century
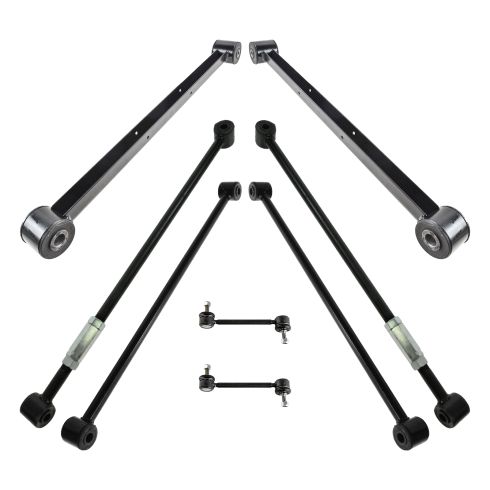
Buick Century Rear 8 Piece Suspension Kit TRQ PSA72558
Pontiac Grand Prix Rear 8 Piece Suspension Kit TRQ PSA72558
2005-2008
Pontiac
Grand Prix
Pontiac Grand Prix without Heavy Duty Suspension Rear 8 Piece Suspension Kit TRQ PSA72558
Part Interchange
Brand Label
Part Number
DIY Solutions
SUS06451
Dorman - OE Solutions
905-503
General Motors
20930845
General Motors
10329695
DIY Solutions
SUS06982
MOOG Chassis Products
K90370
MOOG Chassis Products
RK660276
DIY Solutions
SUS06819
General Motors
15235586
Mevotech
CMS501006
DIY Solutions
SUS06621
General Motors
10415034
DIY Solutions
SUS06620
General Motors
10329694
Dorman - OE Solutions
905-501
General Motors
15820927
General Motors
15236248
General Motors
10329691
General Motors
15235588
Dorman - OE Solutions
905-502
MOOG Chassis Products
RK660275
General Motors
10329689
General Motors
10320234
MOOG Chassis Products
K6662
General Motors
10329690
General Motors
10319450
MOOG Chassis Products
RK6402
MOOG Chassis Products
K660276
Mevotech
CMS501005
Dorman - OE Solutions
523-052
Mevotech
MK6402
Mevotech
MK6662
Mevotech
CMK6402
MAS Industries
LA59586
Beck/Arnley
102-7917
Mevotech
MS501005
QuickSteer
K90370
General Motors
15236247
Dorman - Premium
LA59586PR
Mevotech Supreme
CMS501005
General Motors
10319451
Hollander
513-00115
Mevotech Supreme
MK6402
Mevotech Supreme
MK6662
Mevotech Supreme
CMK6402
Mevotech Supreme
CMS501006
Mevotech Supreme
MS501005
MOOG Chassis Products
VK6402
This item may be interchangeable with parts from other brands with the above part numbers.
This information is provided only for reference and does not guarantee that the item you are
purchasing is identical to parts with part numbers from the brands listed above.
To confirm that this item fits your vehicle, use the above "Check Vehicle Fit" option.
Lifetime Warranty
This item is backed by our limited lifetime warranty. In the event that this item should fail due to manufacturing defects during intended use, we will replace the part free of charge. This warranty covers the cost of the part only.
FREE Shipping is standard on orders shipped to the lower 48 States (Contiguous United States). Standard shipping charges apply to Hawaii and Alaska.
Shipping is not available to a P.O. Box, APO/FPO/DPO addresses, US Territories, or Canada for this item.
Expedited is available on checkout to the United States, excluding Alaska, Hawaii.
Final shipping costs are available at checkout.
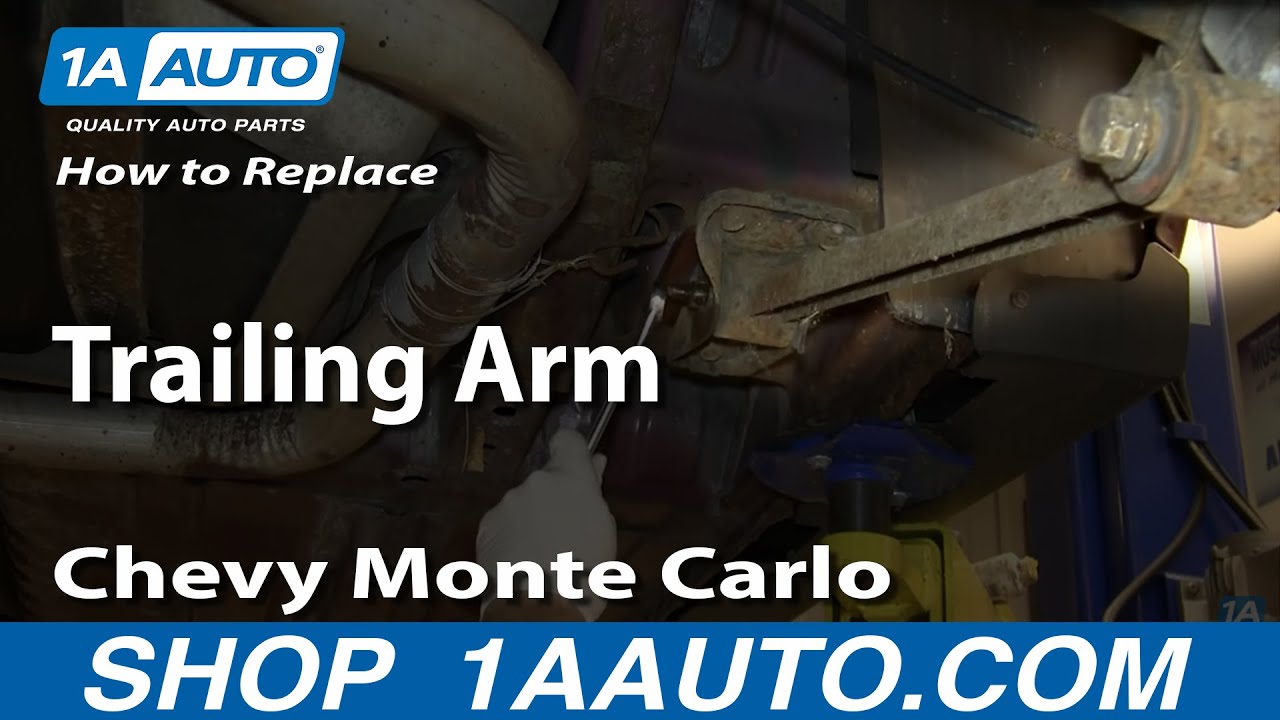
How to Replace Trailing Arm 1995-2007 Chevy Monte Carlo
How to Replace Lateral Link 2000-07 Chevy Monte Carlo
Created on:
Tools used
24mm Socket
Adjustable Wrench
A Piece of Pipe (for leverage)
Torque Wrench
Hammer
15mm Socket
Rust Penetrant
18mm Wrench
Jack Stands
18mm Socket
19mm Socket
24mm Wrench
Ratchet
Floor Jack
1. Removing the Wheel
Loosen the lug nut covers with a 19mm socket
Pry off the center cap with a flat blade screwdriver
Loosen the lug nuts with the vehicle on the ground
Raise the vehicle with a floor jack
Secure the vehicle on jack stands
Remove the lug nuts
Pull off the wheel
2. Removing the Rear Lower Trailing Control Arm
Spray penetrating oil on the 18mm bolt at the top of the trailing control arm
Spray penetrating oil on the 24mm bolt at the bottom of the trailing control arm
Remove the lower nut with a 24mm wrench
Loosen the bolt free with a 24mm wrench and a piece of pipe for leverage
Hammer the bolt free
Loosen the top bolts with an 18mm wrench till the arm lowers
Remove the 15mm bolts from the trailing arm bracket
Remove the trailing arm
Hammer the 18mm bolt out of the arm
3. Installing the New Rear Lower Trailing Control Arm
Push the 18mm bolt through the trailing arm and bracket
Push the bracket into place
Insert and tighten the 15mm bolts to the bracket as tight as possible
Place the lower end of the trailing arm into place
Insert the 24mm bolt on the lower end and tighten it preliminarily
Tighten the 18mm bolt preliminarily
Lower the vehicle onto jack stands placing pressure on the suspension
Tighten the 18mm and 24mm bolts
4. Reattaching the Wheel
Slide the wheel into place
Start the lug nuts by hand
Tighten the lug nuts preliminarily
Lower the vehicle to the ground
Tighten the lug nuts to 100 foot-pounds in a crossing or star pattern
Reattach the center cap
Tighten the lug nut covers with a 19mm socket
Brought to you by 1AAuto.com, your source for quality replacement parts and the best service on the Internet.
Hi, I'm Mike from 1A Auto. I hope this how-to video helps you out, and next time you need parts for your vehicle, think of 1AAuto.com. Thanks.
In this video, we're going to show you how to replace a trailing arm on this 2003 Chevy Monte Carlo. It's the same part and similar process on these Monte Carlos from 2000 to 2007. We show you on the passenger side, but the driver side is the same procedure. The items you'll need for this include a new training arm from 1AAuto.com, 15mm, 18mm, 19mm, and 24mm socket and ratchet, a piece of pipe for leverage, 18mm and 24mm wrench, an adjustable wrench, a torque wrench, jack and jack stands, and a hammer.
Start off by loosening these 19mm lug nut caps, and then pull your hubcap free. Remove these 19mm lug nuts. You want to loosen these while the vehicle is on the ground, raise it, and remove them the rest of the way. If you have air-powered tools, you can remove them entirely when the vehicle is entirely in the air. Once the lug nuts are removed, pull your wheel free.
Spray penetrating oil on this bolt and the bolt up here at the top of your controller. Then just remove this lower bolt. The easiest way to do that is using a 24mm wrench. Once the nut is removed, just break that bolt free. We use air-powered tools to do this, but you could also just use hand tools with a piece of pipe for leverage. Just keep twisting the bolt until it loosens up.
Once it's loosened up, you can just hammer it out the rest of the way and then just pull that down. Using an 18mm wrench, just loosen up this top bolt. When you get it loose enough and the trailing arm lowers, you can then access these two bolts and this bolt right here. All three of those are 15mm. We'll just fast-forward as Mike removes them.
You want to put this somewhere where there's a gap. You can put the bolt down in, and then, just using a hammer, hit the bolt out. You may have better luck and it may just pull out. If yours looks like ours, this is probably how you'll have to do it. You'll need the bolt out of the other one as well.
On the bottom is the old trailing arm and bracket; above it is the new one from 1A Auto. You can see they're identical, and they'll fit exactly the same. Take the new trailing arm and bracket and push the bolt through. Replace the nut on the other side. Push the bracket up into place and replace those three 15mm bolts. Just tighten those up. If you used air-powered tools, go around again with just a ratchet and socket and make sure those are tightened up as tight as you can get them.
Put the lower end of the trailing arm back into place, push the bolt through, and then replace the nut on the other side. Just tighten that up, and for right now you are just tightening this preliminarily. Do the same thing with the top bolt. Now you want to lower the vehicle down onto jack stands, putting all the pressure on the suspension and then tighten up these two control arm bolts the rest of the way.
Replace your wheel, replace the lug nuts, and tighten them up. You want to tighten those while the vehicle is on the ground, and then you want to torque each of them to 100 foot-pounds in a crossing pattern. Replace your hubcap and tighten up those lug nut caps. Then you're all set.
We hope this video helps you out. Brought to you by www.1AAuto.com, your source for quality replacement parts and the best service on the Internet. Please feel free to call us toll-free, 888-844-3393. We're the company that's here for you on the Internet and in person.
Tools used
Adjustable Wrench
13mm Socket
A Piece of Pipe (for leverage)
Torque Wrench
Hammer
Rust Penetrant
Pry Bar
Jack Stands
18mm Socket
19mm Socket
21mm Socket
21mm wrench
Flat Blade Screwdriver
Ratchet
Floor Jack
1. Removing the Wheel
Loosen the lug nut covers with a 19mm socket
Pull off the center cap by hand
Loosen the lug nuts with the vehicle on the ground
Raise the vehicle with a floor jack
Secure the vehicle on jack stands
Remove the lug nuts
Pull off the wheel
2. Removing the Brake Caliper
Remove the two 13mm bolts from the brake caliper
Pry the brake pads into the caliper with a flat blade screwdriver to push in the pistons
Pull the caliper aside
3. Loosening the Struts
Apply penetrating oil to the track bar bolts
Hold the inside track bar bolt with a 21mm wrench
Loosen the inside track bar bolt with a 21mm socket and ratchet
Hold the outside track bar bolt with a 21mm wrench
Loosen the outside track bar nut with a 21mm socket and ratchet
Support the suspension carriage with a jack
Remove the four 18mm bolts from the carriage
Carefully lower the carriage
Remove the outside track bar nut
Pull down the track bar
Pull off the brake rotor
Pull the outside track bar bolt up and out
Remove the inside track bar bolt
Pull the track bar down and out
4. Installing the New Track Bar
Remove the two 21mm nuts from the strut
Hammer the bolts out of the strut
Repeat Steps 1 through 3 on the opposite side
5. Installing the New Track Bar
Raise the new track bar into place
Slide the inside track bar bolt into place
Slide the outside track bar bolt into place
Push the track bar onto the outside bolt
Fasten the washer and 21mm nut onto the outside track bar bolt
Raise the suspension carriage with the jack
Insert the four 18mm bolts into the carriage
6. Reinstalling the Strut
Insert the two 21mm bolts into the strut
Tap the bolts in with a hammer
Fasten the 21mm nuts onto the strut bolts
Tighten the 21mm nuts to 120 foot-pounds of torque
7. Reinstalling the Brakes
Slide the brake rotor on
Put on the brake caliper
Insert the two 13mm bolts into the brake caliper
Repeat Steps 6 and 7 on the opposite side
8. Tightening the Track Bar Bolts
Lower the suspension onto jack stands
Tighten the track bar bolts
9. Reattaching the Wheel
Slide the wheel into place
Start the lug nuts by hand
Tighten the lug nuts preliminarily
Lower the vehicle to the ground
Tighten the lug nuts to 100 foot-pounds in a crossing or star pattern
Reattach the center cap
Tighten the lug nut covers with a 19mm socket
Have the suspension professionally aligned
Brought to you by 1AAuto.com, your source for quality replacement parts and the best service on the Internet.
Hi, I'm Mike from 1A Auto. I hope this how-to video helps you out, and next time you need parts for your vehicle, think of 1AAuto.com. Thanks.
In this video, we're going to show you how to replace the forward, fixed track bar on this 2003 Chevy Monte Carlo. It's the same part and a similar process on these Monte Carlos from 2000 to 2007. We show you on the driver side but the passenger side is the same procedure. The items you will need for this are a new forward fixed track bar from 1Auto.com; 13, 18, 19, and 21 millimeter socket and ratchet with a piece of pipe for leverage; 21 millimeter wrench; two adjustable wrenches; torque wrench; jack and jack stands; pry bar; and a hammer.
Start off by loosening these 19 millimeter lug nut caps, and then pull your hub cap free. Then, remove these 19 millimeter lug nuts. You want to loosen these while the vehicles is on the ground. When you raise it, remove them the rest of the way, unless you have air powered tools. Then you can remove them entirely while the vehicle's in the air. Once the lug nuts are removed, pull your wheel free.
Then, you want to remove these two 13 millimeter bolts on the back of your brake caliper.Now pry in on the caliper. This will push in the piston and make it easier to remove. Set that aside.
Then, remove these two 21 millimeter nuts. We will fast forward as Mike does this. Hammer in between the strut just to help loosen it up and now you can just hammer those two bolts out. We will fast forward as Mike repeats the entire process on the other side.
Spray some penetrating oil on this bolt and on this bolt right here. Then just loosen up these two bolts that go into these track arms. Now, just loosen up this 21 millimeter nut and just use a 21 millimeter wrench on the other side. Jack up this center piece here that your track bars go into and then remove these four 18 millimeter bolts. We will fast forward as Mike does that. Now, carefully lower that down. Then remove this bolt far enough back that you can get the track arm free. Pull the rotor off so it doesn't fall while you are pulling this bolt out. You want to just pry up on the bolt, up and over that bar and then pull the bolt free. Now, we'll fast forward as Mike removes this bolt at the top of the track arm. To get the bolt out the rest of the way, once the nut is removed and the bolt is completely loosened, you can just pry out on this carriage here and then angle the bolt out as you twist it out and you can pull it free. Then the track arm will just pull down and out.
On top, is the new track bar from 1AAuto.com. On the bottom, is the original one. They are identical although they could be slightly longer or shorter so you may want to have your vehicle aligned after this procedure is done. Once you have it in place, just pry out with the pry bar and then angle the bolt back up into place. Once you get it in, then put the nut on the other side and just tighten it up preliminarily. Take the bolt and push it back thought the knuckle. To get it to go in you will have to have the knuckle at the right angle. Then, you can hammer it in the rest of the way making sure you angle it up and over that line. You can see he prys out as he hammers so that he can create a line easier and then hammers itdown in place. Now push this back onto that bolt and push the bolt back through it. Then replace that washer and 21 millimeter nut. We will fast forward as Mike tightens those up. Now, just raise the jack to push this carriage back into place. Replace and tighten up those four bolts.
Now push your bolts back into the strut. Just hammer them in a little bit until you can get the nut on the other side. Then, replace the nut and tighten those up and they will pull through. Then, you want to torque both of those to 120 foot-pounds.
Replace your rotor and then take your caliper and slide it back into place, lining up the holes on the back with the holes on the knuckle. Then replace those 13 millimeter bolts and tighten them up. Then repeat the process on the other side.
Now, you want to lower down the rear suspension onto two jack stands putting the pressure on the suspension and then tighten up the top track bar bolt and the lower track bar bolt as tight as you can get them. Here we are just tightening up the other track bar bolt and you will probably want to get an alignment after this is done because the track bar could be slightly smaller or larger than your old one.
Then, replace your wheel and replace the lug nuts and tighten them up. You want to tighten those while the vehicle is on the ground and then you want to torque each of them to 100 foot-pounds in a crossing pattern. Then replace your hubcap and tighten up those lug nut caps. Then you're all set.
We hope this video helps you out. Brought to you by www.1AAuto.com, your source for quality replacement parts and the best service on the Internet. Please feel free to call us toll-free, 888-844-3393. We're the company that's here for you on the Internet and in person.
Product Reviews
4.3/ 5
★★★★★★★★★★
3 reviews
5★
67%
4★
0%
3★
33%
2★
0%
1★
0%
★★★★★October 9, 2025
Forward lateral links made wrong
The fixed lateral arms that mount in the front are a 1/2 too long and will throw your camber off significantly. Everything else was good.
★★★★★September 25, 2025
Bought it for my 2012 Impala
Great bundle for the price. Arrived on time, all parts packaged well with no damage. Bought it for my 2012 Impala that was clunking in the rear, fixed it right up. Easy enough installation either way the right tools. Would buy again.
★★★★★April 15, 2023
happy with the product. Do you sell hardware too?
Showing 1–3 of 3 reviews
PSA72558
In Stock
Customer Q&A
Got a question about this part? Post it and get answers from our team.
No questions have been answered for this product yet.
Customer service
877-844-3393
Monday - Friday 8:00am - 9:30pm ET Saturday - Sunday 8:00am - 4:30pm ET
Ask a Question
Check Your Email
We sent a verification email to .
Click the Verify Email button in the email to submit your question.
This extra step helps prevent spam.
Select Your Vehicle
Specify your vehicle's year, make and model to guarantee fit.











 WARNING: This product can expose you to chemicals including Lead and Lead Compounds, which are known to the State of California to cause cancer, and birth defects or other reproductive harm. For more information, go to www.P65Warnings.ca.gov.