
★★★★★
July 3, 2020
Good brake parts
I've used these parts on both of our cars now. They seem as good as any I've used in the past. Very quick delivery was a plus too

Replaces




About TRQ:
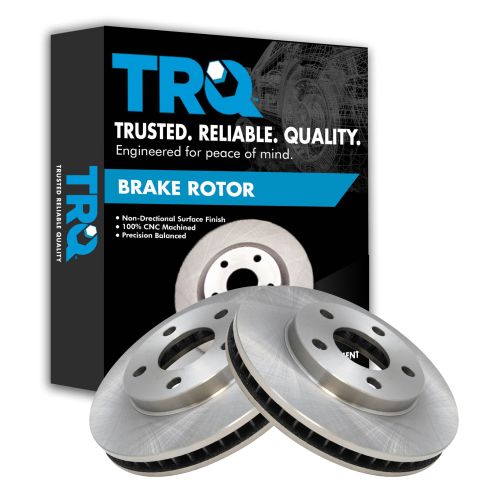
TRQ is a trusted brand dedicated to making every repair a success story by combining premium parts with easy installation. Each TRQ part is engineered by a team of automotive experts to meet or exceed OEM standards, delivering enhanced performance and maximum longevity. With rigorous in-house testing, the brand ensures superior fit and function across every product line. TRQ also provides customers with best-in-class, step-by-step installation videos—so you can complete repairs with confidence, whether you're a first-time DIYer or an industry professional.
Product Features
TRQ brake rotors are manufactured using premium G3000 casting alloy to reduce noise while braking and enhance service life. TRQ rotors have a non-directional finish to minimize the break-in period for new rotors and reduce vibrations throughout the rotor’s lifecycle. TRQ recommends replacing brake pads when you replace rotors to ensure even wear and improved component performance. All products are fit and road-tested in our Massachusetts R&D facility to ensure we deliver on our promise of Trusted Reliable Quality.
Attention California Customers:
 WARNING: This product can expose you to chemicals including Lead and Lead Compounds, which are known to the State of California to cause cancer, and birth defects or other reproductive harm. For more information, go to www.P65Warnings.ca.gov.
This part fits 18 vehicles spanning 1997-2005.
| Year | Make | Model | Description |
|---|---|---|---|
| 1997-2005 | Buick | Century | Buick Century Front Driver & Passenger Side 2 Piece Brake Rotor Set TRQ BRA75816 |
| 1998-1999 | Buick | LeSabre | Buick LeSabre Front Driver & Passenger Side 2 Piece Brake Rotor Set TRQ BRA75816 |
| 2000-2005 | Buick | LeSabre | Buick LeSabre Front Driver & Passenger Side with 15 Inch Wheels 2 Piece Brake Rotor Set TRQ BRA75816 |
| 1997-2004 | Buick | Regal | Buick Regal Front Driver & Passenger Side 2 Piece Brake Rotor Set TRQ BRA75816 |
| 1999 | Buick | Riviera | Buick Riviera Front Driver & Passenger Side 2 Piece Brake Rotor Set TRQ BRA75816 |
| 1997-2005 | Chevrolet | Venture | Chevrolet Venture Front Driver & Passenger Side 2 Piece Brake Rotor Set TRQ BRA75816 |
| 1998-1999 | Oldsmobile | 88 | Olds 88 Front Driver & Passenger Side 2 Piece Brake Rotor Set TRQ BRA75816 |
| 1998-1999 | Oldsmobile | Intrigue | Olds Intrigue Front Driver & Passenger Side with 278mm Diameter Front Rotors 2 Piece Brake Rotor Set TRQ BRA75816 |
| 2000-2002 | Oldsmobile | Intrigue | Olds Intrigue Front Driver & Passenger Side 2 Piece Brake Rotor Set TRQ BRA75816 |
| 1998-1999 | Oldsmobile | LSS | Olds LSS Front Driver & Passenger Side 2 Piece Brake Rotor Set TRQ BRA75816 |
| 1998 | Oldsmobile | Regency | Olds Regency Front Driver & Passenger Side 2 Piece Brake Rotor Set TRQ BRA75816 |
| 1997-2004 | Oldsmobile | Silhouette | Olds Silhouette Front Driver & Passenger Side 2 Piece Brake Rotor Set TRQ BRA75816 |
| 1998-1999 | Pontiac | Bonneville | Pontiac Bonneville Front Driver & Passenger Side 2 Piece Brake Rotor Set TRQ BRA75816 |
| 2000-2005 | Pontiac | Bonneville | Pontiac Bonneville SE Front Driver & Passenger Side 2 Piece Brake Rotor Set TRQ BRA75816 |
| 1997-2003 | Pontiac | Grand Prix | Pontiac Grand Prix Front Driver & Passenger Side 2 Piece Brake Rotor Set TRQ BRA75816 |
| 1999-2004 | Pontiac | Montana | Pontiac Montana Front Driver & Passenger Side 2 Piece Brake Rotor Set TRQ BRA75816 |
| 2005 | Pontiac | Montana | Pontiac Montana Base Model Front Driver & Passenger Side 2 Piece Brake Rotor Set TRQ BRA75816 |
| 1997-1998 | Pontiac | Trans Sport | Pontiac Trans Sport Front Driver & Passenger Side 2 Piece Brake Rotor Set TRQ BRA75816 |
| Brand Label | Part Number |
|---|---|
| Aimco | 55036 |
| DuraGo | BR55036 |
| Bendix | PRT5250 |
| Wagner | BD125507 |
| Raybestos Brakes | 56631 |
| Raybestos Brakes | 56631P |
| Raybestos Brakes | 56631FZN |
| Raybestos Brakes | 56631R |
| Hollander | 530-01981 |
This item may be interchangeable with parts from other brands with the above part numbers. This information is provided only for reference and does not guarantee that the item you are purchasing is identical to parts with part numbers from the brands listed above. To confirm that this item fits your vehicle, use the above "Check Vehicle Fit" option.
Lifetime Warranty
This item is backed by our limited lifetime warranty. In the event that this item should fail due to manufacturing defects during intended use, we will replace the part free of charge. This warranty covers the cost of the part only.
FREE Shipping is standard on orders shipped to the lower 48 States (Contiguous United States). Standard shipping charges apply to Hawaii and Alaska.
Shipping is not available to a P.O. Box, APO/FPO/DPO addresses, US Territories, or Canada for this item.
Expedited is available on checkout to the United States, excluding Alaska, Hawaii.
Final shipping costs are available at checkout.

Created on:
Tools used
Brought to you 1AAuto.com your source for quality replacement parts and the best service on the internet.
Hi, I'm Mike Green. I'm one of the owners of 1A Auto. I want to help you save time and money repairing and maintaining your vehicle. I'm going to use my 20 plus years of experience restoring and repairing cars and trucks like this to show you the correct way to install parts from 1aauto.com. The right parts installed correctly. That's going to save you time and money. Thank you and enjoy the video.
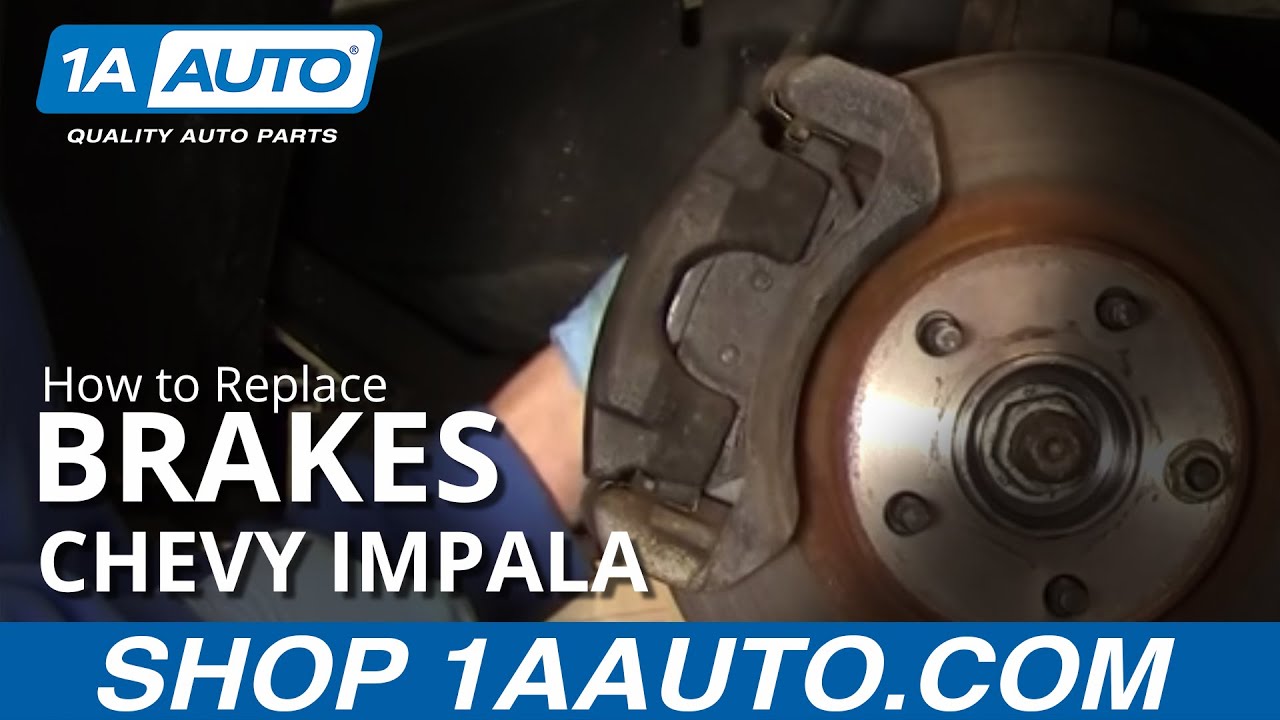
In this video, we're going to show you how to remove and replace the front brakes. I found that this car actually has fairly new front brakes on it, so we're not actually putting new parts on it, just showing you how to take them off and putting them back correctly.
This process is the same for all 2000 and 2005 Impalas, and it's similar for a whole bunch of different cars that have front disk brakes, flat blade screwdrivers, a large size, 15 millimeter, 19 millimeter socket and ratchet, which obviously can be different per vehicle. A breaker bar or pipe, you might need that for leverage, and the torque wrench to get it back together correctly.
First use a screwdriver to remove the center cap. This car has aluminum wheels. If you have a hubcap it might be a little different. You may need to use a wrench to loosen up your lug nuts first while your wheels on the ground, then raise and support your car, and always follow the instructions with the jack and jack stands to jack a car. You can either place a jack or place your jack stand. You can also jack right up here onto the sub frame where the two beams meet.
I have the fortune of having air tools, so I'm going to use them. Just remove the wheel here. You can also use just turn the steering wheel and turn your wheel so you can access the brakes easily. To remove the calipers, you're going to remove two 15 millimeter bolts, one down there and one right up there.
Before you do that, you take a screwdriver or a large pry bar and put it in this hole. If your brakes are worn down more than on this car, you may have to use more angle but then you pry out and that helps to push your piston down into the caliper and makes it easier to get the caliper off.
Now, I'm going to remove those two bolts, and they shouldn't be too tight. They're usually tightened up to about 50 to 60 foot pounds, and we're going to speed it up here.
Depending on how much you pushed the piston back in, you can pull the caliper up and off. Have a screwdriver handy as I now appear with one, and just use a screwdriver to pry off the caliper and put it up top for now. Be careful not to stress your line and then the brake pads just come right off. They just pry right out of the caliper bracket.
Actually, this car has new brakes on it. I'm doing this to show you, but to remove the hub, you remove the caliper bracket by removing those two bolts, and those again are 15 millimeter bolts. You can't quite see it, but I did secure my caliper up top with a wire tie, and now I'm going to use my ratchet and a big piece of pipe.
That pipe helps me get leverage and I'm just going to pull nice and easy. I just keep applying pressure until that bolt breaks loose. Get it going some, and then I'll do the same thing up top. I'll keep continuing to add torque until it breaks loose and get it going and then I'll drop my pipe and just use my air tools to zip them out the rest of the way.
Now my caliper bracket comes up and off, and then, your rotor just comes right off like that. Now here, obviously, the rotor just goes back onto the hub and then I'll hit fast forward. I just use a lug nut to hold the hub in place while I put the brakes together.
We'll grab our bolts, and I got the large 15 millimeter bolts and put the caliper bracket on. Here is just a view from the front so you can see the caliper goes on the opposite side of the steering knuckle, closer to the rotor, and then the bolts go into it.
Now, we want to get those tightened and then tighten them up to 90 foot pounds using a torque wrench. The caliper brackets are stainless steel clips. They're slides. They pull off, and then you want to use a wire brush and just clean those up.
Those are what the calipers slide back and forth in, and then once you clean them up with the brush you can clip them back on. Obviously, this could be done with the caliper bracket off, but if you're just replacing your pads, you want to do it this way.
Now, take your pads, and they basically just slide right into those clips. There's the front side. You put them down into one side first, and then slide them into the other side, and then we'll put the back side in.
Now you want to pull your caliper down and use a large c-clamp. What I'm doing is forcing the piston all the way back into the caliper. If we slope back down here, you can see that piston with the clamp is pushing in is going back into the caliper. You do this and reset it. It lets you put your brake pads on or it lets you get the caliper down onto the brake pads very easily.
It's very important that when you put your vehicle back together, before you drive it out on the road, you want to pump your brakes about four or five times. That allows the piston to work its way back out to the proper place.
You want to make sure you pump your brakes, make sure it holds the car in gear and then do a stop from like 5 miles an hour and 10 miles an hour. Make sure the brakes are working before you drive it on the road.
Now, you can put your caliper down onto your pads. I'm just going to put that clamp down, and there are the little boots that are on the caliper bracket. You squeeze those down as you put the caliper onto the bracket. Then you grab your long bolts. These are pretty clean and well-lubricated. What you want to do is make sure you clean them off a little bit, put some grease on it, just a little bit, a sparing amount. They should slide in nicely. You might have to just kind of move those rubber boots around a little bit and work them in, and then start them by hand.
We'll fast forward as we're just putting those two caliper bolts on. I'll slope back down here. We're using a torque wrench and we're going to torque this bolts up to 50 foot pounds.
Back to fast forward here as we finish up torqueing up those bolts. Once those are done, then you want to remove that lug nut that's holding the rotor, and then you'll spin your wheel straight so it makes it easier to get the tire back on.
Now we'll put the wheel back on and you want to start all the lug nuts by hand so you don't cross-thread them, then you use your wrench or even just by hand. You just want to get the lug nuts preliminary tightened up, just so they kind of hold the wheel in place, and then you'll torque them after you let the car down back onto the ground.
We're back on the ground. We're going to torque our lug nuts to a 100 foot pounds, and you see I'm using a star pattern, basically drawing a star as I torque the lug nuts. Now we'll install our cap, and again, a very important note. Make sure whenever you do work on your brakes, get in your car, pump them a bunch of times first.
Make sure the pedal goes solid again then do a stop from like 5 miles an hour and 10 miles an hour. Before you go out on the road, make sure your brakes are working properly.
We hope this helps you out. Brought to you 1AAuto.com your source for quality replacement parts and the best service on the internet.
Please feel free to call us toll-free 888-844-3393. We're the company that's here for you on the internet and in person.
I've used these parts on both of our cars now. They seem as good as any I've used in the past. Very quick delivery was a plus too

BRA75816
