
★★★★★
January 9, 2026
Trusted parts
Well priced parts to get the job done. From this and past experiences always reliable in workmanship and on time for delivery.

Replaces







About TRQ:
TRQ is a trusted brand dedicated to making every repair a success story by combining premium parts with easy installation. Each TRQ part is engineered by a team of automotive experts to meet or exceed OEM standards, delivering enhanced performance and maximum longevity. With rigorous in-house testing, the brand ensures superior fit and function across every product line. TRQ also provides customers with best-in-class, step-by-step installation videos—so you can complete repairs with confidence, whether you're a first-time DIYer or an industry professional.
Product Features
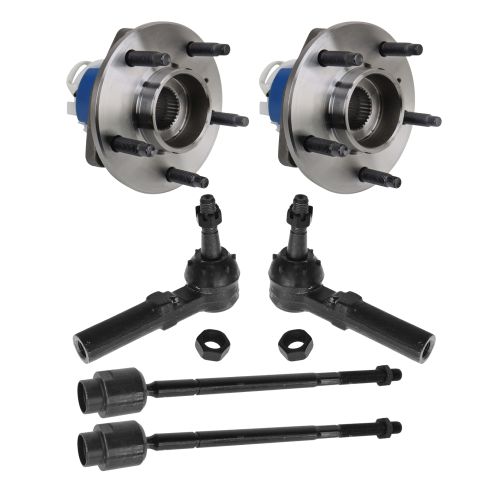
TRQ drivetrain kits are manufactured using premium raw materials to restore original performance. Each TRQ drivetrain component is designed to be a direct, maintenance-free replacement to the stock unit. To extend the service life of your drivetrain, TRQ recommends replacing wheel hubs, bearings, and constant velocity (CV) drive axles at the same time to ensure even wear of components and improved ride comfort. All products are fit and road-tested in our Massachusetts R&D facility to ensure we deliver on our promise of Trusted Reliable Quality.
Install Tip: When replacing steering components, have a professional alignment performed afterwards. This ensures proper tracking and even tire wear.
Our steering and suspension components are pre-greased and sealed for long life and do not require the extra maintenance typically required by greaseable versions.
Attention California Customers:
 WARNING: This product can expose you to chemicals including Lead and Lead Compounds, which are known to the State of California to cause cancer, and birth defects or other reproductive harm. For more information, go to www.P65Warnings.ca.gov.
This part fits 14 vehicles spanning 1997-2016.
| Year | Make | Model | Description |
|---|---|---|---|
| 1997-2002 | Buick | Century | Buick Century Front 6 Piece Steering & Drivetrain Kit TRQ PSA58472 |
| 2003-2005 | Buick | Century | Buick Century Front with 4 Wheel ABS Brakes 6 Piece Steering & Drivetrain Kit TRQ PSA58472 |
| 2005 | Buick | LaCrosse | Buick LaCrosse Front with 4 Wheel ABS Brakes 6 Piece Steering & Drivetrain Kit TRQ PSA58472 |
| 2006-2009 | Buick | LaCrosse | Buick LaCrosse Front 6 Piece Steering & Drivetrain Kit TRQ PSA58472 |
| 1997-2002 | Buick | Regal | Buick Regal Front 6 Piece Steering & Drivetrain Kit TRQ PSA58472 |
| 2003-2004 | Buick | Regal | Buick Regal Front with 4 Wheel ABS Brakes 6 Piece Steering & Drivetrain Kit TRQ PSA58472 |
| 2000-2003 | Chevrolet | Impala | Chevrolet Impala Front with 4 Wheel ABS Brakes 6 Piece Steering & Drivetrain Kit TRQ PSA58472 |
| 2004-2008 | Chevrolet | Impala | Chevrolet Impala with RPO Code FE1 (Soft Ride Suspension) Front with 4 Wheel ABS Brakes 6 Piece Steering & Drivetrain Kit TRQ PSA58472 |
| 2009-2013 | Chevrolet | Impala | Chevrolet Impala with RPO Code FE1 (Soft Ride Suspension) Front 6 Piece Steering & Drivetrain Kit TRQ PSA58472 |
| 2014-2016 | Chevrolet | Impala Limited | Chevrolet Impala Limited without Special Ride & Handling Suspension Package Front 6 Piece Steering & Drivetrain Kit TRQ PSA58472 |
| 2000-2002 | Chevrolet | Monte Carlo | Chevrolet Monte Carlo Front 6 Piece Steering & Drivetrain Kit TRQ PSA58472 |
| 2003-2007 | Chevrolet | Monte Carlo | Chevrolet Monte Carlo Front with 4 Wheel ABS Brakes 6 Piece Steering & Drivetrain Kit TRQ PSA58472 |
| 1998-2002 | Oldsmobile | Intrigue | Olds Intrigue Front 6 Piece Steering & Drivetrain Kit TRQ PSA58472 |
| 2004-2008 | Pontiac | Grand Prix | Pontiac Grand Prix Front with 4 Wheel ABS Brakes 6 Piece Steering & Drivetrain Kit TRQ PSA58472 |
| Brand Label | Part Number |
|---|---|
| MOOG Hub Assemblies | 513179 |
| Timken | 513179 |
| ACDelco | FW116 |
| Delphi | 12413068 |
| ACDelco | FW128 |
| Delphi | 7467564 |
| ACDelco | FW293 |
| ACDelco | FW293MX |
| SKF | BR930149 |
| General Motors | 12429205 |
| MOOG Chassis Products | ES3459 |
| Chicago Rawhide | BR930149 |
| Raybestos Brakes | 713179 |
| Raybestos Brakes | 713199 |
| Drive Tech America | NT513179 |
| MOOG Chassis Products | EV195 |
| Mevotech | H513179 |
| General Motors | 12413035 |
| General Motors | 88964168 |
| SKF | BAR-5124 |
| SKF | BR930548K |
| General Motors | 12429203 |
| GMB | 730-0055 |
| General Motors | 88964968 |
| SKF | BR854 |
| Chicago Rawhide | BR930548K |
| DIY Solutions | SUS07392 |
| DIY Solutions | SUS07340 |
| General Motors | 26056811 |
| General Motors | 26021769 |
| General Motors | 26086580 |
| Delphi | 12411320 |
| General Motors | 10434253 |
| GMB | 725-0216 |
| MOOG Hub Assemblies | 513187 |
| Raybestos Brakes | 713187 |
| ACDelco | FW157 |
| Delphi | 7467657 |
| General Motors | 89047802 |
| General Motors | 88955477 |
| General Motors | 89047684 |
| ACDelco | 89047684 |
| Timken | 513187 |
| Mevotech | H513187 |
| General Motors | 10305030 |
| Drive Tech America | NT513187 |
| Autopart International | 1411-259919 |
| Mevotech | MES3459 |
| Mevotech | MEV195 |
| Timken | 513121 |
| Hollander | 538-01680B |
| Hollander | 538-01569 |
| Hollander | 538-01663 |
| Mevotech Supreme | MEV195 |
| Mevotech Supreme | H513179 |
| Mevotech Supreme | H513187 |
| Mevotech Supreme | MES3459 |
| Suspensia 1 | X07TE1151 |
This item may be interchangeable with parts from other brands with the above part numbers. This information is provided only for reference and does not guarantee that the item you are purchasing is identical to parts with part numbers from the brands listed above. To confirm that this item fits your vehicle, use the above "Check Vehicle Fit" option.
Lifetime Warranty
This item is backed by our limited lifetime warranty. In the event that this item should fail due to manufacturing defects during intended use, we will replace the part free of charge. This warranty covers the cost of the part only.
FREE Shipping is standard on orders shipped to the lower 48 States (Contiguous United States). Standard shipping charges apply to Hawaii and Alaska.
Shipping is not available to a P.O. Box, APO/FPO/DPO addresses, US Territories, or Canada for this item.
Expedited is available on checkout to the United States, excluding Alaska, Hawaii.
Final shipping costs are available at checkout.
Created on:
Tools used
Brought to you by 1AAuto.com, your source for quality replacement parts and the best service on the internet.
Hi, I'm Mike Green. I am one of the owners of 1A Auto. I want to help you save time and money repairing and maintaining your vehicle. I'm going to use my 20 plus years' experience restoring and repairing cars and trucks like this, to show you the correct way to install parts from 1AAuto.com. The right parts installed correctly, that's going to save you time and money. Thank you and enjoy the video.
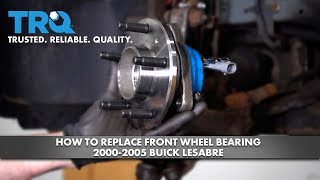
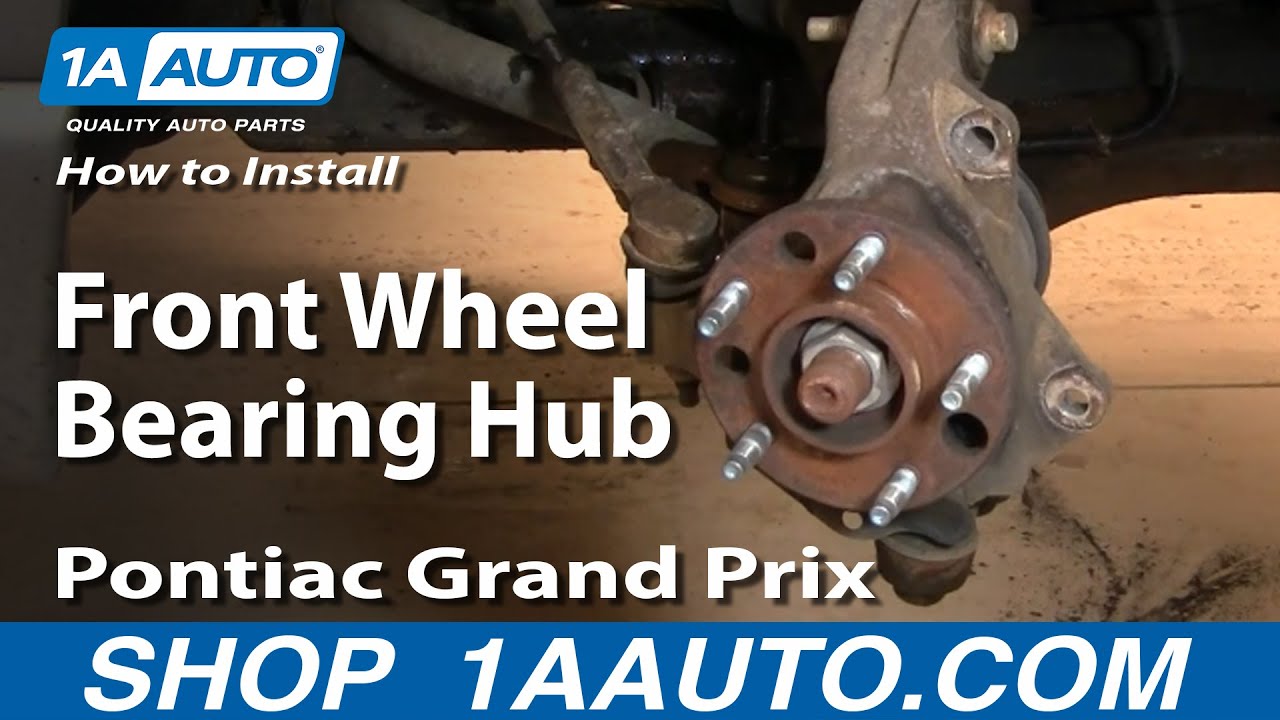
In this video, we will be replacing the hub on this '98 Pontiac Grand Prix. This hub fits a whole bunch of different GM cars, Buick Century, Regal, Cadillac Deville, Eldorado, Olds Mobile, Chevy Impala, Monte Carlo, Bonneville, Grand Prix, Montana Transport, Chevy Venture, all kinds of different stuff. Here's the list of tools you need for the Grand Prix. Really what you need is basically metric sockets from 13 mm up to 19 mm, plus the large hub nut, which is anywhere from 32 to 35 mm and then the rest of the stuff and plus throw in there some penetrating oil and a hammer and rubber mallet.
If your hub doesn't come apart as easily as the one that did in this video, you may need an axle or a gear puller. If you are working with hand tools, start on the ground. Remove your lug nut covers, and loosen up your lug nuts. I've got the benefit of air tools, so I'm going to raise and secure the car and remove the wheel and tire.
I've removed the wheel and turned the wheels all the way to the right here, so I can access the brake caliper bolts, which is the inside ones, one here and then this one here. Those bolts are 15 mm, I am going to remove them. You don't want the brake hose on the caliper to be stressed, so I just kind of took a wire tie and tied the caliper up here, then remove the brake disc. Be careful not to touch the disc and if you do touch it, just clean it off with some rubbing alcohol or mineral spirits when you put it back together.
There's three bolts that hold the hub on. I'll go in behind here and show them to you. There's one here, one up in the middle there, and then back here next to the, this is the steering tie rod, there is one right there. It'll help probably using a little penetrating oil, right on the opposite side. Now we are going to remove those bolts. They are 13 mm, 1/2 inch is a standard equivalent actually it fits, but I am using 3/8 drive tools, so I going to remove those three bolts and the reason you have to use this size tool, is to get in behind on this top one, you need smaller tools in order to get in there. Then you get a nice big handle to work it.
I'm just going to kind of fast forward through here. As I remove these three bolts and as you can tell, they take quite a bit of force to get going. It will help if you have a large breaker bar and then just swivel the steering back and forth to make it easy to get to the bolts on each side. Now I am going to remove the middle hub nut. I have impact tools, so that makes it really easy. If you don't have impact tools, what you want to do is, before you remove the brake caliper, have somebody hold the brakes and then with hand tools, you can pull that hub nut off. This hub nut is 35 mm, so you'll need a 35 mm socket.
Now you need to get the axle back out. You don't want to use a hammer and whack it hard, but what I'd do is just give it a check. If I see it move a little bit with the hammer, which it does, then I would have you break out the rubber mallet and whack away. Rubber mallet is not going to hurt the insides of your CV joint. Now I got the two lower bolts out and the top one is really loose, so now it is kind of a matter of not being nice. You got to pound on each side of the flange and the hub and slowly work the flange out of the steering knuckle.
I have the hub work loose, now I am just removing the top bolt the rest of the way. I just kind of left it in there in case I hit it hard enough and it just came flying out, just safety. Unplug the harness right here and flip up this with your thumb and pull it off. This is what you would rather not see happen. Basically, the hub has been in there so long, the back part stayed in the steering knuckle and this came apart, so what I am going to have to do is use some driving tools and just try and drive the rest of it out of the steering knuckle.
As you see, it turns out to be not much of a problem. You just beat on it with the punch and hammer and it pops out. Don't worry about damaging it or anything like that. I poked a few holes in it.
You just want to push the clip off of this bracket and the rest of that comes out. Push in on the axle and kind of up a little bit and your connector comes out.
Clean up some of the corrosion on here. I'm just gonna use some penetrating oil just to lubricate it. Now it's ready for the new one to go in. Okay, here's our new hub from 1A Auto and not only is it prettier and shinier, it's all in one piece, as it should be, as opposed to three separate pieces. If you kinda use your imagination here this is all the same, it's gonna bolt up the same and now we are gonna put it in and it's not going to make a big groaning grinding noise.
Okay so that ends this part of this video, part one. Check out our other videos to see the installation of the hub.
We hope this helps you out. Brought to you by www.1AAuto.com. Your source for quality replacement parts and the best service on the internet. Please feel free to call us toll free 888-844-3393. We're the company that's here for you on the internet and in person.
Tools used
Brought to you by 1AAuto.com, your source for quality replacement parts and the best service on the Internet.
Hi, I'm Don from 1A Auto. I hope this how-to video helps you out, and next time you need parts for your vehicle, think of 1AAuto.com. Thanks.
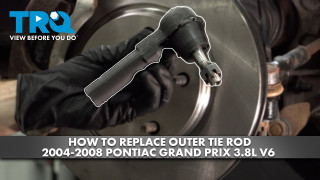
In this video, we're going to show you how to replace an outer tie rod on this 2003 Chevy Monte Carlo. We show you on the passenger's side but the driver's side is the same procedure. The items that you'll need for this is a new outer tie rod from 1AAuto.com; 7, 17 and 19mm socket and ratchet; two adjustable wrenches; a hammer; pliers; a tape measure; a grease gun; and jack and jack stands.
Start off by just loosening up these lug nut caps. Now, you can remove your lug nuts. If you don't have air powered tools, you want to loosen these up while the vehicle is on the ground, then raise the vehicle and remove them the rest of the way. If you do have air powered tools, you can just remove them right here. You can just pull your wheel off.
Measure from the boot on your inner tie rod to this grease fitting on your outer tie rod and just remember this distance. Then, you want to loosen up this nut right here and put one wrench on the outer tie rod, one on the nut and push opposite directions to loosen it up. We recommend using two adjustable wrenches. Next remove the cottering pin from the bottom of the outer tie rod, just use your pliers to straighten out the pin and then pull it free. Now, remove this 17mm castle nut. Hit the knuckle with a hammer. This will loosen up the outer tie rod and you can lift it up and out. Just turn the outer tie rod counterclockwise until it comes free and then remove this nut.
On the left is the old outer tie rod, on the right is the new one from 1A Auto. You can see they're identical and they'll fit exactly the same. Put your new nut into place and then twist the outer tie rod on. Then, lift your outer tie rod up and into the wheel knuckle. Just push it down through. Measure it again from the end of the boot to the middle of the grease fitting and make sure it's the same. This is a good preliminarily alignment, but you probably still want to go get your vehicle aligned and have it adjusted and then put the castle nut back on, tighten it up, and then push the cotter pin through and bend the tabs in opposite directions. Using your two adjustable wrenches, just tighten this nut up. Then twist in your grease fitting, and using either a 7mm socket and ratchet or a 7mm wrench, just tighten it up. Then, using your grease gun, fill it with grease. Clean up any that came out on the sides. Turn your wheel. Then put your wheel back into place and replace the lug nuts. While the car is on the jacks, you want to replace the lug nuts and tighten them preliminarily, lower the vehicle, and then tighten them the rest of the way. Torque each of the lug nuts to 100 foot-pounds in a crossing pattern. Then replace your hub cap and tighten up those lug nut caps.
We hope this video helps you out. Brought to you by www.1AAuto.com, your source for quality replacement parts and the best service on the Internet. Please feel free to call us toll-free, 888-844-3393. We're the company that's here for you on the Internet and in person.
Well priced parts to get the job done. From this and past experiences always reliable in workmanship and on time for delivery.
I buy a lot of parts from 1a. I havent had any problems with quality and the prices are unbeatable. I recommend 1a to everyone.
1Aauto parts has quality parts,much better than Autozone and O'Reilly's,Also the parts even cam a day early give them a Shot you'll be Happy You Did.

PSA58472
