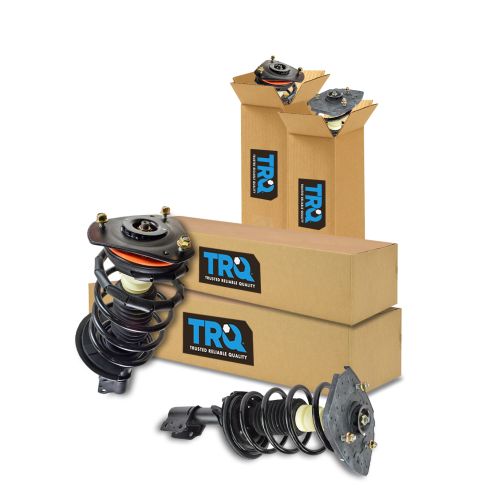
Loaded Struts: Pre-assembled application specific design
Application Specific Design: No modifications necessary
Matched Pair: Improved comfort and extended service life
Restored Performance: Reduced body sway and vibration
Description
TRQ fully loaded shocks and struts are manufactured using premium raw materials and calibrated to restore original ride comfort. TRQ shocks are fully loaded featuring a pre-loaded bearing plate, upper and lower spring isolator, upper spring seat, coil spring, boot kit, and premium strut. TRQ recommends replacing your shocks or struts in pairs to ensure even wear of components and improved ride comfort. All products are fit and road-tested in our Massachusetts R&D facility to ensure we deliver on our promise of Trusted Reliable Quality.
Replacing struts used to require specialized tools to compress, remove, and transfer the old spring and mount. Our Pre-assembled, complete strut & spring assemblies come with all new parts and make the job much quicker and easier for the do-it-yourself mechanic.
Strut & spring assembly contains:
Upper Strut Mount
Strut Bearing
Coil Spring
Boot & Bumper Kit
Gas-charged Strut
Attention California Customers:
WARNING: This product can expose you to chemicals including Chromium (Hexavalent Compounds), which is known to the State of California to cause cancer, and birth defects or other reproductive harm. For more information, go to www.P65Warnings.ca.gov
Lifetime Warranty
This item is backed by our limited lifetime warranty. In the event that this item should fail due to manufacturing defects during intended use, we will replace the part free of charge. This warranty covers the cost of the part only.
FREE Shipping is standard on orders shipped to the lower 48 States (Contiguous United States). Standard shipping charges apply to Hawaii and Alaska.
Shipping is not available to a P.O. Box, APO/FPO/DPO addresses, US Territories, or Canada for this item.
Expedited is available on checkout to the United States, excluding Alaska, Hawaii.
Final shipping costs are available at checkout.
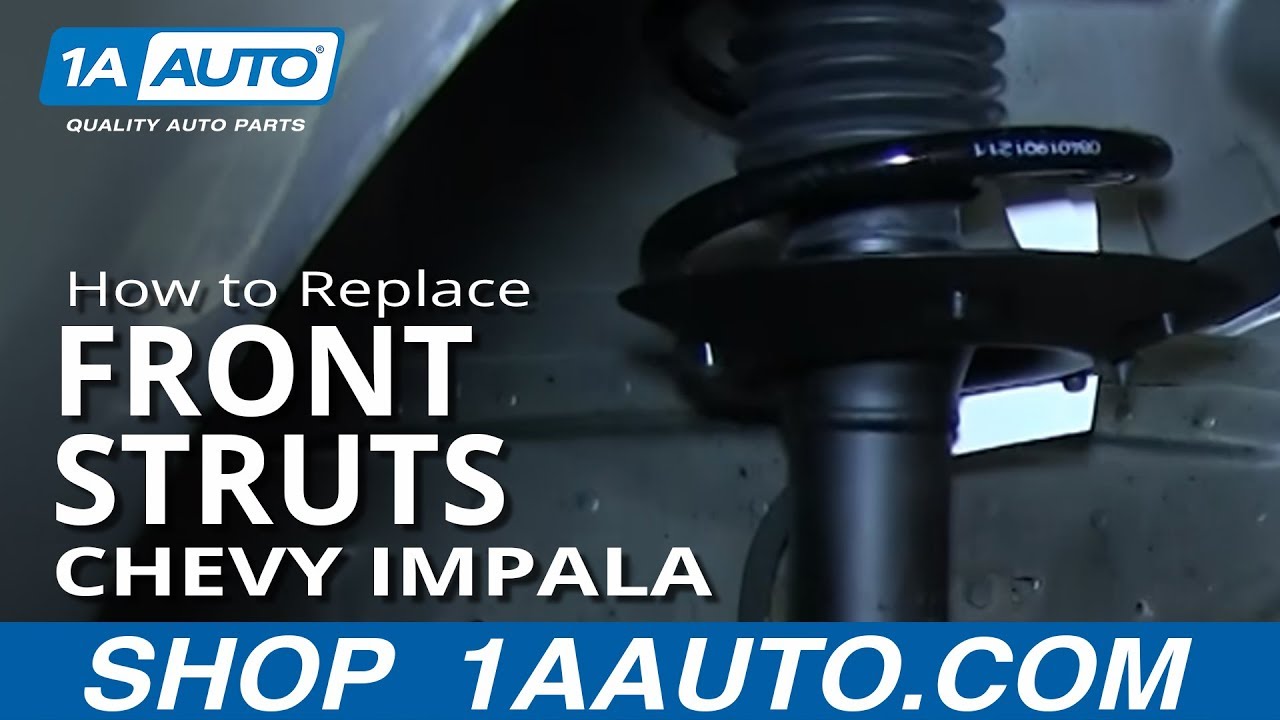
How to Replace Front Struts 2006-13 Chevy Impala
Created on:
Tools used
21mm Socket
13mm Socket
Pry Bar
Jack Stands
19mm Socket
Ratchet
Floor Jack
1/2 Inch Breaker Bar
1. Remove the wheel
Loosen the lug nuts
Raise and secure the vehicle
Remove the lug nuts and wheel.
2. Remove the bottom of the shock
Unbolt the two bottom bolts securing the shock.
Use a breaker bar and a 21 mm socket and some penetrating oil.
You might need a hammer to work the bolts out once you have removed the nuts.
Use a pry bar to pry the spindle free from the strut
3. Remove the top of the strut
Pop the hood and secure it.
Use your 13 mm socket and ratchet and some penetrating oil to remove the three bolts securing the top of the strut.
Pull the strut down and out.
4. Install the new strut
Work the strut into place and bolt in the top three 13 mm bolts
Torque the three 13 mm nuts to 35-45 ft lbs
Bolt in the bottom two nuts and bolts and torque to 100 ft lbs.
5. Replace the wheel
Put the wheel back on and hand tighten the lug nuts
Lower the vehicle and torque the lug nuts to 100 ft lbs
Brought to you by 1AAuto.com your source for quality replacement parts and the best service on the internet. Hi I'm Don from 1A Auto. I hope this how-to video helps you out. And the next time you need a part for your vehicle think of 1AAuto.com. Thanks.
In this video we're going to show you how to replace the front struts on a 2006 Chevy Impala. It's the same operation for the left side and the right side and we always recommend that you do replace struts in pairs. In order to do this repair you're going to need some new struts from 1A Auto. A 21 and 19 and 13 millimeter socket and socket wrench. A hammer. A pry-bar. A pipe for extra leverage if you need it. As well as a torque wrench.
Remove the hubcap by hand using a 19 millimeter socket. If you don't have the benefit of air-tools you'll want to loosen the lug-nuts with the vehicle on the ground first. Then raise and support the vehicle and remove the lug-nuts from the tire. Locate the two 21 millimeter nuts. Using a 21 millimeter socket, a socket wrench and a pipe for extra leverage to remove the two nuts on the strut. I will go ahead and fast-forward as I remove those.
Use a hammer to knock free the two bolts that go through the strut and spindle. Use a long screw-driver or pry-bar to pry the spindle free from the strut. Locate and remove three 13 millimeter nuts on the strut-top. As you're removing the last nut, hold the strut so that it doesn't just come falling down. Here you see a side by side of the old part and the new part from 1A Auto. Going back in with the strut. Start from the bottom. Line up the three holes. And then start your three 13 millimeters nuts up top. Once you get them all started go ahead and tighten them up and I'll fast-forward as I do that. Now line up the strut with the spindle and match up the holes. You might have to pull down or push up on the spindle and hub assembly there to line them up. Go ahead and put in your two bolts. Then once you get the bolts in use a hammer to seat them into that spindle and lower strut assembly.
Now reinstall the two 21 millimeter nuts and go ahead and tighten them down. Torque the two nuts to a hundred foot pounds. Reinstall the wheel and the five lug-nuts. Torque your wheel lug-nuts to a hundred foot pounds. Once you're done torqueing the lug-nuts in a star pattern reinstall your hubcap. And make sure you see the little notch in the hubcap and put it over the valve-stem. And once you've done that you can start with just the socket itself tightening up those five 19 millimeter lug-nut cap-covers. And after you replace your struts it is recommended that you get an alignment on your vehicle. We hope this helps you out. Brought to you by www.1AAuto.com your source for quality replacement parts and the best service on the internet. Please feel free to call us toll-free 888-844-3393. We're the company that's for you on the internet and in person.
SKA60878
In Stock
Product Reviews
Loading reviews
4.91/ 5.011
11 reviews
5 Stars
4 Stars
3 Stars
2 Stars
1 Star
10
1
0
0
0
Great!
Michael
March 18, 2017
2001 buick century. Fit perfect and made the job way easier!! Fast shipping! Thank you a whole lot!
struts and shocks
dan
October 10, 2018
have not installed them yet, but as usual everything looks great as ordered
Great service and parts
D
January 31, 2019
I highly recommend 1AAuto, every since my very first purchase. They have high quality parts that last along with great shipping time and customer service! Thank you 1AAuto Ill be shopping with you guys for now on!
Various parts purchased
D
July 15, 2019
Ive purchased various parts and have not been disappointed. I have already and will continue to recommend your company to friends and family
AARON
June 18, 2020
I got my order on time, happy with that prices was the lowest i found.the next part I need will come from A1Auto .Thank you
Exact Fit and Great Price
Charles
September 20, 2020
The struts were an exact fit and the replacement video helped me replace them more easily. Noe my car drives much better.
Putting new struts on my 1998 Buick Century, was a Pain, But it worked.
D
September 28, 2020
Like I sad , was a pain,because I didn't have some of the proper tools to do it .
The Rear struts came off with no problem , using a floor jack, jack stand and wheel chocks .
Putting the new ones back on was met with problems .
First , the bottom would not line up with the sleeve after
mounting it with the 3 boults on top .
So I mounted with the two boults on the bottom, and used another floor jack , to lift the whole thing up while guiding the three boults on top through the holes ,then putting the nuts on.
Second problem . when you Torque down the three top nuts,
because of the extension on top of the boults and limited space a deep drive socket will not work ,same with a regular socket.it takes one with a little deeper dish, with that sad the back was done.
The front looked easy ,3 nuts on top, 2 boults on the bottom.
no such luck, the strut was being compressed ,could not remove from ether end. So I grabbed the Porta power, put one end of the ram on the control arm, the other
Great product!
Brenden
January 25, 2021
Installed on my 2008 Chevy impala. Very straightforward install. Would get this brand again if needed.
2000 pontiac grand prix gtp shocks
Guy
November 20, 2021
Was all correct parts and direct fit
Great Budget Struts
J.
January 7, 2023
Had them on my Buick for almost 2 years with 30K on them. Nice ride, no noises. Happy for the money
Richard
April 26, 2023
Geart, rides like a dream again! Easiest job I've done in a long time.
Customer Q&A
What brand name shock are these?January 22, 2016
G R
10
These will be our house brand struts. These will come with a lifetime warranty, and does have free ground shipping inside the lower 48 states!
January 22, 2016
Derek C
Will they fit 1999 Buick century custom?March 29, 2019
Michael D
10
This kit is listed to fit the following:
1997-2005 Buick Century Front & Rear Strut & Spring Assembly 4 Piece Set
March 29, 2019
Peter L
Does it lift the rear or does the height stay the same? If its the same height then perfect if its a little lower even betterJanuary 7, 2023
David R
10
It keeps your vehicle at the same height
January 7, 2023
L O
10
OEM Replacement, so OEM height
January 7, 2023
J. A
10
These are a direct replacement for your OE parts. They will not lift or lower the vehicle.
January 7, 2023
Kelly S
Customer service
877-844-3393
Monday - Friday 8:00am - 9:30pm ET Saturday - Sunday 8:00am - 4:30pm ET
Buick is a registered trademark of General Motors Company. 1A Auto is not affiliated with or sponsored by Buick or General Motors Company.See all trademarks.
Enter Vehicle Year Make Model
Specify your vehicle's year, make and model to guarantee fit.
Year
Make
Model
Options
Drivetrain
This part doesn’t fit a . Select from parts that fit.