Replaces





About TRQ:
TRQ is a trusted brand dedicated to making every repair a success story by combining premium parts with easy installation. Each TRQ part is engineered by a team of automotive experts to meet or exceed OEM standards, delivering enhanced performance and maximum longevity. With rigorous in-house testing, the brand ensures superior fit and function across every product line. TRQ also provides customers with best-in-class, step-by-step installation videos—so you can complete repairs with confidence, whether you're a first-time DIYer or an industry professional.
Product Features
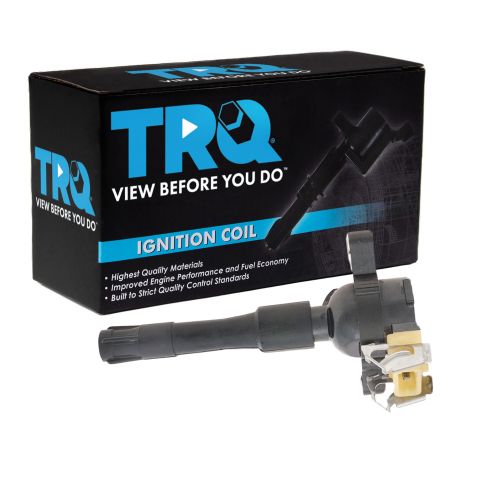
TRQ ignition coils will have your engine running like new. TRQ ignition coils are manufactured to precise specifications using premium raw materials to optimize each vehicle's ignition system. To ensure peak performance, TRQ recommends replacing ignition coils in sets to prevent electrical output imbalances. All products are fit and road-tested in our Massachusetts R&D facility to ensure we deliver on our promise of Trusted Reliable Quality.
Returns: Parts with electrical components cannot be returned once installed.
Attention California Customers:
 WARNING: This product can expose you to chemicals including Lead and Lead Compounds, which are known to the State of California to cause cancer, and birth defects or other reproductive harm. For more information, go to www.P65Warnings.ca.gov.
This part fits 46 vehicles spanning 1996-2005.
| Year | Make | Model | Description |
|---|---|---|---|
| 2000 | BMW | 323Ci | BMW 323Ci L6 2.5L with BREMI Style Ignition Coil Ignition Coil TRQ ICA61683 |
| 1998-2000 | BMW | 323i | BMW 323i L6 2.5L with BREMI Style Ignition Coil Ignition Coil TRQ ICA61683 |
| 1998-1999 | BMW | 323iS | BMW 323iS L6 2.5L with BREMI Style Ignition Coil Ignition Coil TRQ ICA61683 |
| 2001-2002 | BMW | 325Ci | BMW 325Ci L6 2.5L Ignition Coil TRQ ICA61683 |
| 2001-2002 | BMW | 325Xi | BMW 325Xi L6 2.5L Ignition Coil TRQ ICA61683 |
| 2001-2002 | BMW | 325i | BMW 325i L6 2.5L Ignition Coil TRQ ICA61683 |
| 2000 | BMW | 328Ci | BMW 328Ci L6 2.8L with BREMI Style Ignition Coil Ignition Coil TRQ ICA61683 |
| 1996-2000 | BMW | 328i | BMW 328i L6 2.8L with BREMI Style Ignition Coil Ignition Coil TRQ ICA61683 |
| 1996-1999 | BMW | 328iS | BMW 328iS L6 2.8L with BREMI Style Ignition Coil Ignition Coil TRQ ICA61683 |
| 2001-2002 | BMW | 330Ci | BMW 330Ci L6 3.0L Ignition Coil TRQ ICA61683 |
| 2001-2002 | BMW | 330Xi | BMW 330Xi L6 3.0L Ignition Coil TRQ ICA61683 |
| 2001-2002 | BMW | 330i | BMW 330i L6 3.0L with BREMI Style Ignition Coil Ignition Coil TRQ ICA61683 |
| 2001-2002 | BMW | 525i | BMW 525i L6 2.5L Ignition Coil TRQ ICA61683 |
| 1997-2000 | BMW | 528i | BMW 528i L6 2.8L with BREMI Style Ignition Coil Ignition Coil TRQ ICA61683 |
| 2001-2002 | BMW | 530i | BMW 530i L6 3.0L with BREMI Style Ignition Coil Ignition Coil TRQ ICA61683 |
| 1997-2003 | BMW | 540i | BMW 540i V8 4.4L Ignition Coil TRQ ICA61683 |
| 1997 | BMW | 740i | BMW 740i V8 4.4L with Rubber Ignition Coil Boot Ignition Coil TRQ ICA61683 |
| 1998-2000 | BMW | 740i | BMW 740i V8 4.4L with BREMI Style Ignition Coil Ignition Coil TRQ ICA61683 |
| 2001 | BMW | 740i | BMW 740i V8 4.4L Ignition Coil TRQ ICA61683 |
| 1996-1997 | BMW | 740iL | BMW 740iL V8 4.4L with Rubber Ignition Coil Boot Ignition Coil TRQ ICA61683 |
| 1998-2000 | BMW | 740iL | BMW 740iL V8 4.4L with BREMI Style Ignition Coil Ignition Coil TRQ ICA61683 |
| 2001 | BMW | 740iL | BMW 740iL V8 4.4L Ignition Coil TRQ ICA61683 |
| 1996-2001 | BMW | 750iL | BMW 750iL V12 5.4L Ignition Coil TRQ ICA61683 |
| 1996-1997 | BMW | 840Ci | BMW 840Ci V8 4.4L with Rubber Ignition Coil Boot Ignition Coil TRQ ICA61683 |
| 1996-1998 | BMW | M3 | BMW M3 L6 3.2L Ignition Coil TRQ ICA61683 |
| 1999 | BMW | M3 | BMW M3 L6 3.2L with BREMI Style Ignition Coil Ignition Coil TRQ ICA61683 |
| 2000-2003 | BMW | M5 | BMW M5 V8 5.0L with BREMI Style Ignition Coil Ignition Coil TRQ ICA61683 |
| 2000 | BMW | X5 | BMW X5 V8 4.4L Ignition Coil TRQ ICA61683 |
| 2001 | BMW | X5 | BMW X5 L6 3.0L with BREMI Style Ignition Coil Ignition Coil TRQ ICA61683 |
| 2002 | BMW | X5 | BMW X5 V8 4.6L Ignition Coil TRQ ICA61683 |
| 2002 | BMW | X5 | BMW X5 V8 4.4L Ignition Coil TRQ ICA61683 |
| 2002 | BMW | X5 | BMW X5 L6 3.0L Ignition Coil TRQ ICA61683 |
| 2003 | BMW | X5 | BMW X5 L6 3.0L with BREMI Style Ignition Coil Ignition Coil TRQ ICA61683 |
| 1997 | BMW | Z3 | BMW Z3 L6 2.8L Ignition Coil TRQ ICA61683 |
| 1998-2000 | BMW | Z3 | BMW Z3 L6 2.8L with BREMI Style Ignition Coil Ignition Coil TRQ ICA61683 |
| 1998-2000 | BMW | Z3 | BMW Z3 L6 3.2L with BREMI Style Ignition Coil Ignition Coil TRQ ICA61683 |
| 1999-2002 | BMW | Z3 | BMW Z3 L6 2.5L with BREMI Style Ignition Coil Ignition Coil TRQ ICA61683 |
| 2002 | BMW | Z3 | BMW Z3 L6 3.0L with BREMI Style Ignition Coil Ignition Coil TRQ ICA61683 |
| 2000-2002 | BMW | Z8 | BMW Z8 V8 5.0L with BREMI Style Ignition Coil Ignition Coil TRQ ICA61683 |
| 1999-2001 | Bentley | Amage | Bentley Amage V8 4.4L Ignition Coil TRQ ICA61683 |
| 2002 | Land Rover | Freelander | Land Rover Freelander V6 2.5L with BREMI Style Ignition Coil Ignition Coil TRQ ICA61683 |
| 2003-2005 | Land Rover | Freelander | Land Rover Freelander V6 2.5L with BREMI Style Ignition Coil Long Design Ignition Coil TRQ ICA61683 |
| 2003 | Land Rover | Range Rover | Land Rover Range Rover V8 4.4L Ignition Coil TRQ ICA61683 |
| 2004-2005 | Land Rover | Range Rover | Land Rover Range Rover V8 4.4L with BREMI Style Ignition Coil Ignition Coil TRQ ICA61683 |
| 2002 | Rolls-Royce | Park Ward | Rolls-Royce Park Ward V12 5.4L with BREMI Style Ignition Coil Ignition Coil TRQ ICA61683 |
| 1999-2002 | Rolls-Royce | Silver Seraph | Rolls-Royce Silver Seraph V12 5.4L with BREMI Style Ignition Coil Ignition Coil TRQ ICA61683 |
| Brand Label | Part Number |
|---|---|
| Standard Motor Products | UF-354 |
| Airtex | 5C1050 |
| ACDelco | E1196A |
| Standard Motor Products | UF-305 |
| Standard Motor Products | UF-300 |
| Standard Motor Products | UF-354T |
| Delphi | GN10016 |
| Walker Products | 921-2070 |
| Bosch | 221504029 |
| Bosch | 143 |
| BMW | 12131748017 |
| BWD | E383 |
| WPS World Power Systems | CUF354 |
| BMW | 12131703825 |
| Richporter | C-672 |
| BMW | 12137599219 |
| Echlin | IC279 |
| Wells | C1239 |
| Echlin | IC483 |
| BMW | 12131748018 |
| Beck/Arnley | 178-8276 |
| Original Engine Management | 50019 |
| Echlin | IC417 |
| BWD | E886 |
| Spectra Premium | C-672 |
| WPS World Power Systems | CUF300 |
| NAPA Mileage Plus | IC279SB |
| Bosch | 00143 |
| Bosch | 0221504029 |
| BMW | 12131703228 |
| BMW | 12139067830 |
| BMW | 12 13 9 067 830 |
| Standard Import | E383 |
| Standard Import | E886 |
| Standard Motor Products | UF300 |
| Carquest | 52-1640 |
| Standard Ignition | UF-300 |
| Standard Import | UF-300 |
| Hollander | 610-58466 |
This item may be interchangeable with parts from other brands with the above part numbers. This information is provided only for reference and does not guarantee that the item you are purchasing is identical to parts with part numbers from the brands listed above. To confirm that this item fits your vehicle, use the above "Check Vehicle Fit" option.
Lifetime Warranty
This item is backed by our limited lifetime warranty. In the event that this item should fail due to manufacturing defects during intended use, we will replace the part free of charge. This warranty covers the cost of the part only.
Returns: Parts with electrical components cannot be returned once installed.
FREE Shipping is standard on Orders shipped to the lower 48 States (Contiguous United States). Standard shipping charges apply to Hawaii, Alaska and US Territories. Shipping is not available to Canada.
Expedited is available on checkout to the United States, excluding Alaska, Hawaii and US Territories as well as P.O. Boxes and APO/FPO/DPO addresses. Final shipping costs are available at checkout.
Created on:
Tools used
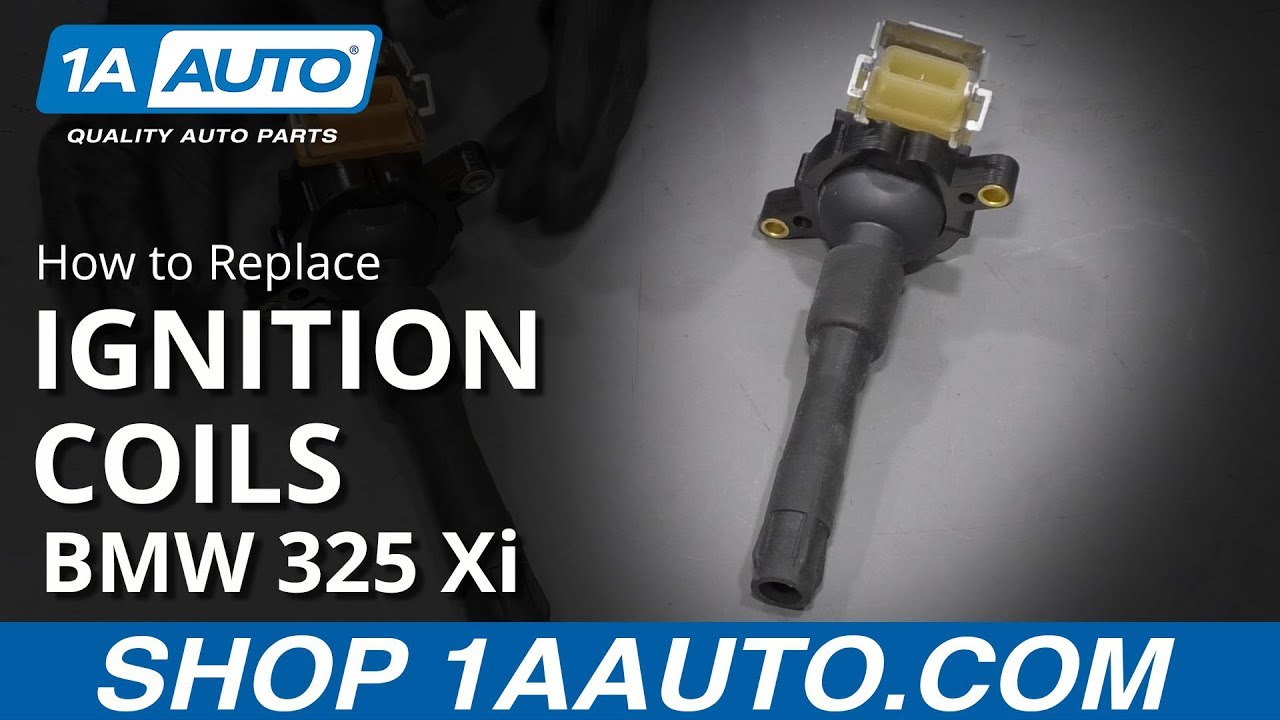
What's up, guys? I'm Andy from 1A Auto. In this video, I'm going to show you how to replace the ignition coils on this 2001 BMW 325xi. If you need this part, or other parts for your vehicle, click the link in the description and head over to 1Aauto.com.
The battery is in the trunk. I'm going to disconnect the negative terminal. I'm just going to use a 10-mm wrench and loosen up this nut right here. Then grab the connector and disconnect that, and set it aside.
All right. We're going to take this cover off. We have this nice light that we can see a lot better under the hood. We sell this at 1Aauto.com. It hooks right onto the hood. Open this up, lift this cover. This should slide out just like that. Just slides forward. Now we can grab this cabin filter, slide it out. Take a straight-blade screwdriver, or pocket screwdriver, or even a pick, and we're going to take this cover right off here. Just get under there, snap this off. Just like that. Slide that out of the way. We can pull these wires down. Just like that. Just like that.
There's four screws right here, one, two, three, four. I'm going to use a T30 socket, extension and a ratchet to take these out. They should stay with the cover, so they're not going to fall out. With all those loose, I can grab this. Just slide it out. I might have to just loosen this by hand a little bit. And pull this off, set it aside.
So, there should be two covers over here and right here. You just take a pocket screwdriver and get underneath there and pop those off. Then there is a bolt in there and there. We're going to use a 10-mm socket, extension and a ratchet to take those bolts out. I'm just going to use a magnet to grab the bolt, and just grab this cover, pull it off.
We can grab the oil cap, fill cap. Take a pocket screwdriver right here and there's also a cover right here. Just take these covers off. I'm going to take a 10-mm socket, extension and a ratchet, and there's a nut here and also under that cover. Take those out. All right, I'll pull that nut out. We can grab this cover and slide it off.
So, this front coil has a ground strap on it, and also that back coil has a ground strap, so you want to keep that in mind before you take it apart. I'm going to take a 10-mm socket, extension and ratchet and take these two bolts out. Set that ground strap aside. You can slide this retainer up. There's like a lock on this. As you slide this up, you should be able to disconnect the connector and then wiggle the coil back and forth and pull it out.
Here's the old coil. Here's the new coil from 1Aauto.com. The shape is the same, the boot is the same length, the connector is the same, and it has the same lock on it. Get yours at 1Aauto.com and you can do it yourself.
Take the new coil, slide this on here. You could actually put some dielectric grease in there if you wanted to. It's a good idea. Then slide this into position. We'll connect the connector and lock it down. Then this one has the ground, same as the last one. Take the two bolts. For that forward one, put it through the ground strap. Take a 10-mm socket, extension and ratchet and we'll snug these down. Snug. Then we can do the same with the other ones.
Then we'll put this cover back on. Slide it back into position, put the cap back on. If you wanted to, you could have left the cap on once you take the cover off, so you don't drop anything in there. Put the nut back on. Put this nut back on. Get those started. I'll use a 10-mm socket, extension and ratchet and tighten these down. Snug those down. Not too tight. It is a plastic that you're holding down. On this cover, we have these two caps. Get those lines up, and press those in.
Now, we'll reinstall this cover. Slide it under the wires. There's a couple of clips underneath here that have to slide onto this rail. Let's see. There we go. All right. Make sure those clips are slide in position and take the bolts, get the bolts started. Take a 10-mm socket, extension and a ratchet and we'll tighten these down just snug. It is plastic, not too tight. There should be two caps that go over here. This vehicle doesn't have them. They're missing, so I'm not going to put those in, but make sure you reinstall those caps.
All right, and then we want to install this. Just get this lined up and get these screws started. I'm going to take a T-30 socket, extension and a ratchet and tighten these up. Now reinstall these wires in this cover right here. Just like that. Take this cover, line it up. That's good. Take the filter. We're going to slide it in with curve side towards the vehicle, so the bowed side more towards out of the vehicle. Just slide that in position like that. We'll take this cover. It's going to just slide in underneath this weather stripping. Just push it in. Get these lock tabs to line up and lock them down. They're spring loaded. The last one, and you're good to go.
Reconnect the battery. Put the negative terminal on. Take a 10-mm wrench and just tighten up this nut and just snug it up. Make sure it's tight, it doesn't wiggle loose, and you're good to go.
Thanks for watching. Visit 1Aauto.com for quality auto parts shipped to your door. The place for DIY auto repair, and if you enjoyed this video, please click the subscribe button.
Tools used
Hi, I'm Mike from 1A Auto. We've been selling auto parts for over 30 years.
Hey everyone. Sue here from 1A Auto, and today on our '06 BMW 325Ci, we're going to be doing spark plugs. So if you need these parts or any other parts of your car, click on the link below and head on over to 1AAuto.com.
Open the hood on this '06 325Ci. The lever is on the driver's side, left foot. Kick panel right here. It's a long black handle. Just pull on it and the hood pops up. The nice thing about this BMW, the hood latch lever pops right out of the grill area and you just pull up on that and lift the hood open.
The first spot is it's located in the center of the engine department right below the windshield. You've got three little clips here and you just turn them to the side. They pop right up. They're spring loaded. Once those are popped up, you just grab this lid and slide it right out.
Then we're going to lift up the actual seals that goes around this compartment area because we're going to take this out. So you're going to have four t40 bolts. You can see them located up on that firewall. Using a Torx Bit screwdriver, I'm just going to take them all out right across. I'm just going to remove this sheathing so that I can take these wires and make sure that I don't break the tabs. You get the battery cable and the electrical wiring harness.
Now we're going to lift up on this housing and get that out of the way.
So in order to take the engine cover off, we took that out of the way, the cowl up there, and I'm going to take these little covers with a small screwdriver. Just pop them out.
It looks like it's a 10 milliliter. And also you're going to need to take the oil cover off. Set that right there.
10 millimeter socket. I'm going to take these two mounting nuts off this cover. Set those aside. You just grab onto that cover and lift it right up out of the way. Now I'm just going to place the oil cover back on because I just don't want any dirt or accidents to happen and something falling down in that crank case.
To disconnect the ignition coil harness, these are a little levers that pop up. I like to take a flathead screwdriver and I just give myself a little leverage and then you can watch it actually disconnect itself and push the harness out. It's a really nice design. And then you just put your finger right into that hole and give it a twist and pull up and there's your ignition coil.
Now I'm going to take a number one cylinder spark plug out and I'm going to use a spark plug socket that we sell here at 1A Auto on our website, and it is a five-eighths extended, all one piece, and it's great for deep cylinder holes like this, BMW is notorious for. We'll take that right out.
And there is our spark plug. And you can see the crossfire. It's a four-pin crossfire. And this is a magnetic style, so the magnet holds onto it and locks it in. So before I install my new spark plug, because it's a crossfire, four-piece crossfire, there is no gapping, but we do do a visual and make sure that, accidents happen. This could have been dropped at the factory before it went in the box. You want to make sure the prongs are all, look alike visually, the equal distance, and that the ceramic is not cracked, and that includes on this part of ceramic.
Everything checks out good for this plug, so I'm going to install it.
Always install spark plugs by hand first. You don't want to cross thread an aluminum head. That is not a project you wish to tackle. There are torque specs to this. So what I do is I just take my 3/8 and I'll just snug it, crush that washer a little bit and I'll go get my torque specs and torque it down.
So there are two sets of specs for this. If it is a 12-millimeter spark plug, the specs are 14.8 to 19.2 foot-pounds. If it's 14 millimeter, it is 20 to 24 foot-pounds. I'm going with five-eighths, so I'm going with the 14 millimeter and I'm going to set this at 21 foot-pounds.
Now before I install my new coil, you can see a little bit of dry dielectric grease they install the factory. I'm just going to add just a little bit more, nothing too generous.
I'm going to set it up, line it right up, push it down. Feel it physically click in. Make sure it's sealed all the way around, that rubber seal, and line up my connector and then bring this right down and lock it. Now we're going to continue this down and do the same procedure on the next five cylinders.
Now that I've done all my coils and spark plugs, I'm ready to install the engine cover again. So I will remove the oil field cover. Slide this down through. Replace that.
I have the two mounting 10-millimeter nuts, 10 millimeter socket size. We had a plastic cover. I'm just going to really just snug it down. There's no need to crank that down. There we go. And the two covers. Line up the grooves. You'll see the little indent tab here. It's in the front part and then the two longer tabs.
So now I'm going to put that plastic cowl back in. I'm going to just line it right up. Place it right in. Here we go. Get the back screw started. Just pop them into place and take your t30. start them. I recommend starting all of them before you tighten it all the way down.
Okay, so now I'm going to just tighten it down. They're all started. I know it's in the place it's supposed to be.
Now I'm going to put the positive cable back into the housing. I'm going to mount that on that inner beginner clip right on over to the other side. So the positive cable goes down right there and then this harness with the loom will clip into this.
We'll take the under piece and line it up. There's tabs on the back, tab in the front. We'll just line them up and snap it right back up in there.
There you go. To install your cabin filter, you've got a tab right here on the bottom in the middle, I'm sorry, and two tabs on each side, and you'll see that there's a notch right here that tab in the center is going to line up to and the two side tabs. We'll just slide it right in, easily. Line that center tab up, line the side, and then go line up the other side.
Now we're going to install the cover and that just slides right down in the back there. You line up these little tabs, push down and twist.
Now we can install the seal. Just line it, push it down all the way around. I'm going to put this one on before I go over there.
And then we're all set.
Thanks for watching. Visit us at 1AAuto.com for quality auto parts, fast and free shipping, and the best customer service in the industry.

ICA61683