
★★★★★
January 4, 2026
Very good pricing with prompt delivery

Replaces





About TRQ:
TRQ is a trusted brand dedicated to making every repair a success story by combining premium parts with easy installation. Each TRQ part is engineered by a team of automotive experts to meet or exceed OEM standards, delivering enhanced performance and maximum longevity. With rigorous in-house testing, the brand ensures superior fit and function across every product line. TRQ also provides customers with best-in-class, step-by-step installation videos—so you can complete repairs with confidence, whether you're a first-time DIYer or an industry professional.
Product Features
TRQ spark plugs are a perfect modern tune-up. TRQ spark plugs are manufactured to precise heat range specifications to optimize each vehicle’s ignition system. The TRQ iridium line of plugs will ensure 60,000 miles of uncompromised vehicle performance and fuel economy. Every plug includes a resistor to ensure no electromagnetic interference with your other electronics. All products are fit and road-tested in our Massachusetts R&D facility to ensure we deliver on our promise of Trusted Reliable Quality.
Returns: Parts with electrical components cannot be returned once installed.
Attention California Customers:
 WARNING: This product can expose you to chemicals including Chromium (Hexavalent Compounds), which is known to the State of California to cause cancer, and birth defects or other reproductive harm. For more information, go to www.P65Warnings.ca.gov
This part fits 37 vehicles spanning 1998-2011.
| Year | Make | Model | Description |
|---|---|---|---|
| 2008-2009 | Buick | Enclave | Buick Enclave V6 3.6L 6 Piece Spark Plug Set TRQ SPA02148 |
| 2005-2008 | Buick | LaCrosse | Buick LaCrosse V6 3.6L 6 Piece Spark Plug Set TRQ SPA02148 |
| 2004-2007 | Buick | Rainier | Buick Rainier L6 4.2L 6 Piece Spark Plug Set TRQ SPA02148 |
| 2004-2006 | Buick | Rendezvous | Buick Rendezvous V6 3.6L 6 Piece Spark Plug Set TRQ SPA02148 |
| 2005-2007 | Cadillac | CTS | Cadillac CTS V6 2.8L 6 Piece Spark Plug Set TRQ SPA02148 |
| 2006-2009 | Cadillac | CTS | Cadillac CTS V6 3.6L 6 Piece Spark Plug Set TRQ SPA02148 |
| 2004-2009 | Cadillac | SRX | Cadillac SRX V6 3.6L 6 Piece Spark Plug Set TRQ SPA02148 |
| 2005-2009 | Cadillac | STS | Cadillac STS V6 3.6L 6 Piece Spark Plug Set TRQ SPA02148 |
| 2008-2009 | Chevrolet | Equinox | Chevrolet Equinox V6 3.6L 6 Piece Spark Plug Set TRQ SPA02148 |
| 2008-2009 | Chevrolet | Malibu | Chevrolet Malibu V6 3.6L 6 Piece Spark Plug Set TRQ SPA02148 |
| 2002-2009 | Chevrolet | Trailblazer | Chevrolet Trailblazer L6 4.2L 6 Piece Spark Plug Set TRQ SPA02148 |
| 2002-2006 | Chevrolet | Trailblazer EXT | Chevrolet Trailblazer EXT L6 4.2L 6 Piece Spark Plug Set TRQ SPA02148 |
| 2009 | Chevrolet | Traverse | Chevrolet Traverse V6 3.6L 6 Piece Spark Plug Set TRQ SPA02148 |
| 2005-2010 | Chrysler | 300 | Chrysler 300 V6 2.7L 6 Piece Spark Plug Set TRQ SPA02148 |
| 1998-2004 | Chrysler | Concorde | Chrysler Concorde V6 2.7L 6 Piece Spark Plug Set TRQ SPA02148 |
| 2001-2010 | Chrysler | Sebring | Chrysler Sebring V6 2.7L 6 Piece Spark Plug Set TRQ SPA02148 |
| 2008-2010 | Dodge | Avenger | Dodge Avenger V6 2.7L 6 Piece Spark Plug Set TRQ SPA02148 |
| 2006-2010 | Dodge | Charger | Dodge Charger V6 2.7L 6 Piece Spark Plug Set TRQ SPA02148 |
| 1998-2004 | Dodge | Intrepid | Dodge Intrepid V6 2.7L 6 Piece Spark Plug Set TRQ SPA02148 |
| 2005-2008 | Dodge | Magnum | Dodge Magnum V6 2.7L 6 Piece Spark Plug Set TRQ SPA02148 |
| 2001-2006 | Dodge | Stratus | Dodge Stratus V6 2.7L 6 Piece Spark Plug Set TRQ SPA02148 |
| 2007-2009 | GMC | Acadia | GMC Acadia V6 3.6L 6 Piece Spark Plug Set TRQ SPA02148 |
| 2002-2009 | GMC | Envoy | GMC Envoy L6 4.2L 6 Piece Spark Plug Set TRQ SPA02148 |
| 2002-2006 | GMC | Envoy XL | GMC Envoy XL L6 4.2L 6 Piece Spark Plug Set TRQ SPA02148 |
| 2004-2005 | GMC | Envoy XUV | GMC Envoy XUV L6 4.2L 6 Piece Spark Plug Set TRQ SPA02148 |
| 2003-2008 | Isuzu | Ascender | Isuzu Ascender L6 4.2L 6 Piece Spark Plug Set TRQ SPA02148 |
| 2002-2004 | Oldsmobile | Bravada | Olds Bravada L6 4.2L 6 Piece Spark Plug Set TRQ SPA02148 |
| 2007-2009 | Pontiac | G6 | Pontiac G6 V6 3.6L 6 Piece Spark Plug Set TRQ SPA02148 |
| 2008-2009 | Pontiac | G8 | Pontiac G8 V6 3.6L 6 Piece Spark Plug Set TRQ SPA02148 |
| 2008-2009 | Pontiac | Torrent | Pontiac Torrent V6 3.6L 6 Piece Spark Plug Set TRQ SPA02148 |
| 2011 | Saab | 9-4X | Saab 9-4X V6 3.0L 6 Piece Spark Plug Set TRQ SPA02148 |
| 2005-2009 | Saab | 9-7X | Saab 9-7X L6 4.2L 6 Piece Spark Plug Set TRQ SPA02148 |
| 2007-2009 | Saturn | Aura | Saturn Aura V6 3.6L 6 Piece Spark Plug Set TRQ SPA02148 |
| 2007-2009 | Saturn | Outlook | Saturn Outlook V6 3.6L 6 Piece Spark Plug Set TRQ SPA02148 |
| 2008-2009 | Saturn | Vue | Saturn Vue V6 3.6L 6 Piece Spark Plug Set TRQ SPA02148 |
| 2009-2010 | Suzuki | Grand Vitara | Suzuki Grand Vitara V6 3.2L 6 Piece Spark Plug Set TRQ SPA02148 |
| 2007-2009 | Suzuki | XL-7 | Suzuki XL-7 V6 3.6L 6 Piece Spark Plug Set TRQ SPA02148 |
| Brand Label | Part Number |
|---|---|
| Autolite | XP5263 |
| Isuzu | 812571164-0 |
| Bosch | 9691 |
| ACDelco | 41-107 |
| ACDelco | 19185438 |
| ACDelco | 41-108 |
| NAPA | ASPXP5263 |
| ACDelco | 41-109 |
| Isuzu | 812598004-0 |
| Bosch | 9617 |
| ACDelco | 41-105 |
| ACDelco | 41-103 |
| SKP | SP1021 |
| ACDelco | 41-990 |
| Suzuki | 1119A78J00000 |
| ACDelco | 41107 |
| ACDelco | 41834 |
| Champion Spark Plug | 9901 |
| ACDelco | 41-118 |
| ACDelco | 41-834 |
| ACDelco | 41103 |
| Omnicraft | QSP5 |
| Saab | 12598004 |
| Suzuki | 1119A7-8J00 |
| E3 | E3.66 |
This item may be interchangeable with parts from other brands with the above part numbers. This information is provided only for reference and does not guarantee that the item you are purchasing is identical to parts with part numbers from the brands listed above. To confirm that this item fits your vehicle, use the above "Check Vehicle Fit" option.
Lifetime Warranty
This item is backed by our limited lifetime warranty. In the event that this item should fail due to manufacturing defects during intended use, we will replace the part free of charge. This warranty covers the cost of the part only.
Returns: Parts with electrical components cannot be returned once installed.
FREE Shipping is standard on Orders shipped to the lower 48 States (Contiguous United States). Standard shipping charges apply to Hawaii, Alaska and US Territories. Shipping is not available to Canada.
Expedited is available on checkout to the United States, excluding Alaska, Hawaii and US Territories as well as P.O. Boxes and APO/FPO/DPO addresses. Final shipping costs are available at checkout.

Created on:
Tools used
Brought to you by 1AAuto.com, your source for quality replacement parts and the best service on the Internet.
Hi, I'm Mike from 1A Auto. I hope this how-to video helps you out, and next time you need parts for your vehicle, think of 1AAuto.com. Thanks.
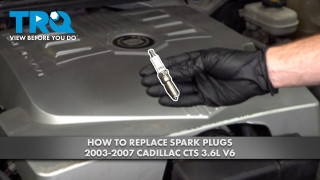
In this video, we're going to be changing out the spark plugs on our 2006 Cadillac CTS 2.8-liter V6. If you like this information, please click that subscribe button. We have a ton more information on this vehicle as well as many other makes and models. If you want these parts for your vehicle, they're available from 1AAuto.com. You can follow a link in the description.
Here are the items you'll need for this repair: 7mm, 10mm, 13mm, 15mm, 18mm socket, ratchet, and extension, 10mm wrench, flat blade screwdriver, spark plug socket, rag, brake cleaner, torque wrench, painter’s tape
Remove the black caps over the nuts for the windshield wiper arms. All you have to do is squeeze them together, and pop them off. You're going to use a small piece of painters tape. Make sure you use the straight edge to mark the position and angle of the wiper blade, so we can reinstall our wiper arms properly.
Remove the two 15 millimeter nuts, securing the wiper arms down. The 15 millimeter socket and ratchet. If you're only replacing one arm, you'll only have to do this to that particular one. Work the wiper arms off of the splines. Do this by grabbing them at the joint. Simply pulling up and pushing down. Eventually, it'll work its way off the splines, and you can remove your wiper arm.
Peel off the leather strip. Remove these four 7 millimeter screws. We're going to use the 7 millimeter socket and ratchet. Lift up. Carefully release this plastic, as it's hooked under the windshield. You can see the little hooks right here. Just be careful to pull out and away with those.
Remove this 10 millimeter nut up against the fender on the driver’s side. Lift up and off of the splines for the wiper arms.
Remove the driver's side of the cowl cover. Remove these two 10 millimeter bolts, securing the wiper transmission and assembly into the vehicle. It's a little easier to access this top one from the other side of the hood. We're going to use the 10 millimeter socket, ratchet, and extension. Lift up and toward the center of the vehicle to release this tab. Flip over the assembly. Release the connector. Remove the assembly from your vehicle.
We're going to remove the engine cover. Remove the oil cap. Lift up and pop off the cover, and reinstall the oil cap to prevent any dirt and debris from falling in while we're working. Using a flat blade screwdriver, loosen the intake boot clamp. Pop this back off the throttle body. Remove the yellow safety on throttle body electrical connector.
Push down on the tab, and release it from the throttle body motor. On the bottom of this fitting is a little tab. You want to push that out with a flat blade screwdriver. Remove the fitting from the nipple. Remove these two vacuum fittings. Simply going to pop them out, carefully, pry them out with a screwdriver.
Using a flat blade screw driver, pry the wire loom up off of the intake. Remove the vacuum booster line from the side of the intake. Lift up this sound deadening material, and release these two connectors. Remove these four bolts with a 10 millimeter socket and ratchet. Once all the bolts have been removed, move the brackets they were securing off the side of the manifold and out of the way.
Using a 10 millimeter wrench, remove these three bolts. Loosen this 18 millimeter bolt at the bottom of the bracket. Crack the bolt loose with an 18 millimeter socket and ratchet. Remove these six 13 millimeter bolts with a 13 millimeter socket and ratchet. Using a flat blade screwdriver, release this harness retainer from the throttle body. Remove the intake manifold.
With the intake manifold off, we can easily access all of our coil packs. We're going to do this one here because it's the easiest to film. All of yours will come out the same way. We'll pull out on this safety tab at the end. You may need a small flat blade screwdriver to help. Once this is pulled out, you can remove our connector. Loosen the hold down bolt with a 10mm socket and ratchet. This is a captured type bolt, so it won't actually come out from the coil pack. Once it's unthreaded, lift up and remove the coil pack from the vehicle. We're going to be using a 5/8" spark plug socket. Difference is you can see there's a little piece of rubber that's designed to go around the porcelain to hold on to it make it easier to pull the spark plug out as well as protecting that porcelain from breaking on a hard edge.
We need a long extension to get down into that spark plug tube as well as a ratchet, break it loose. Usually these come out pretty easily once you've taken that initial torque off of them. Remove your spark plug from the vehicle.
Install you new spark plug. Normally, you can run these all the way down by hand, torque to 15 inch-pounds. Install the ignition coil on to the plug until it clicks, tighten down the 10mm bolt, reinstall the connector, lock the slide back down into place.
Remove your old intake manifold upper plenum gaskets from the intake runners. We'll spray a little brake cleaner on a clean rag or paper towel. We'll wipe all the oil and debris off of the gasket surfaces, both on the plenums of the intake here and on the ports of the manifold itself. Just want to make sure those are nice and clean. Do the same thing here on the bottom side of the intake manifold itself. Wipe off that contact surface on the ports. If you feel any burs or debris build up file that off carefully.
You'll see that there's a small tab that sits into a hole on the top of the runners, as well as a hole that sits onto this dowel on your new intake gaskets. Go ahead and line all that up, and we'll install our intake manifold. Start your 13 millimeter bolts, once you have the manifold set onto its tabs. The longest ones will go into these four counter sunk holes in the center, and the shorter two will go on these outside ones. Tighten all these downs with the 13 millimeter socket and ratchet. Torque these bolts to 17 foot-pounds.
Reconnect the electrical connectors at the rear of the manifold, the brake booster vacuum line, and the two PCV lines; one of each side. Reconnect this fitting to the nipple at the front of the manifold, until that clicks into place. Reinstall the four 10 millimeter bolts for the harness hold downs. Three on the passenger side; one on the driver. You'll then tighten them down with a 10 millimeter socket and ratchet. Line up this bracket. Spin this 10 millimeter bolt in. Tighten up the bolt we loosened at the base of this bracket with an 18 millimeter socket and ratchet. Snug this bolt with a 10-millimeter wrench. Reinstall the sound deadening material onto its pends, as well as the throttle body connector. Lock that safety back into place.
Reinstall the air box on the end. Make sure this vacuum line at the back of that box is still connected. Tighten the clamp with a flat blade screwdriver. Remove the oil fill cap. Reinstall the engine cover. Reinstall your oil fill cap. Reconnect the electrical connector. Set this opening onto the pin. Start tightening down your two 10 millimeter bolts.
Reinstall the driver’s side of the cowl cover first. Be sure that all the plastic hooks line up under the windshield. Reinstall the 10 millimeter nut. Reinstall the passenger side of the cowl cover. Again, make sure all of these hooks line up, and go underneath the windshield.
Reinstall your 7 millimeter screws. Reinstall the rubber seal. The channel simply presses on to this ridge here. Line up your wiper to the tape mark we made on the windshield earlier. Torque to 26 foot-pounds. Line up your wiper to the tape mark we made earlier. Start the nut by hand. Torque the nut to 26 foot-pounds. Reinstall the plastic cap. Close the hood. Remove the tape marks from the windshield. Check for proper operation of your wiper motor.
Thanks for tuning in. We hope this video helped you out. Next time you need parts for your car, please visit 1AAuto.com. Also check out our other helpful how-to and diagnosis videos.
Very good pricing with prompt delivery
I love this product. They work great and are a lot cheaper than if I went to an auto parts store. They fit perfectly the first time. I didn't have to return them because they didn't fit. The best part is that I never have to leave my house to get the parts that I need.
They fixed my misfire issue. Very satisfied
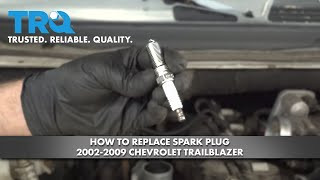
Replaced spark plugs In my 2007 trailblazer 4.2 6 cylinder engine . Always apply anti-seize to Spark plug threads. It's very important. They should of shown it in the video. Check spark plug gap I found two spark plugs way off. They should of shown changing the spark plug in the very back buy the fire wall also. That one is the most difficult! Otherwise a good video.
Great piece thanks again
Great product!
Did exactly what i expected them to do. Didnt fix any problems since it was just preventative maintenance. And they didnt cause any problems. Why spend more on ac delco when these are perfect!
Had a bad misfire. These fixed it. Fast shipping even with standard.
Product lives up to a good standard. I would recommend it.
They worked and fit

SPA02148
Actual Measurements are not listed or available. Our parts are exact replacements for your vehicle's OEM parts. As long as your year, make, and model match up with our listing, these parts will directly fit and function like the originals.
Hello, our spark plugs come pre-gapped based on the vehicle information.
Are these plugs already gapped
