Replaces


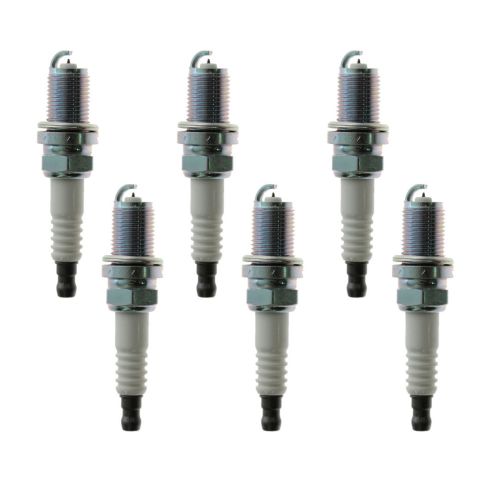


Part Details
Specifications
Returns: Parts with electrical components cannot be returned once installed.
Lifetime Warranty
This item is backed by our limited lifetime warranty. In the event this item should fail due to manufacturing defects during intended use, we will replace the part free of charge. This warranty covers the cost of the part only.
Returns: Parts with electrical components cannot be returned once installed.
FREE Shipping is standard on Orders shipped to the lower 48 States (Contiguous United States). Standard shipping charges apply to Hawaii, Alaska and US Territories. Shipping is not available to Canada.
Expedited is available on checkout to the United States, excluding Alaska, Hawaii and US Territories as well as P.O. Boxes and APO/FPO/DPO addresses. Final shipping costs are available at checkout.

Created on:
Tools used
Hi, I’m Mike from 1A Auto. We’ve been selling auto parts for over 30 years!
Open the hood, we have to pull the release inside the car. It's just inside, right around your left knee on the driver's side. You need to release the secondary or safety release. Just feel around for it. This one is right here, squeeze up. Going to remove these two top nuts that hold on the appearance cover. They are 10 millimeter, so I'm using a 10 millimeter socket, ratchet and extension. They should just thread off real easily. Here's our appearance cover. It's got some foam inside that's just for noise. Just keeps the noise down from the valve train.
Here are your four coil packs. One for each cylinder. They're held into the valve cover with a 10 millimeter bolt. One for each. Underneath these is your spark plugs. Once these are removed, you can change your spark plugs and then reinstall the coil pack. Push down on the lock and remove the connector. These can be brittle. Sometimes they break, the lock does. This procedure will be the same for the other three. Use a ratchet, extension, and 10 millimeter socket to remove this 10 millimeter bolt. Put this bolt aside.
Now, I need to move the coil. May have to wiggle it because there is a seal in here and just break it free. As it's free, it should come right up. There's our coil pack. Use this special spark plug socket. It's got a rubber O-ring in there to hold the spark plug as we move it from the engine. This is one is a 5/8. Put on our extension, longer ratchet. Feed it down in there, you'll feel it sit onto spark plug. Break it free. Should take the ratchet off once it gets loose, just spin it out. You actually see this spark plug is covered with oil because our valve cover gasket has been leaking. Going to replace this spark plug after I clean up the spark plug openings, and then we'll replace the valve cover gasket.
This original spark plug. See it is all worn out. The brand new one we have from 1aauto.com is nice and fresh. The gap is small. Once we put all four of these in the vehicle, the car will be tuned up and it'll run great. I'm just going to take a rag and just carefully down here. Soak up as much as the oil as I can. I'm not going to worry about it too, too much. Any oil that make it into the cylinder will just get burned up anyways, but I do want to dry it up as much as I can before putting in the new spark plug.
Took our new spark plug, it's no need to gap this. It's pre-gapped. Put it into the socket. See it's held in with that rubber piece, so you can put it in without it falling out and take it by hand. You find the threads, put in it in by hand first, make sure it doesn't cross thread. That's just starting to touch the gasket. Take a torque wrench, set to 14 foot-pounds and tighten this down. All you're doing is crushing the crush gasket, so right there the spark plug is torqued in place. Sometimes that happens, the socket will stay on the plug, and you just kind of wiggle it a little bit.
Spark plug sockets have quite a grip to them. Sometimes if you don't have an extension that fits perfect into the socket, it can get stuck, so you just wiggle it around and break it free. It'll come right out. Just repeat these steps for the other three spark plugs and coils. Reinstall the coil, we'll line up the opening with the mounting hole. Move the harness out of the way, so I won't get pinched. We'll push right over the spark plug, reinstall the bolt. Once it gets tight, I'm just going to stop. Put the connector back in.
Now, we're going to reinstall the plastic engine cover. Wiped it down with a rag to clean some of the dirt off of it, make it look a little nicer. Get it lined up over those studs. It'll sit right down, reinstall the nuts. Actually, just do these hand tight. They don't need to be super tight. Job is complete.
Thanks for watching. Visit us at 1AAuto.com for quality auto parts, fast and free shipping, and the best customer service in the industry.
Tools used
Hi, I'm Mike from 1A Auto. We've been selling auto parts for over 30 years.
Hey everyone. Sue here from 1A Auto, and today on our '06 BMW 325Ci, we're going to be doing spark plugs. So if you need these parts or any other parts of your car, click on the link below and head on over to 1AAuto.com.
Open the hood on this '06 325Ci. The lever is on the driver's side, left foot. Kick panel right here. It's a long black handle. Just pull on it and the hood pops up. The nice thing about this BMW, the hood latch lever pops right out of the grill area and you just pull up on that and lift the hood open.
The first spot is it's located in the center of the engine department right below the windshield. You've got three little clips here and you just turn them to the side. They pop right up. They're spring loaded. Once those are popped up, you just grab this lid and slide it right out.
Then we're going to lift up the actual seals that goes around this compartment area because we're going to take this out. So you're going to have four t40 bolts. You can see them located up on that firewall. Using a Torx Bit screwdriver, I'm just going to take them all out right across. I'm just going to remove this sheathing so that I can take these wires and make sure that I don't break the tabs. You get the battery cable and the electrical wiring harness.
Now we're going to lift up on this housing and get that out of the way.
So in order to take the engine cover off, we took that out of the way, the cowl up there, and I'm going to take these little covers with a small screwdriver. Just pop them out.
It looks like it's a 10 milliliter. And also you're going to need to take the oil cover off. Set that right there.
10 millimeter socket. I'm going to take these two mounting nuts off this cover. Set those aside. You just grab onto that cover and lift it right up out of the way. Now I'm just going to place the oil cover back on because I just don't want any dirt or accidents to happen and something falling down in that crank case.
To disconnect the ignition coil harness, these are a little levers that pop up. I like to take a flathead screwdriver and I just give myself a little leverage and then you can watch it actually disconnect itself and push the harness out. It's a really nice design. And then you just put your finger right into that hole and give it a twist and pull up and there's your ignition coil.
Now I'm going to take a number one cylinder spark plug out and I'm going to use a spark plug socket that we sell here at 1A Auto on our website, and it is a five-eighths extended, all one piece, and it's great for deep cylinder holes like this, BMW is notorious for. We'll take that right out.
And there is our spark plug. And you can see the crossfire. It's a four-pin crossfire. And this is a magnetic style, so the magnet holds onto it and locks it in. So before I install my new spark plug, because it's a crossfire, four-piece crossfire, there is no gapping, but we do do a visual and make sure that, accidents happen. This could have been dropped at the factory before it went in the box. You want to make sure the prongs are all, look alike visually, the equal distance, and that the ceramic is not cracked, and that includes on this part of ceramic.
Everything checks out good for this plug, so I'm going to install it.
Always install spark plugs by hand first. You don't want to cross thread an aluminum head. That is not a project you wish to tackle. There are torque specs to this. So what I do is I just take my 3/8 and I'll just snug it, crush that washer a little bit and I'll go get my torque specs and torque it down.
So there are two sets of specs for this. If it is a 12-millimeter spark plug, the specs are 14.8 to 19.2 foot-pounds. If it's 14 millimeter, it is 20 to 24 foot-pounds. I'm going with five-eighths, so I'm going with the 14 millimeter and I'm going to set this at 21 foot-pounds.
Now before I install my new coil, you can see a little bit of dry dielectric grease they install the factory. I'm just going to add just a little bit more, nothing too generous.
I'm going to set it up, line it right up, push it down. Feel it physically click in. Make sure it's sealed all the way around, that rubber seal, and line up my connector and then bring this right down and lock it. Now we're going to continue this down and do the same procedure on the next five cylinders.
Now that I've done all my coils and spark plugs, I'm ready to install the engine cover again. So I will remove the oil field cover. Slide this down through. Replace that.
I have the two mounting 10-millimeter nuts, 10 millimeter socket size. We had a plastic cover. I'm just going to really just snug it down. There's no need to crank that down. There we go. And the two covers. Line up the grooves. You'll see the little indent tab here. It's in the front part and then the two longer tabs.
So now I'm going to put that plastic cowl back in. I'm going to just line it right up. Place it right in. Here we go. Get the back screw started. Just pop them into place and take your t30. start them. I recommend starting all of them before you tighten it all the way down.
Okay, so now I'm going to just tighten it down. They're all started. I know it's in the place it's supposed to be.
Now I'm going to put the positive cable back into the housing. I'm going to mount that on that inner beginner clip right on over to the other side. So the positive cable goes down right there and then this harness with the loom will clip into this.
We'll take the under piece and line it up. There's tabs on the back, tab in the front. We'll just line them up and snap it right back up in there.
There you go. To install your cabin filter, you've got a tab right here on the bottom in the middle, I'm sorry, and two tabs on each side, and you'll see that there's a notch right here that tab in the center is going to line up to and the two side tabs. We'll just slide it right in, easily. Line that center tab up, line the side, and then go line up the other side.
Now we're going to install the cover and that just slides right down in the back there. You line up these little tabs, push down and twist.
Now we can install the seal. Just line it, push it down all the way around. I'm going to put this one on before I go over there.
And then we're all set.
Thanks for watching. Visit us at 1AAuto.com for quality auto parts, fast and free shipping, and the best customer service in the industry.
Tools used
Brought to you by 1AAuto.com, your source for quality replacement parts and the best service on the internet. Hi, I'm Mike from 1A Auto. I hope this how-to video helps you out, and next time you need parts for your vehicle think of 1AAuto.com. Thanks.
In this video, I'm going to show you how to replace spark plugs on this VW Passat. This vehicle has the 1.8T engine, which is basically the same engine for a lot of the different VWs and Audis. The tools you'll need are a large flat-blade screwdriver, a 5/8 sparkplug socket, and then a ratchet and extension for that socket. As you'll see in this video, my socket is old and warn, so I use a magnet to make up for that, as well as I also use some gasket material just to glue the plug into the socket when I'm reinstalling it. You want to remove this cover here. There are three little clips. Use the large screwdriver. Turn 90 degrees. Let them pop up. 90 degrees Then you tap them a little bit. 90 degrees. It will pop up.
This cover comes right up and off. Each coil has a little plug on it. You just push on that tab and pull the harness off. Obviously, if you're doing all four you do that for each one. Just move the coil a little bit. Pull it right up and out. Now, it helps to have a sparkplug socket. Mine is a little old and warn, so what I actually do is just take basically a piece of paper towel and just stuff it in a little bit. These sockets are designed to actually grab onto the sparkplug, but since mine is as old as it is it doesn't actually do that anymore. The paper towel just helps it accomplish its mission. You just put that right down in. This sparkplug seems nice and loose. It didn't work. The other option is to take a magnet and pull it up and out. I'm going to reinstall the plug. I put a little gasket material in there, so that the plug pretty much stays in there even upside down. This just gives me a couple seconds to put the plug right down in. I'm just looking, making sure there's equal space right around here to make sure that I put the plug in nice and straight. Then, you want to tighten these two about 20 to 25 foot pounds.
A new coil from 1A Auto; it's just like the original. Go down in. Put it in nice and straight. Just press it right down in and reconnect it. It's a direct fit. Then, repeat for the rest of them. Just place your cover back on. Basically, just use your oil filter or your oil fill as a separating point. Large screwdriver. Press those down and turn them 90 degrees.
We hope this helps you out. Brought to you by www.1AAuto.com, your source for quality replacement part and the best service on the internet. Please feel free to call us toll-free, 888-844-3393. We're the company that's here for you on the internet and in person.
Tools used
Hi, I’m Mike from 1A Auto. We’ve been selling auto parts for over 30 years!
Disconnect the negative battery terminal, it's a 10 millimeter nut.
Remove the plastic engine cover, two 10 millimeter nuts on the top. Cover should just slip off, let me put that aside. These are your four ignition coil packs, right on top of the engine. To remove them, well this tab is broken, but if the tab is not broken you push the tab in, pull it out. Push the lock in and pull it off.
To remove the coil pack, loosen the 10 millimeter bolt that's holding it into the head. This procedure's the same for the other three coils. Pull it straight up, and it'll come right off the spark plug. Repeat the procedure for the other three coils.
Use a five-eighths spark plug socket to remove the spark plugs.
Here's our old spark plug. Here's our old spark plug from our vehicle, and our new one from 1AAuto.com. Same size, same design, this one's actually not too bad, but the new one will fit great and work great in your vehicle. Procedure will be the same for all four spark plugs.
You want to use a spark plug socket, because it has a rubber piece inside here to hold the electrode in. That way, as you're installing it, the spark plug doesn't fall out. And then thread it in by hand to make sure you don't cross set it. Torque for these spark plugs is 14 foot-pounds.
Install the new coil, and put it down over the spark plug. Until that gets tight, I'm just going to stop. Reconnect the modular connectors. Reinstall the plastic engine cover. The spark plugs and coils have been changed.
Thanks for watching. Visit us at 1AAuto.com for quality auto parts, fast and free shipping, and the best customer service in the industry.
Tools used
What's up guys? I'm Andy from 1A Auto. In this video I'm going to show you how to replace the spark plugs on this 2001 BMW 325xi. If you need these parts or other parts for your vehicle, click the link in the description and head over to 1Aauto.com. Battery's in the trunk. I'm going to disconnect the negative terminal, I'm just going to use a 10 millimeter wrench. Loosen up this nut right here, and grab the connector and disconnect that. Set it aside. All right, we're going to take this cover off. We have this nice light that we can see a lot better under the hood. We sell this at 1Aauto.com. Hooks right onto the hood. Open this up. Lift this cover, this should slide out, just like that. Just slides forward. We can grab this cabin filter, slide it out, take a straight blade screwdriver or a pocket screwdriver or even a pick, we're going to take this cover right off here, just get under there. Snap this off.
Just like that. Slide that out of the way. We can pull these wires down just like that. Just like that. There is four screws right here. One, two, three, four. When going to use a T30 socket, extension and a ratchet. Take these out. They should stay with the cover, so they're not going to fall out. With all those loose, you can grab this, slide it out. Might have to just loosen this by hand a little bit, and pull this off. Set it aside. So there should be two covers over here, and right here you just take a pocket screwdriver, get underneath there, pop those off. Then there is a bolt there and there. We're going to use a 10 millimeter socket, extension and a ratchet to take those bolts out. I'm just going to use a magnet to grab the bolt. I'll just grab this cover, pull it off.
We can just the oil cap, fill cap. Take a pocket screwdriver right here, and then it's also a cover right here. Just take these covers off. So I'm going to take a 10 millimeter socket, extension and ratchet, and there's a nut here and also under that cover. Take those out. Pull that nut out. We can grab this cover and slide it off. So this front coil has a ground strap on it and also that back coil has a ground strap, so you want to keep that in mind before you take it apart. I'm going to take a 10 millimeter socket, extension, and a ratchet, take these two bolts out. Set that ground strap aside.
Can slide this retainer up. There's like a lock on this. As you slide this up, you should be able to disconnect the connector, and then wiggle the coil back and forth and pull it up. This normally should be sealed off so nothing should get in there. There shouldn't be any dirt, but it's always a good idea to just take some compressed air and a blow gun and just blow the hole out. Make sure nothing gets down there when we take the spark plug out.
I'm going to use this spark plug socket to remove the spark plug. It's got a magnet in the end. It is a 12-point, although they're only 6-point spark plugs, which it doesn't matter. It's still going to work. We actually sell this socket at 1Aauto.com I'm going to use a little extension on the end of it and a ratchet. Once it's loose, I can do it by hand, and slide it out.
Here's the old spark plug. Here's the new spark plug from 1Aauto.com. It has the same shape, has the same thread. The important part is the fact that the threads are the same length, which they are. The electrode on the top is slightly different, but that's okay. Get yours at 1Aauto.com and, you'd be ready to do it yourself. Take the new spark plug, install it in my socket. Slowly, we'll drop it. Now these spark plugs, you don't have to gap because they come pre-gapped. They actually don't want you to get them. Once it's snug finger tight, then I will torque it.
I'm going to take this torque wrench, we actually sell this at 1Aauto.com. I'm going to torque this spark plug to 20 foot-pounds. Take the new coil, slide this on here. You could actually put some dielectric grease in there if you wanted to. It's a good idea. Slide this in position. We'll connect the connector and lock it down. And then this one has the ground, same as the last one. Take the two bolts for that forward one, put it through the ground strap.
Take a 10 millimeter socket, extension and ratchet and we'll snug these down, snug, and then we can do the same with the other ones. Now we'll put this cover back on. Slide it back into position. Put the cap back on. If you wanted to, you could have left the cap on once you take the cover off so you don't drop anything in there, and put the nut back on.
Put this nut back on. Get those started. I'll use a 10 millimeter socket, extension and a ratchet, tighten these down. Snug those down, not too tight. It is plastic that you're holding there. On this cover we have these two caps. Get those lined up, press those in. I'll reinstall this cover. Slide it under the wires, so this has to ... There's a couple of clips underneath you that have to slide onto this rail. Let's see. There we go.
All right, so make sure those clips slide in position, and take the bolts. Get the bolts started. Take a 10 millimeter socket, extension and ratchet, tighten these down, just snug. It is plastic, not too tight.
There should be two caps that go over here. This vehicle doesn't have them. They're missing, so I'm not going to put those in, but make sure you reinstall those caps. Now we want to install this. Just get this lined up. You can get these screws started. I'm going to take a T30 socket, extension and a ratchet, tighten these up. Now reinstall these wires in this cover right here. Just like that. Take this cover, line it up. That's good. Take the filter. We're going to slide it in with the curved side towards the vehicle, so the bowed side more towards the out of the vehicle. Just slide that position like that.
We'll take this cover. It's going to just slide in underneath this weatherstripping. Just push it in, get these lock tabs to line up and lock them down. They're spring loaded, and the last one, and you're good to go. Reconnect the battery, put the negative terminal on. Take a 10 millimeter wrench, we'll just tighten up this nut and just snug it up. Make sure it's tight, it doesn't wiggle loose, and you're good to go.
Speaker 3: Thanks for watching. Visit 1Aauto.com for quality auto parts shipped to your door, the place for DIY auto repair. And if you enjoyed this video, please click the subscribe button.

NGETK00029
