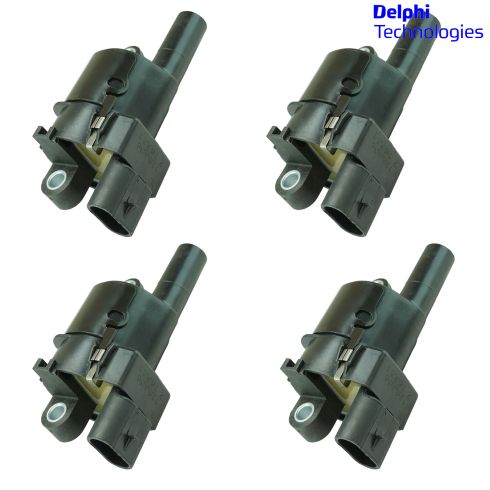
As an Original Equipment Supplier, Delphi Automotive products from 1A Auto come directly from the source. You wont have to worry about going to the dealership for Original Equipment - these parts are the exact same as the original. Delphi products come with the same quality from the dealership at a lower cost to you.
Returns: Parts with electrical components cannot be returned once installed.
Lifetime Warranty
This item is backed by our limited lifetime warranty. In the event this item should fail due to manufacturing defects during intended use, we will replace the part free of charge. This warranty covers the cost of the part only.
Returns: Parts with electrical components cannot be returned once installed.
FREE Shipping is standard on Orders shipped to the lower 48 States (Contiguous United States). Standard shipping charges apply to Hawaii, Alaska and US Territories. Shipping is not available to Canada.
Expedited is available on checkout to the United States, excluding Alaska, Hawaii and US Territories as well as P.O. Boxes and APO/FPO/DPO addresses. Final shipping costs are available at checkout.
How to Replace Ignition Coils 2007-14 Chevy Suburban 1500
Created on:
Tools used
Socket Extensions
Flat Blade Screwdriver
10mm Socket
Ratchet
Pick
1. Removing the Ignition Coil
Pop off the engine cover
Unplug the ignition coil
Tug the wire off by the boot from the coil
Use a pick if necessary
Remove the 10mm bolts from the ignition coil
Remove the coil
2. Installing the Ignition Coil
Insert the coil into the engine
Tighten the two 10mm bolts to the coil
Press the wire onto the boot
Connect the wiring harness
Pop on the engine cover
We have to pop off this cover that's on top the engine. That just pops up. There's two points where it pops onto. So you just kind of get them and work them out straight from the back. Just like that. You can see here, this is where it pops on here and here and then these two tabs slide into the back. We're going to set this aside so it doesn't get broken. With our engine cover removed, you can now see the eight ignition coils on this engine. We've got four on each side. There's one, two, three, four, this is on the driver's side. We'll go over to the passenger's side. We've got one, two, three, four and the process to remove and install them is going to be the same for both sides.
This side you might have to move some of these hoses out of the way so you can get to them. But in general it should be pretty straight forward and we're going to show you that on the driver's side of the car. We're going to start by unplugging the coil. So we're going to lift up that lock, pull it out. Take my 10 millimeter socket ratchet with an extension on it, break these free. Before I take it off completely, this is our spark plug down here and the wire, I'm going to pull the wire off. Don't pull the wire, pull it by the boot. If this seems like it's stuck, you can take a small flat bladed screwdriver or if you've got a pick then just sort of work around the rubber to try to loosen it.
Go back to our ratchet, these are pretty loose so I'm just going to use the socket with my fingertips. Grab that bolt and the next bolts. We'll hold this with my other hand so it doesn't fall and we can remove the coil pack.
Here's our old coil pack from the vehicle and our new coil pack from 1AAuto.com. You can see the connectors are the same, it's got these nice metal inserts in the bolt holes. Same setup for the spark plug wire. This'll fit perfectly and perform great. Take our new coil place it on the bracket, it's loose, don't want it to fall. Our bolts, get them started with my fingers.
10 millimeter socket, ratchet extension just tighten these from the wrist, when they start to feel tight I'm going to stop. Going to reconnect our electrical connector at the top. Should push it in so it locks. Take our spark plug wire put it back in. That will click on, that's tight. And our new coil is installed. Okay, so now we're going to put this engine cover back on. So you've got these two little pins here and there's two little clips in the back. But this needs to slide up and into and then over these to lock it down. So it's easier to slide it to the back and get these hooked and then push it down onto these. It's got a little bit of a curve here, there's some heater hose lines on the other side that they need to go over it like this. So you basically just start it and then just slide it down and you can almost see it as it hits those hooks and then you push it over those pins and down and it's on.
Thanks for watching. Visit us at 1AAuto.com for quality auto parts, fast and free shipping, and the best customer service in the industry.
DEEEK00001
In Stock
Product Reviews
Loading reviews
There are no reviews for this item.
Customer Q&A
No questions have been asked about this item.
Customer service
877-844-3393
Monday - Friday 8:00am - 9:30pm ET Saturday - Sunday 8:00am - 4:30pm ET
Chevrolet is a registered trademark of General Motors Company. 1A Auto is not affiliated with or sponsored by Chevrolet or General Motors Company.See all trademarks.
Enter Vehicle Year Make Model
Specify your vehicle's year, make and model to guarantee fit.
Year
Make
Model
Options
Drivetrain
This part doesn’t fit a . Select from parts that fit.