(1) Front Driver Side Lower Control Arm with Ball Joint
(1) Front Passenger Side Lower Control Arm with Ball Joint
Quantity:
2 Piece
Item Condition:
New
About TRQ: TRQ is a trusted brand dedicated to making every repair a success story by combining premium parts with easy installation. Each TRQ part is engineered by a team of automotive experts to meet or exceed OEM standards, delivering enhanced performance and maximum longevity. With rigorous in-house testing, the brand ensures superior fit and function across every product line. TRQ also provides customers with best-in-class, step-by-step installation videos—so you can complete repairs with confidence, whether you're a first-time DIYer or an industry professional.
Our control arms are designed to be direct replacements for the original factory parts. They are 100% brand new and require no modifications for installation. No special tools are required because all of the bushings come pre-installed.
Our steering and suspension components are pre-greased and sealed for long life and do not require the extra maintenance typically required by greaseable versions.
Attention California Customers:
WARNING: This product can expose you to chemicals including Lead and Lead Compounds, which are known to the State of California to cause cancer, and birth defects or other reproductive harm. For more information, go to www.P65Warnings.ca.gov.
This part fits
1 vehicle spanning 2011-2013.
Fits these Makes
Select vehicle
Year
Make
Model
Description
2011-2013
Honda
Odyssey
Honda Odyssey Front Driver & Passenger Side Lower 2 Piece Control Arm with Ball Joint Set TRQ PSA66714
Part Interchange
Brand Label
Part Number
Dorman
522-857
Dorman
522-858
SYD
1509051
MAS Industries
CB59313
MAS Industries
CB59313PR
Mevotech
CMS601119
MOOG Chassis Products
RK622002
NAPA Premium
2607621
Honda
51360TK8A10
Dorman - OE Solutions
522-857
Mevotech
MS60119
Beck/Arnley
102-7613
Honda
51360SZTA03
Honda
51350TK8A00
MAS Industries
CB59314PR
Honda
51350TK8A01
Honda
51360TK8A00
Beck/Arnley
102-7612
Precision Driveline
5CB601077
Mevotech
MS601119
MOOG Chassis Products
RK622210
Precision Driveline
5CB601078
Mevotech
MS601118
Mevotech
CMS601118
Mevotech
CMS601187
MAS Industries
CB59314
NAPA Premium
2607620
Honda
51350TK8A10
Mcquay-Norris
FA4761
Dorman - OE Solutions
522-858
DIY Solutions
SUS04196
DIY Solutions
SUS06095
DIY Solutions
SUS06096
Dorman - Premium
CB59313PR
Dorman - Premium
CB59314PR
Hollander
512-50627R
Hollander
512-50628L
Mevotech Supreme
MS60119
Mevotech Supreme
MS601118
Mevotech Supreme
MS601119
Mevotech Supreme
CMS601118
Mevotech Supreme
CMS601119
Honda
51360-TK8-A01
Honda
51350-TK8-A01
This item may be interchangeable with parts from other brands with the above part numbers.
This information is provided only for reference and does not guarantee that the item you are
purchasing is identical to parts with part numbers from the brands listed above.
To confirm that this item fits your vehicle, use the above "Check Vehicle Fit" option.
Lifetime Warranty
This item is backed by our limited lifetime warranty. In the event that this item should fail due to manufacturing defects during intended use, we will replace the part free of charge. This warranty covers the cost of the part only.
FREE Shipping is standard on orders shipped to the lower 48 States (Contiguous United States). Standard shipping charges apply to Hawaii and Alaska.
Shipping is not available to a P.O. Box, APO/FPO/DPO addresses, US Territories, or Canada for this item.
Expedited is available on checkout to the United States, excluding Alaska, Hawaii.
Final shipping costs are available at checkout.
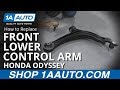
How to Replace Front Lower Control Arm 2011-13 Honda Odyssey
Created on:
Tools used
Pickle Fork
21mm Socket
Hammer
Torque Wrench
Jack Stands
19mm Socket
Ratchet
Floor Jack
Needle nose pliers
1/2 Inch Breaker Bar
1. Removing the Wheel
Raise the vehicle with minimal weight on the wheel
Loosen the 21 mm lug nuts
Raise and support the vehicle
Remove the lug nuts
Remove the wheel
2. Removing the Front Lower Control Arm
Remove the ball joint cotter pin
Remove the 19 mm tie rod castle nut
Hammer on the knuckle to loosen the outer tie rod ball joint, or separate it with a pickle fork
Remove the two 19 mm control arm bolts
Remove the control arm
3. Installing the Front Lower Control Arm
Insert the control arm
Tighten the two 19 mm bolts
Raise the suspension with a floor jack to simulate ride height
Torque the bolts to 83 foot-pounds
Install the 19 mm castle nut onto the tie rod end
Torque the castle nut to 55 ft-lb
Tighten the castle nut further to align the cotter pin hole, if necessary
Insert the cotter pin and peen it over the nut
Tighten the jam nut onto the outer tie rod
4. Installing the Wheel
Install the wheel onto the wheel studs
Install the six lug nuts and tighten them by hand in a crossing pattern
Lower the vehicle with minimal weight on the wheel
Torque the 21 mm lug nuts to 94 ft-lb in a crossing pattern
Lower the vehicle completely
What's up guys? I'm Andy from 1A Auto. In this video I'm going to show you how to replace the front lower control arm on this 2011 Honda Odyssey. If you need this part or other parts for your vehicle, click the link in the description. Head over to 1AAuto.com.
All right, we're going to check out the front end of this vehicle. Just going to grab the tire and shake it a little bit. Now you don't want to shake it like that, extreme. Just give it a little shake. You'll feel a little bit of play if there's anything going on and I feel a little bit there, up and down. I don't really feel anything up and down but a little bit right there. So if we look underneath, what we want to look for right here at that lower ball joint, see if there's any movement while I'm doing that. And as you can see, there's definitely movement so that ball joint's bad. Another thing to check when your going side to side is the outer tie rod or even the inner tie rod, but this one seems to be tight. At least we can't see any play in that until we replaced the ball joint. I'm going to remove the wheel. I'm going to use a 22 millimeter socket and an impact gun. Remove the wheel.
All right first I'm going to start with some rust penetrant. I'm going to put it on the ball joint right there and then I'm also going to do where the other bolts attach the control arm right there and up here. Now I'm just going to take this cotter pin out. I'm just going to use some needle nose pliers. You could also use some side cutters. Pull it out. There we go. Just pull that out.
I'm going to take a 19 millimeter wrench and loosen this nut up. All right, take that nut off. Now I'm going to separate the ball joint from the knuckle. I am going to use a pickle fork and a hammer. Now one thing you want to be careful if you were going to reuse this ball joint, you don't want to use a pickle fork because you could damage the boot on the ball joint. There is other types of tools that you can get in here and it'll push down on the ball joint or you can try hammering on the knuckle, but you're going to be careful doing that as well.
Just going to flip this over. There we go. That's separated. Next thing I'm going to take this bolt out. I'm going to use a 19 millimeter socket and a breaker bar, loosen it up.
Then I'll switch to a ratchet. The same 19 millimeter socket. I'll take that bolt out. Now I'm going to remove this rear bolt with the 19 millimeter socket and the breaker bar. Loosen it up and then switch to the ratchet.
Pull that bolt out. Now just take a pry bar. Pull that down. Pry this out over here. Just get the pry bar in behind here. Slide it up. Here's the old part. Here's the new lower control arm from 1AAuto.com. As you can see, the shape is the same. The bushings are the same. The ball joint is in the same location. Get yours at 1AAuto.com and you'd be ready to rock and roll.
All right, so I want to slide the control arm in here first. Get the bolts started just like that. Get that started and I can slip it in over here and we'll get this bolt lined up over here. I'm just going to use a pry bar and get this lined up. Put the bolt... Get that started. Now I'm going to take the 19 millimeter socket and a ratchet. Tighten this up. Now I'm going to use a torque wrench and torque this to 83 foot pounds. Now I'm going to tighten this bolt down. Now I want the control arm to be as close to ride height as normal. So I'm just going to raise this up. Be careful not to rip the boot on the knuckle. Tighten this down like this.
It would be ideal if you could put this all together, have the vehicle on the ground and then torque that. But that's not the easiest thing to do, so I'm just going to do this. Get that set and I'll use a torque wrench and torque this to 83 foot pounds. I'll just pull this down, get the ball joint lined up with the knuckle, take the castle nut, put that on, and I'm going to take a 22 millimeter wrench and tighten this up.
If you have the ability to tighten this with a torque wrench, I'm not going to be able to fit mine in there. You're going to torque this to 55 foot pounds. So do the best you can. Snug this up and then there's a hole through the stud of the ball joint. You're going to take the cotter pin, slide the cotter pin through the hole. If it doesn't line up, just try to tighten up the nut a little bit more to get it to line up. Then I'll just slide this through, very good.
Now I'm going to put the tire on. Line up the studs. Take the lug nuts, put those on. Now whenever you're doing a front end repair, whether it be a strut or a control arm or tie rod ends, you're going to want to go to a local shop and have your alignment performed because you don't want to burn your tires out prematurely. Now with the vehicle lowered, so the tire is just touching the ground, I'm going to torque these lug nuts to 94 foot pounds, and I'm going to do it in a star pattern. That way the wheel gets tightened down evenly. I'll just go around again just to double check.
Thanks for watching. Visit 1Aauto.com for quality auto parts shipped to your door, the place for DIY auto repair, and if you enjoyed this video, please click the subscribe button.
Product Reviews
4.9/ 5
★★★★★★★★★★
13 reviews
5★
92%
4★
8%
3★
0%
2★
0%
1★
0%
★★★★★March 27, 2026
Perfect fitment! As expected!
Fitment was perfect! Installed within 1 hour! 30 minutes on each side! I hope bushings and ball joint last as long as the OEM i replaced it with!
★★★★★October 10, 2025
Great quality and perfect fit
Absolute perfect fit and the added bonus of a well crafted installation video was fantastic.
★★★★★August 25, 2024
Perfect replacements!
Amazing products! No issues with fitment whatsoever. Highly recommend!
★★★★★June 8, 2024
Parts are great
The lower control arms work great on my Honda Odyssey.
★★★★★June 6, 2024
They arrived in a timely manner. The video on your website was great.
★★★★★June 21, 2023
2011 Odyssey Control Arms
Parts arrived as scheduled. Fit perfect. Van suspension is now safe and feels tight again. Video shows me that I was capable for the repair. ??
★★★★★December 23, 2022
Great quality & Price
Always carry great quality product and speedy service at a reasonable price. Will be repeat customer
★★★★★October 24, 2022
Very good and nice
Very good
★★★★★August 22, 2022
Just As Expected
Arrived on time and looked just like the picture. Easy to install and works great so far.
★★★★★August 1, 2021
lower control arms
shipped fast and easy to install and bolt up.
Showing 1–10 of 13 reviews
PSA66714
In Stock
Customer Q&A
Got a question about this part? Post it and get answers from our team.
SlimaneJanuary 17, 2023
Does this fit in honda odyssey touring 2011?
Yes, this part will fit your vehicle.
Jessica · January 18, 2023
Showing 1–1 of 1 question
Customer service
877-844-3393
Monday - Friday 8:00am - 9:30pm ET Saturday - Sunday 8:00am - 4:30pm ET
Ask a Question
Check Your Email
We sent a verification email to .
Click the Verify Email button in the email to submit your question.
This extra step helps prevent spam.
Select Your Vehicle
Specify your vehicle's year, make and model to guarantee fit.







 WARNING: This product can expose you to chemicals including Lead and Lead Compounds, which are known to the State of California to cause cancer, and birth defects or other reproductive harm. For more information, go to www.P65Warnings.ca.gov.

