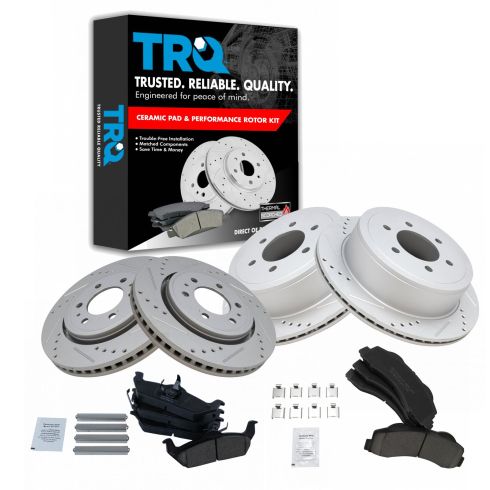
/2011 Ford F150 Truck with Base Payload Package Front & Rear without Integrated Hub with 6 Lug Wheels Ceramic Premium G-Coated Performance Brake Pad & Rotor Kit TRQ Performance BKA12441
1APBS00549-2010-11 Ford F150 Truck with Base Payload Package Front & Rear without Integrated Hub with 6 Lug Wheels Ceramic Premium G-Coated Performance Brake Pad & Rotor Kit TRQ Performance BKA12441
2011 Ford F150 Truck with Base Payload Package Front & Rear without Integrated Hub with 6 Lug Wheels Ceramic Premium G-Coated Performance Brake Pad & Rotor Kit TRQ Performance BKA12441
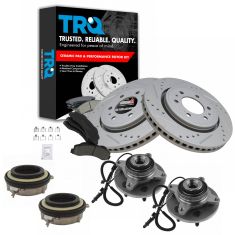
(1) Front Premium G-Coated Performance Brake Rotor Set
(1) Rear Premium G-Coated Performance Brake Rotor Set
(1) Front Ceramic Brake Pad Set
(1) Rear Ceramic Brake Pad Set
Brake Pad Bonding Type:
Premium Posi
Rear Brake Rotor Venting Type:
Vented
Friction Material Composition:
Ceramic
Brake Pad Friction Material Composition:
Ceramic
Front Brake Rotor Diameter:
13.78 in. (350mm)
Front Brake Rotor Venting Type:
Vented
Wheel Lug Count:
6 Lug
Brake Rotor Coating:
Premium G-Coated
Rear Brake Rotor Diameter:
13.7 in. (348mm)
Surface Type:
Slotted X Drilled
Grade Type:
Performance
Product Line:
Performance
Item Condition:
New
Specifications
Wheel Lug Quantity
with 6 Lug Wheels
Wheel Hub Integration Option
without Integrated Hub
Location
Front & Rear
Base Payload Package Option
with Base Payload Package
About TRQ: TRQ is a trusted brand dedicated to making every repair a success story by combining premium parts with easy installation. Each TRQ part is engineered by a team of automotive experts to meet or exceed OEM standards, delivering enhanced performance and maximum longevity. With rigorous in-house testing, the brand ensures superior fit and function across every product line. TRQ also provides customers with best-in-class, step-by-step installation videos—so you can complete repairs with confidence, whether you're a first-time DIYer or an industry professional.
Product Features
Improved Stopping Power: Cross-drilled & slotted to reduce brake fade
Longer Lasting: True non-interference vane design for optimized cooling
Positive Molded: Less dust resulting in cleaner wheels
G3000 Casting Alloy - Reduced noise and improved wear resistance
Direct Replacement: No modifications necessary
Attention California Customers:
WARNING: This product can expose you to chemicals including Lead and Lead Compounds, which are known to the State of California to cause cancer, and birth defects or other reproductive harm. For more information, go to www.P65Warnings.ca.gov.
This part fits
1 vehicle spanning 2010-2011.
Fits these Makes
Select vehicle
Year
Make
Model
Description
2010-2011
Ford
F150 Truck
Ford F150 Truck with Base Payload Package Front & Rear without Integrated Hub with 6 Lug Wheels Ceramic Premium G-Coated Performance Brake Pad & Rotor Kit TRQ Performance BKA12441
Part Interchange
Brand Label
Part Number
Raybestos Brakes
MGD1012CH
Raybestos Brakes
EHT1012H
Raybestos Brakes
EHT1414H
Raybestos Brakes
SP1414PSH
Raybestos Brakes
SGD1012C
DuraGo
BR54111
Bendix
PRT5521
Aimco
54111
Bendix
PRT5698
DuraGo
BR900846
Wagner
BD126110
Aimco
54153
Raybestos Brakes
680508
Raybestos Brakes
680182
Wagner
BD126433
Ford
8L3Z2200A
Ford
AL3Z2200A
Ford
BL3Z2200C
Lincoln
6L3Z2200CD
Lincoln
6L3Z2200AB
Ford
BL3Z2001C
Lincoln
BL3Z2001C
Ford
6L3Z2200CD
Ford
4L3Z2200AB
Ford
BL3Z2001B
Lincoln
AL3Z2001A
Ford
FL1Z2001B
Ford
BL3Z2001A
Ford
DL3Z2001B
Ford
AL3Z2001A
Lincoln
BL3Z2001B
FMSI
CD1414
FMSI
CD1012
Raybestos Brakes
EHT1012AH
Raybestos Brakes
680182P
Raybestos Brakes
680508R
Raybestos Brakes
680508FZN
Raybestos Brakes
680508P
Hollander
530-00187
Hollander
533-02458
Raybestos Brakes
680508PER
Raybestos Brakes
680182FZN
Raybestos Brakes
680182R
Raybestos Brakes
680182PER
This item may be interchangeable with parts from other brands with the above part numbers.
This information is provided only for reference and does not guarantee that the item you are
purchasing is identical to parts with part numbers from the brands listed above.
To confirm that this item fits your vehicle, use the above "Check Vehicle Fit" option.
Lifetime Warranty
This item is backed by our limited lifetime warranty. In the event that this item should fail due to manufacturing defects during intended use, we will replace the part free of charge. This warranty covers the cost of the part only.
FREE Shipping is standard on orders shipped to the lower 48 States (Contiguous United States). Standard shipping charges apply to Hawaii and Alaska.
Shipping is not available to a P.O. Box, APO/FPO/DPO addresses, US Territories, or Canada for this item.
Expedited is available on checkout to the United States, excluding Alaska, Hawaii.
Final shipping costs are available at checkout.
How To Replace Rear Disc Brake Pads and Rotors 2004-10 Ford F-150
How to Replace Rear Brakes 2009-2011 Ford F-150
Created on:
Tools used
21mm Socket
Large C-Clamp
Hammer
Flat Blade Screwdriver
Torque Wrench
Jack Stands
Chisel
White Grease
10mm Socket
Ratchet
Wire Brush
Floor Jack
1. Removing the Wheel
Pry off the center cap with a flat blade screwdriver
Loosen the lug nuts with the vehicle on the ground
Raise the vehicle with a floor jack
Secure the vehicle on jack stands
Remove the lug nuts
Pull off the wheel
2. Inspecting the Brakes
Check for gouges on both sides of the rotor
Check the thickness of the brake pads
3. Removing the Brake Pads and Rotor
Remove the two 10mm bolts from the brake caliper
Pry the brake pads into the caliper with a flat blade screwdriver to push in the pistons
Pull the caliper aside
Pull the rotor off
Pry the brake pads off the caliper with a flat blade screwdriver
Clean the friction areas with a wire brush
Clean the slides with a wire brush
Pry off the brake pad slides with a flat blade screwdriver
Tap the slides on with a hammer
Apply white grease to the slides
4. Installing the Brake Pads and Rotors
Put an old pad in the caliper
Use a large C-clamp and the old pad to push the pistons back
Slide the rotor on
Adjust the emergency brake, if necessary, by turning the star wheel with a flat blade screwdriver
Install the new brake pads into the caliper
Put the caliper on
Thread the two 10mm bolts by hand
Tighten the 10mm bolts to 17 foot-pounds
5. Reattaching the Wheel
Slide the wheel into place
Start the lug nuts by hand
Tighten the lug nuts preliminarily
Lower the vehicle to the ground
Tighten the lug nuts to 120 foot-pounds in a crossing or star pattern
Reattach the center cap
6. Testing the Brakes
Pump your brakes repeatedly until they feel firm
Test your brakes at 5 miles per hour and then 10 miles per hour
Road test the vehicle
Brought to you by 1AAuto.com, your source for quality replacement parts and the best service on the Internet.
Hi, I'm Mike from 1A Auto. I hope this how-to video helps you out, and next time you need parts for your vehicle, think of 1AAuto.com. Thanks.
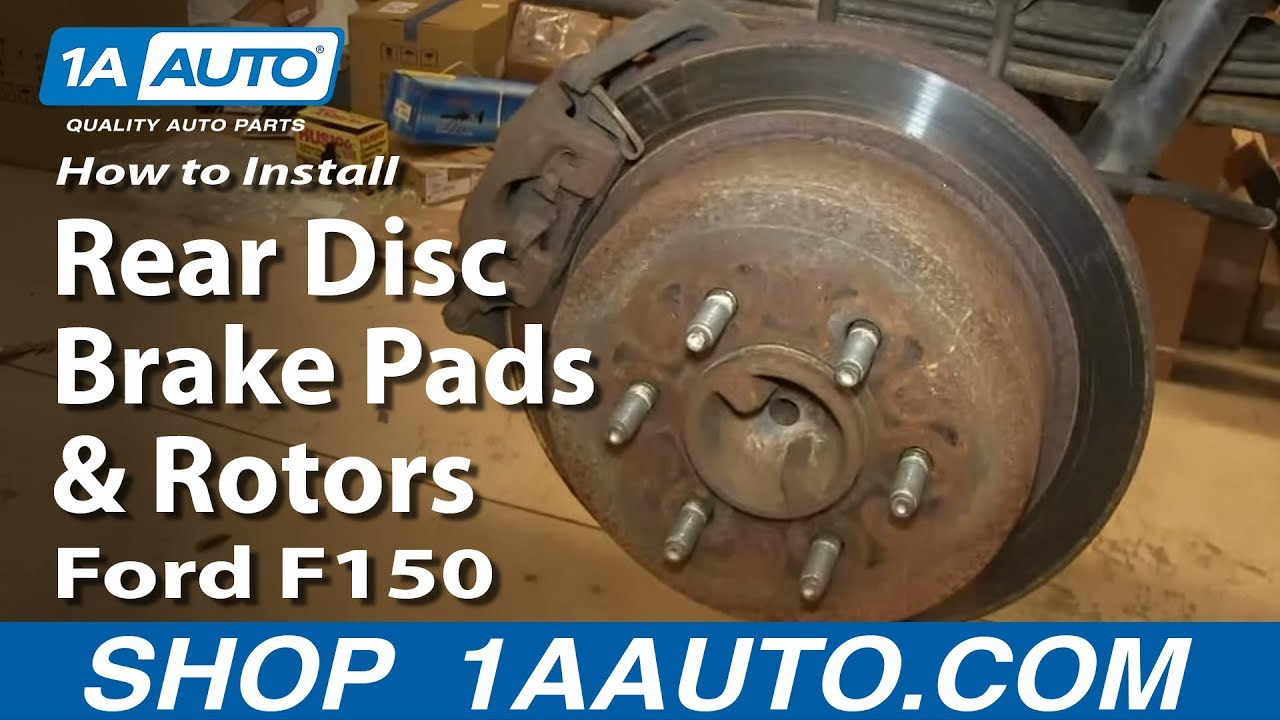
In this video, we're going to show you how to replace the rear brakes on this 2005 Ford F150. We show you on the passenger's side but the driver's side is the same procedure. The items you'll need for this is a new brake pads and rotor kit from 1AAuto.com, a 10 and 21mm socket and ratchet, a hammer, flat blade screwdriver, large C-clamp, wire brush, torque wrench, brake grease and jack and jack stands.
Pry off the hub cap and then remove these 21mm lug nuts and you just want to loosen them each up while the vehicle's still on the ground. Then you want to jack the vehicle up and support it and then remove the lug nuts the rest of the way. Then your wheel will pull free.
With your wheel off, you can do a quick inspection. You just want to feel with the back of your fingernails the rotor and you're just feeling for any deep grooves. You're going to have slight grooves. You can see the brake pads. Actually you can see them better right through here. There's the brake pad and then the rotor and the brake pad. You can see, actually, the rear brakes on this look fairly new but we're going to replace them anyways just to show you.
We'll remove these two 10mm bolts. A good idea, just to help you get it apart, take a large screwdriver or pry bar and you can just pry against the rotor and just do it slowly and easily. If you get a good enough grip, you can actually push the piston all the way back in, which is what you want to do. Then you want to pull the top up first and then pull that right off. Now the rotor will pull right off.
To remove your shoes, you want to remove the outer one first. Pry it with a screwdriver and just pull the shoe this way a little bit, pry out, and the inner one just pulls right out. These are the surfaces that your brake pads slide on and what can happen is, as these trucks age, this cast iron bracket, caliper bracket . water will get in between the bracket and slide and it will start rusting and that will cause these slides to actually expand a little bit and they'll seize your pads into the one spot and your brakes really won't work. First just clean the slide itself off with a wire brush and then we want to remove the slide. Just pry out these end tabs a little bit and now we want to wire brush the caliper bracket itself, as well.
I'm seeing just a little bit of scale here so I'm just going to take a chisel and if yours is in good shape, you don't have to worry about this but I'm just going to scrape it down some. Then there's two little indents here, the indents on the slide go to the outside, just put it in place. Then we're just going to put some brake grease on the slides. We've repeated the entire process for the slide up above it and then we're just going to apply some brake grease to that as well.
On the right, are the old brake pads and rotor. On the left, are the new ones from 1A Auto. You can see they're identical and they'll fit exactly the same.You want to push the piston back in. I was able to do that with a screwdriver at an earlier step but if you wanted to make sure, you could use a large C-clamp and take the C-clamp and press it back in. You can also just put your old brake pad in there for something for the C-clamp to be able to push on.
I'm putting my old brakes back on because as you saw they're in good shape and when you put the rotor on, make sure it goes on. You want a little bit of contact from the emergency brake shoes. You can see there's a lot of play so we're going to adjust the emergency brake shoes. On this side, we're going to go down and it's exposing more threads so that means it's pushing the emergency brake shoes out. The rotor still has quite a bit of play, so we'll continue to adjust it.
For the inner pad, again I'm using my original ones because they're in good shape. It goes into the caliper and then the outer one pushes in. Here you want to make sure these are nice and free, push them that way so it will go on. You might have to pull them out a little bit and they go right in. We'll just fast forward as Mike replaces those two 10mm bolts and tightens them up. Now torque both of those to 17 foot-pounds.
We'll fast forward as Mike replaces the wheel and then replaces those lug nuts and tightens them preliminarily. Then lower the vehicle and torque each of the lug nuts in a crossing pattern to 120 foot-pounds. Then just replace that hub cap.
After doing any work on the brakes, you just want to pump the brake pad until it firms up and then doing a stopping test from 5 miles per hour, then 10 miles per hour.
We hope this video helps you out. Brought to you by www.1AAuto.com, your source for quality replacement parts and the best service on the Internet. Please feel free to call us toll-free, 888-844-3393. We're the company that's here for you on the Internet and in person.
I choose 1A Auto because the price and quality are what I look for in parts. Everything was shipped in a timely manner. Installation was a touch more difficult than the video showed, but not impossible. The entire job was completed in about three hours. Minimal tools were needed and nothing extra was used outside of a typical mechanic's tool kit, other than an impact (to remove lug nuts) a cheater bar (to break bolts) and a pry bar (to remove the rotors).
★★★★★August 22, 2024
Would order again/ recommend to
Great experience, product came as ordered and quick and easy shopping process
★★★★★July 27, 2024
worth the money
good value for the price only draw back is figuring which side the slotted rotors go on
★★★★★June 21, 2024
Very good
★★★★★October 27, 2022
Just Nice real nice
Satisfied
★★★★★April 26, 2021
Good looking rotors and stops are smooth and precise. Good job 1aauto.
★★★★★April 17, 2020
Had a very pleasant a good experience
★★★★★March 18, 2019
Good quality parts, great service
After receiving my brake kit and opening the package, I couldnt believe in the quality knowing what I had paid for everything compared to different vendors. I have installed both stopping is better no noise,little to no brake dust with the ceramic brake pad. I was little skeptical to buy at first because I didnt see to many reviews on Nakomotor products. Im happy to have given them a try and if I had to buy again I would. And also 1aauto great service, fast delivery, two thumbs up thanks
Showing 1–8 of 8 reviews
Customer Q&A
Got a question about this part? Post it and get answers from our team.
KevinDecember 10, 2024
Is this product heavy duty and can it handle towing?
I would NOT put this product into the 'Heavy Duty' category. However, that being said, depending on what you are towing, then they would or would not work. Towing a Jeski? Sure! Towing an overweight trailer with rocks, probably not. There are too many factors to say yes or no on 'can it handle towing'
Anthony · December 13, 2024
JohnNovember 19, 2022
does brakes have
a break in ?
These work great, been going strong now.
Jeff- · November 19, 2022
CharlesJuly 11, 2021
Does the kit include the rubber boots that protect the pin in the bracket? The video showed new boots during the install.
This kit is not shown or listed to include the rubber boots.
Adam · July 12, 2021
ArtieApril 29, 2019
Will these pads and rotors fit a F150 4x4 super cab with 6 lugs?
Yes, according to the information you provided, this part will fit your vehicle as long as you have a 2010-2011 model year.
T · April 29, 2019
Showing 1–4 of 4 questions
Customer service
877-844-3393
Monday - Friday 8:00am - 9:30pm ET Saturday - Sunday 8:00am - 4:30pm ET
Ask a Question
Check Your Email
We sent a verification email to .
Click the Verify Email button in the email to submit your question.
This extra step helps prevent spam.
Ford is a registered trademark of Ford Motor Company. 1A Auto is not affiliated with or sponsored by Ford or Ford Motor Company.See all trademarks.
Select Your Vehicle
Specify your vehicle's year, make and model to guarantee fit.









 WARNING: This product can expose you to chemicals including Lead and Lead Compounds, which are known to the State of California to cause cancer, and birth defects or other reproductive harm. For more information, go to www.P65Warnings.ca.gov.