Brought to you by 1AAuto.com, your source for quality replacement parts and the best service on the internet.
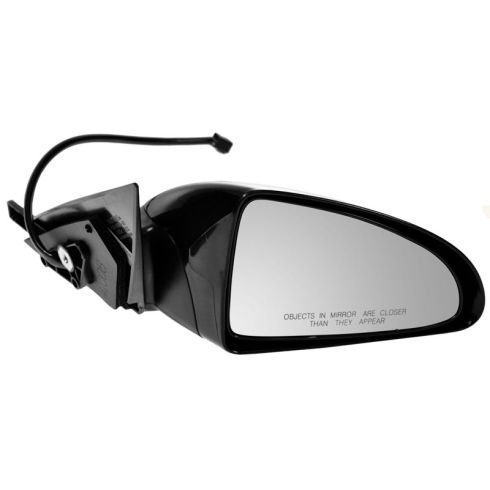
Hi, I'm Don from 1A Auto. I hope this how-to video helps you out, and the next time you need a part for your vehicle, think of 1AAuto.com. Thanks. In this video, we're going to show you how to replace the driver's side mirror assembly on a 2007 Pontiac G6. It's pretty much the same operation for 2007 through 2010. You're going to need a 10mm socket and socket wrench, a Torx 30 bit on the socket wrench, and a flat-blade screwdriver. The operation is pretty much the same for the passenger's side, as well.
With a flat pocket screwdriver, remove the cover that goes over the bolt in the door handle. Use a T30 Torx bit on a socket driver to remove that bolt. I'm fast-forwarding through the removal. Take the assembly out. Locate the tab that holds the cable in place. Pry it with the small screwdriver. With a pocket screwdriver, release the clip that holds the harness to the unlock and lock button. Leave the window down for this. On the edge of the door panel, there's a little plastic rivet. You want to push in the center and then pry out the side with the little flat-blade pocket screwdriver. Pry up on the little matting that's on the inside of the door hand pull. Locate the two Torx30 screws. I'm using a Torx30 bit on a socket wrench, and I'm going to remove those two screws. I'm going to fast-forward through the removal of those.
Go ahead and pull your handle and switch-pack assembly out of the way. You're going to see three connectors. Go ahead and press the tabs in on the gray one, same as the black, and then for the white one you're going to use a pocket screwdriver and pry it out to, Pry the little tongue off the, or out of the housing. Now, get your fingers in between the door panel and the door itself and pop it free of the plastic clips that hold it in place. Don't forget about the clip up on the top by the mirror that covers where the, next to the mirror, the little triangle piece there, pop that out. Then once you've got it out, lift it up off the jamb, off the sill, and pull it out of the way.
Locate the harness that comes down from the mirror and unplug it behind the shield there. See the one, two, and behind that grommet is a third 10mm nut. Remove the three 10mm nuts. I'm going to go ahead and fast-forward through this. Old part, new part, same connector. These mirrors come textured or they come just glossy black so that you can paint them. You can do a bunch of different things. You can put it on and leave it the way it is. You can be as crude as going to a hardware store trying to match the paint with an off-the-shelf can of spray paint, or you can go to an auto-parts store with an auto-body paint-supply unit in the back where they can match a color for you and put it in a self-charge air can and you can spray it.
Install the mirror by first pushing the harness through the door in the appropriate hole where it goes, and then I'm going to pull it through and then line up the studs that are going to go through so I can put the 10mm nuts back on. I'm reinstalling the three nuts, and with those tight, I'm going to reconnect the harness. I'm just running the mirror with the controls just to verify that everything is hooked up correctly and that it's working. If you're looking to do the passenger side, it's fundamentally the same as the driver's side. The only difference is the trim piece that you're going to need to remove, as you can see here, is different than the driver's side. Behind there are the two Torx30 screws that you need to remove, and then there's also that Torx30 that's in the handle assembly where the door unlocks or where you open the door. You open the little cover, remove the screw, and then use your fingers to pry the door panel off. A close-up of those two Torx30s.
I'm putting the door panel back on. Connect the one connector that's supposed to be connected behind there and then pull the rest of them through where the switch-pack and door handle is going to be. Once you get that done, put your unlock button through and position the door panel on the sill and press down. Once the panel is seated, go ahead and give it a couple taps on the edges to seat those plastic clips. I'm reinstalling the Torx30 screws, the two of them that go in the door-handle switch-pack assembly. I'm going to fast-forward through reinstalling those two screws. Install the little pad that goes over those two screws. Reinstall the plastic rivet that goes in the edge of the door panel.
Reinstall the door handle and make sure that you plug in your unlock and lock button, and then put your cable into the ball end of the cable into the socket there and press down with the cable into the housing. Then press it back in. Reinstall the Torx30 screw, tighten it up, and then close the cover.
We hope this helps you out. Brought to you by www.1AAuto.com, your source for quality replacement parts and the best service on the internet. Please feel free to call us toll-free 888-844-3393. We're the company that's here for you on the internet and in person.