About TRQ: TRQ is a trusted brand dedicated to making every repair a success story by combining premium parts with easy installation. Each TRQ part is engineered by a team of automotive experts to meet or exceed OEM standards, delivering enhanced performance and maximum longevity. With rigorous in-house testing, the brand ensures superior fit and function across every product line. TRQ also provides customers with best-in-class, step-by-step installation videos—so you can complete repairs with confidence, whether you're a first-time DIYer or an industry professional.
Product Features
Application Specific Design: No modifications necessary
Anti-Corrosion Coated: Enhanced surface life
Pre-greased: No additional maintenance required
Kitted for Restored Performance: Improved road-feel and handling
Description
TRQ suspension kits are manufactured using premium raw materials and coatings for extended service life. Each TRQ suspension component is designed to be a direct, maintenance-free replacement to the stock unit. To extend the life of your steering and suspension components, TRQ recommends replacing components in pairs, sets, or kits. All products are fit and road-tested in our Massachusetts R&D facility to ensure we deliver on our promise of Trusted Reliable Quality.
Install Tip: When replacing steering components, have a professional alignment performed afterwards. This ensures proper tracking and even tire wear.
Our steering and suspension components are pre-greased and sealed for long life and do not require the extra maintenance typically required by greaseable versions.
Attention California Customers:
WARNING: This product can expose you to chemicals including Lead and Lead Compounds, which are known to the State of California to cause cancer, and birth defects or other reproductive harm. For more information, go to www.P65Warnings.ca.gov.
This part fits
5 vehicles spanning 2008-2009.
Fits these Makes
Select vehicle
Year
Make
Model
Description
2008-2009
Ford
Escape
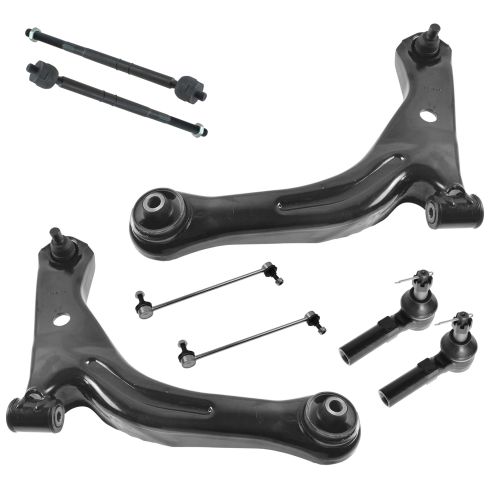
Ford Escape XLT Front 8 Piece Steering & Suspension Kit TRQ PSA59813
2008-2009
Ford
Escape
Ford Escape XLS Front 8 Piece Steering & Suspension Kit TRQ PSA59813
2008-2009
Ford
Escape
Ford Escape Limited Front 8 Piece Steering & Suspension Kit TRQ PSA59813
This item may be interchangeable with parts from other brands with the above part numbers.
This information is provided only for reference and does not guarantee that the item you are
purchasing is identical to parts with part numbers from the brands listed above.
To confirm that this item fits your vehicle, use the above "Check Vehicle Fit" option.
Lifetime Warranty
This item is backed by our limited lifetime warranty. In the event that this item should fail due to manufacturing defects during intended use, we will replace the part free of charge. This warranty covers the cost of the part only.
FREE Shipping is standard on orders shipped to the lower 48 States (Contiguous United States). Standard shipping charges apply to Hawaii and Alaska.
Shipping is not available to a P.O. Box, APO/FPO/DPO addresses, US Territories, or Canada for this item.
Expedited is available on checkout to the United States, excluding Alaska, Hawaii.
Final shipping costs are available at checkout.
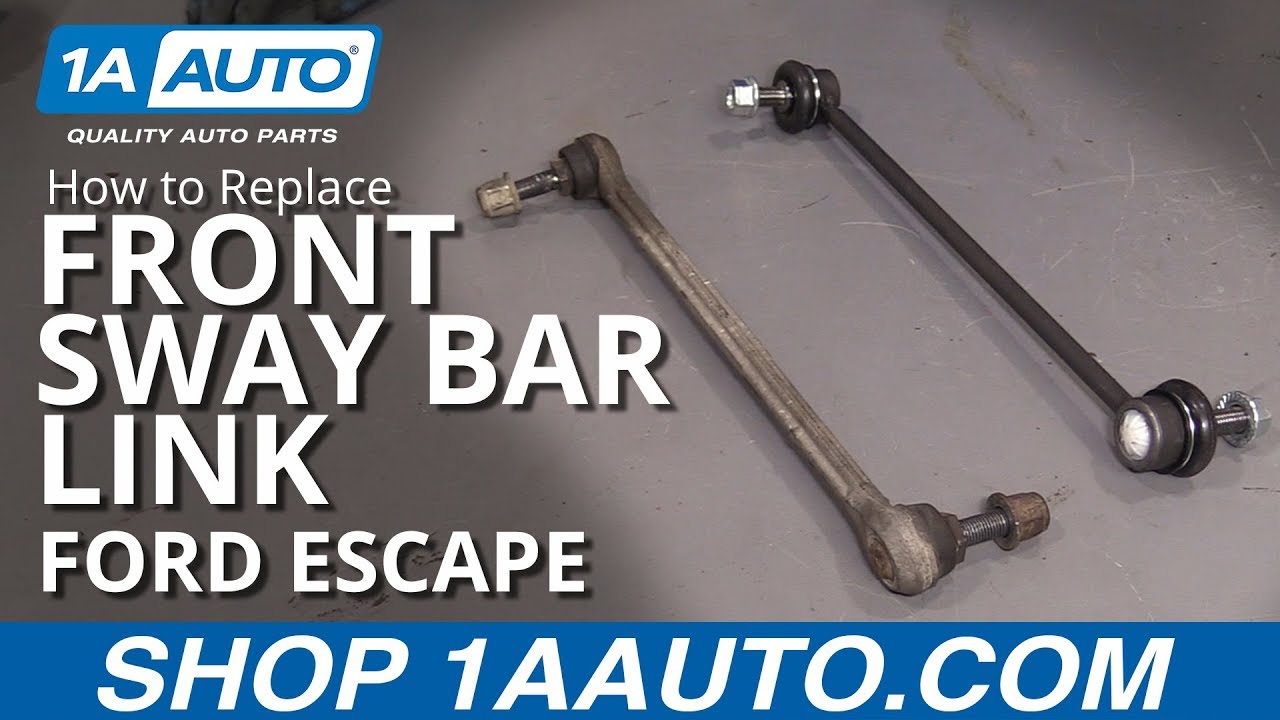
How to Replace Front Sway Bar Link 2005-12 Ford Escape
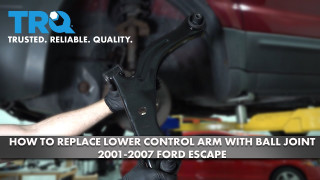
How to Replace Front Lower Control Arm 2005-12 Ford Escape
Created on:
Tools used
5mm Hex Wrench
15mm Wrench
Torque Wrench
15mm Socket
17mm Wrench
Rust Penetrant
4mm Hex Wrench
1. Removing the Front Sway Bar Link
Remove the wheel
Remove the upper 15 mm nut while holding the sway bar link stud with a 5 mm Allen wrench
Disconnect the top sway bar link on the opposite side
Rotate the sway bar to access the lower sway bar link
Remove the lower 15 mm nut while holding the sway bar link stud with a 17 mm wrench
2. Installing the Front Sway Bar Link
Replace the sway bar link in the sway bar
Replace the 15 mm nut while holding the sway bar stud in place with a 4 mm Allen wrench
Rotate the sway bar forward to replace the sway bar link in the strut mount
Replace the 15 mm nut while holding the sway bar link stud with a 4 mm Allen wrench
Replace the wheel
Torque lug nuts to 100 ft-lb
Torque the 15 mm nut to 46 ft-lb
What's up, guys? I'm Andy from 1A Auto. In this video I'm going to show you how to replace the front sway bar links on this 2012 Ford Escape. If you need this part or other parts for your vehicle, click the link in the description and head over to 1AAuto.com.
All right. Before I take this nut off, I'm going to use a little bit of rust penetrant, because it'll just make it easier taking it off. Let that soak for a little bit. All right. With a 15 mm wrench, I'm going to slide that over the nut, and then I can hold the stud with a 5 mm Allen socket and a ratchet. Just put the ratchet on tightened, and I'm going to loosen this. Loosen that up. Get the nut off like this.
On the back side here, I can just take a 17 mm wrench. Hold the stud from spinning while I loosen up the nut. All right. Pull that nut off, and slide that out. Okay, for the bottom nut to take the sway bar off, it's actually a lot easier if you disconnect the top on the opposite side, because when the sway bar is in there, if you look down there, the nut is very close to the control arm. It's almost impossible to even get a wrench on that, so we just disconnect it from the other side.
Okay, so with this up, and we're going to take that nut off. All right, so I'm going to use a 17 mm wrench. Slide that on the back side of the sway bar link right there. That's going to keep the stud from spinning, and then I'll take a 15 mm wrench and take the nut off. To make it a little quicker, I'm going to use a ratchet wrench. At this point it's loose enough. I can grab it and take it right off, and pull the link out.
Here's the old sway bar link. Here's the new, front sway bar link from 1AAuto.com. Although the design looks a little bit different, it still functions the same. Comes with new sway bar link nuts, and the center of the stud has the Allen so that the stud won't spin on you. Get yours at 1AAuto.com, and you'll be ready to rock and roll.
All right, now we're going to take the link. Take the nuts off, and slide this position like that. Install the nut. Then we're going to take a 4 mm Allen wrench. Slide it into the end of the link. Actually I take my ratchet wrench first. Slide the 15 mm ratchet wrench over the nut, and then slide the 4 mm Allen key in the end of the stud. I'm going to tighten this nut up.
Now I'm going to tighten this pretty tight. It's going to be hard to get a torque wrench in here, but if you could get a torque wrench in here, you're going to want to tighten that nut to 46 foot pounds. Now I'm going to slide the Allen out. Slide the ratchet wrench off. At this time, if you're replacing the other side, you'd want to replace that now before you tighten up the top.
Now slide this in position--top. You might have to move this stud down a little bit. Just grab it. Slide it down, just like that. Then you can line that up. Take the 15 mm nut. I'm going to use my 15 mm ratchet wrench and this short Allen, this 4 mm Allen wrench. Now snug that up. Take that off.
Now I'm going to take a 15 mm socket on a torque wrench, and you tighten this nut down to 46 foot-pounds. At this time, you'd want to reinstall the other side. Do the same procedure. At this point we would put the tire on, put the lug nuts on, lower the vehicle, and torque the wheels.
Thanks for watching. If you want the parts to do it yourself, check out 1AAuto.com, the place for DIY auto repair.
Tools used
21mm Socket
13mm Socket
Hammer
15mm Socket
Pry Bar
Jack Stands
Center Punch
Floor Jack
13mm Wrench
1. Removing the Front Lower Control Arm
Raise the vehicle
Remove the wheel
Remove the ball joint nut and bolt using a 13 mm and 15 mm socket
Use a small punch and hammer to push the bolt through
Use a pickle fork to separate the ball joint from the knuckle
Use a pry bar to separate the ball joint from the knuckle
Remove the 15 mm bolt on the front lower control arm joint
Remove the 21 mm bolt from the rear lower control arm joint
Twist and remove the front lower control arm
2. Installing the Front Lower Control Arm
Start reinstalling the front lower control arm by loosely reinstalling the 21 mm bolt
Twist the front lower control arm to reinstall the 15 mm bolt
Torque the 15 mm bolt to 85 ft-lb with the front lower control arm as close to ride height as possible
Torque the 21 mm bolt to 110 ft-lb
Use a pry bar to line up the ball joint with the knuckle
Use a hammer to tap the ball joint into the knuckle
Use a floor jack to put pressure on the front lower control arm to align the bolt groove in the ball joint
Tap the 15 mm bolt through the ball joint hole in the knuckle
Torque the 13 mm nut onto the 15 mm bolt to 45 ft-lb
Replace the wheel
Torque the lug nuts to 100 ft-lb
What's up, guys? I'm Andy from 1A Auto. In this video I'm going to show you how to replace the front lower control arm on this 2012 Ford Escape. If you need this part or other parts for your vehicle, click the link in the description and head over to 1aauto.com.
One thing you're going to want to do anytime you do any kind of front end repair or suspension repair, you're going to want to go to a local shop and have your alignment performed otherwise you're going to have premature tire wear.
So we have the vehicle raised up in the air and we took the wheel off and now we're going to take this bolt out right here. This nut and bolt. On the backside I'm going to use a ratchet with a 13 millimeter socket on it. Back here. Like that, and then on the front side I'll use a 15 millimeter socket and ratchet to take the nut off. We'll take this nut off just like that. Going to take a small punch and a hammer and I'm going to punch the bolt through. Hammer it through. The reason why I don't want to hit it right on the threads is you're going to mushroom it over a little bit. We could leave the nut on it as well and hit it a couple of times first. Alright just put the nut back on loosely, and I'll take a bigger hammer, and I'm just going to hit it a couple of times. Just to get it to move a little bit. And I can take nut off again. Use the punch and the hammer, and punch it through the rest of the way. There we go.
So if your vehicle's very rusty you might have wanted to use some rust penetrant on that bolt taking it out but ours wasn't too bad. So I am going to use this pickle fork to separate the ball joint from the knuckle, and there is other tools you can use but this one's going to work pretty good. Separate the ball joint. You want to keep in mind if you're using a pickle fork, normally it will rip the ball joint boot, and if you're reusing the ball joint then that might not be the best tool for you. They make other tools that go around the knuckle and push down on the ball joint. But for this application, we're going to replace the lower control arm, so it doesn't matter whether we rip it or not.
Alright now I'm just going to take a pry bar. Try to separate the knuckle from the ball joint. Just pry this down. Be careful. You don't really want to put your fingers anywhere near that. There is a little hole right here you can put the pry bar. Sometimes you can just tap on the knuckle or even on the lower control arm with a hammer. Get a bigger hammer. There we go. Next thing, we're going to loosen this bolt up. I'm going to use a 15 millimeter socket and a ratchet. Can use a pry bar. Just going to tap the back of the pry bar. There we go. Now I'm going to take this bolt out. I'm going to use a 21 millimeter socket and a breaker bar. Loosen it up. Just take that out. Alright, then we can grab the control arm and slide it down like here. Put it twisted to the side then I can just slide it out.
Here's the old lower control arm. Here's the new lower control arm from 1aauto.com. Comes with the bushings, comes with the ball joint, and you're going to want to take this little cap off that's just protecting it during shipping. The ball joint looks the same. The general layout of the control arm is the same, get yours at 1aauto.com and you'll be ready to rock and roll.
So I'm going to start with the new control arm. I'm going to slide it in right here, and then I'm going to take the bolt and get this started. And then I'm going to slide the control arm down here underneath the rotor. Be careful when you're doing this because you don't want to let it go and get your fingers cut. Get behind the rotor, and we want this side to go in first. Slip that up into position. Just like that. Take the bolt. You might need to use a pry bar to pry this out so that the hole lines up. And get that bolt started. So for this bolt, it's important to torque this while the control arm is as close to ride height level as possible so then you keep the bushing lasting as long as possible. So what I want to do is just push up on the control arm a little.
Now what's recommended is to be torquing this on the ground but obviously it's very hard to get a torque wrench on this bolt while you're on the ground so that's why we're going to torque it before we install the ball joint into the knuckle. Alright so now I'm going to torque this bolt to 85 foot-pounds using a 15 millimeter socket and a torque wrench. And I'm going to tighten this bolt down just using a 21 millimeter socket and a ratchet. Then I'm going to torque this one down to 110 foot pounds. It's good. Now that those are torqued down, now I can use a pry bar. To get into the control arm there's a hole right here that you can pry and stick the pry bar through there so it's easier to pry down and get the knuckle lined up. This part, you need to be careful, keep your fingers clear.
Alright just going to pry this into place. Might have to move the knuckle a little bit, just take the pry bar. Alright just need to give that a little tap. Once it's lined up pretty good, little tap on the control arm. You really don't want to tap on where the ball joint is but you can tap on ear of the control arm. Get that to line up. To get the ball joint to line up with the knuckle, there's a little groove in the ball joint. I have to use a screw jack. If you're doing this at your house, you can use a floor jack just to put a little pressure on the lower control arm. Just raise it up. Just make sure you're careful, you don't want to hit the reluctor ring on the CV joint. That looks like it's lined up pretty good. Now I'll take the bolt and slide it through. Give a little tap on the bolt.
Now the bolt's through. I'm just going to loosen up on the screw jack. Take the nut on the bolt. Right now I'm going to take a 13 millimeter socket and ratchet. Put it on the backside of the bolt and hold that while I tighten up the nut with a 15 millimeter socket and a ratchet. Then I'm going to use this torque wrench and tighten this up with the same 15 millimeter socket. We actually sell this torque wrench at 1aauto.com. Torque is 45 foot-pounds.
At this point, we would put the tire on, put the lug nuts on, lower the vehicle and torque the wheels.
Thanks for watching. Visit 1aauto.com for quality auto parts shipped to your door, the place for DIY auto repair, and if you enjoyed this video, please click the subscribe button.
Product Reviews
4.7/ 5
★★★★★★★★★★
3 reviews
5★
67%
4★
33%
3★
0%
2★
0%
1★
0%
★★★★★May 10, 2021
Steered me to great part
I received my parts very quickly right to my house. Installed both left and right sides in 3 hours, had an alignment and passed inspection.
★★★★★April 29, 2021
Great Quality
When I ordered these parts from 1A auto for my 2008 Ford Escape I was not expecting the parts to be such high quality and durability. I am very satisfied with my new Control arms kit. Thank you 1A
★★★★★November 14, 2019
Ford suspension kit
Awesome product.... installed w/ ease. Def will be order parts again. Arrived on time as promised.
Showing 1–3 of 3 reviews
PSA59813
In Stock
Customer Q&A
Got a question about this part? Post it and get answers from our team.
No questions have been answered for this product yet.
Customer service
877-844-3393
Monday - Friday 8:00am - 9:30pm ET Saturday - Sunday 8:00am - 4:30pm ET
Ask a Question
Check Your Email
We sent a verification email to .
Click the Verify Email button in the email to submit your question.
This extra step helps prevent spam.
Select Your Vehicle
Specify your vehicle's year, make and model to guarantee fit.










 WARNING: This product can expose you to chemicals including Lead and Lead Compounds, which are known to the State of California to cause cancer, and birth defects or other reproductive harm. For more information, go to www.P65Warnings.ca.gov.