Replaces


Frequently bought together
Part Details
Specifications
Product Features
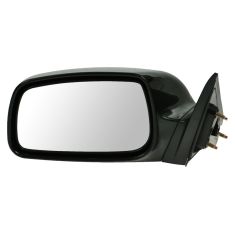
TRQ side mirrors and mirror components are designed to match the function, fixture, and performance of the original version for easy installation. TRQ mirrors are DOT certified, comply with all federal safety standards, and are independently lab tested to ensure our products comply with all government regulations. All products are fit and road-tested in our Massachusetts R&D facility to ensure we deliver on our promise of Trusted Reliable Quality.
Exact fit - To obtain proper fit and function confirm your vehicle has the exact mirror options listed.
Paint To Match Note:
"Paint-to-match finish" refers to a smooth, paintable surface. This item is not painted. Paint offers better coverage and adhesion, but it is not necessary for installation.
Attention California Customers:
 WARNING: This product can expose you to chemicals including Lead and Lead Compounds, which are known to the State of California to cause cancer, and birth defects or other reproductive harm. For more information, go to www.P65Warnings.ca.gov.
Lifetime Warranty
This item is backed by our limited lifetime warranty. In the event that this item should fail due to manufacturing defects during intended use, we will replace the part free of charge. This warranty covers the cost of the part only.
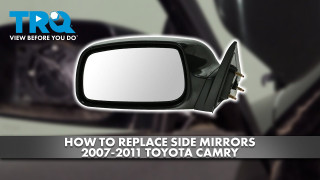
Created on:
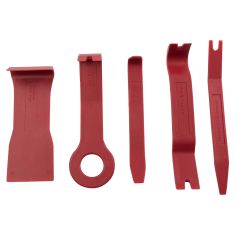
Tools used
The interior comes up pretty easily. Just pops it right off these two clips. I'll take the 10mm deep socket. Remove the last nut. The mirror's actually resting on this plastic tab so it doesn't fall out.
I've got the window down, that does help. What I'm going to do is press down on this plastic tab, slide the mirror out of the door, and just reach my thumb through where the lock is, push it down, unlock it, pull the mirror right out.
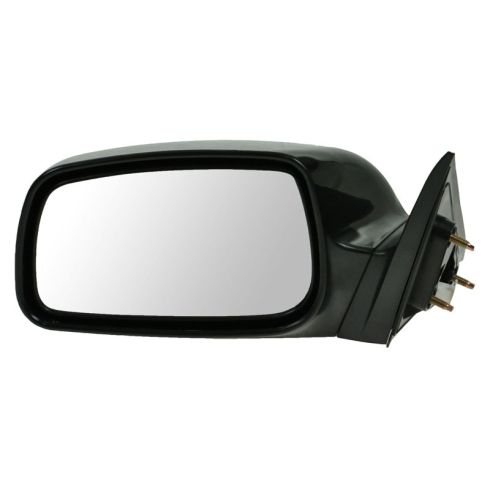
Here's our original mirror from our vehicle, and a brand new one from 1AAuto.com. So, it is black plastic. You could install it as is, or you could bring it to a body shop and have it color matched to your vehicle. But, if you just need a mirror, and you want to save some money, you can install it as is. It ships with some protective packaging, so the corner doesn't get broken.
They both have the same three mounting studs, this little lock tab. These have protective caps on them. Just pull those off before you install it. It also comes with new foam, just like this one. That'll install just like that. It has a stick-on backing. You can peel off this white backing, and then install it in place. It'll stay there for you. This should fit and look great on your vehicle.
Take our new mirror. I'm going to hold the electrical connector there, plug it in at the same time as I'm lining it up with holes. So, it just snapped in. Push it in, just get that lock over there, so it holds it in place. Install the original nuts, and tighten the nuts. Tighten them now evenly. Once I feel they get tight, I'm just going to stop. I don't want to break the studs off from the mirror. I'll reinstall the trim piece. These clips are going to match up with these holes here. It just snaps into place. The mirror's installed.
Thanks for watching. Visit us at 1AAuto.com for quality auto parts, fast and free shipping, and the best customer service in the industry.
Tools used
The interior comes up pretty easily. Just pops it right off these two clips. I'll take the 10mm deep socket. Remove the last nut. The mirror's actually resting on this plastic tab so it doesn't fall out.
I've got the window down, that does help. What I'm going to do is press down on this plastic tab, slide the mirror out of the door, and just reach my thumb through where the lock is, push it down, unlock it, pull the mirror right out.
Here's our original mirror from our vehicle, and a brand new one from 1AAuto.com. So, it is black plastic. You could install it as is, or you could bring it to a body shop and have it color matched to your vehicle. But, if you just need a mirror, and you want to save some money, you can install it as is. It ships with some protective packaging, so the corner doesn't get broken.
They both have the same three mounting studs, this little lock tab. These have protective caps on them. Just pull those off before you install it. It also comes with new foam, just like this one. That'll install just like that. It has a stick-on backing. You can peel off this white backing, and then install it in place. It'll stay there for you. This should fit and look great on your vehicle.
Take our new mirror. I'm going to hold the electrical connector there, plug it in at the same time as I'm lining it up with holes. So, it just snapped in. Push it in, just get that lock over there, so it holds it in place. Install the original nuts, and tighten the nuts. Tighten them now evenly. Once I feel they get tight, I'm just going to stop. I don't want to break the studs off from the mirror. I'll reinstall the trim piece. These clips are going to match up with these holes here. It just snaps into place. The mirror's installed.
Thanks for watching. Visit us at 1AAuto.com for quality auto parts, fast and free shipping, and the best customer service in the industry.

MRA05733