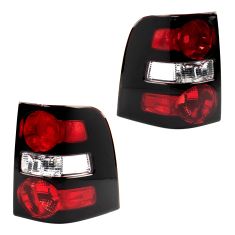
Replaces


Assemblies may include halogen or incandescent test bulbs that should be replaced before installation.
Attention California Customers:
 WARNING: This product can expose you to chemicals including Chromium (Hexavalent Compounds), which is known to the State of California to cause cancer, and birth defects or other reproductive harm. For more information, go to www.P65Warnings.ca.gov
Lifetime Warranty
This item is backed by our limited lifetime warranty. In the event this item should fail due to manufacturing defects during intended use, we will replace the part free of charge. This warranty covers the cost of the part only.
FREE Shipping is standard on Orders shipped to the lower 48 States (Contiguous United States). Standard shipping charges apply to Hawaii, Alaska and US Territories. Shipping is not available to Canada.
Expedited is available on checkout to the United States, excluding Alaska, Hawaii and US Territories as well as P.O. Boxes and APO/FPO/DPO addresses. Final shipping costs are available at checkout.

How to Replace Tail Light and Bulbs 2006-10 Ford Explorer
Created on: 2015-05-13
Tools used
Brought to you by 1AAuto.com, your source for quality replacement parts and the best service on the Internet.
Hi, I'm Mike from 1A Auto. I hope this how-to video helps you out, and next time you need parts for your vehicle, think of 1AAuto.com. Thanks.
In this video, we're going to show you how to service your taillight, both just changing the bulbs as well as replacing a complete assembly. At 1A Auto, we sell quality replacement assemblies if you back into something and break your taillight or something like that. You'll need a new taillight from 1aauto.com, as well as an 8mm wrench or socket and ratchet.
Open up your rear tailgate, and we'll show you on the passenger side but the driver side is exactly the same. There are two 8mm bolts that hold in the taillight. I'm going to use a 8mm socket, ratchet, and extension. A wrench would work as well. Remove those two bolts. With the bolts out, pull diagonally back and out at the same time. There are a couple pins that lock the light into place. Once you have the light free, if you're just looking to change the bulbs, all the sockets twist counterclockwise and come out. Then once you have them out, all the bulbs just pull straight out of the sockets and go back in. The bulbs have their part number printed on them so you can get replacements. If you need the unplug the harnesses from the sockets, there are just tabs on each socket. We press down on the tab and disconnect the socket from the harness.
Reinstall, either reconnect the harnesses or if your light doesn't come with the bulbs in place, put your old bulbs back in place. You just put them in and twist them in clockwise until they lock into place. You'll always hear a clicking sound when they connect. Then there are two pins that you look back in there, line them up into the body, and then give them a tap in. Set them and then put your two 8mm bolts back in and tighten them up nice in firm. Do not over tighten them.
Thanks for tuning in. We hope this video helped you out. Next time you need parts for your car, please visit 1AAuto.com. Also check out our other helpful how-to and diagnosis videos.
Tools used
Brought to you by 1AAuto.com, your source for quality replacement parts and the best service on the Internet.
Hi, I'm Mike from 1AAuto. We've been selling auto parts for over 30 years! We're dedicated to delivering quality auto parts, expert customer service, and fast and free shipping, all backed by our 100% satisfaction guarantee. We've created thousands of videos to help you install our parts with confidence. That saves you time and money, so visit us at 1AAuto.com, your trusted source for quality auto parts.
In this video, we're going to be working with our 2006 Ford Explorer.
We're going to show you how to remove and replace your tail light housing here. These can become cracked, faded, or they occasionally build up moisture inside of the lenses, which can cause corrosion and other issues aside from not looking good and not reflecting light bright and safely.
If you like this video, please click subscribe. We have a ton more information on this truck, as well as many other makes and models. If you want this part for your vehicle, you can follow the link down in the description over to 1AAuto.com.
Here are the items you'll need for this repair: 8mm sockets, ratchet, and gloves.
Open the hatch on your vehicle. Remove the two 8 millimeter bolts on the inside edge of the tail light here. We're going to use a socket and ratchet for that. To remove the taillight housing, pull straight back with the rear of the vehicle to release it from its clips. Remove all two bulb sockets by turning them a quarter turn counterclockwise and removing them from the housing.
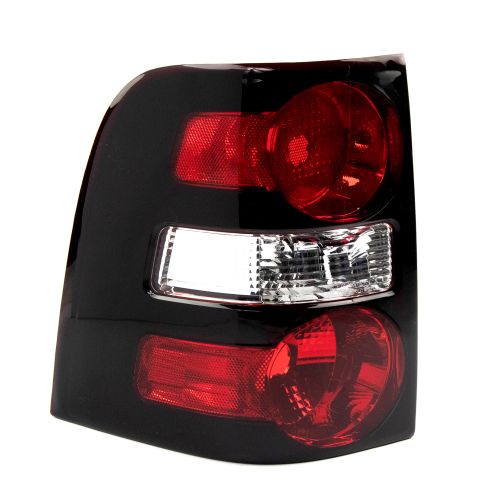
Here we have our old taillight that we removed from our vehicle and our new part from 1AAuto.com. As you can see, these parts are exactly the same. We have the same locations for all of our turn signal, tail light, and marker bulbs. We have the same coloring here and the same reflector locations. On the back, we have the same locating pins here and the same location for our two 8 millimeter screws, as well as the same three bulb sockets you can see here. This is just a cover to keep debris and moisture out of the headlight during shipping. Peel this off. You can see we have the exact same locations for our bulb sockets.
If your old taillight is cracked, faded, or has moisture damage inside of the lenses, this new part from 1A Auto is going to go in direct fit just like your original equipment and fix you up right.
Reinstall all of your bulb sockets by lining up the tabs on them and twisting them a quarter turn clockwise to lock them into place. The large 3-pin bulb is going to go at the bottom. The white socket goes in the middle for our reverse light. The black small bulb goes at the top here for our marker light. These alignment pins snap into the two holes here. Simply line them up, and give them a little push into place. You may have to push in on the tail light a little to get the holes to line up. Then you can start your screws.
Tighten them back down with your 8 millimeter socket and ratchet. You can see that the screws here have a very coarse thread on them for cutting into the plastic, so the first time they go in, it may feel a little tight. That's just because it's cutting in the threads to lock into the new holes. Close your tailgate. Check for proper operation of your light bulbs before hitting the road, and you're good to go.
Thanks for watching. Visit us at 1AAuto.com for quality auto parts, fast and free shipping, and the best customer service in the industry.