Brought to you by 1AAuto.com, your source for quality replacement parts and the best service on the Internet.
Hi, I'm Mike from 1A Auto. I hope this how-to video helps you out, and next time you need parts for your vehicle, think of 1AAuto.com. Thanks.
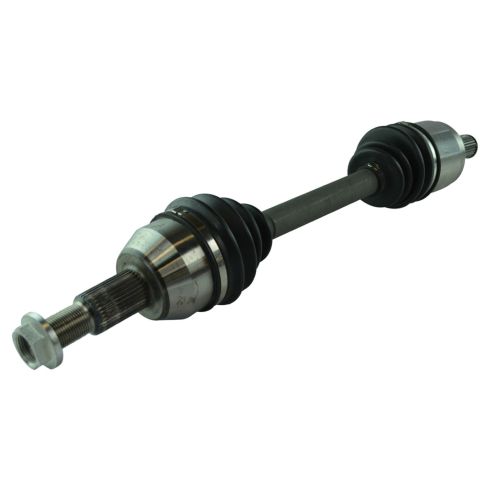
In this video, we're going to show you how to remove and reinstall a front axle. This is a 2008 Chevy Equinox, and they fit on the 2005 to 2010 Equinox, Saturn Vue, and Pontiac Torrent models. This procedure will be generally the same, and you know if you have an axle or worn CV joint, if you turn your vehicle all the way left or right, and you hear a clicking noise or feel a little feedback in the steering wheel, that's usually a good sign of a bad CV joint. You'll need a new axle from 1A Auto, jack and jack stands, a 19mm socket or your lug wrench, ratchet with a breaker bar or a pipe for some extra leverage, 36mm socket, pliers, hammer small screwdriver, an 18mm wrench, a ball joint fork, and large pry bar.
Start out by removing the front wheel. If you don't have the benefit of air tools like I have, you'll want to loosen the lug nuts while your vehicle's on the ground, then raise and securely support your vehicle. Then take your lug nuts off the rest of the way and remove the wheel.
To get this center nut off, you can try a couple things. If you don't have the benefit of impact tools, you want to have a person in the car hold the brakes while you use a 36mm socket and a breaker bar to get it off. The easiest way to do it is to just use an impact wrench, and I've got one so I'm going to use it. You don't want to beat this with a hammer, but you can just hit it once, watch the axle in relation to your wheel disk, and if it moves and it did then just use a hammer. Now you want to separate the ball joint from the steering knuckle. Possibly the most difficult part of this repair is actually just getting the cotter pin out of this bolt. Bend it up right there, and I'm just going to use pliers to grab hold of it.
I am going to break the end of the car pin right off, just by twisting back and forth. Now, I'm just using the pliers and the screwdriver and prying out the other end. What you can do, usually, the cotter pin is pretty rusted and in pretty tough shape. If you can't get it off, I was able to actually on the other side when I did the other side of this vehicle, you can just put your wrench right on that bolt and turn it, and that will shear the cotter pin off. Especially if the cotter pin's a little bit rusty. Otherwise, using the pliers, screwdriver, and maybe even a lineup tool or an impact tool to drive that cotter pin out, is what you'll need to do.
Now, you're going to want to loosen up this nut, so take an 18mm wrench, put it on there, now I'm going to take my 17mm wrench. Hook it on here for some extra leverage. As soon as it starts moving I take my box end off and just use the opening. I'll speed up here as I take that nut the rest of the way off. You want to basically take it off until it turns easily with your fingers. You do want to leave it on with a few threads so that when you separate the control arm from the steering knuckle, nothing violent happens, the nut will still hold it together.
Now with that nut still on there, I'm going to take a ball joint fork and put it right in here. Now remove that nut the rest of the way. Take our ball joint down and out. Pull the axle from the back here. Now, right underneath here is where the axle connects to the transmission. You're going to want a good long breaker bar. Put the bar up in there. Press firmly. You should have it off the axle, just pull your stuff to the side here. Pull the axle out.
Reinstallation, and no, I'm not putting a new axle on this vehicle, it actually doesn't need one. What this actually vehicle needs is a lower ball joint, so you can see our other videos for replacing that lower ball joint. I'm just doing this as I go, but you would take your new axle 1A Auto we sell the correct axles put it in, you have to guide it onto the transmission here. You'll have to pull your hub assembly aside and give yourself some room. It's a little easier with a helper.
Once you get it onto the transmission, you just kind of work it on. A couple different angles, get it on there and make sure you push it nice and firmly against it. Get it to lock on there. Pull your strut and knuckle out. Get the axle back in your hub. Turn things a little bit, get it to come back through. Pull your control arm down, get the ball joint back up into the steering knuckle.
Okay, so the axle shaft is through, and the ball joint is up and through. My axle is seated nicely here. I'm going to put my nut back on. Just kind of tighten it up preliminarily. Push the ball joint up and in, and start the nut on. Now, here, I've put a jack underneath right where the ball joint is. I'm going to lift that up a little bit, and then just kind of finger tighten the nut on the ball joint more. Not the best recording angle here, but use your 18mm wrench again, and, for the ball joint, you basically want to pull it as tight as you can with an 18mm combination wrench.
Generally, the ball joint nut should be torqued to about 55 foot-pounds, but it's really hard to get a torque wrench onto this spot, so pulling it as tight as you can and then pulling it to a point where you can get the cotter pin through and lock the nut in place is the best procedure. Here, I'm just pulling the ball joint just a little bit tighter, so it's a nice clear path through to get the cotter pin in. Put the cotter pin in, pull it through, and then bend it so it won't come out. I've got a person in the car holding the brakes, and I'm going to torque these to 151 foot-pounds.
Now we can put the front wheel and tire back on, and I'll just thread the lug nuts on by hand a few turns first. Make sure they're going on correctly, and then just preliminarily tighten them with my impact wrench. Torque your lug nuts to 100 foot-pounds.
Any time you've done extensive work to the front end of your car, just hit the brakes, pump them up, make sure the pedal's nice and firm. Move your wheel back and forth, feel for any clunks, and listen outside the car. Make sure everything seems pretty tight.
Then just test drive it, but go easy at first. A couple stops in the driveway, turn in the driveway, and then try a prolonged test drive.
We hope this video helps you out. Brought to you by www.1AAuto.com, your source for quality replacement parts and the best service on the Internet. Please feel free to call us toll-free, 888-844-3393. We're the company that's here for you on the Internet and in person.