About TRQ: TRQ is a trusted brand dedicated to making every repair a success story by combining premium parts with easy installation. Each TRQ part is engineered by a team of automotive experts to meet or exceed OEM standards, delivering enhanced performance and maximum longevity. With rigorous in-house testing, the brand ensures superior fit and function across every product line. TRQ also provides customers with best-in-class, step-by-step installation videos—so you can complete repairs with confidence, whether you're a first-time DIYer or an industry professional.
Product Features
Direct Fit - No vehicle or wiring modification necessary
DOT, SAE, and FMVSS Compliant - Meets on-road use regulations
Matching set for a restored look
Assemblies may include halogen or incandescent test bulbs that should be replaced before installation.
Attention California Customers:
WARNING: This product can expose you to chemicals including Chromium (Hexavalent Compounds), which is known to the State of California to cause cancer, and birth defects or other reproductive harm. For more information, go to www.P65Warnings.ca.gov
This part fits
1 vehicle spanning 2001-2011.
Fits these Makes
Select vehicle
Year
Make
Model
Description
2001-2011
Ford
Ranger
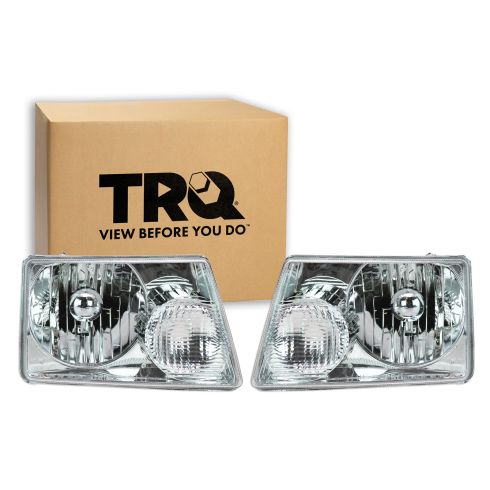
Ford Ranger Driver & Passenger Side 2 Piece Headlight Set TRQ HLA88558
Part Interchange
Brand Label
Part Number
Partslink Numbering System
FO2503173
Partslink Numbering System
FO2502173
Eagle Eye Lights
FR320-B001R
Ford
6L5Z13008BA
Hollander
114-00649R
DIY Solutions
LHT01377
DIY Solutions
LHT01376
Ford
6L5Z13008AA
Hollander
114-00650L
TYC
20-6014-00
TYC
20-6013-00
Eagle Eye Lights
FR320-B001L
This item may be interchangeable with parts from other brands with the above part numbers.
This information is provided only for reference and does not guarantee that the item you are
purchasing is identical to parts with part numbers from the brands listed above.
To confirm that this item fits your vehicle, use the above "Check Vehicle Fit" option.
Lifetime Warranty
This item is backed by our limited lifetime warranty. In the event that this item should fail due to manufacturing defects during intended use, we will replace the part free of charge. This warranty covers the cost of the part only.
FREE Shipping is standard on orders shipped to the lower 48 States (Contiguous United States). Standard shipping charges apply to Hawaii and Alaska.
Shipping is not available to a P.O. Box, APO/FPO/DPO addresses, US Territories, or Canada for this item.
Expedited is available on checkout to the United States, excluding Alaska, Hawaii.
Final shipping costs are available at checkout.
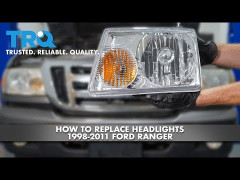
How to Replace Headlight 2001-11 Ford Ranger
How to Replace Headlights 2001-11 Ford Ranger
Created on:
Tools used
No Tools Needed
1. Remove the headlight assembly
Pull up on the two tabs above the headlight assembly
Pull out the headlight assembly.
Unplug the harness.
Replace the bulbs if that is all that is needed, otherwise replace the entire assembly.
2. Install headlight assembly
Adjust the adjustor bolts to match the old assembly.
Plug the bulbs and harness into the new headlight assembly
Put the headlight assembly into place.
Push down the tabs.
Brought to you by 1AAuto.com, your source for quality replacement parts and the best service on the internet.
Hi, I'm Mike Green. I'm one of the owners of 1A Auto. I want to help you save time and money repairing and maintaining your vehicle. I'm going to use my 20-plus years experience restoring and repairing cars and trucks like this to show you the correct way to install parts from 1aauto.com. The right parts installed correctly. That's going to save you time and money. Thank you and enjoy the video.
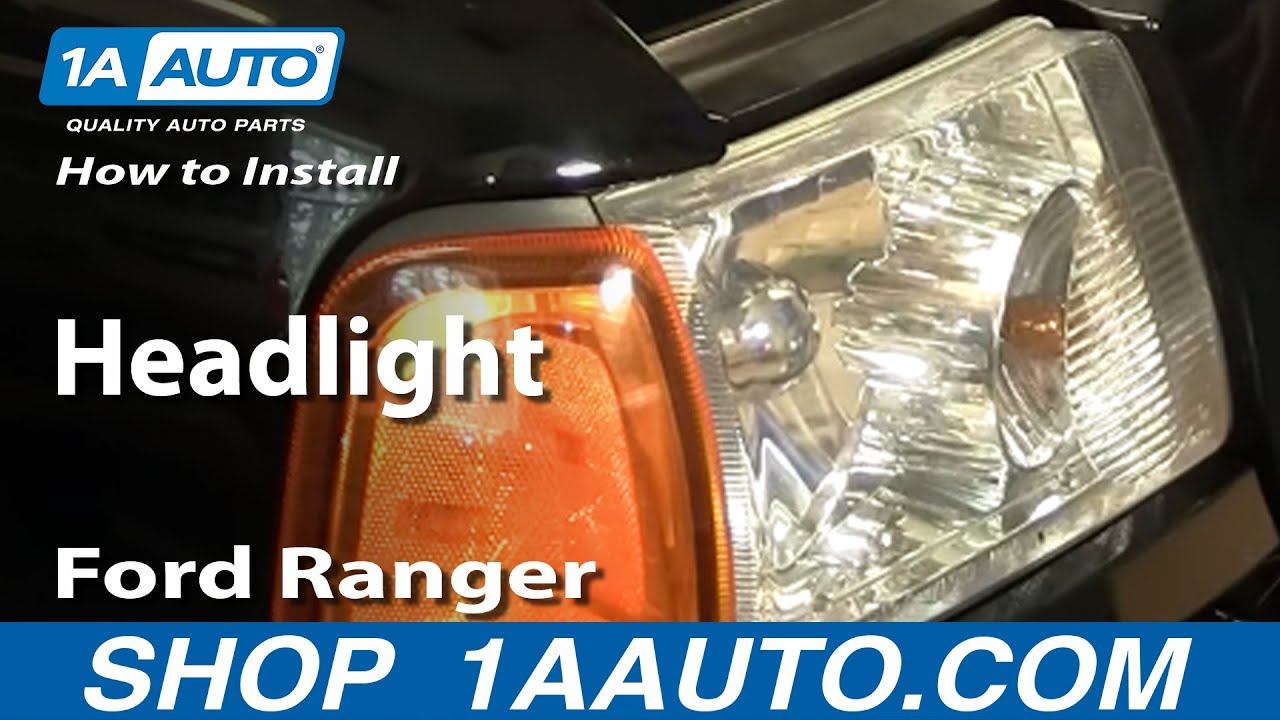
In this video, we're going to show you headlight removal and installation on this '04 Ford Ranger, pretty much the same for any '93 to present Ranger and no tools are necessary. Headlights on these Ford Rangers are really quite nicely designed and pretty easy. There are two tabs that you pull up on right back here. Once you have those tabs up, just pull your light forward. Now, here's the bulb. You can access the bulb easily. Pull this protector off and then your turn signal bulb, you twist, and it comes out, and your light is out. Obviously, you can service the bulbs.
The headlight bulb, you twist this, pull it out, and then you can pull the bulb out. Here's our original light, and here's the new light from 1A Auto. Now, obviously if your original light has been broken or something, you're going to want to replace it with a new one. You can also see, this truck doesn't have many miles on it, so the lens isn't too cloudy or faded, but if you drive your truck a lot of miles or in sandy conditions, these lenses can get pretty chipped up and clouded. A nice easy way to fix that is to just put a new set of lights in. You can see our lights are going to mount in the same. They have all the same connectors and everything so everything is going to go in just like the original.
One tip is before you put the new light in, just try and match it up with the distance. You can see that this adjuster is pretty close to the light there, so just preliminarily aim it. Take your new light and just try and get that just about the same distance. For now, obviously this light is fine, so we're going to put it back in the truck. Installing is just the reverse of the procedure. Put your signal in first, turn and lock, plug your light bulb in, and then carefully place it back in there.
I'm kind of looking down to make sure that all the adjusters are going into their holes properly. The lower one here is just a little bit off. There we go. Down there, just make sure that is all the way through. Then on this side, make sure that one there and the one down below, which is hard to see. Make sure those are all the way in. Push it really good. Push down on your tabs. You can see that mine's not in very well. Put it back up here. Push down and mount it nice and secure.
We hope this helps you out. Brought to you by www.1AAuto.com, your source for quality replacement parts and the best service on the internet. Please feel free to call us toll free, 888-844-3393. We're the company that's here for you on the internet and in person.
Tools used
Socket Extensions
5.5mm Socket
Ratchet
1. Removing the Headlight
Remove the three 5 1/2mm bolts from the headlight bracket
Remove the plastic cover from the top of the headlight
Lift up the two tabs to a balanced point
Pull the headlight out
Turn the base of the bulbs counterclockwise
2. Replacing the Headlight Bulbs
Lift the tabs and disconnect the wiring harnesses from the old bulbs
Remove the old bulbs
Insert the new bulbs
Connect the new bulb to the wiring harness
3. Installing the New Headlight
Turn the base of the new bulbs clockwise
Insert the headlight into place
Press the tabs down
Insert the plastic cover into place
Replace the 5 1/2mm bolts into the headlight bracket
Brought to you by 1AAuto.com, your source for quality replacement parts and the best service on the Internet.
Hi, I'm Mike from 1A Auto. I hope this how-to video helps you out, and next time you need parts for your vehicle, think of 1AAuto.com. Thanks!
In this video, we're going to be working with our 2001 Ford Ranger. We're going to show you how to remove and replace your headlight assembly, or you can follow these same steps to access the turn signal and headlight bulb if you need to change them. We're going to be working on the passenger's side, but this information is the same for the driver.
If you like this video, please click "Subscribe." We have a ton more information on this truck, as well as many other makes and models. If you need this part for your vehicle, you can follow the link down in the description over to 1AAuto.com.
Here are the items you'll need for this repair: 5.5mm, ratchet, and extensions.
Remove the three 5 1/2 millimeter bolts on the top cover for the headlight with a socket, ratchet, and extension. Then remove the plastic cover from the top of the headlight. There's a metal tab on the inside here under that cover. We'll lift up there. Don't lock it all the way up. You want to let it sit at that float point there. Get the one on the opposite side here. Same thing: lift up and hit that balance point. You might have to wiggle them a little if the headlight is not coming out smoothly.
Twist the sockets for the turn signal counterclockwise and the collar for the headlight spins off counterclockwise. We'll place our headlight assembly off to the side.
Now, if you're just in here to change the bulbs, from this point the headlight disconnects from this electrical connector. You want to lift up on those tabs. Pull the assembly out of the socket.
New bulb snaps in. Be sure that this collar sits between the socket and the bulb. Turn signal simply pulls straight out. Your new bulb pops straight in.
To give you a better idea of how these headlight retainers work, you'll see the hole here where our plastic retainer is going to slide in on the back of the headlight. This is with that slide in the floating position. If you pull too far up, the metal comes through the opening and will still hold the bottom of the retainer. Let's see: key hole, when you slide down, that thinner portion locks over the top. When we hit this nice middle point here is when our headlight comes out nice and smooth.
Install the sockets into your new headlight. Socket goes in, and a quarter turn clockwise locks it in place. The headlight pops in. The collar goes over the tabs and locks on clockwise.
Now, we'll line up these pins into the openings. Again, you might have to wiggle those slides a little to get them to go in. Once they're over, lock the tab back down into place and ensure your headlight is in straight and secure. Reinstall the plastic cover over the top of the headlight. Tighten it down with a socket, ratchet, and extension with your 5 1/2 millimeter screws.
Thanks for tuning in. We hope this video helped you out. Next time you need parts for your car, please visit 1AAuto.com. Also check out our other helpful how-to and diagnosis videos.
HLA88558
In Stock
Product Reviews
4.9/ 5
★★★★★★★★★★
7 reviews
5★
86%
4★
14%
3★
0%
2★
0%
1★
0%
Customer photos
★★★★★April 4, 2026
Looks great!
My headlights were so bad I could hardly see at night. Wasn't sure if this was a job I should take on or hire out. Glad I did it! Easy to install and look great!
★★★★★March 31, 2026
2002 Ford Ranger
The headlamps fit perfectly. On my 2002 Ford Ranger it only took 15 minutes to remove and install both headlamps. As for shipping, it was so quick that it arrived a day earlier.
★★★★★March 3, 2026
Good
Quality and easy to install.
I upgraded the headlight bulbs and had to reuse my blinker sockets.
Other than that they are great. Would indefinitely recommend them.
★★★★★September 12, 2025
good quality and fitment will order again thanks
★★★★★June 26, 2025
Good stuff
OEM style, direct fit...easy installation
..looks great.
Recommended!
★★★★★April 2, 2025
Good fit and value for the price
The headlights were easy to install and fit well. Good value for the price.
★★★★★September 8, 2024
These headlights were a perfect fit for my 2004 Ranger. The perfect fit made installation a dream. I also have to give many kudos to the 1A team for their excellent videos.
Showing 1–7 of 7 reviews
Customer Q&A
Got a question about this part? Post it and get answers from our team.
davidMarch 13, 2026
Will these replacements accept LED headlight bulbs?
These assemblies accept halogen bulbs only.
Nick · March 13, 2026
JasonJanuary 12, 2026
Does it come with bulbs?
Yes but really cheap bulbs that you should plan on changing before installing the new lamp assemblies.
Nagel · January 19, 2026
T0mNovember 7, 2024
How do l adjust the headlights to shine higher?
There is an adjustment beam on the back of the headlight assembly that you should be able to adjust the beam with.
Emma · November 7, 2024
Showing 1–3 of 3 questions
Customer service
877-844-3393
Monday - Friday 8:00am - 9:30pm ET Saturday - Sunday 8:00am - 4:30pm ET
Ask a Question
Check Your Email
We sent a verification email to .
Click the Verify Email button in the email to submit your question.
This extra step helps prevent spam.
Ford is a registered trademark of Ford Motor Company. 1A Auto is not affiliated with or sponsored by Ford or Ford Motor Company.See all trademarks.
Select Your Vehicle
Specify your vehicle's year, make and model to guarantee fit.









 WARNING: This product can expose you to chemicals including Chromium (Hexavalent Compounds), which is known to the State of California to cause cancer, and birth defects or other reproductive harm. For more information, go to www.P65Warnings.ca.gov