About TRQ: TRQ is a trusted brand dedicated to making every repair a success story by combining premium parts with easy installation. Each TRQ part is engineered by a team of automotive experts to meet or exceed OEM standards, delivering enhanced performance and maximum longevity. With rigorous in-house testing, the brand ensures superior fit and function across every product line. TRQ also provides customers with best-in-class, step-by-step installation videos—so you can complete repairs with confidence, whether you're a first-time DIYer or an industry professional.
Attention California Customers:
WARNING: This product can expose you to chemicals including Lead and Lead Compounds, which are known to the State of California to cause cancer, and birth defects or other reproductive harm. For more information, go to www.P65Warnings.ca.gov.
This part fits
2 vehicles spanning 2000-2002.
Fits these Makes
Select vehicle
Year
Make
Model
Description
2000-2002
Dodge
Dakota
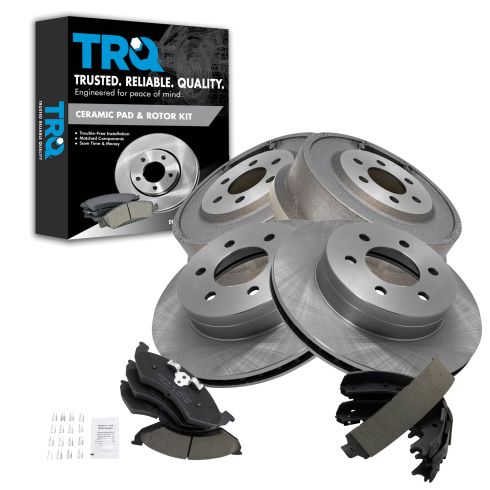
Dodge Dakota Front & Rear with 11.00 Inch Rear Drums Ceramic Brake Pad & Rotor, Shoe & Drum Kit TRQ BKA10453
2000-2002
Dodge
Durango
Dodge Durango Front & Rear Ceramic Brake Pad & Rotor, Shoe & Drum Kit TRQ BKA10453
Part Interchange
Brand Label
Part Number
Raybestos Brakes
EHT820H
DuraGo
BR5382
Wagner
BD125610
DuraGo
BD80079
Bendix
PDR0708
Raybestos Brakes
76645
Aimco
5382
Raybestos Brakes
9662
Aimco
80079
Wagner
BD125632
Bendix
PRT5147
Dodge
05014126AA
Dodge
05016170AA
Dodge
05003780AA
Dodge
05016167AA
Dodge
05016167AB
Lincoln
1W1Z2200AA
FMSI
CD820
FMSI
S734
FMSI
S723
Ford
F65Z2200AA
Raybestos Brakes
76645FZN
Raybestos Brakes
9662R
Raybestos Brakes
9662P
Raybestos Brakes
9662FZN
Raybestos Brakes
76645P
Raybestos Brakes
76645R
Raybestos Brakes
76645PER
Hollander
530-01973
Hollander
533-02367
This item may be interchangeable with parts from other brands with the above part numbers.
This information is provided only for reference and does not guarantee that the item you are
purchasing is identical to parts with part numbers from the brands listed above.
To confirm that this item fits your vehicle, use the above "Check Vehicle Fit" option.
Lifetime Warranty
This item is backed by our limited lifetime warranty. In the event that this item should fail due to manufacturing defects during intended use, we will replace the part free of charge. This warranty covers the cost of the part only.
FREE Shipping is standard on orders shipped to the lower 48 States (Contiguous United States). Standard shipping charges apply to Hawaii and Alaska.
Shipping is not available to a P.O. Box, APO/FPO/DPO addresses, US Territories, or Canada for this item.
Expedited is available on checkout to the United States, excluding Alaska, Hawaii.
Final shipping costs are available at checkout.
How to Replace Brake Kit 2000-02 Dodge Durango
Created on:
Tools used
Large C-Clamp
Flat Blade Screwdriver
Torque Wrench
Jack Stands
19mm Socket
Floor Jack
T47 Torx Socket
1. Removing the Front Wheel
Begin with your vehicle on the ground so the tires won't move
Using your 19mm socket and ratchet, or a lug wrench, loosen the lug nuts
Jack up the car using a lift or a floor jack and stands
2. Removing the Brake Caliper
Turn the wheels to the left by pushing on the passenger side wheel
Remove the two T47 Torx bolts
Then take your flat blade screwdriver and pry a little bit on the caliper and get it going
Pull your caliper right off
3. Removing the Brake Pads and the Rotor
For the inner pad, you should be able to simply pull it out
To get the outer one out, you use your hammer and you want to hit diagonally and they come out
Place the caliper above and secure it with a wire-tie or something similar. You don't want to just let it hang down because there is a chance you can rupture your hose.
With the caliper out of the way, simply remove the rotor
4. Replacing the Brake Rotor
Put the brake rotor back on and then you want to push your piston back in to your caliper
As you tighten the C-Clamp, the piston goes down in to the caliper
Remove the C-clamp
5. Replacing the Brake Pads
Your inner pad has the clamps to secure-just put in to the caliper and push it in
Your outer pad goes right in. While making sure you have your bolts out of the way, you push them down like that with the caliper right in
After the caliper is in, start your bolts back in and, once again, that's a T47 Torx
Push on your bolts and start them
Tighten up these bolts to about 35 pounds
6. Replacing the Front Wheel
Replace the wheel into the vehicle. Use the air wrench to start the lug nuts a little bit, and you want to torque your lug nuts to about 100 foot pounds
Make sure that before you drive your car, you get in and pump the brake pedal a few times until you make it feel solid
When you push the piston back in to the caliper you'll need to work it back against the discs
Before you road test your vehicle, just make sure that the brakes are holding the car in gear
Do a stop from 5 mph and 10 mph just to make sure that everything is working before you get it out on the road
Brought to you by 1AAuto.com, your source for quality replacement parts and the best service on the internet.
Hi, I'm Mike Green, one of the owners of 1A Auto. I want to help you save time and money repairing and maintaining your vehicle. I'm going to use my 20+ years' experience restoring and repairing cars and trucks like this to show you the correct way to install parts from 1AAuto.com. The right parts installed correctly, that's going to save you time and money. Thank you and enjoy the video.
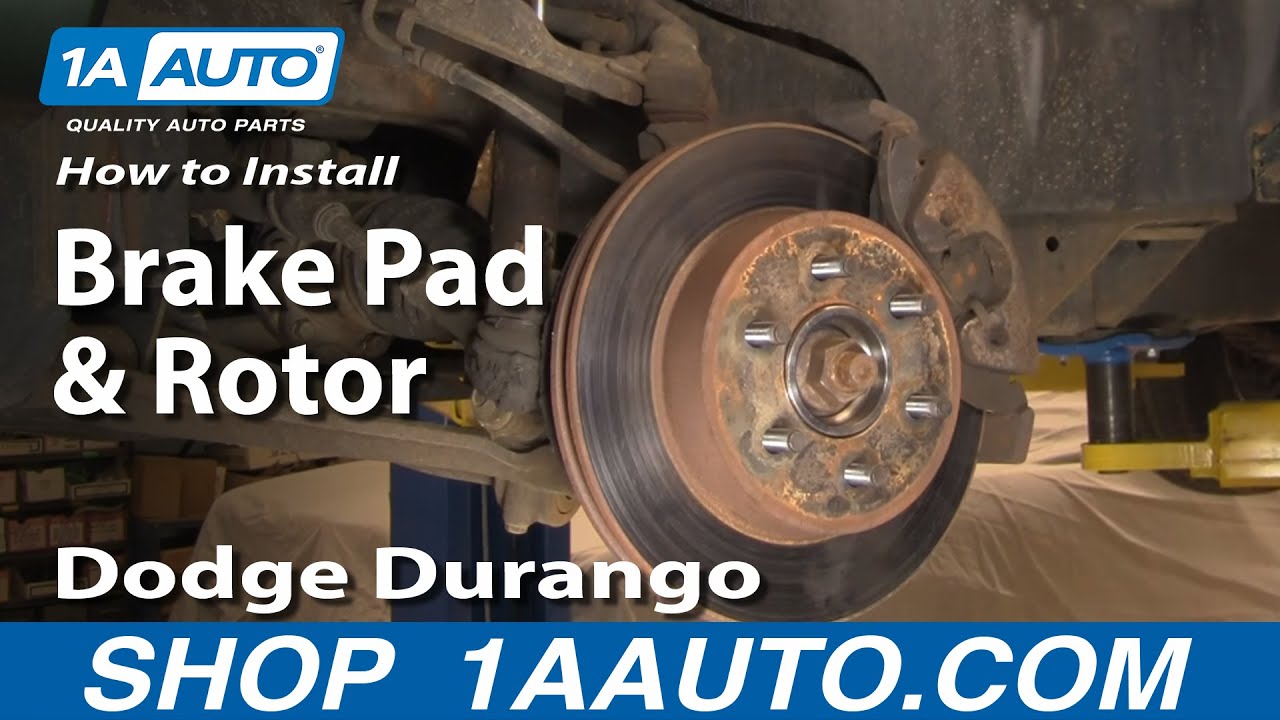
In this video, we're going to show you how to remove and replace the rotors and brake pads on this Dodge Durango; same as any 1998 to 2003 Durango and 1997 to 2004 Dakota. This vehicle had pretty good brakes so we actually just took them off and put them back on just to show you, in case you're wondering why we didn't put any new brakes on. Tools you'll need are jack and jack stands, a 19-mm socket and ratchet or your lug wrench, a T47 driver and ratchet, large flat-blade screwdriver, a hammer, a large c-clamp, and a torque wrench.
First, you're going to want to remove the front wheel. I have the benefit of air tools. If you start with your tire on the ground, you'll want to loosen the lug nuts first, then jack it up, and remove the lug nuts. I'm just going to take them off with my air ratchet. We'll just fast forward here a little bit.
Now, you want to go in behind. I've actually turned the wheels to the left a little bit on the passenger's side here. There's two T47 Torx bolts; one on the side, and then one right on top. Again, I'm going to use the T47 Torx bit. Then take your screwdriver and pry a little bit on the caliper and get it going. Pull your caliper right off.
To get the brake pads out, you'll pull the inner one right like that. To get the outer one out, you use your hammer and you want to hit diagonally and they come out.
Now, to get your rotor off, you'll take your caliper and place it up above. You don't want to just let this hang down because you can rupture your hose; rest it up here or maybe put it on there with a wire-tie or something. Then the rotor just pulls right off.
Put the brake rotor back on; you want to push your piston back in to your caliper. I just use a big C-clamp like this. As you see while I tighten, that piston goes down in to the caliper. I remove the C-clamp. Your inner pad has the clamps to secure just put in to the caliper and push it in. Your outer goes right in, while making sure you have your bolts out of the way, you push them down like that with the caliper right in.
Now, start your bolts back in and, once again, that's a T47 Torx. Push on your bolts and start them. These you want to tighten up to about 35 pounds. That doesn't sound like a lot. It really isn't because what really takes the braking pressure are these big arms. You can see that the caliper squeezes and then the pads push against those. These bolts are just kind of holding the caliper in place. They don't really do much of the braking.
Okay, so now you can see we've got our wheel back on. You want to put the cap on with the lug nuts. I'm just going to use the air wrench to start the lug nuts a little bit. You want to torque your lug nuts to about 100 foot pounds and you should be all set.
NOTE: Make sure that before you drive your car, you get in and pump the brake pedal a few times until you make it feel solid. When you push the piston back in to the caliper you'll need to work it back against the disks. Before you road test your vehicle, just make sure that the brakes are holding the car in gear and then do a stop from 5 mph and 10 mph just to make sure that everything is working before you get it out on the road.
This video was brought to you by www.1AAuto.com. We hope we helped you out. We are your source for quality replacement parts and the best service on the Internet. Feel free to call us, Toll Free: 888-844-3393. We're here for you on the Internet and in person. Thank you very much.
Product Reviews
4.7/ 5
★★★★★★★★★★
3 reviews
5★
67%
4★
33%
3★
0%
2★
0%
1★
0%
★★★★★September 30, 2019
good buy
the brake kit saved me money even with the shipping cost to hawaii locally the front parts would have cost me about the same one of the packages was in poor condition bthe parts inside were ok will shop with a1 again
★★★★★August 25, 2019
Mechanic Pleased With All New Brake Parts!!!
The parts necessary to do a brake job on my 18 year old Durango were available, at a very reasonable price, and shipped/received in the time promised. Our mechanic was so happy that we bought all new parts to do the job. He said it made his job much EASIER!
Thank YOU!!!!
★★★★★October 29, 2018
Fit perfectly
I am very happy for what I has purchased from this website. Its fit perfectly and the price are not too high. I very recommend this website to everyone.
Showing 1–3 of 3 reviews
BKA10453
In Stock
Customer Q&A
Got a question about this part? Post it and get answers from our team.
NefJuly 26, 2020
Do this set work for my dodge dakota 4x4 stickshift?
These will fit as long as you have 11inch rear drums.
Corey · July 27, 2020
Showing 1–1 of 1 question
Customer service
877-844-3393
Monday - Friday 8:00am - 9:30pm ET Saturday - Sunday 8:00am - 4:30pm ET
Ask a Question
Check Your Email
We sent a verification email to .
Click the Verify Email button in the email to submit your question.
This extra step helps prevent spam.
Select Your Vehicle
Specify your vehicle's year, make and model to guarantee fit.









 WARNING: This product can expose you to chemicals including Lead and Lead Compounds, which are known to the State of California to cause cancer, and birth defects or other reproductive harm. For more information, go to www.P65Warnings.ca.gov.