

★★★★★
December 9, 2023
Fit perfectly.
Fit perfectly.

Replaces





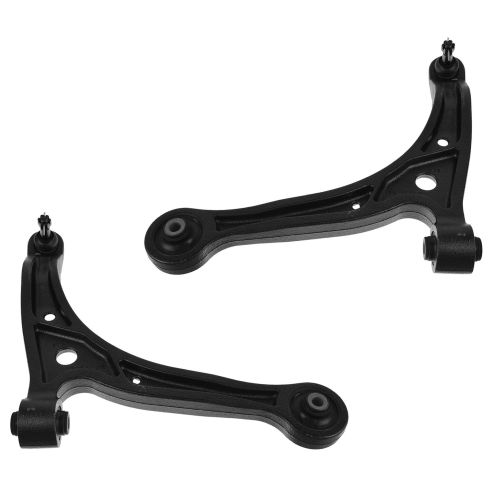
Part Details
Specifications
About TRQ:
TRQ is a trusted brand dedicated to making every repair a success story by combining premium parts with easy installation. Each TRQ part is engineered by a team of automotive experts to meet or exceed OEM standards, delivering enhanced performance and maximum longevity. With rigorous in-house testing, the brand ensures superior fit and function across every product line. TRQ also provides customers with best-in-class, step-by-step installation videos—so you can complete repairs with confidence, whether you're a first-time DIYer or an industry professional.
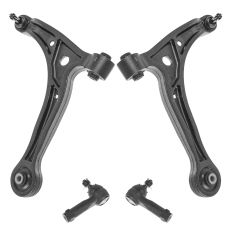
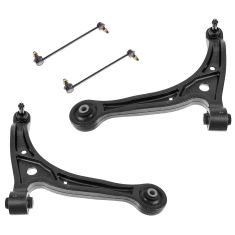
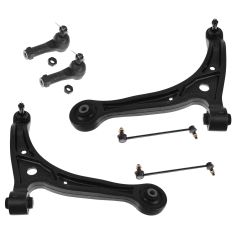
Our control arms are designed to be direct replacements for the original factory parts. They are 100% brand new and require no modifications for installation. No special tools are required because all of the bushings come pre-installed.
Our steering and suspension components are pre-greased and sealed for long life and do not require the extra maintenance typically required by greaseable versions.
Attention California Customers:
 WARNING: This product can expose you to chemicals including Lead and Lead Compounds, which are known to the State of California to cause cancer, and birth defects or other reproductive harm. For more information, go to www.P65Warnings.ca.gov.
This part fits 1 vehicle spanning 1999-2004.
| Year | Make | Model | Description |
|---|---|---|---|
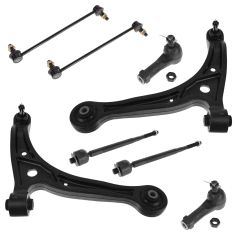
| 1999-2004 | Honda | Odyssey | Honda Odyssey Front Driver & Passenger Side Lower 2 Piece Control Arm with Ball Joint Set TRQ PSA62263 |
| Brand Label | Part Number |
|---|---|
| ACDelco | 45D3444 |
| Dorman | 521-352 |
| Dorman | 521-351 |
| ACDelco | 45D3443 |
| Mevotech | GS60104 |
| Raybestos Chassis | 507-1443 |
| Honda | 51360S0XA02 |
| NAPA Premium | 2605714 |
| MAS Industries | CB59004PR |
| Beck/Arnley | 101-5684 |
| Mcquay-Norris | FA4610 |
| Ingalls Engineering | CAK620325 |
| MOOG Chassis Products | CK620325 |
| Precision Driveline | CB60080 |
| Beck/Arnley | 102-5684 |
| Centric Parts | 623.40049 |
| MOOG Chassis Products | K620326 |
| NAPA | 260-5715 |
| Ingalls Engineering | CAK620326 |
| Mevotech | MS60103 |
| MOOG Chassis Products | CK620326 |
| Dorman - OE Solutions | 521-352 |
| Honda | 51350SOXA02 |
| Mevotech | CMS60104 |
| Honda | 51350S0XA02 |
| Centric Parts | 623.40012 |
| MOOG Chassis Products | RK620325 |
| SYD | 1509041 |
| Beck/Arnley | 101-5683 |
| NAPA | 260-5714 |
| MOOG Chassis Products | RK620326 |
| Precision Driveline | CB60081 |
| Mevotech | GS60103 |
| Dorman - OE Solutions | 521-351 |
| Mcquay-Norris | FA4611 |
| SYD | 1509040 |
| NAPA Premium | 2605715 |
| MAS Industries | CB59003 |
| Beck/Arnley | 102-5683 |
| MAS Industries | CB59004 |
| Mevotech | CMS60103 |
| Precision Driveline | 5CB60080 |
| Raybestos Chassis | 507-1444 |
| Precision Driveline | 5CB60081 |
| MOOG Chassis Products | K620325 |
| Honda | 51360SOXA02 |
| MAS Industries | CB59003PR |
| Mevotech | MS60104 |
| DIY Solutions | SUS00956 |
| DIY Solutions | SUS05629 |
| DIY Solutions | SUS05630 |
| Carquest | CA517B |
| Carquest | CA516B |
| Honda | 51360-S0X-A02 |
| Honda | 51350-S0X-A02 |
| Dorman - Premium | CB59003PR |
| Dorman - Premium | CB59004PR |
| Hollander | 512-58464R |
| Hollander | 512-58464L |
| Mevotech Supreme | CMS60104 |
| Mevotech Supreme | CMS60103 |
| Mevotech Supreme | GS60104 |
| Mevotech Supreme | MS60104 |
| Mevotech Supreme | GS60103 |
| Mevotech Supreme | MS60103 |
This item may be interchangeable with parts from other brands with the above part numbers. This information is provided only for reference and does not guarantee that the item you are purchasing is identical to parts with part numbers from the brands listed above. To confirm that this item fits your vehicle, use the above "Check Vehicle Fit" option.
Lifetime Warranty
This item is backed by our limited lifetime warranty. In the event that this item should fail due to manufacturing defects during intended use, we will replace the part free of charge. This warranty covers the cost of the part only.
FREE Shipping is standard on orders shipped to the lower 48 States (Contiguous United States). Standard shipping charges apply to Hawaii and Alaska.
Shipping is not available to a P.O. Box, APO/FPO/DPO addresses, US Territories, or Canada for this item.
Expedited is available on checkout to the United States, excluding Alaska, Hawaii.
Final shipping costs are available at checkout.

Created on:
Tools used
Brought to you by 1AAuto.com, your source for quality auto replacement parts and the bets service on the internet.
Hi, this is Mike from 1A Auto. I hope this how to video helps you out. Next time you need parts for your vehicle, think of 1AAuto.com. In this video, we'll show you how to repair or replace the front control arms. We're going to show you the passenger side. The driver side is the same procedure. Usually these, you really won't know if they were out. A lot of times it will come up in the yearly inspection but some symptoms of bad control arms are just kind of spongy steering or hearing kind of a knocking or clanking sound when you steer back and forth, right to left. We're doing this on a 2003 Odyssey, same as a '99 to '04 Odyssey.
You'll need new control arm or control arms from 1AAuto.com, jack and jack stands, 19mm socket and ratchet. You'll need a breaker bar or a pipe for some extra leverage, 17mm and 18mm wrenches, a ball joint or sometimes called pickle fork, a hammer and some penetrating oil. Okay, as you can see here, I've got the vehicle raised up and the lug nuts with my impact wrench. If you don't have an impact wrench, you want to start the vehicle on the ground, loosen the lug nuts with a 19mm socket and breaker bar or your tire iron then raise and support the vehicle and remove the lug nuts and wheel the rest of the way. You can see here I'm kicking the tire. That's basically just the way if your tire or your wheel is a little bit frozen on because of the aluminum. Just give it some good kicks and break it loose and then you can remove the tire.
Using pliers and a small pick or a screwdriver, I'll remove the pin that holds the ball joint nut. We're going to attach two wrenches together to get a little extra force on this and you can see, it works. I'm going to speed up here as Jeremy just takes that nut all the way off. That nut is generally a 17mm, it can be an 18mm though as well. Once the nut is off, I actually like to put it back on again, a few threads just because we're going to be breaking these two separate from each other and I don't like anything to happen to suddenly. If you have the nut on there, it keeps anything from getting crazy over here. This is an air activated pickle fork. They sell them to be used with a hammer as well. The hammer ones you just put right here then you hit on the end with a hammer. This one like I said is air activated so it's powered by air. Just put it right in here. As you can see, it separates the ball point.
Now, we'll grab a pry bar, put through in the lower control arm and pry it down. Take the nut off of the lower ball joint. Hopefully when it try it out enough, pull it out of the knuckle. Spray the bolts the best you can with some penetrating oil. There's two bolts that hold the control arm to the frame of the vehicle. Now, both of the control arm bolts are 19mm. You'll want to use a ratchet with a pipe on it because it's going to be pretty tight. Or maybe not. I'm going to speed it up here as we just remove that bolt the rest of the way. As it comes out, you'll probably have to keep spinning it with your wrench and kind of pull on it to get it out the whole way. Same thing with this one, just speed it up as the bolt is removed.
As you can see, the new one versus the old one. They look identical for all intents and purposes. New one have a nice coating on it. New ball joint, new bushings and it obviously fits the same way. Put the rear of the control arm in first. Then place the bolt in. Just install a couple of threads there while we rotate the arm into place. You can get the ball joint in too. Then your front bolts. You're going to need some messing with a pry bar. You can put the nut on the ball joint now. Using the original nut, it has the grove in it so the clip will fit a lot better. We'll tighten this down. Make sure that the pin will slide through the castle nut. I think we're pretty close. Now, you just push down and wiggle it, make sure it's tight. Now, just tighten those two main bolts until they start to sit. Now, before tightening these bolts, I'm putting a jack underneath the ball joint end of the control arm and basically jacking it up until the van starts raising off the lift a little bit. That means I have full support on the suspension and you want to tighten up those bolts with all the support on the suspension.
This should be torqued to around 90 to 95 foot pounds. This one should be the same. Okay, now you can let the suspension down off the jack and put your wheel and tire back on, start the lug nuts by hand first and just kind of tighten them up preliminarily before you put the vehicle down on the ground. Now again, use your torque wrench and you want to tighten up your lug nuts between 95 and 100 foot pounds and use a start pattern as you tighten.
We hope this helps you out. Brought to you by www.1AAuto.com, your source for quality auto replacement parts and the bets service on the internet. Please feel free to call us toll-free, 888-844-3393. We're the company that's here for you on the internet and in person.

PSA62263
Fit perfectly.
Perfect fit and looks like similar quality.
A+++++!! Fast shipping!! Great product!!
They Best of they rest
Bought tie rod ends missing cotter pin and castle nut.
was very easy to install
Perfect match. Easy to install. Works great.
Went on like a glove so far so good
I rate this purchase a five star review due to the swift timeliness the part arrived in. The quality and the price both are excellent, a must by.
OEM passenger ball joint rubber boot failed and front end started clunking over speed bumps (@~170K miles). Instead of replacing just the ball joint, I decided to replace both LCA's. Watched 1A Auto's videos and replacement was smooth. Did the outer tie rods, sway bar bushings and end links at the same time. After alignment, front end feels brand new! Glad that I went with 1A Auto. Thanks!
Yes, these parts will already come with the bushings. Please do not hesitate to contact us with any further questions.
I did have the alignment checked after I installed the new control arms. The comments from the alignment people were that it was "a little out" and needed to be corrected.
