Replaces


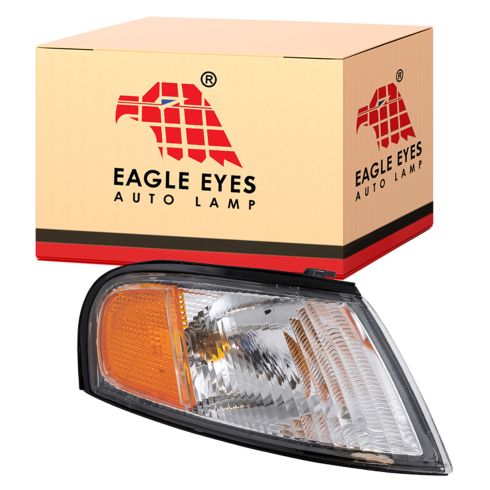
Assemblies may include halogen or incandescent test bulbs that should be replaced before installation.
Attention California Customers:
 WARNING: This product can expose you to chemicals including Chromium (Hexavalent Compounds), which is known to the State of California to cause cancer, and birth defects or other reproductive harm. For more information, go to www.P65Warnings.ca.gov
This part fits 1 vehicle spanning 1998-1999.
| Year | Make | Model | Description |
|---|---|---|---|
| 1998-1999 | Nissan | Altima | Nissan Altima Passenger Side Corner Light Eagle Eyes DS471-B000R |
| Brand Label | Part Number |
|---|---|
| Hollander | 166-59849L |
| Maxzone | 315-1954L-AF |
| Maxzone | 315-1531R-AS |
| Hollander | 116-58673R |
| TYC | 18-5223-00 |
| Nissan | 261209E025 |
| Nissan | 26120-9E025 |
| TYC | 18-5223-00-1 |
| Eagle Eye Lights | DS471-B000R |
| Partslink Numbering System | NI2521123 |
This item may be interchangeable with parts from other brands with the above part numbers. This information is provided only for reference and does not guarantee that the item you are purchasing is identical to parts with part numbers from the brands listed above. To confirm that this item fits your vehicle, use the above "Check Vehicle Fit" option.
This item is backed by our limited lifetime warranty. In the event this item should fail due to manufacturing defects during intended use, we will replace the part free of charge. This warranty covers the cost of the part only.
The bulbs are for testing and not covered under our warranty. Our warranty applies to the light assembly only.
FREE Shipping is standard on Orders shipped to the lower 48 States (Contiguous United States). Standard shipping charges apply to Hawaii, Alaska and US Territories. Shipping is not available to Canada.
Expedited is available on checkout to the United States, excluding Alaska, Hawaii and US Territories as well as P.O. Boxes and APO/FPO/DPO addresses. Final shipping costs are available at checkout.


Created on:
Tools used
Brought to you by 1AAuto.com, your source for quality replacement parts and the best service on the Internet.
Hi, I'm Mike Green. I'm one of the owners of 1A Auto. I want to help you save time and money repairing or maintaining your vehicle. I'm going to use my 20-plus years experience restoring and repairing cars and trucks like this to show you the correct way to install parts from 1AAuto.com. The right parts installed correctly: that's going to save you time and money. Thank you and enjoy the video.
In this video, we'll be replacing a parking light on a 1998 Nissan Altima. This is basically the same for all 1998 to 2001.
First, there's a screw. You open the hood and there's a little screw right there, at the junction of the head light and parking light. You pull that out. And then you have to pull the light from a stud, and I'm going to show you a picture of that little stud in just one second. You can see it right there on this headlight that's removed.
You put your screwdriver down in there and pull it out and then the light is free. Then you twist the bulb from the back, and you've removed the marker, or the parking light.
Now, reverse the procedure to reinstall it. Put the bulb in, you can service the bulb, if you need to change the bulb, or if you're replacing the parking light assembly itself. Then, near my left hand in this picture, there are two tabs on the parking light that line in behind the fender. While you're trying to put it on to that, you're trying to press the front onto that little stud, you need to make sure those tabs are going into the fender. You can see I tried at this angle, and then after a minute I think I switched around here and got it from the front, it's easier to push it down.
Make sure that back there where my left hand is is lined up correctly, and then push it right in. Once it goes, it goes. Then put in the screw, tighten it up, and you've replaced your parking light or fixed your parking light.
I hope this has helped you out. Going to do a quick test here to make sure everything's working right. Turn on the headlights, try a quick blinker test, and it's good.
We hope this video helps you out. Brought to you by www.1AAuto.com, your source for quality replacement parts and the best service on the Internet. Please feel free to call us toll-free, 888-844-3393. We're the company that's here for you on the Internet and in person.

DS471-B000R